
Yes, you can lay patio slabs on existing concrete, and when the base is sound it is often the smarter, faster option compared to ripping everything out and starting from scratch. For more on suitable bases and substrate options, see our guide on what to lay a patio on. The concrete acts as a ready-made sub-base, saving you a significant amount of excavation and hardcore work. The catch is that not all concrete is worth building on, and laying slabs over a base that is cracked, damp, poorly drained, or simply too high will create problems that are far more expensive to fix later. This guide walks you through how to judge whether your concrete qualifies, how to prepare it properly, and which of the three main installation methods suits your project. For step-by-step instructions on how to lay a patio over an existing patio, consult our detailed how-to guide.
Can You Lay Patio Slabs on Concrete? Guide for DIYers How-to

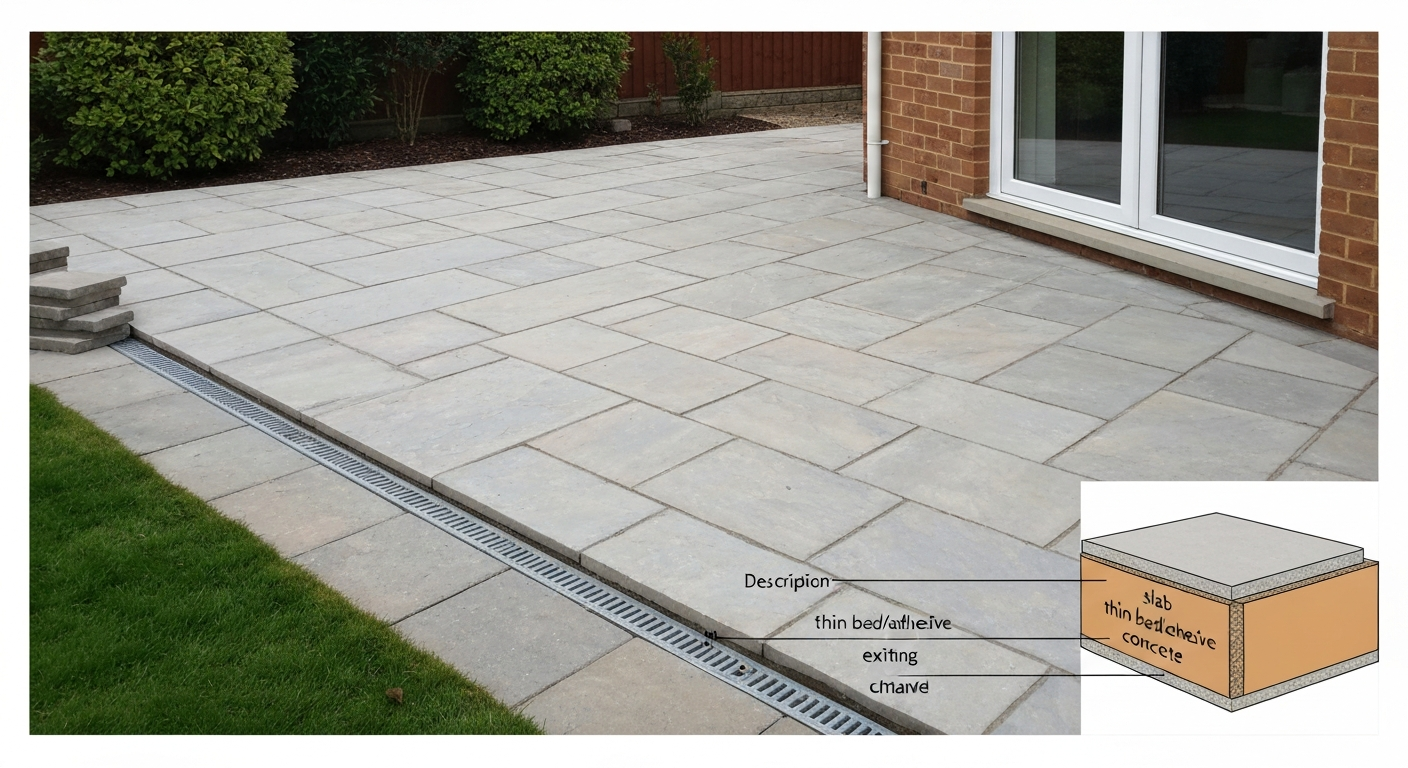
When overlaying existing concrete makes sense
Overlaying is genuinely practical when the existing concrete slab is structurally intact, reasonably flat, and already draining away from the house. In those situations you keep all the compaction and load-bearing work you already have, and you are simply adding a finished surface on top. It is a common approach for upgrading old, tired-looking concrete driveways and back patios without the disruption of a full dig-out.
The key benefits are real: you skip excavation, you skip hiring a skip (or at least reduce its size significantly), and you typically cut days off the job. For porcelain and natural stone slabs in particular, a solid concrete base is actually ideal because it provides the rigid, non-flexible platform those materials need to resist cracking under load. Calibrated natural stone and porcelain tiles 20 mm or thinner are especially well-suited to adhesive-bonded installation over concrete, which requires a much thinner bedding layer than a traditional mortar bed.
- The concrete slab is at least 75–100 mm thick and free from structural cracking
- There are no significant hollow or delaminated areas when you tap across the surface
- The slab already falls away from the house at approximately 1: 80 (about 12–15 mm per metre)
- The finished height of slabs plus bedding will not block a damp-proof course or raise a threshold dangerously
- There are no active drainage problems or standing water after rain
- The surface is free of oil, paint, sealants, or other bond-breaking contaminants
When you should remove the old concrete instead
I know it is tempting to overlay everything and avoid the hard work of breaking out concrete, but there are situations where that shortcut will haunt you. If the existing slab is heaving, has large structural cracks (wider than about 3–4 mm and still moving), or sounds hollow across more than a third of its area when you tap it, no amount of surface prep will make it a reliable base. If your ground is clay, see our practical guide on can i build a patio on clay to understand how clay subsoils affect heave, drainage and whether you should remove or stabilise the existing base. Movement in the old slab will telegraph straight through your new slabs, cracking joints and eventually the slabs themselves.
The other scenario that forces removal is height. Adding even a modest mortar bed of 30–40 mm plus the slab thickness (often 20–40 mm depending on the product) can easily add 60–80 mm to your finished level. If that pushes you above a damp-proof course, a door threshold, or a gate post base, you cannot sensibly overlay without significant other works. The same applies if the existing concrete already has a negative fall (sloping toward the house) and there is no way to correct it without building up too high on one side.
- Structural cracks that are active (still moving seasonally or widening year on year)
- Widespread hollow or delaminated sections covering more than about a third of the area
- Slab thickness under 75 mm, especially over clay soil or poorly compacted fill
- Finished overlay height would sit above the damp-proof course on the house wall
- Overlay would create a trip hazard at boundaries or create a step up into the house
- The existing concrete slopes toward the house and the fall cannot be corrected within a sensible height budget
- Persistent damp or standing water under the slab suggesting drainage failure below
If you are unsure whether your slab is structurally compromised, it is worth having a builder or structural engineer take a quick look before you invest in materials. Epoxy injection can restore tensile capacity across dormant structural cracks, but active cracks need to be sealed with polyurethane injection and monitored before any overlay goes on. Both are jobs I would leave to a specialist.
How to choose the right method for your project
Once you have established that overlaying is appropriate, the choice of installation method comes down to four factors: the finished height available, the type of slab you are using, how level the existing concrete is, and how much movement tolerance your situation demands. Here is a practical breakdown of all three methods side by side. If you are considering decking instead of paving, see can you lay decking over a patio for guidance on suitability, finished height implications, and preparation requirements.
| Method | Best for | Typical added height | DIY difficulty | Key limitation |
|---|---|---|---|---|
| Full mortar bed (4:1 sand:cement) | Thick natural stone, concrete slabs (40–60 mm) | 60–100 mm (bed + slab) | Moderate | Needs good mixing and floating skills; not ideal for thin porcelain |
| Flexible thinset / tile adhesive (C2TES1 or C2TES2) | Porcelain, calibrated stone (20–30 mm) | 25–45 mm (adhesive + slab) | Moderate | Requires very clean, primed, profiled concrete; moisture testing advised |
| Adjustable pedestal system | Large-format slabs, roof terraces, uneven bases | 50 mm minimum, adjustable to 300+ mm | Easy to moderate | Higher material cost; slab must be specified for pedestal span loads |
The mortar bed method is the traditional route and is specified under the BS 7533 family of standards for external paving in the UK. It gives you the most forgiving bedding layer for minor variations in the base and works well with thicker, heavier natural stone or concrete slabs. The flexible adhesive method is increasingly popular for porcelain and slim-format slabs because it keeps the finished level lower, but it is far less tolerant of a dirty or insufficiently profiled concrete surface. Pedestal systems are the best option where the base is uneven beyond what screeding can sensibly correct, or where you want proper drainage and air circulation under the slabs on a roof terrace or balcony.
Pre-check checklist before you start
Before ordering a single slab or bag of cement, work through this checklist. I have seen too many jobs go wrong because someone skipped these steps in their eagerness to get going.
- Tap test the entire slab: use a rubber mallet or the back of a spade handle and listen for hollow spots. Mark any hollow areas with chalk and assess how widespread they are.
- Check for cracks: measure their width and look for any vertical displacement between the two sides. Hairline cracks (under 0.5 mm) are generally cosmetic; cracks over 3 mm need investigation before you proceed.
- Measure the fall: use a long spirit level and measure the drop over 2 m. You are aiming for a fall away from the house of at least 1:80 (roughly 25 mm over 2 m). A fall toward the house is a red flag.
- Measure threshold and DPC heights: hold a straightedge at your intended finished slab height and check the gap to the lowest damp-proof course and the bottom of any door threshold. You need at least 150 mm clearance between any DPC and the finished paving level.
- Check drainage outlets: make sure any gulley, drain, or channel drain is in the right position to accept the new finished level and that it will not be buried or obstructed.
- Assess existing height against boundaries and paths: check whether the overlay height will create a trip edge or change levels at a gate or neighbour's boundary.
- Check planning and permitted development rules: most domestic patios are permitted development, but if you are within 3 m of a boundary or using impermeable paving over 5 m² in a front garden, restrictions can apply. Check with your local authority if in doubt.
- Party wall considerations: if the patio abuts a shared boundary or structure, notify your neighbour and check whether the Party Wall Act applies to any associated groundworks.
Tools and materials for all three methods
Tools you will need regardless of method
- Angle grinder with diamond blade (for cutting slabs to size)
- Long spirit level (1.8–2.4 m) and shorter torpedo level
- Rubber mallet
- String lines and profile boards for setting out levels
- Tape measure, chalk line, and set square
- Stiff brush, pressure washer or stiff broom for surface prep
- Paint roller and tray (for primer/bonding agent application)
- Safety goggles, dust mask (P3 rated for cutting), knee pads, and gloves
- Bucket, mixing paddle, and drill (or forced-action mixer for mortar bed work)
- Pointing gun or grouting float for joints
- Sponge and bucket for joint clean-up
Materials for the full mortar bed method
- Sharp (concreting) sand
- Ordinary Portland cement (OPC)
- Slurry primer / bonding SBR (styrene-butadiene rubber) for improved adhesion to the base
- Proprietary BS 7533-compliant bedding mortar (optional, but recommended for premium slabs)
- Kiln-dried jointing sand or pointing mortar appropriate to slab type
- Patio slabs (natural stone, concrete or porcelain 20–40 mm thick)
Materials for the flexible thinset / adhesive method
- Polymer-modified, deformable tile adhesive classified to EN 12004 as C2TES1 or C2TES2 (the S1/S2 rating provides the deformability needed outdoors to cope with freeze-thaw movement)
- Concrete primer approved by the adhesive manufacturer (many require this step over existing concrete)
- Large-format notched trowel (10 mm or larger, depending on slab back texture)
- Anti-fracture membrane or crack-isolation mat for concrete with hairline cracks (optional but recommended)
- Flexible external pointing mortar or grout rated for freeze-thaw conditions
- Porcelain or calibrated natural stone slabs (typically 20–30 mm for this method)
Materials for the adjustable pedestal system
- Adjustable paving pedestals (confirm manufacturer load ratings and recommended slab size/span before ordering)
- Self-levelling compound or screed mortar if the base needs initial gross levelling
- Paving slabs with sufficient thickness and bending strength for the span between pedestals (at least 20 mm porcelain or 40 mm natural stone is typical; confirm with pedestal manufacturer's TDS)
- Protective corner/edge bumpers if required by manufacturer
- Drainage channels or gullies positioned at low points
Repairing and preparing the concrete base
This is the step most DIYers rush, and it is by far the most important one. A poorly prepared base is the number one cause of bond failure, loose slabs, and efflorescence staining. Proper prep is not glamorous, but take it from someone who has seen a newly laid porcelain patio delaminate six months later because the concrete underneath was greasy and not profiled: it is worth every minute you spend on it. Project technical specification (example), pull‑off strength requirement cited (1.5 N/mm²) Project technical specification (example) — pull‑off strength requirement cited (1.5 N/mm²).
Cleaning and degreasing
Start with a thorough pressure wash to remove loose debris, algae, and surface dirt. For oil or grease stains (common on old driveways or workshop floors), apply a degreasing concrete cleaner and scrub in with a stiff brush, leave for the manufacturer's recommended dwell time, and rinse thoroughly. Any residual grease will act as a bond-breaker between your bedding material and the old concrete. For general laitance (the weak cement paste layer on the surface), ideally mechanically abrade the whole surface using an angle grinder with a diamond cup wheel, a hired floor grinder, or a scarifier. This creates the mechanical key that bonding materials need to grip. Manufacturers describe this in terms of the ICRI Concrete Surface Profile (CSP) scale: most bonded overlays need at least a CSP 3–4, which looks like a lightly sandblasted or bush-hammered finish.
Removing contaminants and coatings
Paint, sealants, waterproofing products, and bituminous coatings must be completely removed before any bonded overlay. These are bond-breakers, full stop. Chemical strippers work for paint, but test in a small area first and always rinse completely before grinding. If in doubt about what is on the surface, do an adhesion test: apply a strip of duct tape, press it firmly, wait a few minutes, and pull it off sharply. If any surface material comes away with it, the surface needs further preparation.
Repairing cracks, spalls and potholes
Hairline cracks can often be treated with a crack-isolation membrane or left if you are using a full mortar bed. Wider dormant cracks (0.5–3 mm, not actively moving) should be raked out, blown clear of dust, and filled with a flexible repair mortar or polyurethane sealant. For genuinely structural dormant cracks, epoxy injection can restore tensile capacity across the break, but this is specialist work. See American Concrete Institute (ACI) repair guidance on epoxy injection and related repair procedures for restoring tensile capacity across dormant cracks blank" rel="noopener noreferrer">American Concrete Institute (ACI) related concrete repair references (ACI repair guides, epoxy injection RAP). Active cracks that you can see have moved between seasons need polyurethane injection and monitoring: if they are still moving, you should not overlay until the cause is resolved. Spalled or scaled areas should be cut back to sound concrete with an angle grinder and filled flush with a polymer-modified repair mortar. Allow full cure before proceeding. Potholes deeper than about 20 mm should be cut square at the edges and filled with a fast-setting concrete repair compound. Feather-edge fillings rarely bond well, so always cut a clean, square recess.
Moisture and damp checks
Moisture in the base concrete is a bigger issue than many people realise, especially for adhesive-bonded methods. The standard test methods used in the industry are ASTM F1869 (the calcium-chloride MVER test) and ASTM F2170 (in-situ relative humidity probes). As a practical rule, if the concrete feels damp to the touch or you see any standing water or efflorescence on the surface, investigate the source before laying anything. Manufacturer guidance (notably from MAPEI) states that if in-situ RH probe readings exceed 80%, additional moisture mitigation is required before applying adhesive, typically an epoxy moisture-barrier primer. For a standard domestic external patio that drains freely, moisture in the substrate is usually less critical than for internal floors, but a persistent damp concrete base will cause efflorescence, adhesion problems, and salt staining over time.
Leveling and screeding the existing concrete
Once the base is clean and repaired, you need to decide whether it is flat enough to lay on directly or whether it needs levelling work first. For domestic concrete, industry guidance typically accepts tolerances of up to around plus or minus 15 mm over 2 m before reprofiling is required. If your base is within that tolerance and has a workable fall, you can often absorb minor undulations within a full mortar bed during laying. But if there are significant hollows, humps, or the fall is uneven, you need to address this before laying.
Screed mortar for gross levelling
Where hollows or high spots exceed what the bedding layer can absorb, a screed mortar (typically a 3:1 or 4:1 sand:cement mix) can be used to build up low areas or create a consistent fall. Prime the concrete with an SBR bonding agent before applying screed to ensure it keys properly rather than delaminating. Tamp and float the screed level to your string line, allow it to cure for at least 24–48 hours (longer in cold weather), and then check again with a long straight edge before proceeding. Do not apply screed in layers thicker than about 50 mm in a single pass without reinforcement.
Self-levelling compound for tight tolerances
If you are using the adhesive/thinset method and need a very flat, smooth surface, a self-levelling compound (SLC) can be poured to fill minor undulations and produce a flatter finish faster than hand-floating screed. Prime the concrete as directed by the SLC manufacturer (usually an acrylic or PVA-based primer), dam any edges, mix to a pourable consistency and pour from the centre outward. SLC is typically limited to layers of 3–10 mm per pour depending on the product, and it must be cured fully before laying over it. Do not use a thin SLC pour over a surface that is moving or has unrepaired cracks, as it will reflect those cracks almost immediately. For outdoor use, make sure the SLC product you choose is rated for exterior conditions and frost.
Dealing with uneven falls
If the existing concrete falls away from the house inconsistently (for example, it is higher in the middle and lower at the edges, creating a dish), the most reliable fix is spot-screeding low points to create a consistent gradient before laying. Set up string lines from a datum at the house wall to the lowest drainage point, measure the difference at multiple points across the slab, and calculate your screed depths accordingly. A common mistake is trying to correct fall by varying the mortar bed thickness during laying: this is possible in skilled hands but very difficult to control consistently for a first-time installer. Sorting out the fall at the prep stage with screed is far more reliable and avoids uneven slab heights and rocking. For projects switching from slabs to timber or composite, see a guide on how to lay decking on uneven patio for techniques like adjustable pedestals, joist shimming and subframe levelling.
FAQ
Can you lay patio slabs directly onto existing concrete?
Yes — you can lay patio slabs onto an existing concrete base, but only when the concrete is structurally sound, sufficiently level or correctable, has appropriate falls/drainage, and is prepared to accept the chosen bonding or support method. Unsound, contaminated, heavily cracked, or poorly drained concrete should be repaired or removed before overlaying.
When is overlaying slabs on concrete appropriate vs when should you remove the concrete?
Overlay is appropriate when the concrete is: intact (no structural failure), well bonded to its sub‑base, has usable falls (or can be corrected), and can be profiled/cleaned to provide a proper mechanical key. Remove the concrete when it is unstable, severely cracked or contaminated (oils, paint, coatings that can’t be removed), has chronic moisture/vapour problems that can’t be mitigated, or when the finished level/thresholds cannot be achieved with an overlay without creating trip hazards.
What pre-checks should I make before starting?
Check: 1) Structural soundness — no spalling undermining or settlement; 2) Surface condition — laitance, paint, oil, or coatings; 3) Cracks — active vs dormant and width; 4) Level/flatness — local high/low spots and falls for drainage (minimum falls away from buildings ~1:80 is typical); 5) Height/thresholds — finished paving height relative to doors, drainage gullies, steps and boundaries; 6) Moisture/vapour — perform moisture tests (calcium‑chloride MVER or in‑situ RH probes) if adhesives/overlays are used; 7) Surrounding drainage and outlets; 8) Local regulations/party walls and services.
How do I prepare and repair the existing concrete?
Preparation steps: 1) Clean thoroughly — remove dirt, vegetation, grease, oil and loose material (pressure wash, degreaser); 2) Remove contaminants and coatings — mechanically grind, shot‑blast or scarify to expose sound concrete and produce a profile (follow ICRI CSP guidance); 3) Repair cracks and spalls — small non‑structural cracks can be routed and filled with a suitable flexible filler; structural cracks should be assessed and repaired (epoxy injection for dormant structural cracks or specialist solutions for active cracks) by a contractor/engineer; 4) Check and correct falls/level — use screed, tapered repair mortar or self‑levelling underlayments where needed; 5) Moisture mitigation — test for moisture and apply manufacturer‑approved damp‑proof membranes/epoxy moisture barriers if required; 6) Prime if required by the adhesive or mortar manufacturer.
What are the common overlay methods suitable for DIY homeowners?
Three proven methods: 1) Full mortar bed (traditional bricklaying/mortar bedding) — a 30–40 mm bedding layer with cement:sand mortar or proprietary bedding mortar; 2) Cementitious/polymer‑modified tile adhesive (thinset) — improved/deformable adhesives (check EN 12004 classification, e.g., C2TES1) used with a suitable primed, profiled substrate; 3) Adjustable pedestal / raised paving systems — decoupled system sitting on pedestals, good for drainage and services access. Choice depends on slab type (natural stone vs porcelain), substrate condition, required finished level and DIY skill.
What tools and materials will I need?
Basic list: 1) Tools — pressure washer, stiff brushes, grinders/diamond cup wheel or scarifier, hammer and cold chisel, trowels (butter/floating), pointing tool, spirit level/long straightedge, tile spacers, rubber mallet, mixing drill and paddle, measuring tools, PPE (eye, ear, dust mask, gloves), wheelbarrow; 2) Materials per method — mortar bed: sharp sand, cement, bedding mortar; Adhesive: polymer‑modified cement tile adhesive (C2TES1 or manufacturer‑approved), primer/DPM; Pedestals: pedestal supports, neoprene pads, jointing material; Others: edge restraints, movement joints, pointing compound, drainage channels, epoxy moisture barrier (if needed), large‑format suction or lifting equipment for heavy slabs.