
You can install patio deck tiles yourself in a weekend or two, and the finished result can look genuinely professional. The key is spending most of your time on preparation: getting the base right, planning your slope for drainage, and choosing the correct adhesive or setting method for your specific tile and situation. Skip the prep and the tiles will rock, crack, or lift within a season. Do it properly and you'll have a surface that lasts decades.
How to Install Patio Deck Tiles: DIY Step-by-Step Guide

Clara Farrell
17 Jul 2026
What this guide covers
This is a complete, hands-on guide for homeowners and DIYers who want to install patio deck tiles from scratch or over an existing surface. Whether you're working with porcelain pavers on pedestals, natural stone set in mortar, or interlocking composite tiles over a concrete slab, the principles are the same: assess your site, choose the right materials for your conditions, prepare the base properly, and follow the correct setting method for your chosen tile. I'll walk you through every stage, from measuring your space and buying materials to laying the last tile and sealing the surface. I'll also flag the mistakes I see most often and tell you honestly when a particular job is worth calling in a pro.
Patio deck tile systems: the four main approaches
Before you buy a single tile, you need to understand which installation system suits your site. There are four broad approaches, and each has different base requirements, skill levels, and costs.
Tile on a concrete slab (mortar or thin-set)
This is the most traditional and durable method. You pour or use an existing concrete slab as a rigid base, then bond tiles to it using a polymer-modified thin-set mortar. The slab must be structurally sound, sloped to drain, and free of major cracks. This approach works best for permanent, fixed patios where you want the most stable long-term result. Porcelain, ceramic, and natural stone all work well here.
Tile on compacted gravel (sand-set)
Thicker tiles (typically 2 cm or 3/4 inch and above, including many porcelain pavers and concrete pavers) can be set directly into a compacted aggregate base with a bedding layer of coarse sand or crusher dust. This method drains naturally, tolerates slight ground movement better than a mortar bed, and is more forgiving to install. It's not suitable for thin standard tiles, which will flex and crack without a rigid substrate.
Pedestal or floating systems
Adjustable pedestals are plastic supports that lift the tiles off the surface below, creating a ventilated, fully draining gap underneath. They're ideal for rooftop terraces, balconies, and situations where you're working over waterproof membranes you don't want to penetrate with adhesive. They're also the best solution for leveling tiles on a sloped surface without mortar. Buzon and Eterno Ivica pedestals are two well-known brands; quality pedestals are rated for around 1,000 kg (roughly 2,200 lb) per support, so structural load is rarely an issue for residential use.
Overlay kits and snap-together tiles over existing surfaces
Composite deck tiles, rubber tiles, and some interlocking porcelain systems are designed to sit directly over an existing concrete or decking surface with no adhesive. These are the fastest and most beginner-friendly option. The existing surface does the structural work; you just need it to be reasonably flat, solid, and sloped. This approach is reversible and great for renters or anyone who may want to change the design later.
Choosing the right tile material
The tile material you choose affects everything: which base system you need, how you cut the tiles, what adhesive you use, and how much maintenance the finished patio will require. Here's a practical comparison of the four most common options.
| Material | Best For | Pros | Cons | Typical Thickness |
|---|---|---|---|---|
| Porcelain pavers | Modern patios, pool surrounds, rooftop terraces | Very low water absorption (<0.5%), frost-resistant, durable, low maintenance | Heavy, needs diamond blade to cut, can be expensive | 2 cm (20 mm) for outdoor use |
| Natural stone (slate, travertine, granite) | Traditional or rustic aesthetics | Unique appearance, natural variation, durable if sealed | Porous, needs sealing, variable thickness can complicate setting | 12–20 mm typically |
| Concrete pavers | Budget-friendly, driveways, general patios | Affordable, widely available, can be made locally | More porous than porcelain, can fade or stain, heavier per m² | 50–60 mm for pedestrian use |
| Composite/wood-plastic tiles | Decks, balconies, quick overlays | Lightweight, easy to cut and snap together, warm underfoot | Not as durable long-term, can fade UV, not a permanent hard surface | 20–30 mm typically |
For most outdoor patios in climates with freezing winters, porcelain pavers rated frost-resistant (PEI Group IV or V, water absorption under 0.5%) are my first recommendation. They outperform natural stone in durability and require far less maintenance. If you love the look of stone, choose granite or a dense slate rather than travertine or limestone, both of which are prone to staining and freeze-thaw damage if not properly sealed. For a weekend project over an existing surface, composite snap-together tiles are hard to beat for speed and simplicity. For more detail on working specifically with porcelain, the guide on how to install porcelain tile patio goes deeper on adhesive choices and frost ratings. For a deeper dive on adhesive choices and frost-rated porcelain, see the guide on how to install porcelain tile patio (internal ref: 9a92edd5-b6d2-4c54-85b1-5df9d4e65aa9). For a broader walkthrough covering all materials and base systems, see our guide on how to install outdoor patio tile.
Choosing your base system
The base is the most important decision you'll make. I'll be direct: most patio failures come from inadequate base preparation, not from the tiles themselves.
| Base System | Best Use Case | Key Requirement | Skill Level |
|---|---|---|---|
| New concrete slab | Permanent mortar-set installation | 4-inch minimum thickness, compacted 4–8 inch aggregate sub-base, 1/4" per foot slope to drain | Moderate to advanced |
| Compacted gravel base | Sand-set thick pavers and concrete pavers | 6–8 inches compacted aggregate, geotextile fabric over clay soil, positive drainage outlet | Beginner to moderate |
| Adjustable pedestals | Rooftops, balconies, over membranes, sloped surfaces | Existing structural surface (concrete, decking), access to perimeter drain or slope to edge | Moderate |
| Direct overlay on existing slab | Snap-together tiles, composite tiles, floating porcelain | Existing surface must be sound, flat within 3/16" per 10 ft, and sloped | Beginner |
If you're starting from bare ground, the compacted gravel base is the most DIY-friendly for thick pavers. Hire a plate compactor (most equipment rental shops have them) and build your base in 3- to 4-inch lifts, compacting each layer to at least 95% density (the industry standard referenced in ASTM D698). If you're working on a clay-heavy site (more on that in the drainage section), lay a geotextile separation fabric between the native soil and your aggregate base before you start. It's one of the cheapest steps you can take and it prevents clay fines from migrating up into your base over time.
Tools and materials: your complete shopping checklist
Tools
- Tape measure and chalk line
- Long spirit level (4 ft minimum) and a shorter torpedo level
- Rubber mallet
- Notched trowel (size depends on tile and method — see adhesive section below)
- Margin trowel for mixing and spreading
- Bucket and drill-mounted paddle mixer for thin-set
- Angle grinder with diamond blade or a wet-cut tile saw (essential for any cuts near edges or obstacles)
- Knee pads (non-negotiable for a full patio project)
- Safety glasses and dust mask rated at least P2 for cutting
- Plate compactor (hire one — don't try to compact a base with a hand tamper)
- Laser level or water level (very useful for checking drainage slopes over larger areas)
- Grout float and sponges
- Bucket for water
- Tile spacers appropriate to your joint width
- String lines and stakes for layout
- Wheelbarrow for mixing and transporting materials
- Stiff brush for cleaning grout haze
Materials
- Tiles (quantity calculated from your site plan, plus 10% extra for cuts and breakage)
- Polymer-modified thin-set mortar (ANSI A118.4 or A118.15 rated) for mortar-set applications
- Coarse washed sand or crusher dust for sand-set bedding layer
- Crushed aggregate (typically 3/4-inch clean stone) for the base layers
- Geotextile fabric if building over clay or soft soil
- Tile spacers or proprietary leveling clips (Raimondi, Tuscan Leveling System, etc.)
- Grout suited to joint width and use: sanded cement grout for joints 1/8 inch or wider; unsanded for narrower joints; epoxy grout for high-moisture or chemical-exposure areas (confirm UV stability rating for outdoor use)
- Exterior-rated tile sealer appropriate to your tile type (essential for natural stone, optional but recommended for unglazed porcelain)
- Adjustable pedestals if using a floating system (check load ratings match your tile weight and size)
- Edge restraints or border tiles to prevent lateral movement on sand-set installations
- Silicone caulk rated for exterior use for perimeter movement joints on mortar-set work
Recommended product specs: what to look for before you buy
Tile grades and frost ratings
For outdoor use in any climate, choose tiles labeled frost-resistant or impervious. Porcelain pavers should have a water absorption rate under 0.5% (ISO 10545-3). PEI wear rating of Group IV or V is appropriate for patio foot traffic. For outdoor settings, a 2 cm (20 mm) thickness is the standard for porcelain pavers when using sand-set or pedestal systems; thinner tiles (10–12 mm) require a rigid mortar or concrete base.
Thin-set and adhesive specs
This is an area where people often cut costs and regret it. For any exterior horizontal tile installation, you need a polymer-modified mortar that meets ANSI A118.4 (standard polymer-modified) or A118.15 (high-performance polymer-modified). Wall mastics and standard unmodified mortars are not acceptable for exterior floor installations. Brands like MAPEI Ultraflex 2, LATICRETE 254 Platinum, and Custom Building Products VersaBond Exterior are well-regarded polymer-modified options. Your target is approximately 95% mortar contact coverage under each tile. To achieve this on rough or uneven tiles, back-butter each tile (spread a thin skim coat of thin-set on the back of the tile) before pressing it onto the combed mortar bed.
Trowel sizes
Trowel notch size controls how much mortar you apply and whether you get adequate coverage. A 1/4-inch x 3/8-inch square-notch trowel is a common starting point for 12x12 to 18x18-inch tiles. For larger format tiles (24 inches and above), move to a 1/2-inch x 1/2-inch square notch. If you're using an uncoupling membrane like Schluter DITRA, follow the specific trowel requirements in the DITRA handbook: a 1/4-inch x 3/16-inch V-notch for the membrane side, and a 1/4-inch x 3/16-inch V-notch or 3/16-inch square notch for tiling over it. Using the wrong trowel is a very common cause of poor coverage and future tile failure.
Grout selection
For outdoor patio joints 1/8 inch (3 mm) or wider, use a sanded cement grout. For tighter joints under 1/8 inch, unsanded is correct. Epoxy grouts are extremely durable and resist staining, but check the UV stability of any specific product before using it outdoors: some epoxy grout pigments will yellow or fade under prolonged sun exposure, which looks terrible on a patio. Manufacturer datasheets will specify whether the product is approved for exterior exposed horizontal installations. When in doubt, a quality polymer-modified sanded cement grout is the practical choice for most patio work.
Sealers
Natural stone must be sealed before grouting and again afterward, using a penetrating impregnator sealer appropriate to the stone type. Porcelain with a glazed or polished surface generally doesn't need sealing. Unglazed porcelain and textured finishes benefit from a sealer to prevent grout and dirt from staining the surface during and after installation. Re-apply sealer every two to three years on heavily used surfaces.
Measuring, planning and layout
Measuring your space and calculating tile quantities
Measure the length and width of your patio area at the widest points, then multiply to get the total square footage (or square meters). Add 10% for a simple rectangular space with minimal cuts, or 15% for L-shapes, angled edges, or intricate patterns. It's better to have leftover tiles than to run short mid-job: tile batches from different production runs can have slight shade differences, so you want all your tiles from the same order.
Once you have the area, divide it by the coverage per tile (your tile supplier's website will list this, or calculate it as tile length x tile width including grout joint). Round up to the nearest full box.
Planning the layout before you set a single tile
A good layout means the cut tiles at the edges of your patio are roughly equal in size on both sides, and no cut tile is smaller than half a tile unless it's completely unavoidable. Here's how I approach it. Find the center of the space (measure and mark the midpoint of each side, snap chalk lines across). Then dry-lay a row of tiles from the center toward each edge with spacers in place. This shows you exactly where the cuts will fall. If you end up with a sliver of less than about 3 inches at one edge, shift the whole layout half a tile width so both edges get a larger cut piece.
For rectangular patios with a strong visual line (like a back wall or a pool edge), you can start the layout from that dominant edge rather than the center, so full tiles read prominently along the feature you see most. Mark your final layout lines with chalk or a pencil on the slab before you mix any mortar.
Accounting for expansion and movement joints
On mortar-set installations, plan for a movement joint (filled with exterior-grade silicone caulk, not grout) at the perimeter where the tiles meet walls, steps, or any fixed structure, and every 8 to 12 feet across the field. These are essential: exterior tiles expand and contract with temperature changes, and without movement relief the tiles or the substrate will crack. Match the silicone color to your grout as closely as possible and these joints are nearly invisible.
Slope, drainage and waterproofing
This section is critical. Water management is the single biggest cause of patio tile failures, especially in climates with frost. Get this right and your patio will last. Get it wrong and you'll be lifting tiles in three years.
The minimum slope requirement
The industry-standard minimum slope for horizontal exterior tile is 1/4 inch per foot (approximately 2%), directed toward a positive drainage outlet. The Technical White Paper, Exterior Installations from Custom Building Products recommends a minimum slope of 1/4" per foot toward a positive drainage outlet for horizontal exterior tile and paver assemblies to avoid water ponding and related damage blank" rel="noopener noreferrer">Custom Building Products' Technical White Paper — Exterior Installations specifies a minimum slope of 1/4 inch per foot (≈2%) toward a positive outlet to prevent ponding.. This means for every 12 inches of horizontal distance, the surface drops by 1/4 inch. On a 10-foot-wide patio, the far edge should be 2.5 inches lower than the high edge. Both the TCNA (Tile Council of North America) handbook methods for exterior installations and most major manufacturer technical guides use this minimum. Less slope than this and water will pond, freeze, and eventually work its way under the tiles.
Building the slope into the base
The slope needs to be built into the base, not corrected with thick-and-thin mortar. If you're pouring a new concrete slab, set the formwork at the correct fall before you pour. If you're building a compacted aggregate base, grade it to slope during compaction. You cannot achieve consistent drainage by varying mortar thickness across a flat base: you'll end up with voids under tiles and the mortar will crack under load.
Pedestal systems on sloped surfaces
One of the real advantages of adjustable pedestals is that they let you create a perfectly level tile surface over a sloped structural substrate. The pedestal height compensates for the slope so the tiles themselves sit level (important for roof terraces and balconies where you want a flat walking surface but the waterproof membrane beneath must drain). Use pedestals with a built-in slope-correction head (most quality brands include these as accessories) on slopes greater than about 2% to keep each tile perfectly level. The drainage happens in the open gap between the tiles and below the pedestal deck.
Clay soil and poor drainage sites
Clay soil is the most challenging condition for any patio base. Clay holds water, expands when wet, contracts when dry, and will heave your base if not managed properly. If you're digging into clay, don't skip these steps. First, excavate at least 6–8 inches below finished grade (deeper in heavy clay). Lay a geotextile separation fabric (a non-woven geotextile, not just weed fabric) across the bottom and sides of the excavation before you add any aggregate. This prevents clay fines from migrating up through the aggregate over time, which is what causes soft spots and subsidence. Fill with clean, open-graded crushed aggregate (not all-in ballast, which clogs) and compact in layers. If the site pools water badly, install a French drain (a perforated pipe in a gravel trench leading to a suitable outlet) along the low side of the excavation before you fill. Directing surface water away from the patio with grading and perimeter edging will do more for long-term stability than almost anything else.
Waterproofing for balconies, roof decks and covered patios
If you're tiling a balcony or roof deck where the substrate is above a habitable or enclosed space, waterproofing is not optional. In this situation, I strongly recommend using an uncoupling/drainage membrane system like Schluter DITRA or DITRA-XL over a sound concrete substrate, connected to a proper drain (such as a Schluter KERDI-DRAIN or linear drain). The membrane handles both uncoupling (protecting tile from substrate movement) and drainage (routing water to the drain outlet). This is one area where following the manufacturer's installation handbook precisely is worth the time: the specified slope, trowel sizes, and drain connection details exist for good reason.
Step-by-step installation
Step 1: Prepare and compact the base
Excavate to the correct depth: for a sand-set paver installation, you need roughly 6–8 inches of compacted aggregate plus a 1-inch bedding layer plus the tile thickness. Mark and set your slope during excavation. Lay geotextile fabric if building on clay or soft soil. Add aggregate in 3- to 4-inch lifts and compact each layer thoroughly with a plate compactor. Check your slope with a long level and a tape measure after each compaction pass. The final compacted base should be consistent and firm: if it shifts under your feet, it needs more compaction.
Step 2: Install the bedding layer
For sand-set work: spread a 1-inch layer of coarse washed sand or crusher dust over the compacted base. Screed it flat (or to the correct slope) using two parallel pipes or screed rails as guides. Do not compact the sand; it needs to stay workable so tiles can be tapped level. Avoid walking on the screeded sand after leveling it.
For mortar-set work on a slab: clean the concrete thoroughly. It must be free of dust, grease, curing compounds, and loose material. If the slab surface is smooth or polished, scarify it or apply a concrete primer. Mix your polymer-modified thin-set to a peanut butter consistency (not soupy), and allow it to slake (rest) for about 10 minutes after initial mixing, then mix briefly again before use.
Step 3: Set the tiles
Start at your layout reference lines in the center (or from your dominant edge, depending on your layout decision earlier). For mortar-set: spread thin-set with the flat side of the trowel first, pressing it into the substrate, then comb with the notched side at a consistent 45-degree angle. Back-butter each tile with a thin skim coat of thin-set before pressing it down. Press firmly, twist slightly as you seat the tile, and check coverage by lifting an occasional tile early in the job: you should see full contact on both faces with no bare spots. If you see less than about 95% contact, switch to a larger trowel or apply more back butter.
Use tile spacers or a leveling clip system to maintain consistent joint width and prevent lippage (where one tile edge sits higher than its neighbor). A good leveling clip system is one of the best investments for a first-time tiler: it clamps across the joint and draws adjacent tiles to the same height automatically. Check level frequently in multiple directions as you go. Never try to move a tile that's been down for more than about 10–15 minutes; the mortar will have skinned over and the bond won't form correctly. Pull it up, clean both surfaces, and re-apply fresh mortar.
Step 4: Cut tiles for edges and obstacles
Cut tiles after you've set all the full tiles and the mortar has cured (minimum 24 hours, ideally 48). This means the full tiles are your reference and the cuts are the final pieces. For straight cuts on most tiles, a wet tile saw gives the cleanest results. For curves and notches around drain covers or posts, an angle grinder with a diamond blade works well. Always wear eye protection and a dust mask when cutting. For more cutting techniques and tips on specific tile materials, the guide on how to cut patio tiles covers this in full detail.
Step 5: Grouting
Allow the thin-set to cure for at least 24 hours (check the product datasheet: some require 48 hours or more, especially in cool conditions) before grouting. Remove all tile spacers and leveling clips. Mix grout to a firm, lump-free consistency. Work it into joints with a rubber grout float held at a 45-degree angle, pressing firmly. Work in sections of about 10–15 square feet at a time. After 10–15 minutes (when the grout starts to haze but hasn't fully hardened), clean the surface with a damp sponge in a circular motion, rinsing the sponge frequently. Avoid using excess water: it dilutes the grout mix and weakens it. A second cleaning pass an hour later will remove most haze. If a powdery film remains after 24 hours, a diluted grout haze remover (chemica or similar) will lift it.
Step 6: Seal and finish
If your tiles or grout require sealing, wait the full cure time specified on the grout packaging (typically 72 hours for cement grout, sometimes longer) before applying sealer. Apply sealer in thin, even coats and wipe off any excess before it dries on the surface, as pooled sealer leaves a white residue that's difficult to remove. Seal the perimeter movement joints with exterior-grade silicone caulk matched to your grout color.
Pedestal system installation: what's different
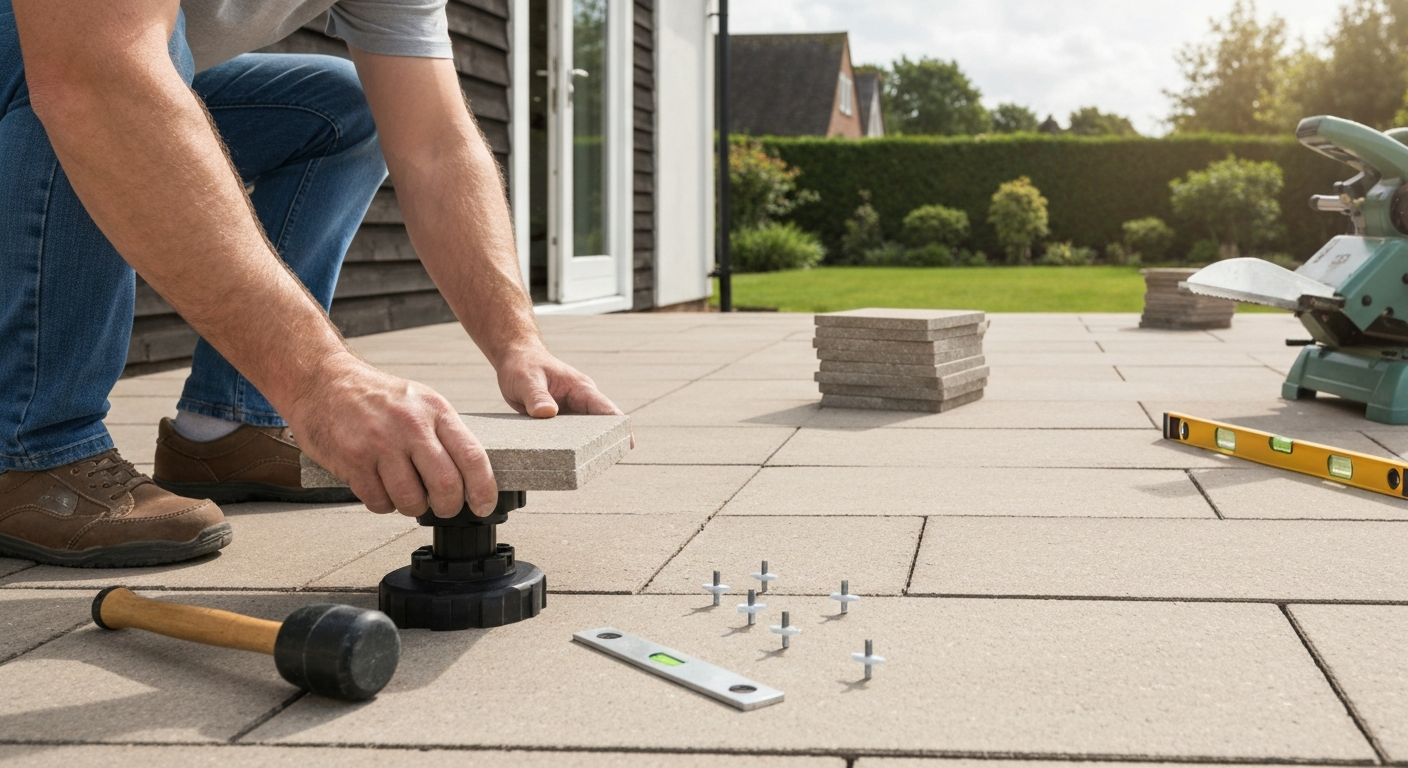
If you're using adjustable pedestals, the process is simpler in some ways and requires different thinking in others. Set pedestals at your layout grid points (spacing depends on tile size: typically 12 to 16 inches on center for tiles up to 24 inches, or at the four corners for large-format pavers). Adjust height using the pedestal screw thread to bring tiles level. Use the manufacturer's slope-correction head accessories if the underlying surface is sloped. Place tiles on the pedestal heads and check level across multiple tiles with a long level. Tiles don't need adhesive in a floating pedestal system: they sit on the pedestal heads, held in alignment by the spacer tabs built into most modern pedestal caps. This makes individual tile replacement straightforward later if one tile cracks.
The main discipline with pedestals is keeping them out of the drain path. Position pedestals so water can always flow around them to the drain or perimeter outlet. Never allow a pedestal to sit directly in a drain opening.
Common mistakes and how to avoid them
- Skipping base compaction: loose base = rocking tiles and cracked grout within months. Rent a plate compactor, don't skip this.
- Wrong mortar for outdoor use: wall mastics and unmodified mortars are not suitable for exterior horizontal tile. Use polymer-modified thin-set (ANSI A118.4 minimum).
- No movement joints at perimeters and field breaks: tiles expand in heat and contract in cold. Grout in perimeter joints will crack and force tiles up. Use silicone caulk at perimeters.
- Insufficient slope: a patio that looks roughly level but doesn't drain will pond water, which freezes and destroys grout joints and tile bonds fast. Check slope with a level and tape, not just by eye.
- Mixing too much mortar at once: polymer-modified thin-set has an open time of roughly 20–30 minutes depending on temperature. Mix only what you can use in that window. Remixing dried mortar with water weakens the bond.
- Not back-buttering large tiles: for tiles 15 inches or larger, combing the substrate alone rarely gives 95% coverage. Always back-butter too.
- Grouting too soon: if the tiles rock slightly when you press on them, the mortar hasn't cured. Walking on or grouting freshly set tiles breaks the bond while it's forming.
- Laying tiles directly on clay without drainage measures: clay heave will destroy the base. Geotextile fabric, proper drainage, and correct excavation depth are mandatory on clay sites.
Cost and time estimates for a typical DIY project
| Installation Type | Approximate Material Cost (per sq ft) | Typical Time for 150 sq ft patio | Skill Level |
|---|---|---|---|
| Composite snap-together overlay | $3–$8 | 4–8 hours (1 day) | Beginner |
| Pedestal floating system with porcelain pavers | $12–$25+ | 1–2 days plus base prep | Moderate |
| Sand-set concrete or porcelain pavers | $4–$15 | 1.5–3 days including base | Moderate |
| Mortar-set porcelain on new concrete slab | $10–$30+ | 3–5 days (slab cure adds 7+ days) | Moderate to advanced |
These are material costs only and assume you're doing the labor yourself. Equipment rental (plate compactor, wet tile saw) typically adds $80–$200 for a weekend. Hiring a professional tiler for the setting work while you handle base prep is a good middle ground if you're not confident with the mortar work. Factor in the cost of a skip or disposal for excavated soil, which many first-timers forget.
Safety on site
- Always wear safety glasses when cutting tile: shards travel fast and far.
- Use a P2-rated dust mask or respirator when dry-cutting or sanding tile: silica dust from ceramic and stone is a serious long-term lung hazard. Wet cutting dramatically reduces dust.
- Wet thin-set and grout are alkaline and will irritate skin with prolonged contact. Wear nitrile gloves when mixing or applying.
- Knee pads protect your knees on a full day of tiling. Don't skip them.
- When handling 2 cm porcelain pavers, get help: large format tiles are heavy (a single 24x24-inch paver can weigh 15–20 lb) and have sharp edges.
- Ensure any hired plate compactor has a dead-man's switch and you read the operating instructions before use.
- If excavating near the house, check for buried services (gas, water, electrical) before you dig.
Maintenance after installation
A well-installed patio requires very little maintenance. Clean porcelain pavers with a pH-neutral cleaner and a stiff brush annually, or whenever they look grimy. Avoid bleach on colored grout: it fades it over time. Inspect grout joints in spring after any harsh winter, and repoint any cracks or voids with matching grout before water penetrates. Re-seal natural stone and grout as needed, typically every two to three years for heavily used areas.
If you notice individual tiles starting to rock, lift them, scrape off the old mortar, and re-set them with fresh thin-set. Catching this early prevents water from getting under adjacent tiles and causing more widespread failure. On pedestal systems, replacement is even easier: simply lift the rocking tile, adjust the pedestal, and replace the tile.
When to hire a professional
Most patio deck tile installations are genuinely within reach for a capable DIYer who's willing to prepare properly. But there are situations where I'd recommend calling in a professional. If you need to pour a new concrete slab, especially one over 200 square feet, the formwork, reinforcement, and finishing work is a significant undertaking for a first-timer. If your site has serious drainage problems (water that pools for days after rain, or a known high water table), a landscape drainage contractor is worth the consultation fee before you start. If you're tiling a balcony or roof deck above living space, waterproofing errors can cause serious structural damage: in this case, either hire a professional tiler with balcony experience or at least have a pro review your design and drainage plan before you begin.
For everything else, particularly sand-set pavers, pedestal systems, snap-together overlays, and mortar-set tile on an existing sound slab, a careful DIYer following the steps in this guide and the manufacturer's installation instructions can produce a result that's indistinguishable from professional work. Take your time on the base prep and layout planning, and the setting work will go smoothly. If you're moving on to a backyard patio project with more complex shaping and patterns, the guide on how to tile a backyard patio builds on these fundamentals with more detail on pattern layouts and working around landscaping features.
FAQ
What are patio deck tiles and when should I use them?
Patio deck tiles are modular tile units (porcelain, natural stone, concrete, or composite) designed for outdoor floors and terraces. Use them when you want a durable, attractive surface that’s easier to install or replace than poured concrete or full‑bed tile. Choose solid porcelain or stone for heavy wear/UV resistance, concrete for budget builds, and composite for low maintenance. Pedestal/floating systems are best when you need drainage, access below the deck, or to avoid breaking an existing substrate.
How do I plan and measure for installing patio deck tiles?
Measure the patio area (length × width) and add 5–10% extra for cuts and waste. Sketch the space, locate fixed points (doors, drains, steps), and plan tile layout to minimize small edge cuts. Check slope/drainage—target at least 1/4" per foot (≈2%) to an outlet. Identify the substrate (soil, compacted gravel, concrete slab, wood) because it determines your base method. Make a materials checklist (tiles, mortar/adhesive, grout/sealer, pedestals if used) and tools checklist (trowels, level, wet saw, rubber mallet, broom, safety gear).
Which materials and tile types are best for exterior patio decks?
Porcelain: excellent frost, stain and wear resistance; available as thin tiles or 2cm pavers for pedestals. Natural stone: attractive but variable—requires sealing and careful mortar/grout selection. Concrete pavers: economical and durable. Composite tiles: low maintenance and lightweight but check UV/colorfastness. For horizontal exterior use, choose tiles rated for exterior floors and appropriate thickness for your installation method (e.g., 2cm pavers for pedestals).
What base options are appropriate and how do I choose between them?
Common base options: 1) New concrete slab—best for a permanent, flat base; typical residential slab is 4" with proper reinforcement and joints. 2) Compacted aggregate/sand base—good for sand‑set pavers; needs engineered gradation and compaction to ~95% density. 3) Pedestal (floating) system—ideal for rooftop, balcony, or where you need access or no substrate prep. 4) Install over existing surfaces (concrete/tiles) using an uncoupling/drainage membrane (e.g., Schluter DITRA) or mortar bed per manufacturer specs. Choose based on substrate condition, drainage needs, load, and budget.
What adhesives, mortars and grout should I use for exterior patio tiles?
Use polymer‑modified thin‑set mortars meeting ANSI A118.4/A118.15 (or C2E/C2F ISO 13007 equivalents) for exterior horizontal installations. For natural stone or large pavers on sand/mortar beds follow manufacturer guidance. Epoxy grouts are chemically resistant and good for wet areas but check UV stability for exposed exterior use. Traditional cement grouts are common for joints; seal stone where required. Avoid wall mastics and unmodified adhesives for exterior horizontal floors.
How important is mortar coverage and what coverage should I aim for?
For horizontal exterior tile you should aim for near‑full mortar contact—industry guidance recommends about 95% coverage to avoid voids, freeze‑thaw damage and lippage. Use appropriate trowel notch size specified by the membrane or tile manufacturer and butter the tile back‑buttering technique for large format/porcelain tiles to improve contact.