Laying a patio yourself is completely achievable, and when done right it will last decades without cracking, shifting, or turning into a puddle after every shower. The key is spending most of your time on the groundwork: excavate to the correct depth, build a solid compacted subbase, get your falls right from the start, and use proper edge restraints. The actual laying of bricks, slabs, or pavers is the satisfying part at the end of a process that is mostly about preparation. If you are working with a brick layout, a patio pal brick laying guide will help you plan the pattern, bedding depth, and jointing for a long-lasting finish laying of bricks.
Laying a Patio Guide: Steps, Drainage, Base and Finishing

Clara Farrell
26 Jun 2026
Choosing your patio type, layout, and materials
Before you buy anything or lift a spade, decide what surface you actually want. The material you choose affects every other decision: how deep to dig, what bedding method to use, how heavy the work gets, and how long the finished surface lasts. Here is a quick breakdown of the main options most homeowners are choosing between.
| Material | Best for | Bedding method | Relative difficulty |
|---|---|---|---|
| Concrete block/brick pavers | Driveways, patios, high-traffic areas | Sharp sand laying course (flexible) | Beginner-friendly |
| Sandstone or natural stone flags | Garden patios, decorative areas | Cement-bound full bed (rigid) | Moderate |
| Precast concrete slabs | Budget patios, straightforward shapes | Cement-bound full bed or 5-spot | Beginner-friendly |
| Porcelain tiles | Contemporary patios, low maintenance | Full cement bed, often with adhesive | Moderate to advanced |
| Clay pavers/brick | Period homes, traditional look | Sharp sand or mortar bed | Moderate |
For most first-time DIYers, concrete block pavers or precast concrete slabs are the most forgiving. Natural sandstone and porcelain look stunning but are less tolerant of an uneven bed, and porcelain especially needs a full solid bed and the right adhesive to avoid hollow spots. If you are interested in specific brick laying patterns or working with clay brick, there is a lot more detail worth exploring on those topics separately.
For your layout, sketch it out on paper first. Decide on the pattern: running bond, herringbone, basketweave, or straight grid. Herringbone is the most stable for block paving because the interlocking angles resist lateral spread. For slabs, a simple staggered grid (like brickwork) is easiest to set out and cut for. Try to plan your layout so you minimise cuts, especially at visible edges. A half-brick border of a different colour is a practical way to hide the inevitable cuts and frame the whole patio neatly. If you are doing a brick patio with a half-brick border, remember that the same general laying and setting out principles apply even before you choose the exact pattern.
Planning: measurements, drainage, and subbase thickness
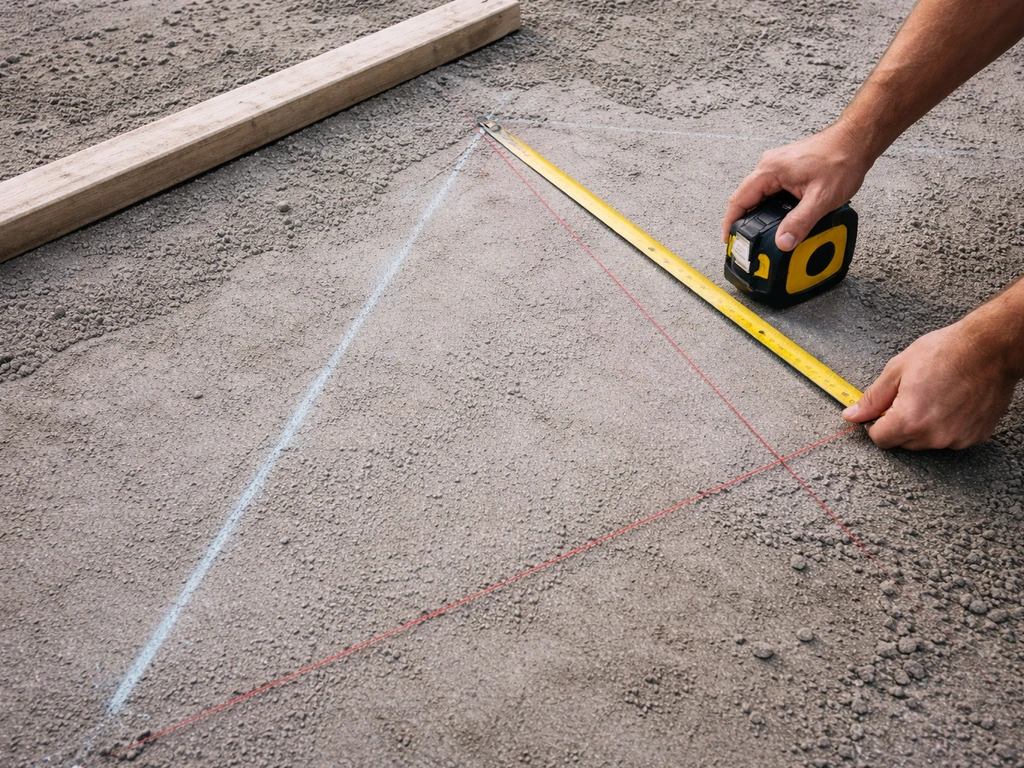
Measure your space carefully and add at least 10% to your material quantities to account for cuts and breakages. For an irregular space, break it into rectangles, calculate each area separately, and add them together. Write everything down before you go to the merchant.
Drainage is non-negotiable. A flat patio will pool water, and pooled water is the start of every long-term patio problem: frost heave, slippery algae, and water working into the base. The standard fall for a private patio is 1:60, meaning the surface drops 1 unit for every 60 units of horizontal run. In practical terms, a patio that is 3 metres deep from the house needs to fall about 50mm (just under 2 inches) across that run. Always fall away from the house, never toward it.
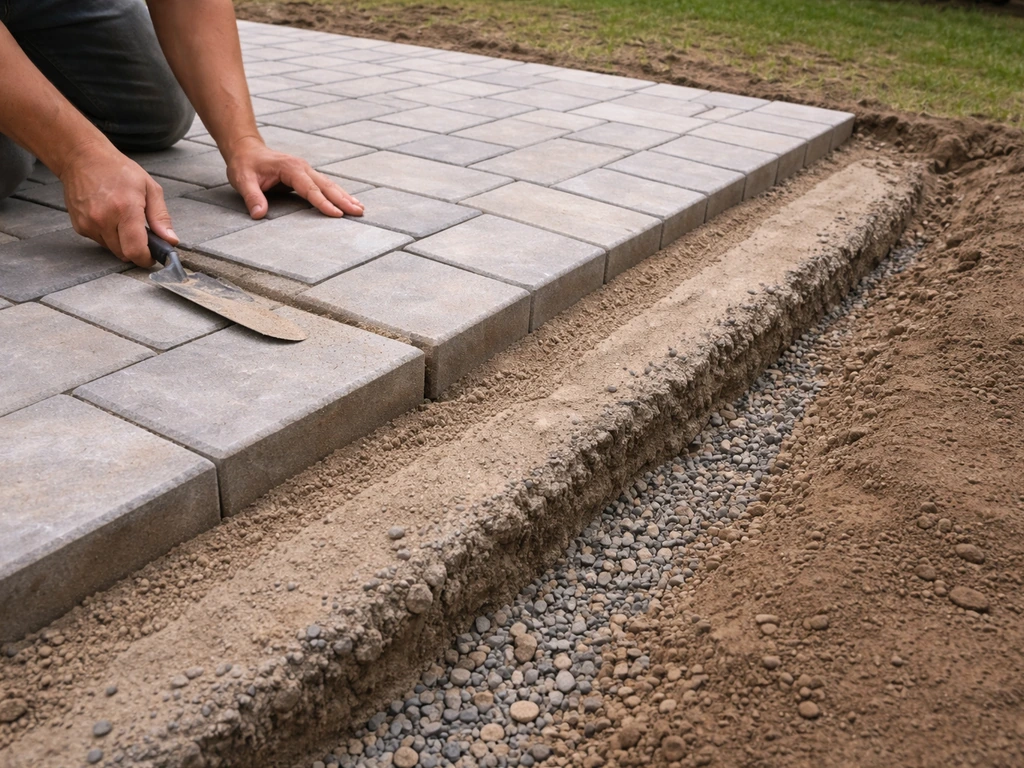
For subbase thickness, the depth you excavate depends on your material choices. A typical domestic patio on reasonable ground uses roughly 100mm of compacted hardcore (Type 1 MOT granular subbase), plus 30-50mm of bedding (sharp sand for flexible paving, or a cement-bound mortar bed for flags and slabs), plus the thickness of the paving unit itself. Add all three layers together and that is your total excavation depth. On clay soil or soft ground, increase the hardcore to 150mm. If the ground is particularly poor or the patio will bear vehicle weight, go deeper still or take professional advice.
| Layer | Typical thickness | Notes |
|---|---|---|
| Paving unit | 50-80mm (block), 35-50mm (flag/slab) | Varies by product |
| Bedding layer | 30-50mm | Sharp sand (flexible) or cement-bound (rigid) |
| Compacted hardcore (Type 1) | 100mm minimum, 150mm on clay | Compact in 75-100mm layers |
| Total excavation depth | 180-280mm typical | Measure from finished surface level down |
Site prep: stripping turf, excavating, and handling what's already there
Mark out your patio area with pegs and string lines, then strip the turf. A flat spade or turf cutter makes this much easier. Turf and topsoil are not suitable base material, so remove them completely. Topsoil is organic: it compresses, rots, and moves. Even a few centimetres left in the base will cause settlement later.
Excavate to your calculated depth, checking regularly with a tape measure or depth gauge. Keep the base of your dig as level and consistent as you can. On sloped ground, you have two choices: cut and fill (dig deeper on the high side, build up on the low side) or step the patio in levels. If you go with fill on the low side, that fill must be well compacted in layers, not just tipped in and covered. Uncompacted fill will settle and your patio will sink.
If you are laying over an existing concrete or paved surface, assess it carefully first. A solid, flat, well-drained base can sometimes be overlaid, but any blank" rel="noopener noreferrer">loose, rocking, or cracked sections need to be broken out and replaced rather than covered over. Laying over a weak substrate just pushes the problem to the future, usually at the worst possible time. Drainage falls on the existing surface also need to be checked: if they drain the wrong way now, they will drain the wrong way with new paving on top.
On clay soil, take extra care. Clay holds moisture and moves with freeze-thaw cycles. Go deeper with your hardcore layer (150mm is a sensible minimum), and consider a geotextile membrane at the bottom of your excavation as well as under your hardcore, to prevent clay migration upward into the aggregate over time.
Building your base: hardcore, compaction, weed control, and geotextile
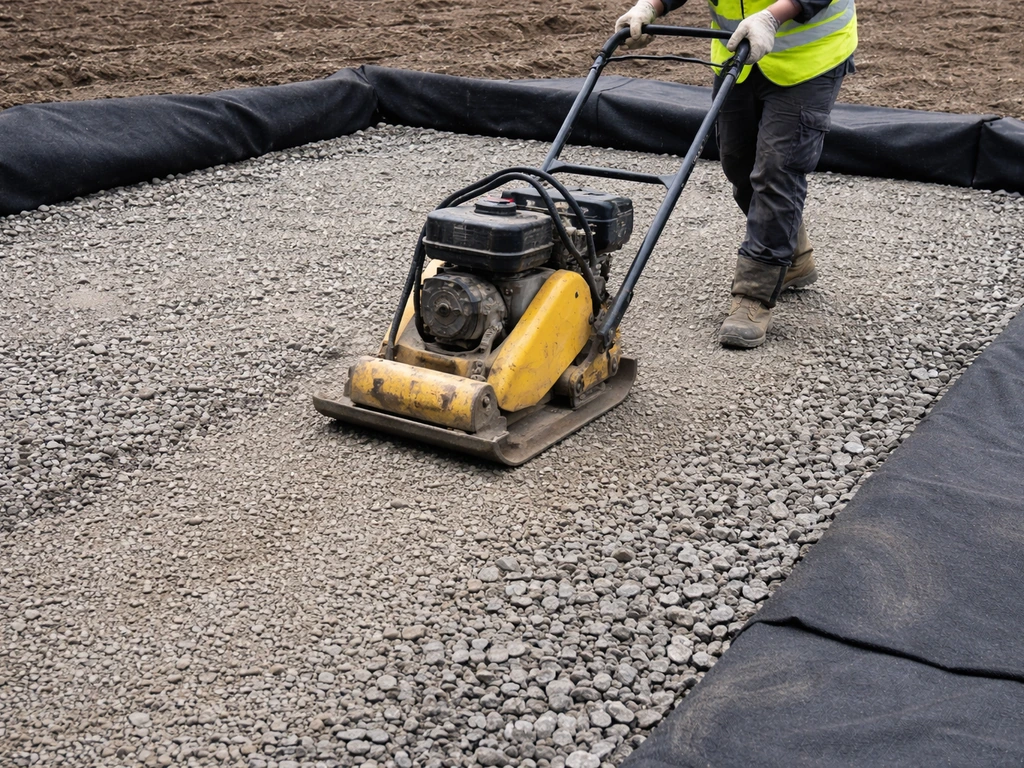
Type 1 MOT granular subbase is the standard choice for the hardcore layer. It is a crushed stone graded from coarse down to fines, and when compacted it locks together into a stable, load-bearing base. Tip it in and spread it roughly level, then compact it with a wacker plate (plate compactor). Do not try to compact more than 100mm at a time: put it in in layers and compact each one. Hire the wacker plate if you do not own one. Trying to compact by hand or by just walking over it simply does not work.
Once you have a compacted hardcore base, lay a geotextile weed-suppression membrane over the top before you bring in your bedding material. A woven geotextile is better than cheap non-woven sheeting here: it lets water through (important for drainage) while stopping weeds and preventing your bedding sand from migrating down into the hardcore. Overlap joints by at least 300mm and push the membrane up to your edge restraints. This step is easy to skip because you cannot see the result, but skipping it is one of the most common reasons patios end up with weeds pushing through joints three years later.
For flexible block paving, the bedding layer on top of the membrane is sharp (coarse) sand, screeded to a consistent depth of around 40-50mm before compaction. For rigid paving (flags, slabs, porcelain), the bedding is a semi-dry cement:sand mix, typically around 1:4 or 1:5 ratio, laid 20-40mm thick as a full bed under each unit. Do not use the cheap five-spot (five blobs of mortar) method for anything you expect to last: unsupported areas crack, and hollow spots allow water to sit under the slab.
Edge restraints and setting out your levels
Edge restraints are the part most DIYers underestimate. Without proper restraint, block paving especially will slowly spread outward under foot traffic and the whole surface loses its tight interlock. Concrete-bedded edging is the right approach for any edge that is not already retained by a wall or structure. Lay your edging units on a concrete bed (1:5 or 1:6 cement:ballast mix), haunched on both sides with concrete, and leave it to cure for at least 24-48 hours before you start laying the main paving. Token haunching (just a dab of concrete) is not adequate and will lead to edge failure. The edging has to be solid before anything else goes in.
Set your levels using pegs, a spirit level, and a string line. Start at the highest point, which is usually the house wall or door threshold, and work your fall outward from there. Use a long straight edge (at least 1.8m) and a level to check regularly as you go. For a 1:60 fall, on a string line of 3 metres you need a 50mm drop from one end to the other. A simple way to measure this is to put a 50mm packing piece under one end of a 3m straight edge and adjust until the bubble reads level: that straight edge now represents your finished surface fall.
Take your time here. Every level error you embed in the bedding course will be visible in the finished surface. It is far faster to get levels right before laying than to lift and relay slabs afterward.
Laying the paving and filling the joints
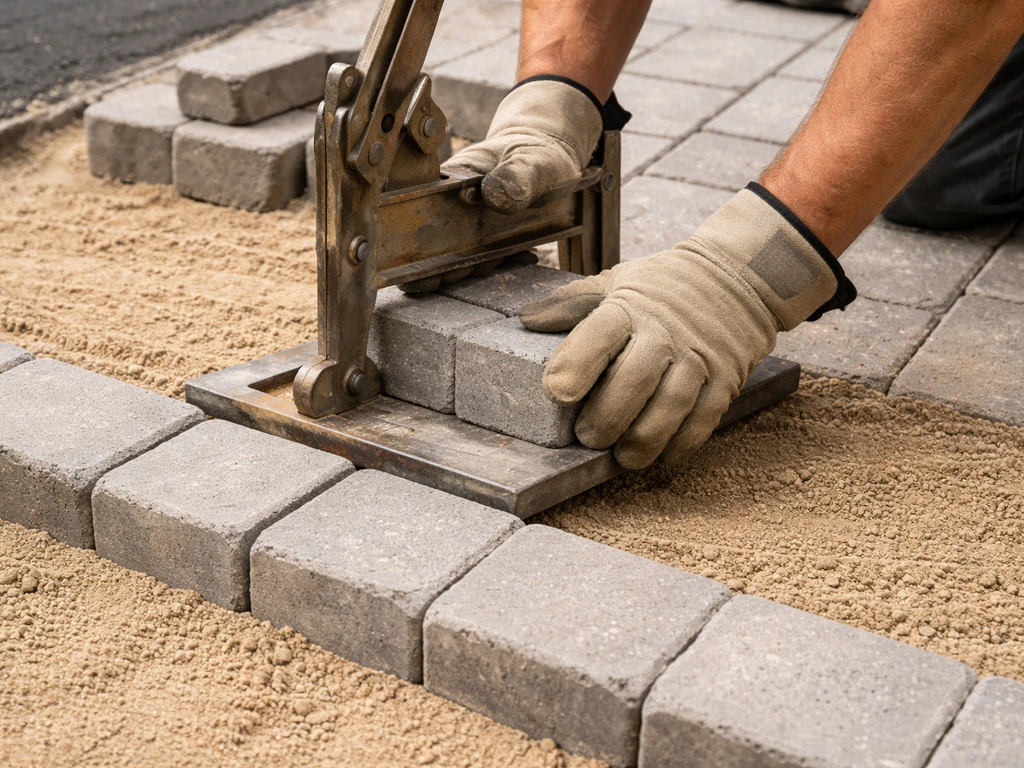
Laying block pavers (flexible method)
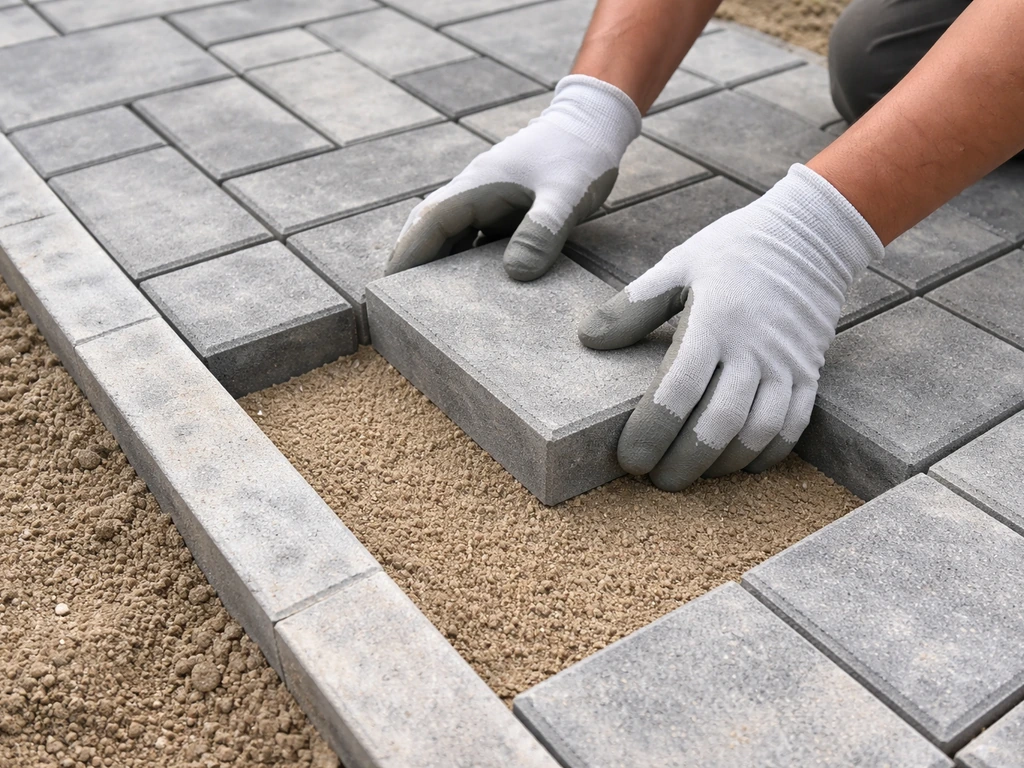
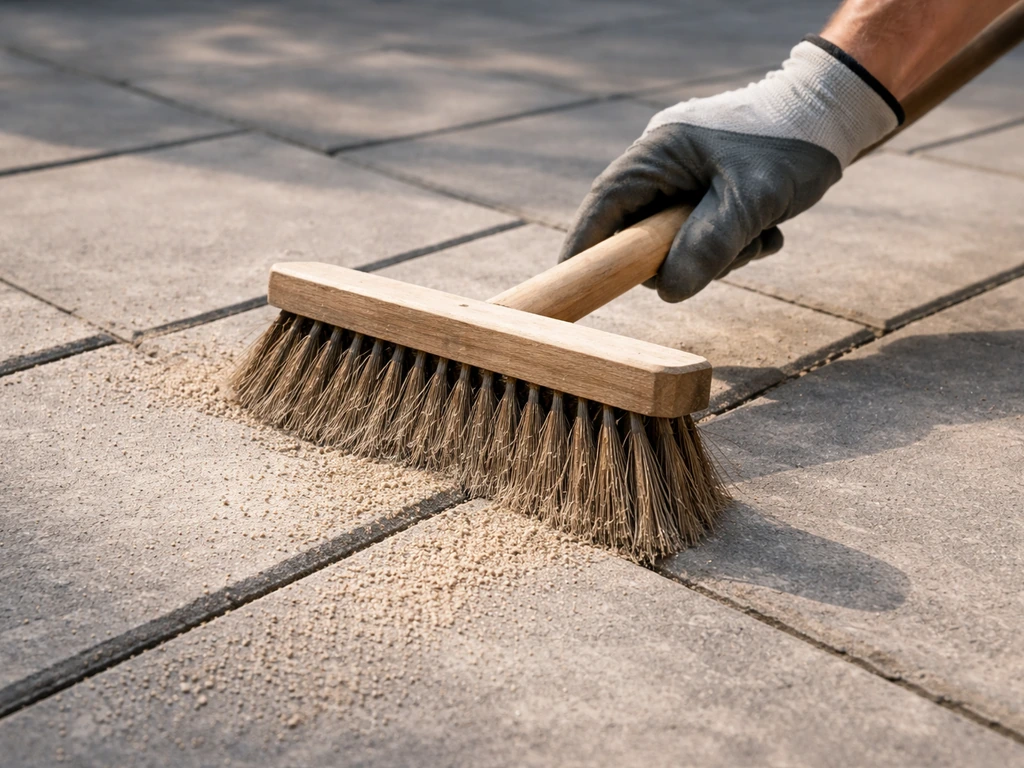
Work from a fixed corner outward, placing blocks on the screeded sand bed. Follow this patio laying guide to keep your setting out, bedding, and compaction steps on track as you go. Do not walk on the screeded sand: kneel on a board to spread your weight. Lay blocks snugly together, but avoid jamming them so hard that you trap sand between units and widen your joints to 6mm or more. The target joint width for standard block paving is around 2-3mm, achieved by letting the blocks sit naturally against each other. Once a section is laid, use the wacker plate with a rubber sole plate protector to compact the blocks down into the sand. The blocks should be set slightly proud of your string line before compaction, as the vibration will drive them down to final level. After the first compaction pass, sweep kiln-dried jointing sand into the joints, then run the wacker plate over again to vibrate the sand fully into the joints. Repeat the brushing and compacting cycle until the joints are filled and no more sand disappears.
Laying flags and slabs (rigid method)
Mix your semi-dry mortar bed to a consistency where it holds its shape when squeezed but crumbles rather than slumps. Spread a full bed for each slab (not spots), tamp it roughly flat, then lower the slab into position and tap down with a rubber mallet until it sits at your string line level. Check each slab with a spirit level in both directions and against adjacent slabs with a straight edge. Natural stone slabs vary in thickness, so the bedding depth may need to vary from slab to slab: adjust the bed, not the final surface level. Leave consistent joint gaps (typically 8-15mm for natural stone, 3-5mm for precast concrete) using tile spacers or timber off-cuts.
Cutting paving units
Hire an angle grinder with a diamond blade or a block splitter for cuts. Mark your cut line clearly with chalk or a pencil, score first if using an angle grinder, then cut through fully. Always wear eye protection, ear protection, and a dust mask. Porcelain needs a wet-cut diamond blade specifically rated for porcelain: it chips badly with dry cutting.
Jointing flags, slabs, and natural stone
Once slabs have been down for at least 24 hours (and ideally longer in cool weather to allow the bed to firm up), point the joints. For a traditional finish, use a pointing mortar (3:1 or 4:1 sharp sand:cement, dry-mixed) brushed dry into the joints and then carefully dampened with a fine mist. Keep wet mortar off the slab faces as it will stain. Alternatively, use a ready-mixed pointing compound or a polymeric jointing mortar. Polymeric products vary: some are dry-brushed in, some are wet-applied. Read the manufacturer instructions for your specific product because the application methods are not interchangeable. Do not apply polymeric jointing sand when rain is forecast within a few hours of installation: moisture from rainfall before the product has set will wash it out of the joints or cause uneven curing.
Fill joints as soon as you can after laying to prevent water getting into the bedding course through open joints. This is especially important for block paving where the sand laying course is directly below an unfilled joint.
Finishing, sealing, and the mistakes that catch people out
Cleaning and curing
Once pointing or jointing is complete, clean the surface with a stiff brush to remove any loose mortar or sand. For a light clean, plain water and a brush is fine. For mortar smears on natural stone, use a diluted brick acid (follow dilution instructions carefully and test on a hidden area first). Leave the finished patio undisturbed for at least 48-72 hours so bedding and jointing can cure properly before foot traffic, and longer before any heavy furniture or planters go back on.
Should you seal your patio?
Sealing is genuinely useful for some materials and largely unnecessary for others. Natural sandstone benefits from an impregnating sealer, which reduces staining and makes cleaning easier without changing the surface appearance much. Porcelain does not need sealing and generally should not be sealed. Block paving can be sealed to lock in jointing sand and enhance colour, but wait at least 90 days after installation before applying sealant: the paving and jointing need time to fully cure first, and sealing too early can trap moisture and cause problems. Never seal over polymeric jointing sand that has not fully cured.
Common mistakes and how to avoid them
- Not enough fall: A flat or back-falling patio will pond water, grow algae, and eventually heave. Set the fall before you lay a single slab and check it constantly as you work.
- Inadequate subbase depth: Skimping on hardcore depth is the number one cause of slab cracking and settlement. 100mm minimum on stable ground, 150mm on clay. No exceptions.
- Skipping the geotextile membrane: You will not see the weeds for two or three years, but they will come. The membrane takes 20 minutes to lay and saves years of pulling weeds from joints.
- Five-spot bedding for flags and slabs: Unsupported areas crack under load. Use a full mortar bed.
- Weak edge restraints: Token haunching fails. Concrete-bed your edgings properly and let them cure before laying the field paving.
- Over-wide joints on block paving: Caused by forcing blocks against each other and trapping sand. Let blocks sit naturally and aim for 2-3mm joints.
- Pointing in wet or cold weather: Mortar and polymeric products need dry, mild conditions to cure. Below 5°C or in rain, wait.
- Sealing too early: Wait 90 days minimum after laying before applying any surface sealer. Sealing fresh paving traps moisture and causes discolouration.
- Laying over a weak existing surface: Inspect existing paving critically. Rocking or cracked sections must be removed, not covered.
- Uneven slab levels: A small high point on one slab creates a trip hazard and a visible flaw in a flat run. Check every slab against its neighbours with a straight edge before moving on.
When to call a professional
Most domestic patios are well within DIY reach. Where it makes sense to get professional input: if you have very poor ground conditions (boggy, filled ground, or significant slopes requiring structural retaining), if you need drainage connected to the mains, if the patio is immediately adjacent to a house foundation, or if you are working with large-format porcelain slabs that are both expensive and unforgiving. Getting a professional assessment of those specific elements does not mean handing over the whole project.
Take your time with the preparation, check your levels obsessively, and do not rush the curing. The paving itself goes in quickly: it is everything underneath it that will determine whether the patio looks good in ten years or needs lifting in two.
FAQ
How do I confirm my patio fall will actually drain, not just slope?
Aim for a straight, measurable fall across the whole paved area. If your patio is bordered by a wall on one side, keep the fall away from the house and make sure the low edge still has an exit path for water (to a gully, channel, or drain), not just a lower paving surface that still traps runoff against the boundary.
What should I do if, during excavation, the ground feels soft or uneven?
If you see soft spots, rocking slabs, or a base that still feels springy after compacting, do not lay straight over it. Lift and rework until the hardcore is uniformly compacted, because minor movement gets amplified in bedding and shows up as cracked grout lines or hollow-sounding areas.
How many layers should I compact, and what if I compacted too thick in one go?
A wacker plate compacts best in passes, typically no more than about 100mm of subbase per layer. If you have already compacted too much depth at once, you usually need to loosen and redo the top section, because crushed stone can look level while remaining under-compacted.
Can I build up the patio with fill on a slope, and how do I avoid dips?
Yes, but do it deliberately. Use compacted, layered fill only on the low side, and treat it like subbase, not loose landscaping material. Re-check levels after every layer, because un-compacted fill can settle unevenly and create a visible dip that will always collect water.
Why do I have to remove every bit of topsoil, can’t I just scrape it thin?
Not usually. Turf and topsoil contain organics that keep compressing and moving over time. If any topsoil remains, remove it thoroughly down to consistent mineral subgrade, then rebuild the depth you planned (hardcore plus bedding), even if that means excavating slightly deeper.
What’s the point of geotextile membrane, and can I substitute cheaper non-woven?
Use the correct membrane and layering. For drainage and bedding stability, woven geotextile is preferred because it lets water pass while limiting sand migration. Still, overlaps should be generous (around 300mm) and the membrane should be tucked up against edge restraints so runoff and fines are not able to bypass it.
Is it ever okay to skip the plate compactor and just compact by walking?
Do not rely on “walking it down.” If the base is not compacted properly, you can get settlement and a patio that shifts even if the paving pattern is good. Hire or buy the right plate compactor, and keep compaction consistent across the whole area, not just around edges.
What happens if my block paving joints end up too wide or I don’t vibrate them in well?
Correct: joints matter. If your block paving joints end up too wide (for example around 6mm or more), you often get sand loss and reduced interlock, and gaps can become pathways for weeds. Keep blocks slightly proud before compaction, then fill and vibrate jointing sand until it stops disappearing.
How do I deal with natural stone slabs that vary in thickness?
For slabs, variability can be unforgiving. Don’t try to correct uneven slabs by forcing the final level with thinner bedding at random points, adjust the bedding depth so each slab sits at the correct finished height while still receiving a proper bed thickness under the slab.
When can I lay new patio paving over an existing concrete or paved surface?
You can lay over a sound existing base if it is solid, flat, and correctly drained. The key is to check for movement and cracking, and verify that any fall to drainage is correct on the existing surface, because adding paving layers often changes thresholds and may trap the wrong drainage pattern.
What’s the correct order for jointing sand or polymeric jointing, and what mistakes cause washout?
For block paving, sweeping kiln-dried jointing sand into joints and compacting with vibration usually gives the best fill. For polymeric products, moisture and timing are critical, and you must follow the product instructions for whether you dampen after installation. If rain is likely before curing, delay polymeric application.
Should I point or polymeric-joint, and how does weather affect the choice?
Yes, but set expectations. Pointing mortar, especially on natural stone, needs careful curing and minimal water on faces to avoid staining. Using polymeric jointing on areas that get heavy wash or where installation conditions are wet can reduce performance, so choose the joint system based on exposure to rainfall and foot traffic.
How do I plan cuts so they look neat on visible edges?
Cutting makes up most of the extra work, so reduce risk by planning a layout that keeps cuts narrow at the perimeter. For visible edges, consider a half-brick or contrasting border to hide awkward cuts, and always maintain the planned joint spacing through cuts rather than squeezing pieces to fit.
When should I get a professional to check levels, drainage, or foundation proximity?
You may need professional guidance if the patio is right next to a foundation, has significant falls toward the house, or requires tying into mains drainage, because mistakes can affect structural performance and long-term water management. Even without full handover, a site check can clarify levels, drainage routes, and foundation-safe clearances.
How long should I wait before walking on the patio and before placing heavy items?
Wait time is about cure and load. Even if the paving “feels” walkable, bedding and joints need enough curing time to resist displacement, especially before replacing heavy items like planters or patio furniture. A common safe approach is to keep foot traffic off for at least the initial cure window, then add heavier loads later rather than immediately.