
Yes, you can cut masonry patio blocks with a standard circular saw, and it works well as long as you fit it with a diamond blade, set the depth correctly, and support the block properly. The key choices are whether to cut full-depth in a single pass or score a shallow groove first and snap (or chisel) the block along the line. For most standard concrete patio blocks up to about 2.5 inches thick, a turbo-rim diamond blade on a 7-inch circular saw gives you clean, accurate cuts with minimal chipping.
How to Cut Patio Block With a Circular Saw Cleanly

Clara Farrell
10 Jul 2026
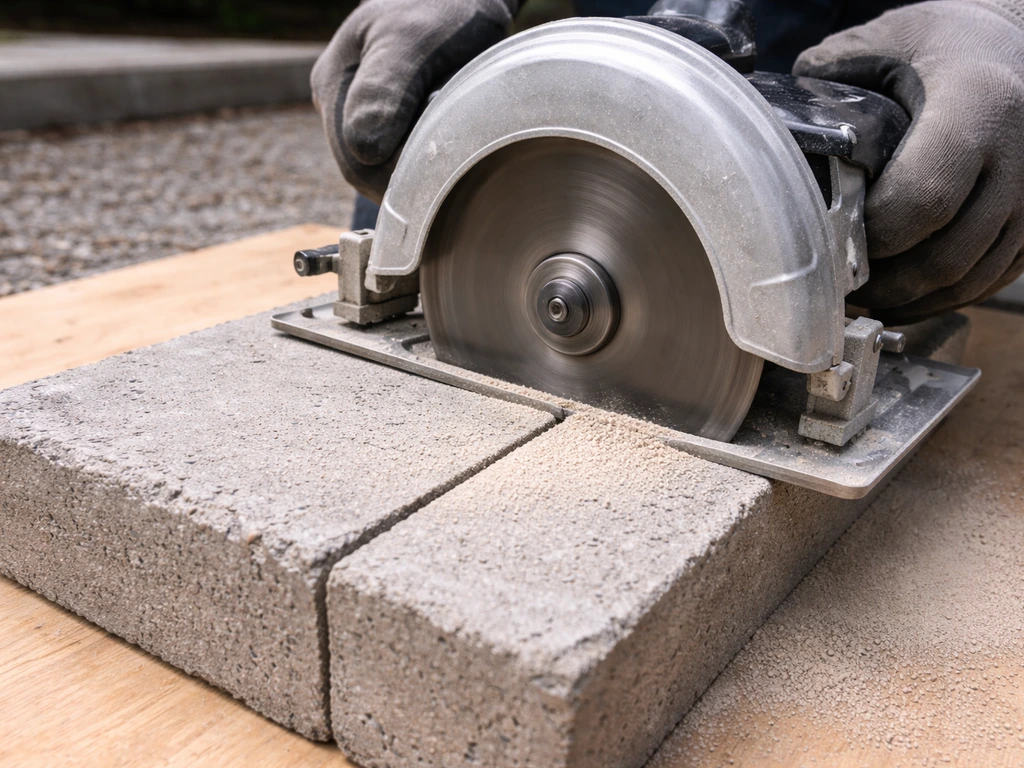
What you need before you start cutting
Circular saw and blade choice
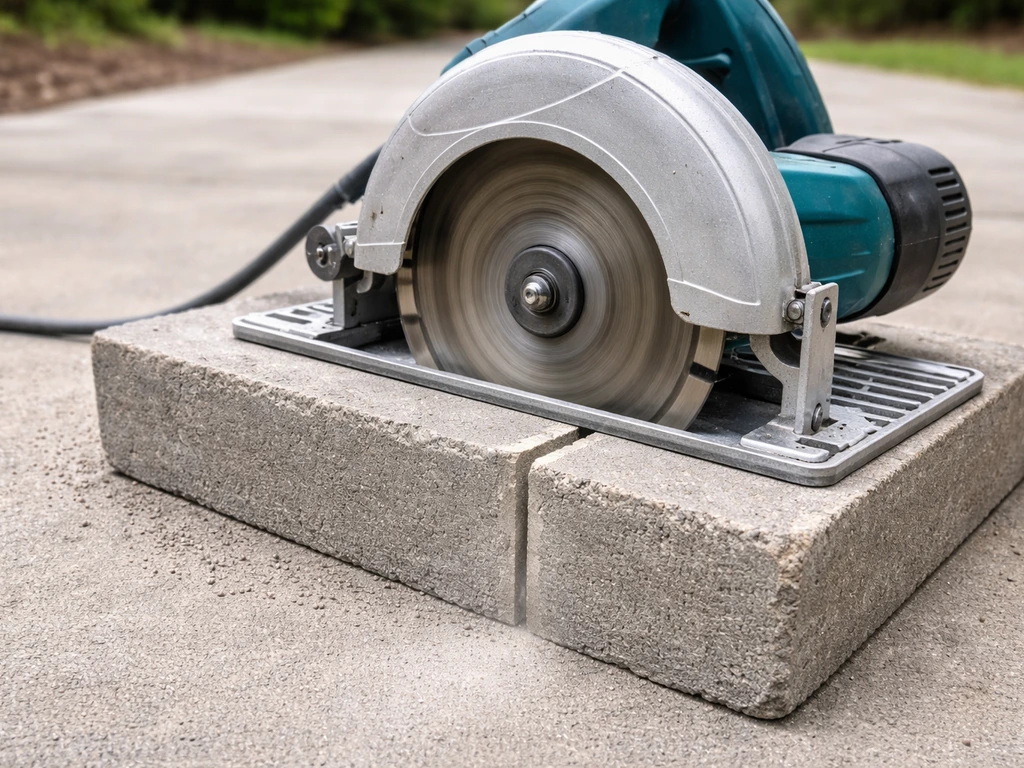
A standard 7-inch circular saw is the right tool here. Avoid using a wood-cutting carbide blade on masonry blocks, it will destroy the blade and likely ruin the cut. You need a diamond blade rated for masonry or concrete. There are two main rim styles to choose from.
| Blade Type | Best For | Cut Quality | Speed |
|---|---|---|---|
| Turbo rim (serrated segments) | Concrete patio blocks, brick, cured concrete | Good, minimal chipping | Fast |
| Segmented rim | Dry cutting general masonry, rough cuts | Rougher edge | Fastest, more chip-prone |
| Continuous smooth rim | Tile, porcelain, finish work | Very clean edge | Slower, not ideal for thick block |
For cutting patio blocks, a turbo-rim diamond blade is the sweet spot. MK Diamond’s rim-style overview manual describes turbo or serrated rim blades as providing fast cutting with minimal chipping on pavers and similar stone or concrete materials turbo-rim diamond blade for fast cutting with minimal chipping. It cuts fast enough to get through the material without overheating and produces a cleaner edge than a fully segmented blade. Look for a 7-inch blade rated to at least 8,700 RPM to match a standard circular saw. Blades from Makita (B-69727), DEWALT (DW4712B), and similar manufacturers are widely available at hardware stores for around $20 to $40 and will handle a full patio installation easily.
PPE: this is not optional
Cutting concrete blocks generates respirable crystalline silica dust, which is a serious lung hazard. OSHA and NIOSH both identify this as one of the most dangerous aspects of masonry work. Wet cutting is the most effective way to control silica dust because water prevents it from becoming airborne in the first place. When Table 1 conditions are used for respirable crystalline silica, OSHA requires that the handheld power saw has an integrated water delivery system that continuously feeds water to the blade, along with specified respiratory protection. If you are dry cutting, you need at minimum an N95 respirator, but a P100 half-face respirator gives you much better protection. Do not skip this and just wear a dust mask. The rest of your PPE checklist:
- Safety glasses or a full face shield (chips fly at speed)
- Ear protection, circular saws and masonry cutting are loud enough to cause hearing damage quickly
- Work gloves for handling blocks and managing the saw
- N95 respirator minimum, P100 half-face respirator strongly preferred for dry cutting
- Dust-rated knee pads if you are kneeling to cut at ground level
- Old clothes or a work apron, masonry dust gets into everything
If your saw has a blade shroud port, you can attach a shop vacuum with a HEPA filter to capture dust at the source. This approach, combined with a respirator, gives you solid control even without water. Some DIYers rig up a simple wet-cutting setup by having a helper slowly pour water just ahead of the blade during the cut, which works reasonably well and dramatically reduces dust.
Measure, mark, and dry-fit before you cut anything
One of the most common mistakes on a first patio project is cutting blocks before you have properly laid out the whole pattern. Always dry-fit the entire course or row of blocks first, including any edge blocks that will need cutting. This lets you see exactly what size each cut piece needs to be, adjust joint spacing, and avoid wasting blocks on cuts you did not need to make.
For joint spacing, aim for 1/16 inch to 3/16 inch between blocks. Consistent spacing matters not just for appearance but for long-term stability. Use plastic spacers or a piece of scrap ply cut to the right thickness to keep joints even while you dry-fit. Once everything is laid out, you will know exactly which blocks need trimming and by how much.
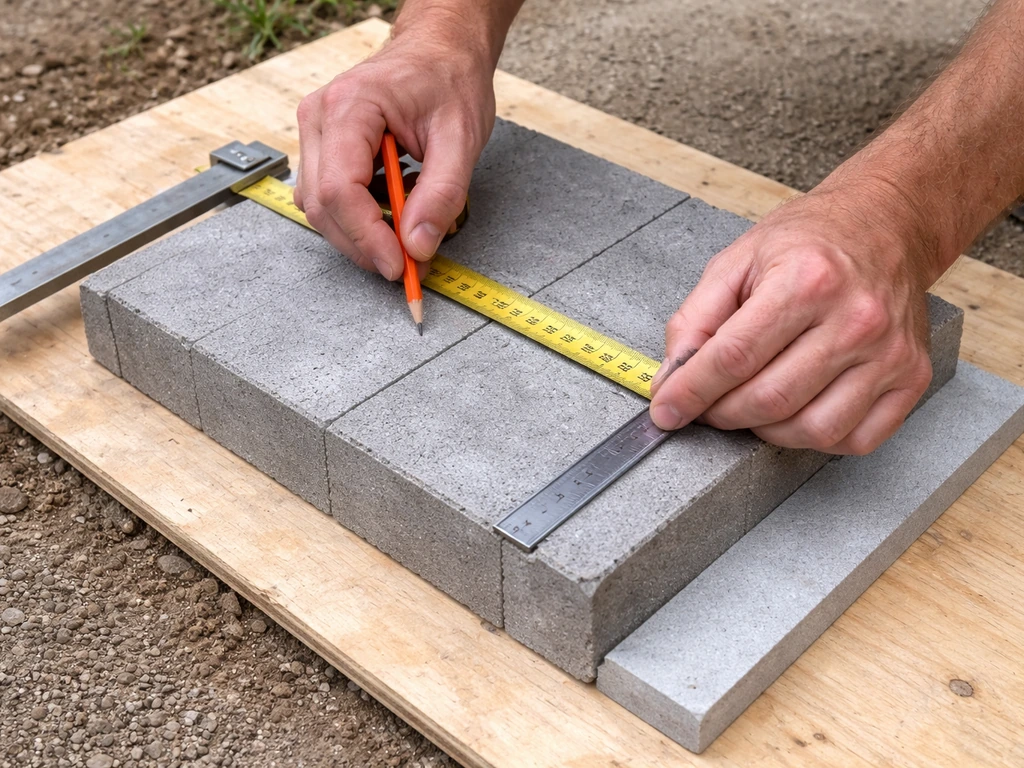
To mark your cut line, use a pencil, chalk line, or marking crayon and a straightedge or combination square. Mark all four sides of the block if you are cutting all the way through, so you can line the blade up accurately from both faces. A silver or white lumber crayon shows up well on concrete. Double-check your measurement before marking, and mark before you move the block off the dry-fit layout.
Setting up a safe cutting position
Proper support is what separates a clean cut from a cracked block or a dangerous situation. Never cut a patio block that is resting on uneven ground or cantilevered off the edge of a surface. The block needs to be fully supported on both sides of the cut line so it does not flex, drop, or pinch the blade mid-cut.
Set the block on a flat, stable surface. A piece of rigid foam board or scrap plywood on the ground works well as a cutting mat, it gives you a consistent surface and lets the blade pass through without hitting hard concrete underneath. Position the block so the cut line overhangs the edge of the support slightly, or lay two pieces of scrap timber parallel to each other so the blade can pass between them. Clamp the block down if it is at risk of shifting, especially for smaller pieces.
Stand to the side of the blade line, not directly behind it. Keep both hands on the saw: one on the main handle and one on the front auxiliary grip. Your body weight should be stable and balanced before you start the cut. Never reach across the cut line with either hand. If you are cutting at ground level, make sure your knees are clear of the blade path.
How to actually make the cut: step by step
Setting your blade depth
Set the blade depth so it extends about 1/8 inch to 1/4 inch deeper than the block thickness. This ensures a full cut without the blade bottoming out against your work surface. For a standard 2-inch patio block, set the blade to about 2.25 inches. Check by holding the saw next to the block before you start, with the blade guard retracted carefully, to confirm the depth visually.
Full-depth cut method
For blocks up to about 2.5 inches thick, a single full-depth pass works well if your saw has enough power and your blade is sharp. Start the saw fully up to speed before the blade contacts the block. Guide the blade along your marked line using a clamped straightedge guide if you want maximum accuracy. Move the saw steadily forward without forcing it, let the blade do the work. Pushing too hard causes the blade to heat up, bind, and produce a rougher cut edge.
Using a straightedge clamped to the block surface is one of the best tips I can give you here. Set the guide so the edge of the saw base plate aligns with your cut line when the guide is against the plate. This removes the guesswork of trying to visually track the blade to a pencil line. Once you have made the cut, do not lift the saw until the blade has fully stopped spinning.
Score-and-snap (or score-and-chisel) method
For thicker blocks or when you want more control, the score-and-snap approach is a good option. Instead of cutting all the way through in one pass, make a shallow groove about 1/8 inch to 1/4 inch deep along the cut line on the top face. Then flip the block and score the same line on the bottom face. Place the block over a sharp edge (a piece of pipe or the edge of a timber works well) aligned under the groove, and apply firm downward pressure on both sides. The block will snap cleanly along the scored line.
For blocks that are too thick or dense to snap cleanly, score the groove as above and then use a cold chisel and hammer to complete the break. Set the chisel in the groove along the full length of the line, tapping progressively from one end to the other rather than hammering hard in one spot. This gives you more control and a cleaner break than trying to force a single heavy blow.
Which method should you use?
As a general rule: use full-depth cutting for blocks up to 2.5 inches thick when you need a precise, finished-looking edge (visible cuts along borders or steps). Use score-and-snap or score-and-chisel for thicker blocks, for cuts where the edge will be hidden (under edging or buried in a border), or when you are making a lot of cuts and want to reduce saw time. For more detail on the full range of cutting methods available, the broader guide on how to cut patio block covers all your options in one place. If you want the most reliable results, follow a complete, step-by-step approach for how to cut patio block.
Fitting cuts: edges, notches, and working around obstacles
Straight cuts for edge pieces are simple once you have the workflow above down. The trickier situations are L-shaped notches to fit around posts or drainage pipes, and cuts that need to follow a curve. Here is how to handle each.
L-shaped notch cuts
For an L-shaped notch, you need two straight cuts that meet at a corner. The important thing to know is that a circular saw cannot complete a corner cut, the blade is round, so it will overcut slightly past the corner on both passes. To avoid this, stop each cut just short of the corner line and complete the last small section with an angle grinder, a hand hacksaw with a masonry blade, or a cold chisel. Mark both cut lines clearly, make the longer cut first, then the shorter cut, and finish the corner. This is a much cleaner result than trying to force the blade to the corner.
Curved cuts and transitions
Circular saws cannot follow curves. For curved edges, the best approach is to make a series of straight chord cuts that approximate the curve, then chip or grind the small remaining tabs smooth. For a tight radius, an angle grinder gives you much more control. If you are installing a curved patio border, it is worth reading up on fitting cut blocks to curves, as the overall layout approach matters as much as the cutting method. The guides on how to lay patio edging blocks and how to lay patio edging cover the layout side of this in detail. If you want the full step-by-step for placement, see our guide on how to lay patio edging.
Keeping your cut line accurate
Always mark all four sides of the block before cutting, not just the top face. If your cut wanders slightly on the top face, you want a reference line on the sides and bottom to catch it. Use a combination square to transfer your measurement accurately around all faces. When using a clamped straightedge guide, account for the offset between the guide edge and the blade (the distance from the edge of the saw's base plate to the blade kerf). Measure this once on a scrap piece and note it down so you know exactly where to position the guide.
Getting a clean cut: avoiding chipping and blade binding
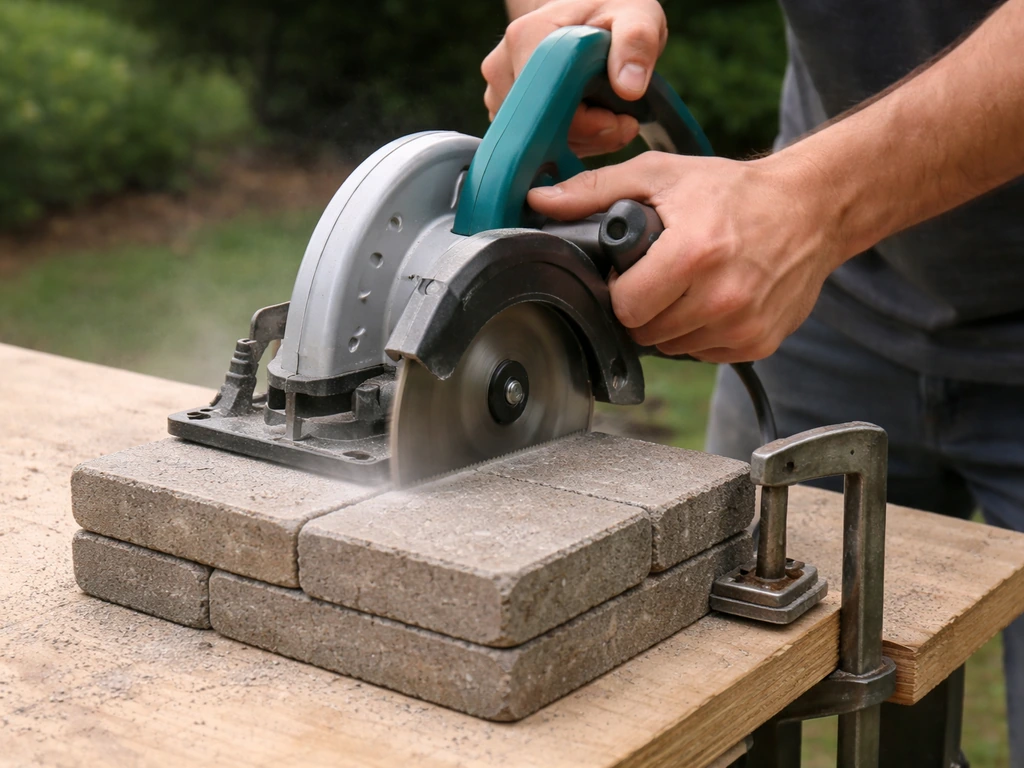
Chipping and rough edges are the most common complaints when cutting patio blocks with a circular saw, and most of them are avoidable. Here are the techniques that make the biggest difference.
- Let the saw reach full speed before the blade contacts the block. Starting the cut with a spinning-up blade causes the blade to grab and chip at the entry point.
- Move at a steady, consistent pace. Hesitating or pausing mid-cut allows heat to build up, which dulls the blade faster and causes more chipping.
- Do not force the saw. If the blade is struggling, it is either dull, the depth is set too deep, or the block material is very dense. Let the blade cut at its own pace.
- Use wet cutting if chipping is severe. Even a trickle of water directed at the blade from a squeeze bottle helps cool the blade and reduce chipping on the exit face.
- Score the exit face first with a shallow pass before making the full cut. This gives the cut a clean exit edge and dramatically reduces breakout chipping.
- Support the off-cut piece so it does not drop and crack the edge of the main block as the cut finishes.
- For visible cuts, always cut from the face side (the top of the block as it will be installed) so any minor chipping happens on the underside.
Blade binding, where the saw bogs down or gets stuck in the cut, usually happens because the block is flexing and pinching the blade, or because the blade is running too slowly before contact. Make sure the block is fully supported and that the off-cut cannot drop and close the kerf. If the blade does bind, do not force the saw forward. Release the trigger, wait for the blade to stop completely, then back the saw out carefully.
Troubleshooting: when things go wrong
The cut is wandering off the line
This is almost always caused by trying to freehand the cut without a guide, or by moving the saw too fast and losing tracking. Use a clamped straightedge guide every time for cuts that need to be accurate. If you have already started a cut that is going off line, stop, back out, and restart from the beginning with a guide clamped in place. Trying to steer a circular saw back onto a line mid-cut almost never works and usually makes the problem worse.
Heavy chipping on the cut edge
If you are getting significant chipping, check the blade first. A dull or worn diamond blade will chip aggressively. You should be able to see the diamond segments clearly; if they look glassy or smooth, the blade needs replacing or dressing. Beyond blade condition, reduce your feed speed, add water to the cut, and make sure you are scoring the exit edge first as described above.
The block cracked instead of cutting cleanly
Usually this means the block was not properly supported, or the off-cut dropped before the blade finished the cut. It can also happen if you are using the score-and-snap method and the block has hidden stress fractures or inconsistencies. If this happens, assess whether the cracked piece can still be used (sometimes a crack in a hidden edge area does not matter). If not, re-measure and cut a fresh block, this time with better support under both sides of the cut line.
The cut is slightly off the line and the block does not fit
If you cut a block slightly too large, you can trim it with another pass. Set your straightedge guide the correct distance from the new edge and make a light clean-up cut. If you cut it too small, the block will not fit the gap tightly. In most cases you can work with a slightly undersized piece along a border (where edging will cover the gap), but if the gap will be visible, cut a new block. This is why dry-fitting before cutting is so important, measure twice.
When a circular saw is not the right tool
A circular saw is versatile but not always the best choice. If you are cutting many blocks of the same size repeatedly, a dedicated masonry cut-off saw or a wet tile saw will save you significant time and give cleaner results. For curved cuts on a decorative border, an angle grinder with a turbo diamond wheel gives you the control that a circular saw simply cannot. And for a single straight snap cut on a thinner block, a brick splitter (bolster) or cold chisel takes seconds and generates no dust at all. Know your limits: if you find yourself fighting the tool constantly, switch methods.
Finishing up and connecting cuts to your patio layout
Once your cut pieces are ready, dry-fit them back into the layout before committing to final installation. Check that joint spacing is consistent (1/16 inch to 3/16 inch all around), that cut edges align cleanly with the patio border, and that the surface is level across the cut joint. Any small variation in block thickness at the cut edge can create a lip that is both a trip hazard and an eyesore.
For edge rows along a patio perimeter, the cut face of the block should face inward toward the patio center wherever possible, with the factory edge facing outward toward the edging restraint. For the full process, follow this guide on how to lay patio edging blocks from planning the line to securing the restraint. This hides the cut edge under or against the edging and gives the border a cleaner finished look. If you are installing edging blocks or sleepers to retain the patio edge, the guides on how to lay patio edging blocks and how to lay sleepers for patio edging walk you through exactly how to align and secure those border elements after your cut pieces are placed.
Clean up all masonry dust and debris from the patio surface before you bed the blocks permanently. Grit under a block affects seating and can cause rocking over time. Wet the area lightly if you were dry cutting, let the dust settle, then sweep or blow it clear. From here, you are back to normal patio installation: bedding, compacting, and jointing. Once the patio edging cuts fit, you can proceed to lay the sleepers, bed them properly, and compact the base so the edging stays aligned over time lay sleepers for patio edging. The cutting is done.
FAQ
What diamond blade should I choose if my circular saw is a 5.5 inch model instead of 7 inch?
Use a masonry or concrete diamond blade sized to your saw (5.5 inch for a 5.5 inch tool). Match the blade’s maximum RPM to your saw’s no-load speed, and expect slower cutting. For clean patio blocks, prefer a turbo-rim style, and plan on making more passes if the blade can’t reach the depth you need in one setup.
Can I cut patio blocks without a wet system if I do a lot of small cuts?
Yes, but treat it as a dust-control project, not just a cutting step. Use a HEPA vac on the saw shroud port when available, wear at least a P100 half-face respirator, and consider a setup where you contain runoff water if you do occasional wet cuts. Take short breaks to avoid filling your work area with airborne silica.
How do I prevent the cut line from looking rough on the side facing inward or outward?
Decide which face will be the “finish” face first, then cut so the chipping happens on the hidden side. For full-depth cuts, a clamped straightedge guide helps tracking, and doing a shallow score first reduces breakout at the exit edge. If both sides will be visible, consider score-and-snap plus a light cleanup pass on the finished face.
Should I mark only the top of the block or all sides before cutting?
Mark all four sides whenever you cut all the way through. Even with good tracking, the blade can wander slightly on top, and side marks give you a reference if you need to correct your guide position. Transferring measurements with a combination square also helps keep the cut perpendicular so joints stay consistent.
What’s the best way to keep the block from flexing or pinching the blade mid-cut?
Support the block so both sides of the cut line are fully bearing weight, and keep the off-cut from dropping. A cutting mat like scrap plywood or foam works, but add rigid support under the cut zone. If you’re near an edge, use two parallel scraps to let the blade pass without bridging, and clamp small pieces so they cannot shift.
If my blade starts binding, should I back out and restart or try to continue?
Back out rather than forcing it. Release the trigger, wait for the blade to stop fully, then pull the saw straight back and check the kerf for pinch. Re-check support and confirm the block isn’t rocking or the off-cut isn’t closing the gap before restarting.
How do I calculate the right blade depth for different block thicknesses?
Set depth so the blade extends 1/8 inch to 1/4 inch deeper than the block thickness. Use your saw’s depth scale as a starting point, then verify by holding the saw alongside the block with the guard retracted carefully. This prevents bottoming on the support surface, which can cause rough cuts or sudden blade grab.
What should I do if my cut is slightly off the line and the gap becomes too visible?
If the block is undersized relative to the visible joint, you usually need a new block rather than trying to force fit. If it’s slightly oversized, you can trim with a light guided cleanup cut using the straightedge offset you determined. Re-check joint spacing against your layout before you bed anything permanently.
How do I cut an L-shaped notch more accurately with a circular saw?
Plan two straight cuts that stop short of the corner lines, then finish the small remaining section with an angle grinder, masonry hand saw, or chisel. Mark both leg lines clearly and cut the longer leg first. This avoids overcut past the corner on both passes, which is common because a circular blade cannot land exactly in the inner corner.
How can I make curved cuts with less chipping when a circular saw can’t follow a radius?
Make a series of straight chord cuts close together to reduce the amount of material left to chip. Then grind or chisel the remaining tabs down gradually to the layout line. For tighter radii, switch to an angle grinder for the final shape so you don’t remove too much in one spot.
Can I reuse cracked cut pieces somewhere non-visible?
Sometimes, but only if the crack is in a hidden edge area and the piece still seats firmly with correct joint spacing. Do a dry-fit and check for rocking or a gap that would expose the crack line. If the joint will be visible or structural seating matters for stability, cut a replacement rather than risking long-term movement.
When should I choose score-and-snap instead of full-depth cutting?
Choose score-and-snap when you’re making many cuts, when the cut edge will be hidden by edging or buried in a border, or when you want to reduce saw time and dust exposure. Choose full-depth for the most visible edges and borders where you want the cleanest finished face.