Installing patio slabs is a job most homeowners can handle themselves over a weekend or two, as long as you get the groundwork right. Dig out to the correct depth, compact a solid MOT Type 1 subbase, lay a mortar or sand bedding layer, place your slabs with consistent spacing, cut the edges to fit, and fill the joints with a suitable compound. That's the whole process. The details matter a lot though, especially below the surface, so let's walk through every step in order.
How to Install Patio Slabs Step by Step for Beginners

Clara Farrell
22 May 2026
Planning your layout, measuring up, and picking the right slab
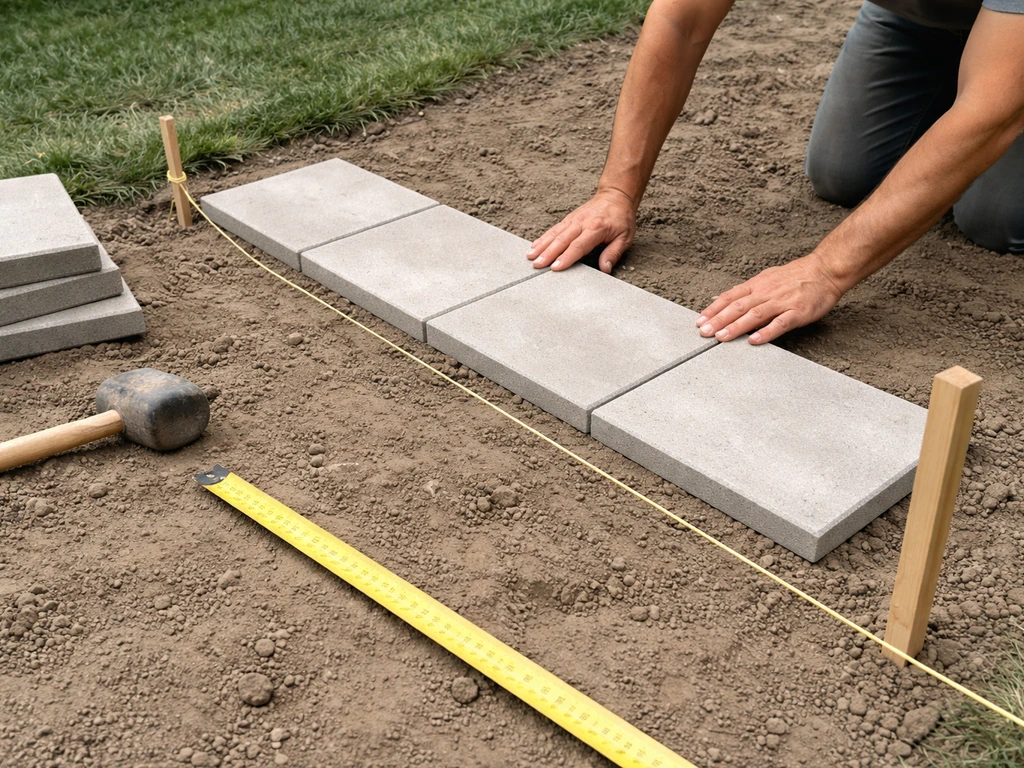
Before you dig a single spade of soil, spend time on paper and then on the ground with string and pegs. Mark out your patio outline using wooden pegs and taut string lines, checking square corners with the 3-4-5 triangle method (measure 3 units along one string, 4 along the adjacent string, and the diagonal between those two points should be exactly 5 units). This is the single most important step for keeping your slab lines straight from the very first course.
Dry-lay a row of slabs along each string line before you commit to anything. This lets you see how your chosen slab size fills the space, where you'll need cuts, and whether a different orientation (landscape vs portrait) gives you fewer awkward edge pieces. Aim for joint widths of 5–10mm for most concrete and natural stone slabs, and no less than 2–3mm for porcelain or very precise machine-cut slabs. Minimising small off-cuts at the borders not only looks better, it saves a huge amount of cutting time.
For slab type, the three most common options in the UK right now are concrete, natural stone, and 20mm porcelain. Concrete slabs are the most affordable and beginner-friendly. Natural stone (sandstone, limestone, slate) looks beautiful but requires more care with the bedding mix. Porcelain is extremely durable and low-maintenance but is harder to cut and less forgiving on an uneven base. Thin slate paving (under 30mm) is closer to a tile and really needs a full mortar bed for support. Make sure you know your slab thickness before you start calculating excavation depth.
| Slab Type | Typical Thickness | Bedding Method | Difficulty |
|---|---|---|---|
| Concrete | 35–50mm | Semi-dry mortar or sand | Beginner-friendly |
| Natural Stone (sandstone/limestone) | 22–38mm | Full mortar bed | Intermediate |
| Porcelain | 20mm | Full flexible mortar bed | Intermediate–Advanced |
| Slate | 20–40mm (tile if <30mm) | Full mortar bed | Intermediate |
Clearing the site and digging to the right depth
Clear the area completely. Remove turf, plants, old paving, and any loose topsoil. Topsoil is organic, it compresses over time, and it has absolutely no place under a patio. Once the vegetation is gone, you need to calculate your excavation depth. Work from the finished surface level backwards: slab thickness, plus 30–40mm mortar/sand bedding, plus at least 100mm of compacted MOT Type 1 subbase. For most standard concrete slabs (about 40mm thick), that puts your total dig depth at around 180–200mm below finished patio level. If you're using slimmer porcelain (20mm), you still need that full subbase depth, so dig to roughly 160–170mm.
Also factor in DPC (damp proof course) clearance if the patio runs against the house. Your finished slab surface must sit at least 150mm below the house DPC to prevent damp from bridging into the wall. This is non-negotiable and a very common mistake on first builds.
On sloped ground, you have two choices: step the patio down in terraces, or build up one side and retain it. For most DIYers, stepping is much simpler and looks great. If your garden slopes away from the house, you actually have drainage working in your favour, though you still need to set your string lines to achieve a controlled fall rather than letting the natural slope decide.
Building a solid base: hardcore, compaction, and edge restraints
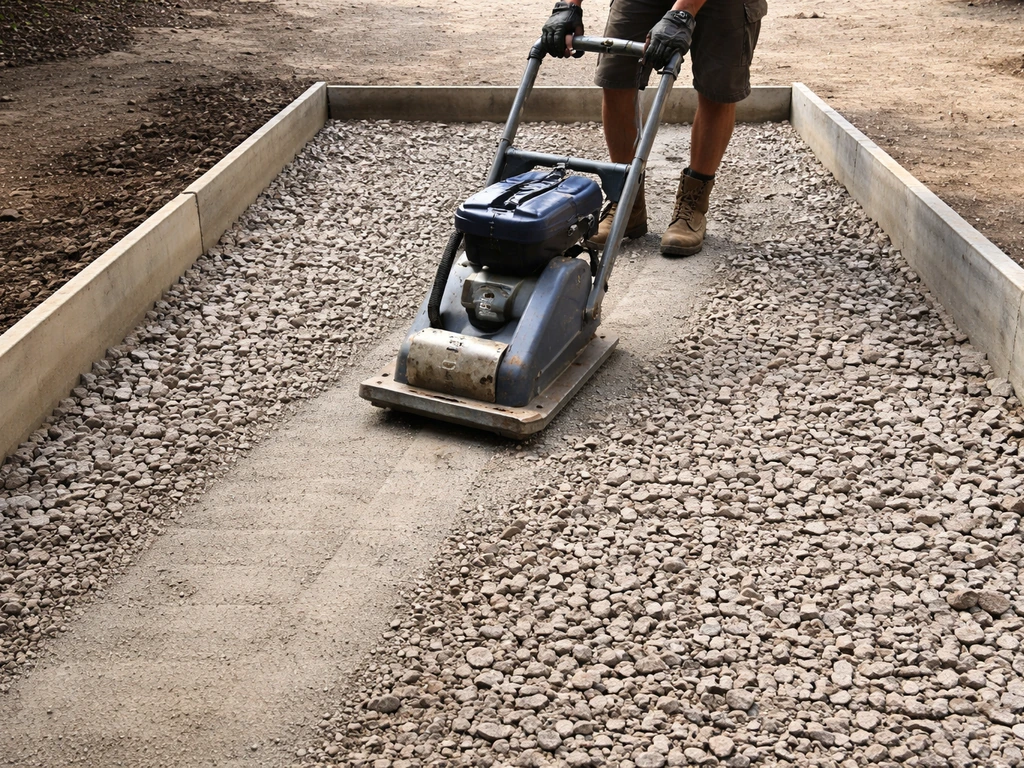
Pour in your MOT Type 1 (also called DTp1 or crusher run) in layers of no more than 50mm at a time, and compact each layer with a vibrating plate compactor before adding the next. This is the step most DIYers rush, and it's the reason patios sink, rock, and crack. A proper plate compactor, which you can hire for around £60–80 per day, makes the difference between a subbase that lasts decades and one that fails in a wet winter. For 100mm of compacted depth, you'll need to work in two 50mm passes minimum.
Once the hardcore is compacted and level, you can add a thin blinding layer of sharp sand (about 25–30mm loose, which compacts down) to fill voids and create a smoother surface for your bedding layer to sit on. NHBC guidance for ground-supported slabs specifies using a blinding layer of sand sufficiently to fill voids in the hardcore to help minimise the risk of puncturing a membrane (where a membrane is used) fill voids and create a smoother surface for your bedding layer to sit on. If you're laying on clay soil, some installers use a geotextile membrane between the soil and the hardcore to prevent the clay from working up into the subbase over time. On well-draining ground with a tight subbase finish, a membrane isn't strictly necessary for a domestic patio, but it does no harm.
Install your edge restraints before you lay a single slab. Concrete haunching (a small concrete collar) along the perimeter edges prevents the outermost slabs from spreading outward over time. Dig a slightly deeper channel around the perimeter and pour a stiff concrete mix against which the edge slabs will bed. This is particularly important on the sides of the patio that don't have a wall or building to restrain them.
Getting your drainage fall set from the start
Set your string lines with the drainage fall built in now, not after laying. The standard UK fall for domestic patios is 1:80, which works out to 12.5mm of drop for every metre of patio. So a 3-metre-wide patio should fall roughly 37–40mm from the high point (usually the house wall) to the low edge. String your level lines with this gradient built in, and every subsequent check against these lines keeps your fall consistent throughout the job.
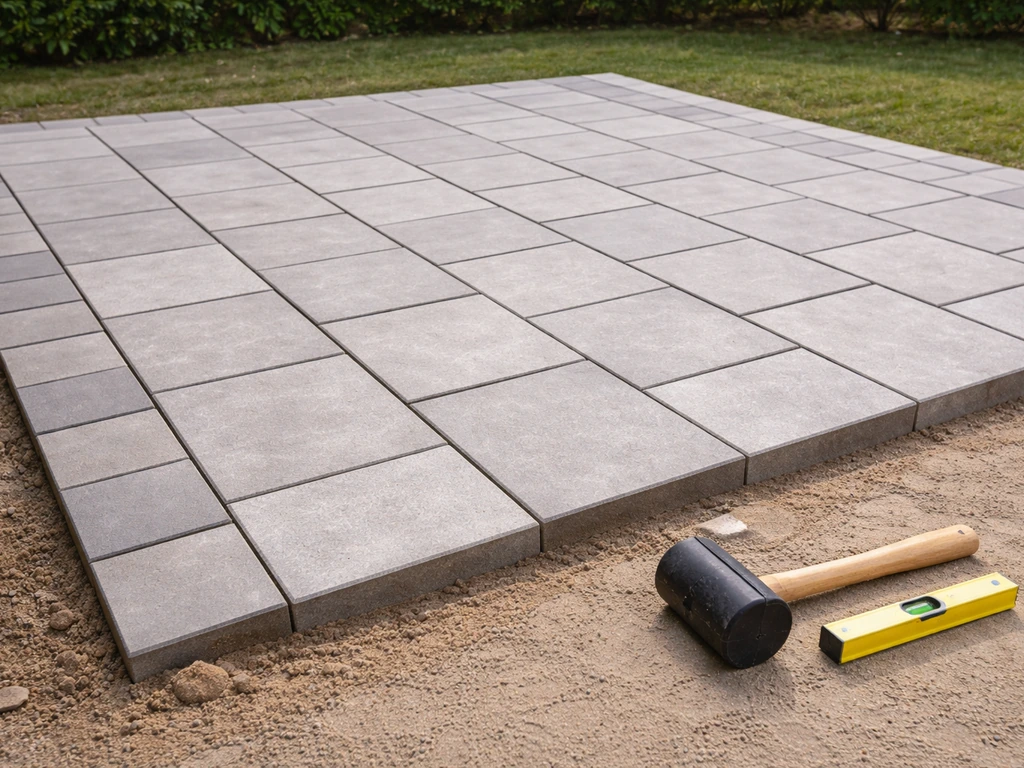
How to place your patio slabs correctly
This is the part people search for most, and it's actually quite satisfying once you get into a rhythm. Start from a fixed, visible corner, typically the corner closest to the house and most visible from the garden. Your first slab sets the standard for everything else, so take your time with it.
Mixing and laying the mortar bed
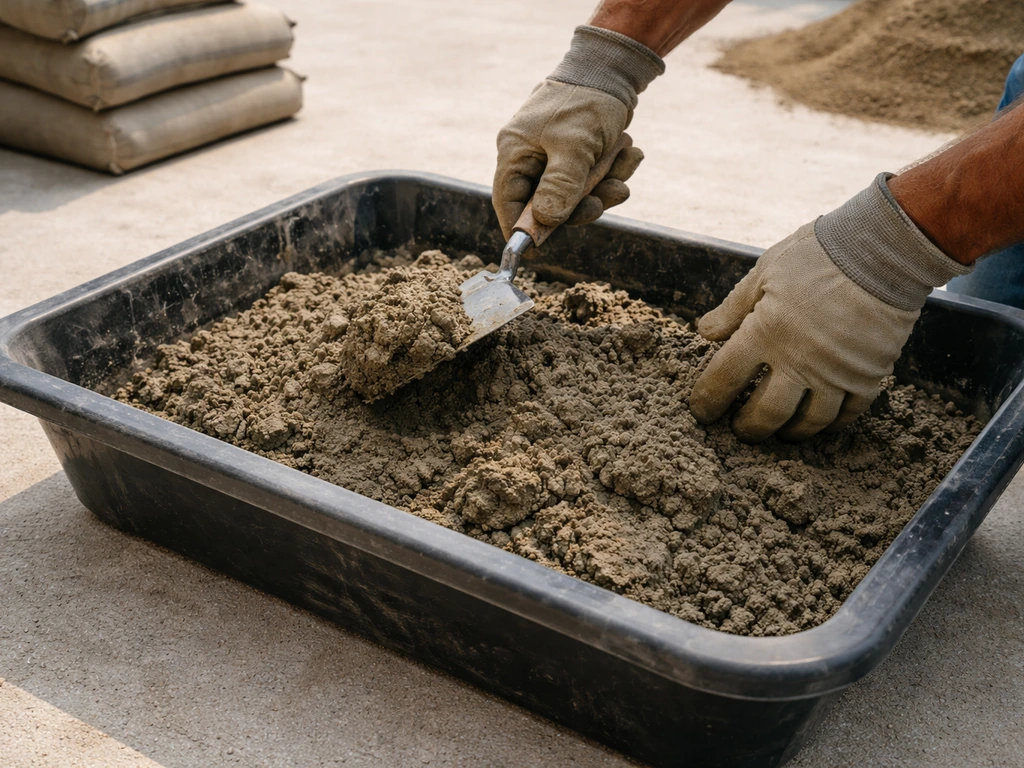
For most slab types, you want a semi-dry mortar bed: roughly 6 parts sharp/grit sand to 1 part cement, mixed just damp enough to hold its shape when squeezed but not wet enough to slump. If you are aiming to lay patio slabs without cement, you can still create a stable mortar bed using a sand-and-bedding approach that suits your slab type and base. This is a key part of the process when you’re learning how to build a cement patio slab, because the mortar bed supports every slab and helps prevent rocking semi-dry mortar bed. Lay this at 35–50mm depth (it'll compress slightly under the slab). Spread it and level it with a float or piece of timber. For porcelain slabs or thin natural stone, a full wet mortar bed using a flexible adhesive mortar is better practice, as these materials need complete surface coverage to avoid cracking under point loads.
Setting each slab
- Lower the slab gently onto the mortar bed, don't drop it. Start from one edge and lay it down progressively.
- Use a rubber mallet to tap the slab down firmly and evenly across the whole surface. Work from the centre outwards to avoid air pockets.
- Check level and fall immediately with a long spirit level. One check per slab isn't enough: run the level along the slab's length, then across its width, then diagonally.
- Run a straight edge spanning two or three slabs to check they're flush with each other. A 2–3mm lip between adjacent slabs is the maximum acceptable tolerance. More than that and you've got a trip hazard.
- Use plastic spacers or small offcuts of plywood to maintain consistent joint gaps as you work. Remove spacers before the mortar sets fully.
- Work backwards away from your starting corner so you're never standing on freshly laid slabs.
Keep two string lines running as you work: one along the length of the patio and one across the breadth. Every few slabs, check that your courses are still tracking parallel to these lines. It's easy for small errors to accumulate, and catching drift early saves you from having to lift and re-lay.
Cutting slabs to fit and finishing the edges

Cutting is the part that intimidates most beginners, but with the right tool it's straightforward. For concrete slabs, a circular saw or angle grinder with a diamond blade works well. Natural stone cuts cleanly with a diamond blade on an angle grinder. Porcelain really needs a dedicated wet tile saw or a quality diamond disc, as it chips easily with dry cutting. Rent rather than buy if you're only doing one patio.
Before cutting, mark your cut line clearly on both the top and back faces of the slab so you can see it from whichever side you're cutting from. Double-check your measurement against the actual gap you're filling, accounting for the joint width on both sides. Secure the slab on a flat, stable surface so it can't move during the cut. Always wear eye protection, a dust mask rated for silica dust (P3 or FFP3), ear protection, and gloves. Silica dust from cutting paving is a genuine health hazard, not one to take lightly.
After cutting, check the edge for chips or rough spots. A quick pass with a diamond hand pad or an angle grinder smooths up most rough cuts. If the cut edge will be visible (at a border or step), take extra care with your line.
Grouting and jointing for a finished, stable surface
Leave freshly laid slabs for at least 24 hours (ideally 48 hours in cooler weather) before walking on them or starting jointing. The mortar bed needs time to firm up so you're not disturbing slab positions.
You have two main options for filling joints. Traditional sand and cement pointing (roughly 4 parts soft building sand to 1 part ordinary Portland cement, mixed with a small amount of plasticiser to a firm but workable consistency) is tried and tested, durable, and relatively cheap. Press it into joints using a pointing trowel, compact it slightly, and finish with a brushed or raked profile. Brush off excess before it dries. The downside is that it can stain if you're not careful, especially on light-coloured natural stone.
Modern brush-in jointing compounds (resin-bound or polymer-modified) are the easier alternative for beginners. You pour the dry compound over the patio, brush it into the joints, and then activate with water. They're more forgiving, set faster, and resist weeds and erosion better than sand and cement. Match the product to your joint width: most brush-in compounds work best in joints of 3–15mm. For very narrow porcelain joints (2–3mm), use a purpose-made narrow-joint grout.
Whichever method you use, make sure joints are filled to within about 3–5mm of the slab surface, not flush to the top (which causes water to sit in the joint) and not hollow (which lets water undermine the bedding). Once jointing is complete, keep the patio damp for the first day or two if weather is dry and warm, to help the mortar or compound cure properly.
Drainage checks, final leveling, and mistakes to avoid
Before you call the job done, walk the entire patio with a long spirit level and your garden hose. Run water across the surface and watch where it goes. It should drain consistently toward the low edge, not pool in any spot. If you find a low spot, you'll need to lift that slab, adjust the bedding, and relay it. It's annoying, but far less annoying than a permanently wet patch of patio.
The most common mistakes and how to avoid them
- Skipping compaction or rushing it: under-compacted subbase is the number one cause of patio failure. Hire the plate compactor. Do the layers properly.
- Using dot-and-dab or five-spot mortar instead of a full bed: this leaves voids under the slab that cause cracking and rocking. Always use a continuous mortar bed.
- Not setting the drainage fall in the string lines from the beginning: trying to correct fall mid-lay is a nightmare.
- Skipping edge restraints: without haunched edges, the border slabs slowly spread outward and joints open up.
- Joints that are too wide and left unfilled: wide unfilled joints let weeds establish and allow bedding material to wash out.
- Using a plate compactor on laid slabs to settle jointing sand: this can crack slabs and disturb the bedding. Let gravity and foot traffic do it instead.
- Ignoring DPC clearance next to the house: building up ground level against the wall causes damp ingress and can invalidate your home insurance.
Keeping your patio in good shape for years to come
A well-installed patio needs very little ongoing maintenance, but a bit of attention goes a long way. Sweep regularly to stop organic matter building up in joints, which encourages weeds and moss. Once a year, check the joints and top up any that have eroded. If you used sand and cement, you may need to re-point every few years in exposed locations. A brush-in compound generally lasts longer between touch-ups.
Sealing is worth considering for porous natural stone like sandstone or limestone. A quality impregnating sealer (not a surface film) protects against staining and reduces moss growth without changing the look of the stone. Apply it once the patio has been down for at least a month and the mortar has fully cured. Porcelain doesn't need sealing at all.
If you notice a slab rocking or a joint opening up, deal with it straight away. A rocking slab means the mortar bed below has failed or the subbase has moved slightly. Lift the slab, scrape out the old bedding, and re-lay it on fresh mortar. Left alone, one rocking slab becomes two, and two become a section that needs relaying.
Finally, if your patio abuts a lawn or bed, check the edge restraints each spring and autumn. Roots from nearby plants can work under edge slabs over time. Catching this early means a quick adjustment rather than a full rebuild.
When to call a professional
Most domestic patios are absolutely within DIY reach, but there are a few situations where getting a professional in is the smarter call. If your ground is heavily waterlogged, has very deep soft clay, or there's extensive tree root activity nearby, the ground engineering becomes complex. The same applies if you're laying over an existing concrete slab (which needs specific preparation), working on a steep slope that requires retaining walls, or using very large format slabs (above 900x600mm) that are genuinely difficult to handle and set without assistance. For everything else, back yourself, take it one step at a time, and focus especially hard on that subbase.
FAQ
Can I install patio slabs over existing paving or concrete?
Sometimes, but you usually need to remove anything that is loose, cracked, or uneven first. If you are working over an existing concrete slab, you typically need a thorough clean and a preparation method suitable for bonding or leveling (not just sand on top), otherwise you can end up with rocking slabs and trapped moisture.
What joint width should I use if I am not sure what slab type I have?
If you cannot confirm whether the slab needs narrow porcelain-style joints, start conservative and measure typical joint gaps from the manufacturer, or treat the slabs as general concrete/natural stone and aim for about 5 to 10mm. This avoids making joints too tight for sand movement, especially if you are cutting and getting slight height variations.
How level does the base need to be before I lay slabs?
You need the subbase level enough that slabs sit solidly without “bridging.” If you can press down on a test slab and feel any rocking, that means the bedding or subbase has a void or low spot. Rework the bedding at that stage, it is far quicker than lifting later after jointing.
Do I need a geotextile membrane under patio slabs on clay?
It is often used when clay can “pump” water up into the subbase, but it is not a substitute for compaction. If you use membrane, cover it properly without tearing and ensure the subbase remains the correct depth and is still compacted in layers.
How do I keep slabs from drifting out of alignment once I start laying?
Check alignment frequently using two string lines, one each direction, and do not rely only on the first slab. Also keep re-measuring your course spacing, because minor joint-size errors compound quickly over long runs.
What should I do if my patio has a slope but my string lines do not match a 1:80 fall?
Fix the string lines before bedding any slabs. A 1:80 fall is about 12.5mm per metre, if you set strings at the wrong gradient you will create puddling spots, and you will need to lift slabs later to correct it.
Is semi-dry mortar always OK, or should I use a wet mortar bed for all slab types?
Semi-dry mortar beds are generally suitable for many standard slab types, but thin natural stone and porcelain usually need complete surface coverage to reduce cracking under concentrated loads. If you are unsure, follow the slab supplier guidance and consider full wet bedding for porcelain and delicate stone.
How long should I wait before jointing, and what if it rains during that time?
Let the mortar bed firm up at least 24 hours before jointing, longer if it is cool. If rain hits the slabs before the bed has set, wait until surfaces are stable and joints are clean before filling, because slurry mixing can weaken mortar bed contact.
Can I use wet cutting methods for porcelain instead of a wet saw?
A proper wet tile saw is usually the safest and least chip-prone option. If you are using an angle grinder with a diamond disc, use a suitable method to keep dust down and minimize chipping, but expect more edge finishing work and more risk of micro damage.
What is the best way to fill joints at the perimeter and around steps?
Use the same joint profile you used in the field, then ensure the edges are properly restrained with haunching or an equivalent edge support where slabs have no wall backing. Perimeter joints that are left too deep or too low can collect water and undermine bedding over time.
Why does sand-and-cement pointing stain light natural stone, and how can I prevent it?
Staining usually happens when cement paste runs over the stone face or is not brushed off promptly. Keep pointing mix firm, press it fully into joints without overfilling, and remove residue immediately while it is still workable.
What should I use if I need very narrow joints, like 2 to 3mm for porcelain?
Use a purpose-made narrow-joint grout designed for that gap width. Narrow joints also magnify any base unevenness, so confirm your subbase is flat and your mortar coverage is appropriate before you start laying.
How can I tell if a slab is likely to rock later before I joint everything?
Before jointing, do a “walk test” gently and lift-check one or two random slabs if you suspect a hollow. If a slab rocks even slightly, remove it now, scrape out the old bedding, and re-lay on fresh mortar or corrected bedding.
Do I need to seal patio slabs, and when?
Seal only porous natural stone if the product recommends it, and wait until the mortar has fully cured, typically around a month. Use an impregnating sealer, not a surface film, so you do not trap moisture in the joints and reduce skid risk.
Should I pressure wash a new patio to clean off residue?
Avoid pressure washing immediately after installation. Wait until the mortar and jointing have cured, then use gentle cleaning methods appropriate for your joint compound, because aggressive washing can erode joints and pull material from narrow gaps.