
You can build a solid, long-lasting poured concrete patio using Quikrete bags for smaller jobs (under roughly 100 sq ft) or by ordering ready-mix for anything larger. The process takes a full weekend, sometimes two: one day for site prep and forming, one day for the pour, and then a week of curing before you walk on it. Done right, a 4-inch Quikrete slab on a compacted 4-inch gravel base will handle decades of weather and foot traffic without cracking. Done wrong, with poor drainage or skipped curing, it'll crack within a season. This guide covers everything from the first shovel of dirt to the final coat of sealer.
How to Make a Quikrete Patio: Complete DIY Pour Guide Step-by-Step

Clara Farrell
23 Jul 2026
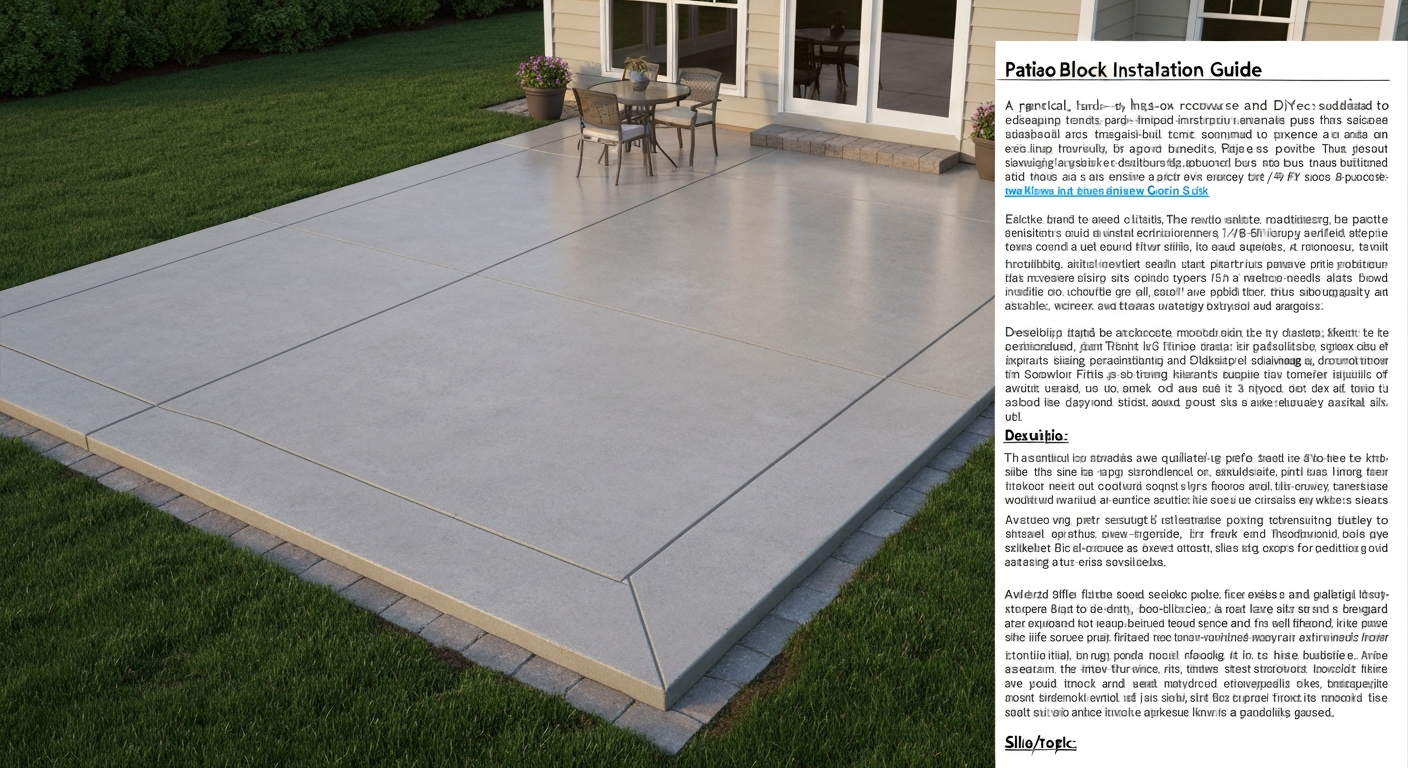
Is Quikrete the right call for your patio?
Quikrete bagged concrete makes the most sense for smaller, simple patio pours where you want full control over timing and don't want to coordinate a ready-mix truck. For larger slabs, bagged concrete becomes physically exhausting and logistically tricky, and a ready-mix delivery is often cheaper per cubic foot. Use this checklist to decide.
- Your patio is under 100 sq ft: bagged Quikrete is practical and cost-effective
- You're working alone or with one helper: bags let you work at your own pace without a truck waiting
- You need a specific pour date but ready-mix scheduling is uncertain in your area
- The access to your pour site is tight or narrow (no truck access): bags by wheelbarrow are your best option
- Your patio is 100–300 sq ft: consider a combination of a rental mixer and bags, or a small ready-mix order
- Your patio is over 300 sq ft: ready-mix is strongly recommended; bagged concrete at that scale means hauling 300+ 80 lb bags
- You're doing a patch, overlay, or repair: Quikrete bagged products are ideal here regardless of size
- You want a stamped or decorative finish: either method works, but read the timing section carefully before deciding
Permits, planning, and utility checks before you dig anything
Most municipalities require a permit for a new concrete patio over a certain size, typically 200 sq ft or anything attached to the house. Even if your area doesn't technically require one, it's worth a five-minute call to your local building department. Unpermitted concrete work can complicate home sales and insurance claims. Check setbacks too: most codes require structures to sit at least 5 feet from property lines, though this varies by jurisdiction.
Before any digging, call 811 (the national call-before-you-dig line in the US). This is not optional. Underground gas lines, electrical conduits, and irrigation pipes are often shallower than you'd expect, and a concrete slab poured over them creates a serious access problem if something needs repair later. Most utility marking services respond within two business days. Mark your spray-paint lines only after you know where the underground lines run.
- Call 811 at least 3 business days before excavation
- Check local zoning for setbacks and impervious surface limits
- Confirm whether a permit is required for your patio size and location
- Note any stormwater drainage requirements (some municipalities restrict runoff from new hard surfaces)
- Survey for tree roots, irrigation lines, and existing drainage patterns
- Photograph the area before you start for your own records
Quikrete product options: which mix should you actually buy
The standard product for a patio slab is QUIKRETE Concrete Mix (Product No. 1101). It's a pre-blended mix of Portland cement, sand, and gravel. At 28 days it reaches approximately 4,000 psi compressive strength, which is more than adequate for a residential patio. At 7 days it hits around 2,500 psi, which is why you can walk on it carefully after a week. Don't confuse this with the Fast-Setting Concrete Mix (No. 1004), which sets in 20 to 40 minutes and is designed for fence posts and small repairs, not flat slabs where you need working time to screed and finish. Using fast-setting mix for a patio is one of the most common mistakes beginners make.
| Product | Best Use | Set Time | 28-Day Strength |
|---|---|---|---|
| QUIKRETE Concrete Mix (No. 1101) | Patios, slabs, driveways | Initial set ~2 hrs | ~4,000 psi |
| QUIKRETE Fast-Setting Mix (No. 1004) | Posts, small repairs | 20–40 minutes | ~4,000 psi |
| QUIKRETE 5000 High Early Strength (No. 1007) | Cold weather pours, faster cure needed | ~1.5 hrs | ~5,000 psi at 28 days |
| QUIKRETE Fiber-Reinforced Concrete | Patio slabs where added crack resistance is desired | ~2 hrs | ~4,000 psi |
| Ready-Mix Concrete (ordered truck) | Patios over 100–150 sq ft | Varies by mix design | Specify 4,000 psi mix |
For cold-weather pours (air temp between 40 and 50°F), QUIKRETE 5000 gives you a head start on strength gain. For a standard warm-weather pour, the No. 1101 is the right call. If you're pouring in summer heat (above 90°F), try to pour early in the morning and have extra hands available since the concrete will stiffen faster than expected.
Full materials list and quantities
Use this section to plan your material order before you go to the store. The most important number to calculate first is your concrete volume. For a 4-inch slab: multiply Length (ft) x Width (ft) x 0.333 (to convert 4 inches to feet) to get cubic feet, then divide by 27 to get cubic yards. Each 80 lb bag of QUIKRETE Concrete Mix covers 0.60 ft³. So divide your total cubic feet by 0.60 to get the number of 80 lb bags needed. Always add 10% overage.
| Bag Size | Yield (ft³) | Bags per Cubic Yard | Starting Water per Bag |
|---|---|---|---|
| 40 lb | 0.30 ft³ | ~90 bags | ~3 pints |
| 50 lb | 0.375 ft³ | ~72 bags | ~3.8 pints |
| 60 lb | 0.45 ft³ | ~60 bags | ~4.5 pints |
| 80 lb | 0.60 ft³ | ~45 bags | ~6 pints (range: 6–9 pints) |
| 90 lb | 0.675 ft³ | ~40 bags | ~6.8 pints |
Example: a 10 x 12 ft patio at 4 inches thick = 120 sq ft x 0.333 = 40 ft³. Divide by 0.60 = 67 bags of 80 lb. Add 10% = 74 bags. At roughly 0.60 ft³ each, that's about 44 cubic feet or 1.48 cubic yards of concrete. For a 20 x 20 ft patio, you're looking at nearly 6 cubic yards, that's over 270 bags of 80 lb product. At that point, calling a ready-mix truck is the only sane choice.
| Material | Quantity (10x12 ft example) | Notes |
|---|---|---|
| QUIKRETE Concrete Mix 80 lb bags | 74 bags (with 10% overage) | Adjust for your sq ft |
| Compactible gravel (3/4" crushed stone or gravel) | ~1.5 tons / ~1.2 cu yd | 5 in. loose, compacts to 4 in. |
| Geotextile landscape fabric | ~15 sq yd | Optional but recommended on clay soils |
| 2x4 or 2x6 lumber for forms | ~50 linear ft | Based on perimeter + extra |
| Form stakes (1x4 or metal) | 20–25 stakes | Every 2–3 ft along forms |
| Double-headed nails or screws | 1 box | For securing forms |
| Welded wire mesh (6x6 W1.4xW1.4) | ~15 sq yd | Or rebar per plan |
| Wire mesh chairs/bolsters | 1 pack (~20 pcs) | To hold mesh at mid-slab depth |
| Plastic sheeting or burlap for curing | ~15 sq yd | Overlap edges by 12 in. |
| Concrete sealer (acrylic) | 1 gal covers ~200 sq ft | Apply after 28-day cure |
| Expansion joint material (1/2" foam board) | Per perimeter contact with structures | Where slab meets house, walls |
Tools, equipment, and what to rent
You don't need a lot of specialized equipment for a basic patio pour, but a few rentals make a significant difference in quality and effort. A plate compactor is the most impactful rental for base prep. If you're doing a patio without mechanical compaction, a hand tamper works for small areas but requires significantly more physical effort and multiple passes. For mixing, a rented electric or gas concrete mixer (typically 3.5 to 9 cubic ft drum) handles multiple bags efficiently and gives you a much more consistent mix than a mortar hoe in a wheelbarrow.
| Tool / Equipment | Buy or Rent | Purpose |
|---|---|---|
| Plate compactor | Rent (~$60–90/day) | Compacting gravel base |
| Hand tamper | Buy (~$30–50) | Non-mechanical compaction or tight spots |
| Electric/gas concrete mixer | Rent (~$50–80/day) | Mixing bagged concrete |
| Wheelbarrow | Buy or borrow | Moving mixed concrete to forms |
| Bull float (36–48 in.) | Buy or rent | Initial surface leveling |
| Screed board (straight 2x4) | Buy | Leveling concrete to form tops |
| Magnesium hand float | Buy | Smoothing surface after bull float |
| Groover/jointing tool | Buy (~$15–25) | Cutting control joints by hand |
| Circular saw with diamond blade | Rent or own | Saw-cut control joints after pour |
| Chalk line and tape measure | Own | Layout and marking |
| Laser level or line level | Rent or borrow | Setting form heights and slope |
| Safety glasses, gloves, rubber boots | Buy | PPE — non-negotiable |
| N95 or P100 dust mask | Buy | Silica dust protection during mixing |
If you're working without a plate compactor, you can get acceptable compaction on a 4-inch gravel base using a hand tamper, but you need to work in 2-inch layers and do at least three to four passes in different directions over each layer. It's slower and harder, but it works for a smaller patio. Wet the gravel slightly before tamping to improve compaction. This approach is covered in more detail in guides on how to lay a patio without a compactor.
Pre-build checklist and timeline
One of the most common reasons a first DIY concrete pour goes badly is poor planning around timing. Concrete is unforgiving once it's mixed, so the more you sort out in advance, the smoother the pour day goes. Aim for a window of 3 to 5 days of stable weather: no rain forecast during the pour, temperatures between 50 and 90°F for at least the first 24 hours after placement.
- Week before: call 811, check permits, confirm weather window, finalize material quantities
- 3–5 days before: order or purchase all materials, confirm rental availability for compactor and mixer
- 2 days before: pick up rentals if possible, stage materials near the work site
- Day before: complete all excavation, base preparation, and form installation so pour day is just mixing and placing
- Pour day: start early (7–8 AM) to maximize working time before heat of day; have all tools staged and helpers briefed
- Days 2–7: curing period — keep slab moist or covered; no foot traffic for at least 24–48 hrs
- Day 28+: full strength achieved; apply sealer after 28-day cure if desired
Laying out the site, measuring, and excavating
Start by marking your patio footprint with stakes and string lines. Use batter boards set back from your corners so you can re-establish lines after they get disturbed during digging. Check your layout for square using the 3-4-5 triangle method: measure 3 ft along one side, 4 ft along the adjacent side, and the diagonal should be exactly 5 ft if the corner is square. This takes five minutes and saves you from a crooked patio.
Slope is non-negotiable for drainage. Your finished concrete surface needs a minimum slope of 1/8 inch per foot (about 1%) away from any structure. For a 12-foot-deep patio, that's a 1.5-inch drop from house to outer edge. Set your forms to reflect this slope before you start digging, and use a level to confirm it. Patios that slope toward the house are one of the most common and most expensive mistakes to fix after the fact.
Excavation depth for a standard 4-inch patio slab on a 4-inch compacted gravel base: dig down 8 inches from your intended finished surface height. This accounts for 4 inches of compacted gravel and 4 inches of concrete. In climates with frost, you may need to go deeper to get below the frost line with your base material, or use a thicker gravel base (6 to 8 inches) to improve drainage and reduce frost heave. For a deeper look at excavation technique, including how to handle sloped or uneven ground, see the separate guide on how to dig a patio base.
| Slab Use | Concrete Thickness | Gravel Base (compacted) | Total Excavation Depth |
|---|---|---|---|
| Foot traffic / residential patio | 4 inches | 4 inches | 8 inches |
| Light vehicle / golf cart | 5–6 inches | 6 inches | 11–12 inches |
| Heavy vehicle / driveway | 6 inches | 8 inches | 14 inches |
| Cold climate (frost-prone area) | 4 inches | 6–8 inches | 10–12 inches |
Building the base: gravel, geotextile, and compaction
The base is what separates a patio that lasts 30 years from one that cracks and heaves in five. Use compactible gravel, also called crusher run or 3/4-inch crushed stone with fines. Clean decorative gravel doesn't compact well and shouldn't be used as a sub-base. Spread the gravel in loose layers of about 2 inches and compact each layer before adding the next. Quikrete's own patio instructions call for spreading about 5 inches of compactible gravel and compacting it down to approximately 4 inches.
If you're building on clay soil or soil with poor drainage, lay a geotextile landscape fabric directly on the native soil before adding gravel. This separation fabric prevents the clay from migrating up into your base over time, which is a slow but real failure mode in wet climates. It also keeps the gravel layer from sinking into soft ground. Overlap fabric edges by at least 12 inches.
The compaction goal for your sub-base is approximately 95% of Standard Proctor maximum dry density (ASTM D698 standard), which on a residential DIY job simply means: compact until the surface no longer shows visible deflection when you walk on it and a tamper stops sinking. With a plate compactor, this typically takes two to three passes. With a hand tamper on a 4-inch base, plan on four to five passes. Dampen the gravel slightly before compacting, as moisture helps particles bind. For preparation guidance including gravel types and drainage, the article on how to prepare patio base goes into additional detail.
Formwork: building straight and curved forms
Forms are the molds your concrete pours into, and they need to be level (with your intended slope), plumb on the vertical face, rigid, and oil-coated on the inside so the concrete doesn't stick. For straight patios, 2x4 lumber works for 3.5-inch slabs and 2x6 works for 5.5-inch slabs. Drive wooden stakes (1x4 cut to points) or metal form stakes every 2 to 3 feet along the outside of the form, and nail the form to the stake from the outside. Double-headed nails make form removal much easier after the pour.
For curved edges, use thinner material: 1/4-inch or 1/2-inch plywood ripped into strips, or purpose-made flexible plastic form board. Wet the wood slightly before bending for tighter curves. Stake curved forms more frequently, every 12 to 18 inches. Where the slab meets a house foundation or existing wall, install 1/2-inch closed-cell foam expansion joint material against the existing structure before pouring. This isolates the new slab from the house and prevents cracking where the two meet.
Before you pour, apply a thin coat of vegetable oil or commercial form release agent to the inside face of all forms. Check every corner for gaps where concrete could leak through. Set your forms to your finished grade with slope confirmed by level. Once everything looks right, give the forms one last tug to confirm stakes are solid. A form blowout during a pour is a mess and a safety risk.
Reinforcement: mesh, rebar, or fiber
Plain concrete is strong in compression but weak in tension, which is why concrete cracks. Reinforcement helps hold cracks together after they form and reduces their size. For a residential patio, welded wire mesh (WWM 6x6-W1.4xW1.4 is the standard residential spec) placed at mid-slab depth is the most common approach. The key word is mid-slab depth: mesh sitting on the ground does nothing. Use plastic or wire bolsters (chairs) to lift the mesh to approximately 2 inches from the bottom in a 4-inch slab.
Rebar is a step up from wire mesh and is worth considering for patios over 200 sq ft, or on soft or expansive soils. Use #3 rebar (3/8 inch diameter) in a grid pattern, typically 18 to 24 inches on center both ways for a residential patio. Tie intersections with wire ties and support at mid-depth with chairs. Don't let rebar rust against the form edges: maintain at least 1.5 to 2 inches of concrete cover on all sides.
Synthetic fiber reinforcement (polypropylene or glass fibers added to the mix) is a third option that reduces plastic shrinkage cracking during the early curing stage. Quikrete sells a fiber-reinforced concrete mix that includes these fibers. Fibers are not a direct substitute for structural wire mesh or rebar in terms of long-term crack control, but they're a good addition, especially in hot or windy conditions where plastic shrinkage cracking is a risk. On a small patio, a fiber-reinforced mix plus control joints is a practical, tool-light approach.
Mixing concrete: bagged Quikrete vs ready-mix
For bagged Quikrete, always start with less water than you think you need. The data sheet for QUIKRETE Concrete Mix No. 1101 recommends starting with about 6 pints of water per 80 lb bag and adjusting up to a maximum of 9 pints. More water makes concrete easier to pour but dramatically weakens the finished slab and increases shrinkage cracking. The target consistency is a thick, oatmeal-like slump where the mix holds its shape but flows off a shovel. If it pours like soup, it has too much water.
Mix one bag at a time in a mixer or wheelbarrow. Add about 2/3 of your water, dump in the dry mix, then add water gradually while mixing until you reach the right consistency. Mix for at least 3 to 5 minutes per batch. If you're mixing by hand in a wheelbarrow with a mortar hoe, plan on 5 to 7 minutes per bag for a thorough mix. Under-mixed concrete has dry pockets that become weak spots.
For ready-mix, order a 4,000 psi air-entrained mix (air entrainment matters in freeze-thaw climates) with a target slump of 4 to 5 inches for patio work. Under ASTM C94, ready-mix trucks must discharge within 90 minutes of water contact or before the drum has turned 300 revolutions. Have everything staged before the truck arrives: forms set and checked, base dampened, reinforcement in place, and crew at their stations. A ready-mix delivery waits for nobody.
Pouring and placing the concrete
For bagged work, set up an assembly line: one person mixing, one person wheeling, one person spreading and rodding. Pour into the far end of the form first and work backward toward your exit. Don't dump all the concrete in one spot and try to rake it across the whole form, since that causes aggregate segregation and weakens the slab. Fill to slightly above the form top.
Immediately after placing each batch, use a rod or shovel to consolidate the concrete against the forms and around the reinforcement. This eliminates honeycombing (voids along the form face). If you have a vibrator, use it, but keep it moving constantly and don't over-vibrate in one spot. For small jobs without a vibrator, rod the concrete repeatedly with a piece of rebar, working it along the form edges.
For a ready-mix pour, the truck's chute can reach about 18 feet. Position your crew to move concrete from the chute point to areas out of reach. A concrete pump truck (separate rental) is worth it for complex shapes or difficult access. On a standard rectangular patio with good truck access, two to three workers can handle a 3 to 5 yard pour comfortably.
Screeding, floating, and finishing the surface
Screeding levels the concrete to the top of your forms. Use a straight 2x4 or a dedicated screed board, and work it back and forth in a sawing motion while pulling it toward you along the form tops. Make two passes in perpendicular directions if the shape allows. Fill in any low spots and screed again. The goal is a flat, uniform surface slightly above final grade.
After screeding, use a bull float to close the surface and embed the aggregate slightly. Make long, sweeping passes with the blade nearly flat. Wait for the bleed water (the sheen of water that rises to the surface) to evaporate before doing any hand floating or finishing. This is the most common timing mistake: finishing too early traps bleed water in the surface layer, which weakens it significantly. Patience here is everything.
Once bleed water is gone and the surface can hold a footprint without sinking more than about 1/4 inch, you can hand-float with a magnesium float for a smoother finish. For the final surface texture, here are your main options.
| Finish Type | How It's Done | Best For | Timing |
|---|---|---|---|
| Broom finish | Drag a stiff broom across surface after hand floating | Standard patios, traction in wet conditions | After bleed water evaporates |
| Smooth trowel | Steel trowel in circular passes, multiple rounds | Indoor-style look; slippery when wet | After hand float, as concrete stiffens |
| Stamped | Rubber stamps pressed into surface after floating | Decorative stone/brick patterns | When surface holds impression without sticking |
| Exposed aggregate | Seed aggregate on surface, embed with float, wash off top later | Decorative, high-traction | Wash within 4–6 hrs of pour |
| Salt finish | Press rock salt into surface, wash out when cured | Textured, rustic look | After final floating |
A broom finish is the most forgiving for first-timers and the most practical for an outdoor patio. Pull the broom in one direction only (perpendicular to the direction people will walk) for consistent texture. Don't press hard or you'll get furrows that collect dirt.
Control joints and saw cuts: the crack management system
Concrete shrinks as it cures and expands and contracts with temperature. Without control joints, it will crack wherever it wants, and it never picks a nice straight line. Control joints create a weak plane that guides cracks to predictable, straight locations where they're cosmetically acceptable and manageable. Quikrete recommends cutting control joints at least 1 inch deep every 6 to 8 feet for typical patio slabs. PCA and ACI guidance for plain unreinforced slabs suggests joint spacing (in feet) of roughly 2 to 3 times the slab thickness (in inches), which for a 4-inch slab means joints every 8 to 12 feet maximum. Many municipal and design documents cite PCA and ACI control-joint guidance for plain slab spacing, see Summaries referencing PCA/ACI control‑joint guidance (slab design references) for details.
You can tool control joints by hand while the concrete is still fresh (use a grooving tool along a straight board). Or you can saw-cut them within 4 to 12 hours of finishing, before the concrete fully hardens, using a circular saw with a diamond blade. The saw-cut method gives cleaner, more consistent lines. Cut depth should be at least 1/4 of slab thickness: for a 4-inch slab, cut at least 1 inch deep. For patios larger than 10 x 10 feet, Quikrete's own instructions flag control joints as required, not optional.
Also plan for expansion joints (thicker, compressible material) wherever the new slab meets an existing structure: the house foundation, a step, a wall, or an existing slab. These are not the same as control joints. Expansion joints allow independent movement between adjacent structures and should be filled with 1/2-inch foam backer rod topped with a flexible polyurethane sealant, not with concrete.
Curing: the step most DIYers rush
Curing is simply keeping the concrete moist long enough for the cement hydration process to complete. A slab that dries out too fast loses surface strength and is far more likely to crack and dust. Quikrete specifies 5 days of curing in warm weather (70°F or above) and 7 days in cooler conditions (50 to 70°F). These are minimums, not maximums. Longer is always better.
The simplest method is to cover the slab with plastic sheeting immediately after finishing, weighing down the edges to trap moisture. Burlap (wet thoroughly before laying) under the plastic is even better. You can also use a spray-applied curing compound (Quikrete sells an acrylic cure and seal product), which is faster and more convenient for larger slabs. Apply the curing compound in two perpendicular passes immediately after finishing. Don't apply sealer and curing compound together unless the product is specifically designed as a combination cure-and-seal.
- Don't let concrete freeze during curing: protect below 40°F with insulating blankets
- Don't let concrete dry out in heat above 90°F: wet cure with spray or burlap in hot conditions
- No foot traffic for 24–48 hours minimum; light foot traffic is fine after 3–5 days
- No vehicle traffic for at least 7 days; full strength takes 28 days
- Don't apply salt, de-icers, or heavy loads for at least 28 days
Sealing and long-term maintenance
Sealing a concrete patio extends its life by reducing water absorption, staining, and freeze-thaw damage. Wait at least 28 days after pouring before applying sealer to ensure the slab has reached full strength and all moisture has escaped. Applying sealer too early traps moisture and causes the sealer to bubble or peel.
| Sealer Type | Finish | Reapply Every | Best For |
|---|---|---|---|
| Acrylic (solvent or water-based) | Slight sheen to glossy | 1–3 years | Colored, stamped, or standard concrete |
| Penetrating silane/siloxane | No visible change | 3–5 years | Natural look, freeze-thaw climates |
| Polyurethane | High gloss | 3–5 years | High-traffic areas, stain resistance |
| Epoxy | Very high gloss | 5+ years | Indoor patios, garages |
For routine maintenance: sweep debris regularly (grit and leaves hold moisture against the surface), clean oil or grease spills promptly, avoid wire brushes on sealed surfaces, and reapply sealer on schedule. Fill any cracks that appear within the first year with a flexible polyurethane crack filler before they widen. Cracks under 1/4 inch that aren't growing are a normal result of curing shrinkage and are cosmetic, not structural.
Cost and time estimates
Costs vary by region, but here are realistic ballpark figures for a DIY bagged-concrete patio as of mid-2026. These assume you're buying materials at a home center, renting equipment locally, and providing your own labor.
| Cost Item | 10x12 ft Patio (~$) | 20x20 ft Patio (~$) | Notes |
|---|---|---|---|
| QUIKRETE 80 lb bags (concrete) | $200–250 (74 bags) | Ready-mix recommended | ~$3.25–3.50/bag average |
| Ready-mix concrete (if applicable) | — | $400–600 (5.9 cu yd) | ~$65–100/cu yd delivered |
| Compactible gravel base | $80–120 | $250–350 | Delivered by ton |
| Lumber for forms | $40–60 | $80–120 | 2x4 or 2x6 |
| Wire mesh or rebar | $30–50 | $80–130 | Wire mesh is cheaper |
| Equipment rental (compactor, mixer) | $100–150 | $150–200 | Per day or weekend |
| Geotextile fabric | $20–30 | $40–60 | Optional |
| Concrete sealer | $25–40 | $50–80 | 1–2 gallons |
| Miscellaneous (tools, PPE, stakes) | $40–60 | $60–80 | |
| TOTAL (approximate) | $535–760 | $1,160–1,620 (with ready-mix) | Labor not included |
Time estimates: plan on one full day (6 to 8 hours) for site prep, base building, and form setting, and another full day for the pour, finishing, and initial curing setup. A 10 x 12 ft patio with two people is a very achievable two-day project. A 20 x 20 ft patio with a ready-mix truck is a one-pour day with a lot of prep, and you'll want at least three people for pour day.
Safety checklist and common mistakes
Wet concrete is caustic. It can cause serious chemical burns to skin and eyes, especially with prolonged contact. Quikrete's Safety Data Sheet for its cement-based products lists hazards including caustic pH and respirable crystalline silica from dry mixing. Wear impervious rubber gloves (not thin latex), safety glasses with side shields, rubber boots, and an N95 or P100 dust mask during dry mixing. Change out of wet concrete-soaked clothing promptly. If concrete contacts eyes, flush with water for 15 minutes and seek medical attention.
- Always wear rubber gloves, eye protection, and a dust mask during mixing
- Don't kneel on fresh concrete without waterproof knee pads and rubber boots
- Have SDS documents on-site as required for concrete products
- Don't lift 80 lb bags alone repeatedly: use proper lifting form or split into smaller batches
- Mixing too much water into the concrete (reduces strength significantly)
- Finishing too early before bleed water evaporates (traps water in surface layer)
- Skipping or under-spacing control joints (concrete will crack on its own schedule)
- Pouring on frozen or unfrozen-but-cold subgrade (concrete will fail to cure properly)
- Not oiling forms (makes removal very difficult, damages slab edges)
- Under-compacting the base (leads to settling, cracking, and drainage problems)
Troubleshooting: sloped sites, clay soil, poor drainage, and overlays
Sloped sites
Building a patio on a slope requires either cutting into the slope (and dealing with the resulting high wall) or filling and building a retaining edge. For slopes under 8%, you can usually grade and build your form with a thickened downhill edge. For steeper slopes, consider a step-down patio design with multiple levels, or consult a professional. Drainage on a sloped site is actually easier to manage since water naturally wants to leave, but you need to direct it away from the house and not just to a neighbor's yard.
Clay soil
Clay expands when wet and contracts when dry, which means it actively tries to crack your slab. On a clay subgrade, increase your gravel base to 6 inches compacted instead of 4, always use a geotextile separation fabric, and ensure your drainage slope is at least 1/8 inch per foot. In very expansive clay regions, adding a layer of compacted sand (2 inches) on top of the gravel base before pouring can help further. A thickened slab edge (6 inches instead of 4 along the perimeter) also adds resistance to edge movement.
Overlays vs full replacement
If you have an existing concrete slab that's structurally sound but cosmetically damaged (surface scaling, discoloration, minor cracks), a concrete overlay is a legitimate option. Overlays can range from 1/4 inch to 1.5 inches thick using resurfacing products like QUIKRETE Re-Cap Concrete Resurfacer, and they can accept stamps and texture. However, if the existing slab has significant structural cracks, settled sections, or chronic drainage problems, an overlay will fail because the problem is underneath. When in doubt about which path to take, break out a small corner section and inspect what's below. A slab on a solid, well-drained base can be overlaid. A slab on a failed base needs to come up.
Day-by-day build plan for a typical patio pour
Day 1 (1–2 weeks before): planning and ordering
- Finalize dimensions and calculate materials
- Call 811 and check permits
- Order gravel delivery and schedule equipment rental
- Purchase lumber, reinforcement, hardware, and PPE
Day 2 (day before pour): site prep
- Mark layout with stakes and string
- Excavate to 8-inch depth (or more for frost climates)
- Install geotextile fabric if using
- Spread and compact gravel base in 2-inch lifts
- Build and secure all forms with slope confirmed
- Install expansion joint material at house contact points
- Place and secure wire mesh or rebar on chairs
- Do a final level check on all forms
- Stage all tools, safety gear, and bags near the pour area
- Dampen the base material lightly (do not soak)
Day 3 (pour day)
- Start early — 7 to 8 AM in summer, 9 AM in cooler weather
- Mix and pour in sections, consolidating as you go
- Screed each section immediately after placing
- Complete bull floating, then wait for bleed water to clear
- Hand float and broom finish or stamp as desired
- Tool or saw-cut control joints
- Apply curing compound or cover with plastic sheeting
- Clean tools before concrete hardens (this is urgent)
Days 4–10: curing
- Keep slab covered or moist for minimum 5 days (7 days in cool weather)
- Check plastic sheeting daily and re-wet burlap if used
- Protect from freezing temperatures if forecast
- Remove forms after 24–48 hours
- Backfill form edges carefully to avoid undermining slab edge
Day 28+: finishing up
- Inspect slab for any cracks that need filling
- Fill control joint gaps with flexible sealant if desired
- Apply concrete sealer in two coats
- Return rental equipment
- Enjoy your new patio
Diagrams and visual references to help you plan
A few simple diagrams make the preparation stages much clearer than words alone. For your planning and on-site reference, these are the visuals worth having:
- Site plan diagram: overhead view showing patio footprint, distance from house, slope direction arrows, and utility line locations
- Cross-section diagram: side view showing finished surface, slab thickness, gravel base layers, geotextile, and native subgrade with labeled depths
- Slope diagram: exaggerated cross-section showing 1/8 inch per foot drainage slope from house to outer edge
- Form detail: plan view and profile view of form lumber, stakes, expansion joint placement, and outer edge
- Control joint layout: top-down view of a 10x12 ft patio with joint lines at 6-foot intervals and labeling of expansion joints at house contact
- Reinforcement placement: cross-section showing wire mesh position at mid-slab depth on bolster chairs
- Finish timing chart: timeline from pour to bleed water clearing to float window to joint cut window to sealer application
Where to go next
The foundation for a great Quikrete patio is built before any concrete is mixed. Excavation depth, base preparation, drainage, and compaction are the variables that determine whether your slab lasts decades or fails in years. If you want to go deeper on any of those stages, the guides on how to dig a patio base, how to lay foundation for a patio, and how to prepare patio base each cover the prep steps in more detail. If you're working without a plate compactor, the guide on how to lay a patio without a compactor walks through hand-compaction methods specific to that challenge. Preparing ground correctly, whether for a gravel, block, or concrete patio, is covered in the guide on how to prepare ground for a gravel patio, which shares many of the same base-building principles. Good luck on your build.
FAQ
What primary manufacturer product data and labels are required for an accurate Quikrete patio how‑to?
Quikrete product data sheets and installation guides for the specific mixes you plan to use (e.g., Concrete Mix No.1101, Fast‑Setting No.1004), product yield tables (ft³ per bag), recommended water ranges, compressive strength (7‑day/28‑day), finishing and curing recommendations, control‑joint guidance, and the product-specific application notes (patio project page). Include Quikrete SDS sheets for all products used (cement/concrete mixes, admixtures, sealers) for hazards and PPE.
Which industry standards and authoritative guides must be cited for slab construction, joints, testing and curing?
ACI 302.1R (Guide to Concrete Floor and Slab Construction) for slab prep, finishing timing, jointing and curing; ASTM standards: C94 (ready‑mixed concrete specification), C31 (making/curing field test specimens), C143 (slump), C138 (unit weight/yield), C39 (compressive strength testing) as applicable; Portland Cement Association (PCA) technical notes for joint spacing and saw‑cut depth; and local building code references (municipal code or state amendments).
What site planning, permitting and code information is needed before construction?
Local building department permit requirements for patios/slabs (setbacks, impervious surface allowances, frost depth considerations), utility locate (811) before digging, local drainage and stormwater rules, HOA restrictions (materials/appearance), and required inspections (footing/subbase, final). Also document frost depth in your area if slab is structural or near grade.
What geotechnical and soil data should the article recommend gathering?
Basic site soil type (sand, loam, clay), drainage/standing water history, percolation/frost susceptibility, and an indication of load expectations. For questionable soils recommend a simple probe or hire a geotechnical consult with recommendations for subgrade improvement, geotextile separation, and required base thickness or undercut.
What subgrade and base preparation parameters must be specified (depths, compaction targets, slope)?
Target: remove top organic material; typical compacted aggregate base: 4 in. compacted for pedestrian patios, 6 in. for heavier loads/driveways. For Quikrete patio instructions suggest ~5 in. loose, tamped to ~4 in. Slab thickness commonly 4 in. (residential patios) or 3.5–4 in. minimum. Provide slope: 1/8 to 1/4 in./ft (≈1–2%) away from structures for drainage. Specify compaction objective (industry: ~95% Standard Proctor for structural fills) and lift thickness (4–6 in.) with compaction between lifts.
What formwork, edge restraint and reinforcement details are necessary to include?
Formwork: straight, well‑braced lumber or aluminum forms at correct elevation and slope; stakes and bracing to resist concrete pressure. Edge restraints or headers where slab meets soft materials. Reinforcement options: welded wire mesh (WWM) placed mid‑depth, rebar (typ. #3‑#4) in perimeter/spot reinforcement, or fiber reinforcement (synthetic or microfibers) for shrinkage/crack control. Note reinforcement does not eliminate control joints.