
To prepare the ground for a gravel patio, you need to excavate down to firm subsoil (typically 150–200mm below your finished surface level), compact the subgrade, lay a separation geotextile, build up a compacted sub-base of crushed stone or road base in layers, install solid edge restraints to keep the gravel contained, and finish with 50–75mm of your decorative gravel graded at a 1–2% slope away from any buildings. Do each of those steps properly and the patio will stay level, drain well, and not sink under foot traffic. Skip any one of them and you'll be raking gravel back into place every spring.
How to Prepare Ground for a Gravel Patio Step by Step

Clara Farrell
7 Jul 2026
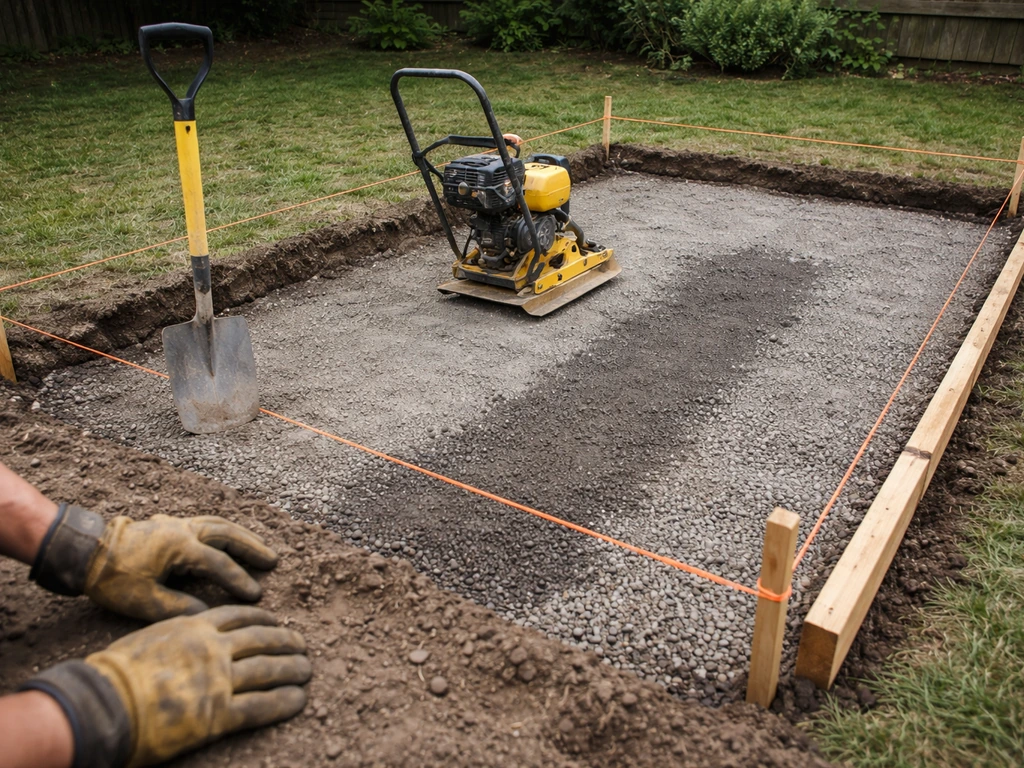
Assessing the site and soil conditions
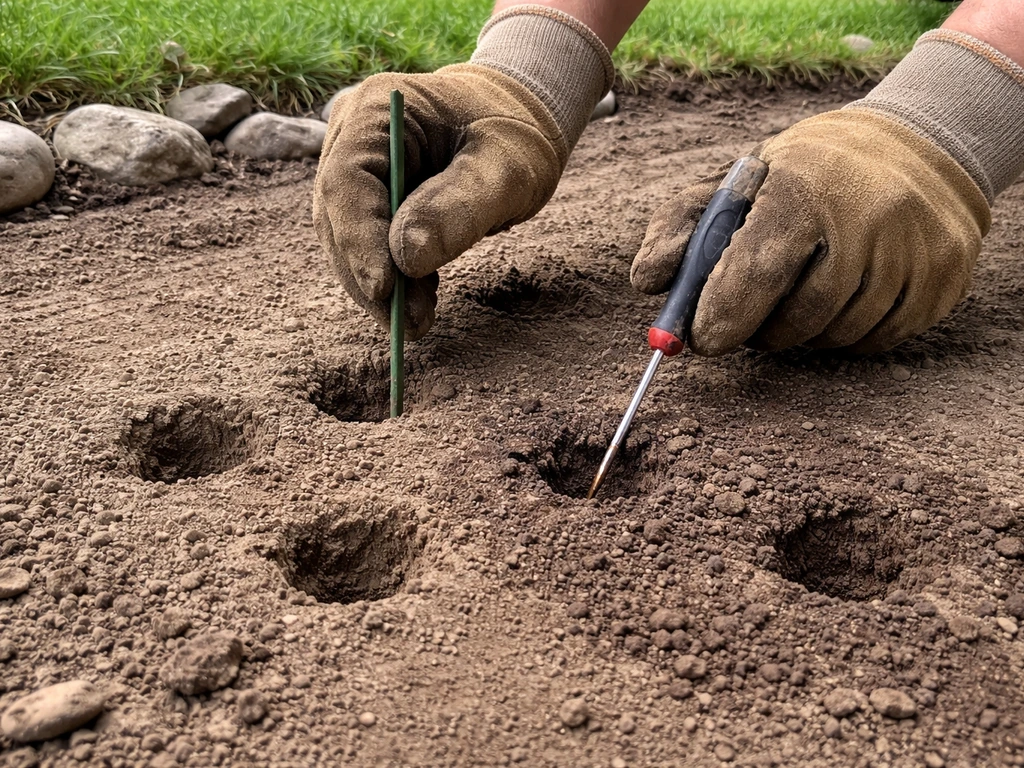
Before you dig a single spit, spend 20 minutes really looking at the ground. Push a garden stake or screwdriver into the soil in several spots. If it slides in easily with light pressure, you've got soft or loose ground and you'll need to dig deeper and possibly add more sub-base than a standard build. If it hits solid resistance within the first 50mm, you're in good shape.
Clay soil is the one that catches people out the most. Clay holds water, swells when wet, shrinks when dry, and is highly frost-susceptible. In cold months, water trapped in clay freezes, expands, and pushes your carefully laid base upward. This is exactly what the NHBC and SAPCA guidance flag when they stress that sub-base thickness and depth must account for the frost susceptibility of the subgrade beneath it. On clay ground, always go deeper (aim for the upper end of your depth range), and never cut corners on compaction.
While you're assessing the ground, look for these things specifically:
- Tree or shrub roots within the patio footprint (roots regrow and will lift your base over time — remove them and treat the stumps)
- Low spots where water already pools after rain (these need extra attention to drainage and slope)
- Any soft, peaty, or made-up ground (fill, old garden waste, vegetable beds) that will continue to settle
- Existing slabs, concrete, or hardcore that you might be able to leave in place as a partial sub-base
- How close the patio is to your house foundation (this affects the slope direction you'll need to plan)
If you find more than about 150mm of genuinely soft or organic topsoil, you may need to over-excavate and bring in imported fill before you even start the sub-base build. That's a bigger job, but it's far better than building on ground that will move.
Planning levels, slope, and patio layout
Gravel patios need a fall built into them so water drains away rather than sitting on the surface and migrating down through the layers in the wrong direction. The standard recommendation is a 1 to 2% gradient, which works out to roughly 10–20mm of drop for every metre of patio. In practical terms, 1/4 inch per foot (about 2%) is what most experienced installers use because it's visually almost imperceptible but reliable enough to shift water off the surface quickly.
If your patio is next to the house, the slope must run away from the building. This is non-negotiable. Sloping toward a wall is one of the most common and damaging mistakes in DIY patio work. If the garden naturally falls toward the house, you'll need to think about where the water will go once it reaches the patio edge and plan a channel or soakaway accordingly.
For setting out the slope on site, knock in timber pegs at the corners of your patio area, then use a string line and a spirit level to find your datum (level reference point). From there, drop the string on the drainage side by 10–20mm per metre of run. A long straightedge with a spirit level works well for checking fall across short distances. Mark the slope on your pegs so you can reference it throughout the dig and build.
While you're setting out, also confirm the final patio level relative to any doors, steps, paths, or damp-proof courses. Your finished gravel surface should sit at least 150mm below any DPC (damp-proof course) in a house wall. Plan this now, before you start digging, because it directly determines your excavation depth.
Excavation and base depth calculations
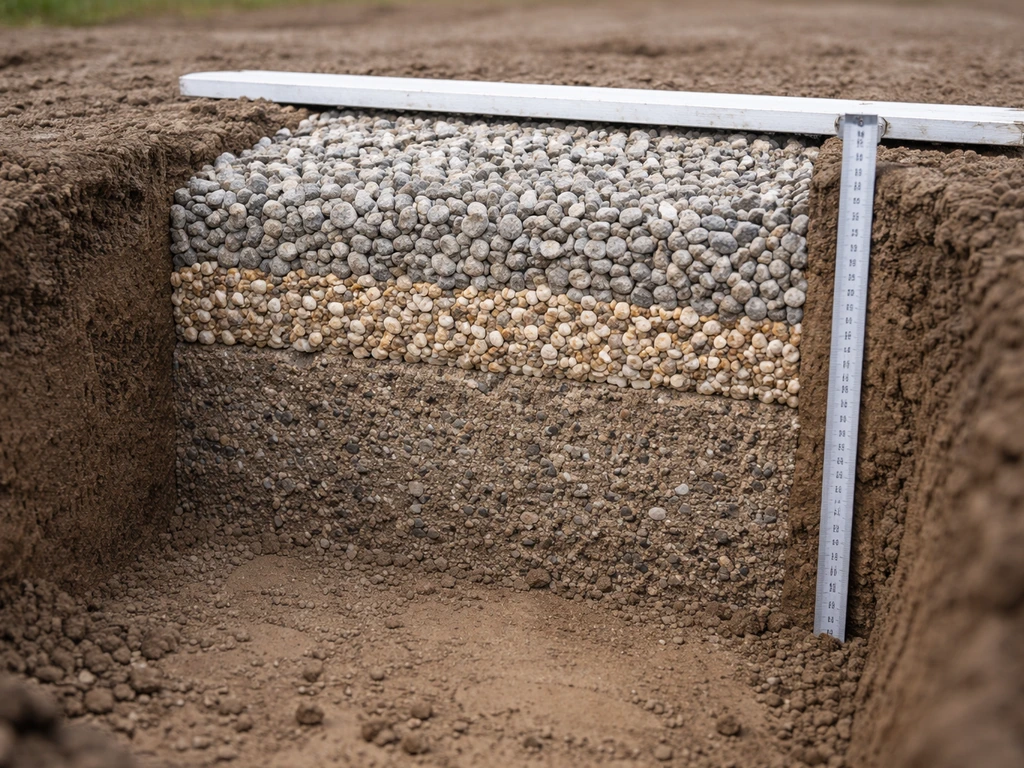
Here's a simple build-up to work backwards from when calculating how deep to dig:
| Layer | Typical Depth | Notes |
|---|---|---|
| Decorative gravel (top) | 50–75mm | Pea gravel, 10mm or 20mm angular gravel |
| Compacted sub-base (MOT Type 1 / road base) | 100–150mm | 100mm on firm ground; 150mm on clay or soft soil |
| Separation geotextile | Negligible | Sits between subgrade and sub-base |
| Compacted subgrade | Firm natural ground | The foundation everything sits on |
| Total excavation depth | 150–225mm below finished level | Add more on soft/clay ground |
For a typical garden patio on reasonably firm ground with foot traffic only, excavate to around 150–175mm below your intended finished surface. On clay or softer ground, go to 200mm or more. These depths account for the frost susceptibility issue: greater depth keeps the sub-base away from the freeze-thaw zone near the surface, which reduces heave risk significantly. If you follow the right excavation depth and base preparation, you’ll be well on your way to learning how to lay foundation for a patio that lasts frost susceptibility issue.
Start by marking out the full patio area using string lines pegged about 150mm outside your actual edge line (this gives you room to work). Strip off all turf and topsoil first. Topsoil is organic, it compresses and rots, and you never want it under a structural base. Dispose of it or use it elsewhere in the garden. Once you're down to mineral subsoil, you can start assessing the bottom of your excavation. It should look consistent in colour and texture. Any soft spots, dark organic patches, or areas that feel spongy underfoot need to be dug out further and backfilled with compacted hardcore or sharp sand before you proceed.
Once the excavation is complete, use a hand tamper or a hired plate compactor to firm up the bottom of the dig. blank" rel="noopener noreferrer">ASTM D1556 (sand-cone method) is one standard test method used to determine density or unit weight of soil in place, which can support compaction verification. This step is called compacting the subgrade, and it's often missed by first-timers. If you walk across the bottom of your dig and feel any give, compact it. A well-compacted subgrade should feel firm and unyielding, similar to walking on hard-packed earth.
Installing edging and preparing formwork
Edge restraints are one of the most skipped steps in DIY gravel patios, and missing them is why so many gravel patios end up with loose stone migrating onto the lawn or path within a year. Gravel has no structural cohesion on its own. Without a solid physical barrier at every edge, foot traffic and weather will gradually push it sideways.
Your options for edging include:
- Pressure-treated timber boards (75x50mm or 100x50mm) held in place with timber stakes hammered into the ground
- Concrete edging blocks or kerbs bedded on a small concrete haunch
- Metal landscape edging (galvanised or powder-coated steel) secured with ground anchors or stakes
- Rigid plastic landscape edging pinned down through pre-formed anchor tabs
Whatever you choose, the edging must be set before you lay the sub-base, not after. It defines the shape of your patio and gives the compacted sub-base something to push against, which improves how well it locks together. Drive stakes or anchoring spikes at no more than 600–900mm intervals for timber, and follow the manufacturer's spacing for proprietary metal or plastic edging. When using plastic landscape edging with anchor tabs, drive the spikes at a slight angle (about 45 degrees outward) so they resist the outward pressure of the gravel.
Set the top of your edging at the finished gravel surface height, accounting for the slope you planned earlier. Use your string lines and a straightedge to check the edging top is following the correct fall. Once the edging is in and checked, you're ready to build upward.
Building the drainage layer and separation fabric
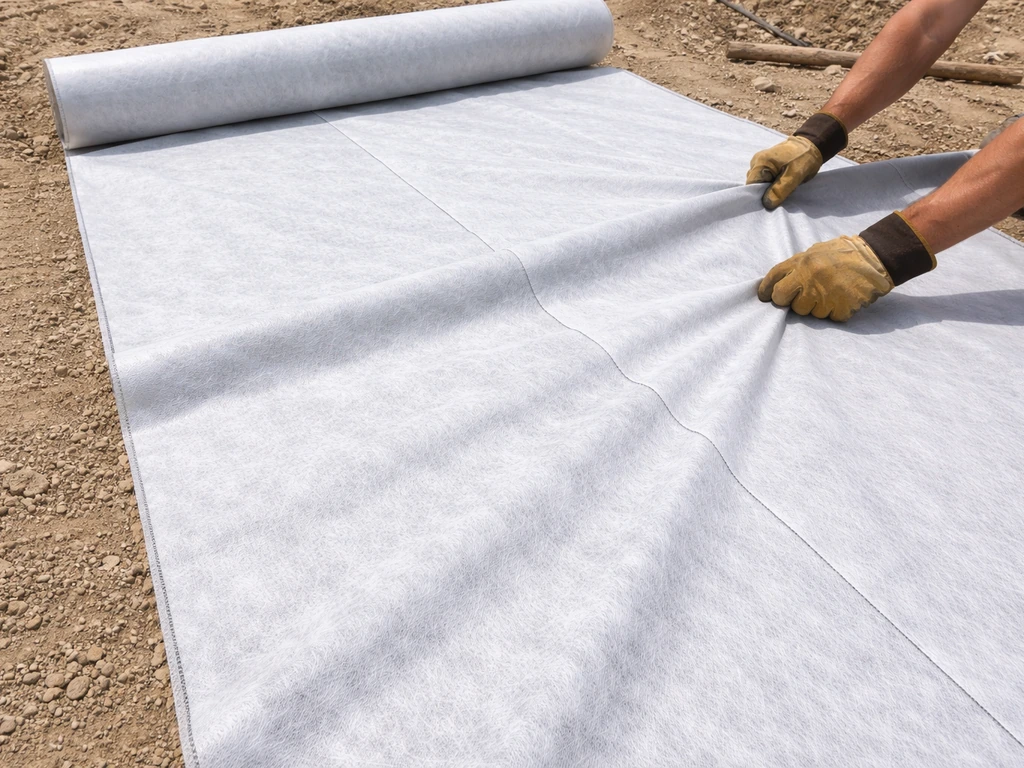
Geotextile separation fabric sits between the compacted subgrade and the sub-base aggregate. Its job is to stop fine particles from the soil migrating up into the sub-base (which would clog drainage and cause settlement) and to stop the sub-base aggregate punching down into soft soil. It does not replace the sub-base, and it does not stop weeds on its own. Think of it as a filter and stabiliser, not a magic weed barrier.
Before you roll out the fabric, clear any sharp stones, roots, or debris from the compacted subgrade. Geotextile can be punctured by sharp objects sitting underneath it, and once it's torn, fine particles track through the tear and the separation is compromised. Smooth off the bottom of your dig and remove anything pointy before the fabric goes down.
Roll the fabric across the full excavated area, lapping it up the inside faces of your edging. Where you need to join two rolls, overlap them by at least 300–500mm on firm ground, or 500–1000mm on soft or wet subgrades where the fabric can shift during installation. Sigma Geosynthetics and other manufacturer guidance is consistent on these overlap figures. Pin the fabric at the edges and overlaps so it doesn't move when you start tipping sub-base material on top. Use proprietary ground staples or improvise with bent wire tent pegs.
Whether you need a drainage layer beneath the sub-base depends on your specific ground conditions. On free-draining sandy or gravelly soils, the compacted sub-base itself provides adequate drainage and the geotextile alone is sufficient. On heavy clay where water sits after rain, consider adding a 50mm layer of clean angular single-size stone (such as 20mm clean crushed stone or 3/4-inch #57 gravel) directly on top of the geotextile before the sub-base goes in. This open-graded layer allows water to escape laterally rather than building up pressure beneath the base. The geotextile sits underneath this drainage layer too, sandwiched between the soil and the stone.
Laying and compacting the sub-base (crushed stone, scalpings, or road base)
The sub-base is the structural heart of the whole patio. Everything above it depends on how well this layer is laid and compacted. The best material for a DIY patio sub-base is MOT Type 1 (also called crushed limestone, scalpings, or road base depending on your region). It's a dense-graded aggregate, meaning it contains particles ranging from about 40mm stones down to fine dust. That wide range of particle sizes is exactly what makes it compact so well: the fines fill the voids between larger pieces, and when compacted, the whole mass locks together into a near-rigid slab.
Do not use rounded pea gravel or washed decorative stone for the sub-base. Rounded particles roll against each other under load and never properly lock together, no matter how much you compact them. You want angular, fractured material with rough faces that interlock under compaction.
The golden rule of sub-base compaction is to work in layers, not all at once. If you tip the full 150mm of material in and try to compact it in one go, the plate compactor will only properly consolidate the top 75–100mm. The material beneath will remain loose and will settle later under load. Instead:
- Tip in your first layer of sub-base to a loose depth of about 100mm (it will compact down to roughly 75–80mm)
- Level it roughly with a rake, keeping your slope direction in mind
- Make three to four passes with the plate compactor, overlapping each pass by about 50% to ensure even coverage
- Add a light spray of water if the material is very dry — slight moisture helps the fines bind and improves compaction
- Check the compacted surface by walking across it — no footprints, no give, no rocking
- Add a second layer if needed (to reach 150mm total compacted depth) and repeat the process
After compaction, a well-done sub-base looks and feels almost solid. You should be able to walk across it without making any impression at all. If you're sinking in or seeing footprints, the material needs more passes or you have a soft spot in the subgrade underneath that needs addressing. Hire a plate compactor for this job, a hand tamper is fine for the very bottom of the dig (the subgrade) but it doesn't have the force needed to properly consolidate 100–150mm of granular aggregate.
For reference on depth targets: on firm, non-clay ground with foot traffic only, 100mm of compacted Type 1 is usually adequate. On clay, softer soils, or ground with slightly heavier use, go to 150mm. Some guidance from UK suppliers and installers pushes to 200mm on genuinely difficult ground. If in doubt, go deeper. You'll spend a bit more on material, but you'll only do this job once.
Finishing layers, grading for gravel, and maintenance tips
Once the sub-base is compacted and sitting at the right level (check it against your string lines), you're ready for the final decorative gravel layer. Aim for 50–75mm of gravel depth. Shallower than 50mm and you'll see the sub-base through the gravel after a few months; deeper than 75mm and the surface becomes difficult to walk on and gravel migrates more easily.
Angular 10mm or 20mm crushed stone is the most practical choice for a patio that gets regular foot traffic. It compacts slightly underfoot and stays in place better than rounded pea gravel. That said, pea gravel is popular for its look and feel, if you go that route, expect to rake it back periodically and plan to top it up by about 25mm every couple of years. Some guides suggest a full top-up every few years regardless of material type, as some loss through displacement is normal.
Tip the gravel in and spread it with a rake to an even depth, maintaining your drainage slope throughout. Do a final check with a long straightedge or spirit level to confirm the fall is consistent. The gravel surface should follow the same 1–2% gradient you built into the sub-base.
Common mistakes that cause gravel patios to fail
- Skipping edging restraints: gravel migrates outward within months without a solid physical barrier at every edge
- Not compacting in layers: tipping the full sub-base depth in at once leaves loose material at the bottom that settles later
- Wrong slope or no slope: a flat or inward-sloping patio holds water, which saturates the base and accelerates frost damage on clay soils
- Using the wrong gravel for the sub-base: rounded, washed, or decorative stone doesn't compact properly — always use dense-graded angular aggregate for structural layers
- Skipping the geotextile: without separation fabric, sub-base aggregate gradually mixes with soft soil underneath, drainage clogs, and the surface sinks unevenly
- Not removing all topsoil and organic material: organic material compresses and rots over time, causing subsidence
- Too-thin sub-base: less than 100mm compacted depth on any soil type is not enough to distribute load and resist frost movement
- Ignoring drainage context: if the patio collects water from a roof, path, or surrounding lawn, you need to plan where that water exits the patio edge or it will undermine the base over time
Quick pre-start checklist
- Site assessed: soil type identified, soft spots and roots dealt with
- Finished levels and drainage slope planned (1–2%, away from buildings)
- DPC clearance confirmed (finished surface at least 150mm below any house DPC)
- Excavation depth calculated based on soil conditions and build-up layers
- Edging material ordered and ready to install before sub-base
- Geotextile fabric on hand, with enough overlap for your area
- MOT Type 1 or equivalent dense-graded aggregate ordered (not washed or decorative stone)
- Plate compactor hired or booked
- Decorative gravel ordered (50–75mm depth across the patio area)
If you're wondering how all of this compares to a more rigid patio surface, the preparation principles are largely the same. If you are set on a concrete option, you can use Quikrete to build the base and then finish the patio surface properly how to make a quikrete patio. The key differences with gravel are the need for particularly solid edge restraints (since gravel has no inherent lateral stability) and the lighter, more permeable nature of the surface itself. The sub-base preparation described here is essentially the same foundation work you'd do for a paved or block-paved surface, which is why getting it right here sets you up well for any future upgrades too.
Take your time on the ground prep. Ninety percent of gravel patio problems trace back to something done (or not done) below the surface. Get the base right and the decorative part on top almost takes care of itself.
FAQ
Can I skip the sub-base and just put geotextile under gravel?
Not usually. A gravel patio still needs a compacted, granular sub-base because the base carries the load. If you install only geotextile plus gravel, any soft or organic pockets below will keep deforming, and your gravel surface will sink and lose its fall.
If my ground is uneven, can I level it with more gravel instead of excavating?
Yes, but only if the goal is to correct an uneven site. Bring in fill to create a firm, level-to-fall subgrade, then compact and build the sub-base to your target depth. Avoid “dressing” low areas with extra gravel, it will pump and settle over time.
How do I set the edging height correctly when there’s a slope?
Set edge restraints slightly below or at the planned finished gravel level, then account for gravel thickness on top. Don’t bury the edging too low, because you need a clean line the gravel can sit against while still maintaining the 1 to 2% slope you set out.
Will geotextile prevent weeds under a gravel patio?
No, they don’t. Geotextile helps stop fines migration and stabilizes the layers, it is not a weed killer. For fewer weeds, keep topsoil completely out, use the correct overlap and pinning, and consider a proper gravel depth so light can’t reach the soil.
Can I use sand instead of MOT Type 1 for the sub-base?
If you do, use clean, angular material (or the specified drainage/Type 1) and compact it, otherwise the layer can become a loose “mud” interface. Also make sure you don’t create a soft layer at the geotextile interface, any debris under the fabric can puncture it and defeat the separation.
How do I know if the subgrade and sub-base are compacted enough?
Compaction should be checked at two levels: the bottom of the excavation (subgrade) and the top of each sub-base layer. A plate compactor consolidates granular sub-base when done in lifts, but it cannot fix a soft subgrade underneath.
What overlap should I use when joining geotextile sheets?
Typically, overlap can be reduced on firm, dry, stable ground but not eliminated. On soft or wet subgrades, use the larger overlap you can manage during installation, and pin/weight the fabric so it doesn’t shift when you tip aggregate on top.
What if the only place for drainage is toward the house or a corner of the garden?
Yes, but plan the drainage path first. If water can’t run away at the patio edge, it will collect and saturate the sub-base, especially on clay. In that case you may need a soakaway or a controlled channel, and you may also need the added open stone layer mentioned for heavy clay.
Will a gravel patio hold up if I drive a car or bring heavy equipment over it?
If the site gets frequent heavy loads (vehicles, wheelbarrows regularly, or events), you may need a thicker build and higher-quality sub-base compaction. Otherwise, the base can deform and the fall can change, causing water pooling and settlement.
How do I handle transitions at doors, steps, and paths?
Yes, and it’s one of the most practical ways to finish neatly. Cut the paving/edging line cleanly, then keep the gravel depth consistent right up to the edge. If you install a patio near steps or door thresholds, verify the finished height relative to the DPC before you excavate.
What should I do if I hit soft spots when digging?
If you find soft, spongy spots after excavation, you should remove them until you reach consistent, firm mineral subsoil, then backfill with compactable hardcore or sharp sand in layers and re-compact. Patching with topsoil or leaving organic pockets in place is a common cause of future settlement.
Can I fix poor drainage by adding more gravel after installation?
Don’t. Raked gravel can hide an incorrect slope, and adding “extra gravel” later usually just buries a problem rather than restoring drainage. The correct approach is to rebuild to the designed fall, then finish with the specified gravel depth.
How does frost affect depth choices for a gravel patio on clay?
Yes, but it depends on the local climate and site. In cold regions or on clay, going toward the upper end of the recommended excavation and sub-base depth helps keep the base away from the freeze-thaw zone near the surface. Also keep compaction tight because trapped voids increase heave risk.