
Building a poured concrete patio slab is one of the most rewarding weekend projects a homeowner can tackle. You dig out the area, set timber formwork, lay reinforcement, pour and finish the concrete, then wait a week before you have a permanent, low-maintenance outdoor surface that will outlast most alternatives. A standard 10×12 ft patio at 4 inches thick takes a long weekend to complete and costs roughly $600–$1,200 in materials depending on whether you mix bags yourself or order ready-mix. That's the scope. The key to getting it right is almost entirely in the preparation, not the pour itself.
How to Build a Cement Patio Slab: Complete DIY Guide

Clara Farrell
30 Jul 2026
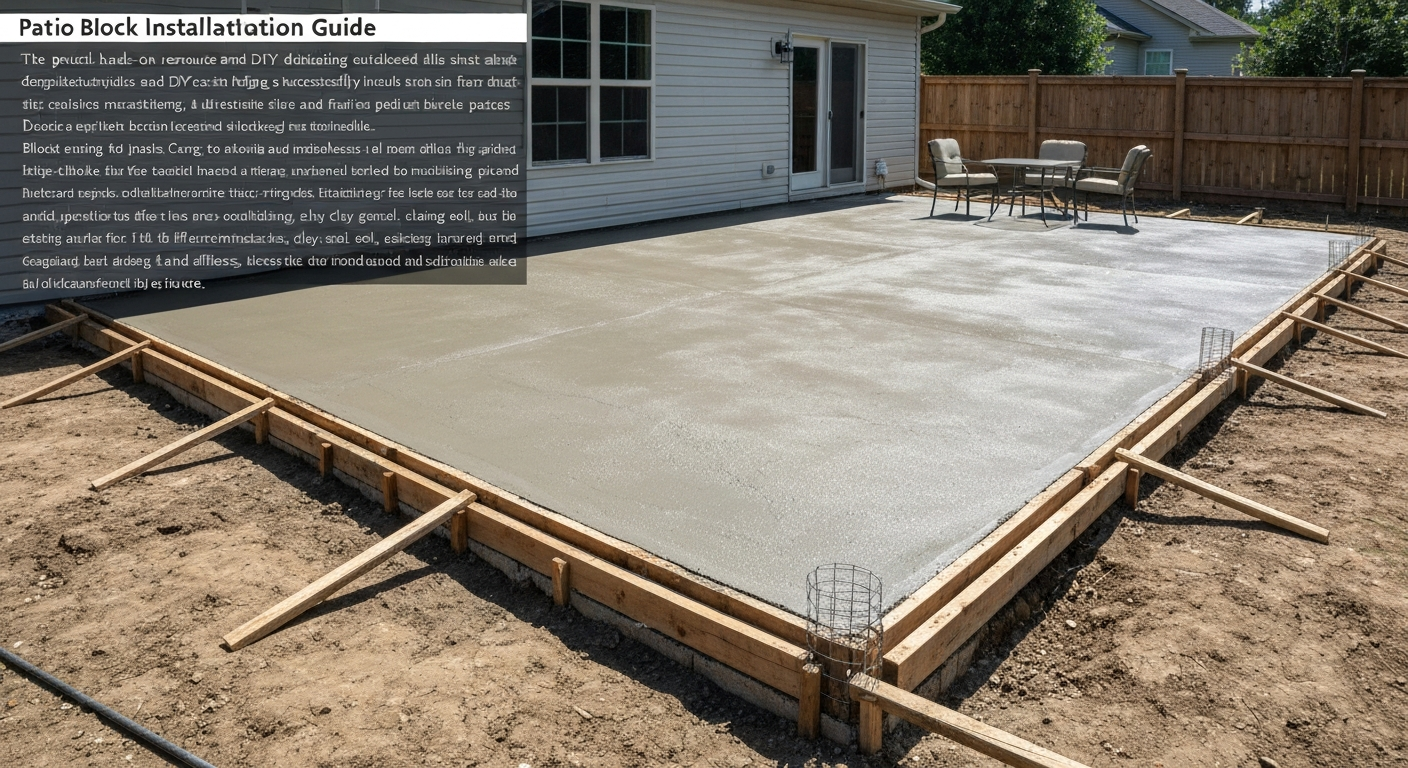
What a poured concrete patio slab actually is
A poured (cast-in-place) concrete slab is a monolithic panel of concrete formed in place on your prepared ground, as opposed to precast or individual patio slabs that are laid like tiles. You build a timber form around the perimeter, place reinforcing mesh or rebar inside it, pour wet concrete in, screed it level, finish the surface, then cure it in place. The result is one continuous slab bonded to itself, which is why it handles foot traffic, furniture, and light vehicle loading so well. It also means any prep mistakes are permanent, poor drainage or weak subgrade will eventually show up as cracks or settlement, which is why I spend so much of this guide on what happens before the concrete truck arrives.
Is a poured slab actually the right choice for you?
Poured concrete is not always the best answer, and it's worth being honest about that before you rent equipment and order materials. A monolithic slab is the strongest, most durable option and handles vehicle loads, hot tubs, and heavy structures that pavers or loose-laid slabs can't reliably support. But it is also the least forgiving: once poured, you can't easily relay it if you change your mind, and cracking or settlement requires cutting and patching rather than simply lifting and re-bedding a unit.
If your project is a simple seating or planting area and you're comfortable with a more flexible approach, dry-laid methods (sand-bedded pavers, individual flags, or block) can be just as attractive and are far easier to adjust or repair later. Precast concrete patio slabs laid on a prepared bed are another practical middle ground, and handling large-format slabs has its own set of considerations worth reading about before you commit. If drainage is your primary concern and you'd rather not deal with formwork or mixing, permeable systems have real advantages. The poured slab shines when you need a level, seamless, heavy-duty surface that won't shift, a large entertaining patio, a base for a pergola, or any surface that doubles as a driveway apron.
Planning your project: dimensions, permits, and site decisions
Start by marking out your patio with stakes and string lines. Measure the length and width carefully, these numbers feed directly into your formwork, material orders, and permit application. Add a few inches to each dimension in your planning to account for form board waste and cleanup. Before you break ground, check whether your municipality requires a permit for concrete flatwork. In many areas, patios under a certain size are exempt, but attached slabs, any work near the foundation, or slabs that double as impervious cover in regulated drainage zones often do require one. A quick call to your local building department takes five minutes and saves you from having to break up work later.
Think about drainage direction early. The finished slab surface should slope away from the house at a minimum of 1/8 inch per foot (roughly 1%) and ideally 1/4 inch per foot (2%). That means a 10-foot-wide patio sloping away from the house needs to be about 1 inch lower at the outer edge than at the house end. Note this on your sketch before you set your forms, because the slope is baked into every formwork height and screed pass you do.
How thick does your slab need to be?
Thickness is the single most consequential structural decision you'll make. Too thin and the slab cracks under load; the right thickness for your use case is shown in the table below. For the vast majority of residential patios, 4 inches is the correct answer. PL633 (Portland Cement Association) recommends a minimum 4 in (100 mm) slab for pedestrian patios and 4–6 in for exterior slabs intended for vehicle traffic. Go to 5 or 6 inches if you're parking on it or placing something very heavy like a large hot tub.
| Use Case | Recommended Slab Thickness | Base Thickness | Concrete Strength |
|---|---|---|---|
| Pedestrian patio, furniture, BBQ | 4 in (100 mm) | 4–6 in compacted aggregate | 3,000 psi (use air-entrained in freeze-thaw zones) |
| Light vehicle access / single car occasional | 4–5 in | 6 in compacted aggregate | 3,500 psi, air-entrained |
| Regular car/SUV parking | 5–6 in | 6–8 in compacted aggregate | 3,500–4,000 psi, air-entrained |
| RV / heavy vehicle / frequent loading | 6 in or engineered | 8+ in, may need geotextile | 4,000 psi, engineered reinforcement |
| Hot tub base (large unit) | 5–6 in with rebar grid | 6 in compacted aggregate | 3,500 psi minimum |
For freeze-thaw climates, anywhere that gets hard winters, always specify air-entrained concrete. The tiny air bubbles in the mix give water somewhere to expand when it freezes, which dramatically reduces surface scaling and spalling over time. Ask your ready-mix supplier specifically for 'air-entrained mix' and confirm the air content is in the 5–7% range for your region.
Materials and tools you'll need
Tools checklist
- Tape measure, stakes, string line, and a line level or laser level
- Spade, digging bar, and square-nose shovel for excavation
- Plate compactor (rent one — don't skip this) for compacting the aggregate base
- Wheelbarrow (at least 6 cu ft capacity — bigger is better for moving concrete)
- Bull float (48–60 in for most patios) for initial leveling
- Hand float or magnesium float for edges and finishing
- Steel finishing trowel for a smooth final surface (optional — broom finish is easier and safer outdoors)
- Screed board (a straight 2×4 cut to span your form width)
- Concrete edger for rounded slab edges
- Circular saw or angle grinder with diamond blade for control joints (or an early-entry saw if you cut same-day)
- Wire cutters or bolt cutters for mesh
- Rebar bender/cutter if using rebar
- Concrete mixer (electric or gas drum) if mixing bags — essential for more than 10–15 bags
- Safety gear: rubber gloves, waterproof boots, safety glasses, dust mask for cutting
Materials checklist
- Concrete: ready-mix ordered by the yard (best for slabs over ~1 yd³ or 27 cu ft) OR 80 lb bags of 4,000 psi bagged mix
- Compactable aggregate base: 3/4-inch minus crushed stone or equivalent well-graded crushed aggregate
- Form boards: straight 2×6 or 2×8 dimensional lumber (2×6 for a 4-inch slab works well with some room for overfill)
- Form stakes: 1×2 or 2×2 timber or metal stakes, one per 2–3 ft of form length
- Duplex nails (double-head) for attaching forms — they pull out cleanly later
- Welded wire reinforcement (WWR): 6×6-W1.4/W1.4 mesh, cut to fit with 2-inch clearance from all edges
- Rebar chairs or wire bar supports (1.5 or 2 in height) to hold mesh at mid-depth
- Expansion joint material: 1/2-inch premolded fiber expansion joint strips for where the slab meets the house foundation or existing concrete
- Plastic sheeting or burlap for curing
- Concrete curing compound (water-based, dissipating type) as an alternative to wet curing
- Concrete sealer (penetrating silane/siloxane or film-forming acrylic) for finished surface
Quick-buy tip: if your slab is under about 0.5 cubic yards (13.5 cubic feet), bagged mix is practical and gives you control over the pace. Above that, ready-mix is almost always faster and cheaper per cubic yard than bags. Call at least two ready-mix suppliers for quotes, prices vary more than you'd expect, and most suppliers have a minimum order (often 1 cubic yard) with a short-load fee below a certain volume. Ask about fiber-reinforced mixes if you want to skip laying mesh, though fibers work best as a supplement to, not a replacement for, conventional reinforcement under any real load.
Estimating how much material you need
The concrete volume formula for slabs is: cubic yards = Length (ft) × Width (ft) × Thickness (in) ÷ 324. Always add 10% for waste, overfill, and the fact that your excavation will never be perfectly uniform. The table below shows estimated material quantities for common patio sizes at 4-inch thickness.
| Patio Size | Concrete Volume (cu yd) | +10% Waste | 80 lb Bags (if mixing) | Aggregate Base (4 in, tons approx.) | WWR Mesh (sheets, 5×10 ft) |
|---|---|---|---|---|---|
| 8×10 ft | 0.74 yd³ | 0.82 yd³ | ~62 bags | ~1.2 tons | 2 sheets |
| 10×12 ft | 1.11 yd³ | 1.22 yd³ | ~92 bags | ~1.8 tons | 3 sheets |
| 12×16 ft | 1.78 yd³ | 1.96 yd³ | ~148 bags | ~2.9 tons | 4–5 sheets |
| 16×20 ft | 3.95 yd³ | 4.35 yd³ | ~327 bags (order ready-mix) | ~6.4 tons | 8–10 sheets |
| 20×24 ft | 5.93 yd³ | 6.52 yd³ | Order ready-mix | ~9.5 tons | 12–15 sheets |
For bags: one 80 lb bag yields approximately 0.60 cubic feet of concrete. To find your bag count, convert your total cubic yards to cubic feet (multiply by 27), then divide by 0.60. Round up and buy an extra bag or two. For aggregate base, a rough rule for 3/4-inch crushed stone is about 1.4 tons per cubic yard of compacted material, your supplier can confirm this for the specific product they carry.
Site assessment and preparation: the make-or-break stage
I'll be direct: more poured slabs fail because of poor preparation than bad concrete. Settlement, cracking, and drainage problems almost always trace back to what was (or wasn't) done before the pour. This stage deserves at least as much time as the pour itself.
Grading and drainage
Before you excavate, observe how water moves across your yard during rain. You want the finished slab to drain away from the house and toward either a lawn area, a drainage swale, or a catch basin. The minimum slope is 1/8 inch per foot (1%) but 1/4 inch per foot (2%) is safer and more practical on a residential site where you have some flex in finished height. Set your string lines to reflect this slope before you start digging, your excavation depth will vary slightly across the slab to compensate.
Soil types and what to do about them
Cohesive clay soils are the most problematic for concrete slabs. Clay swells when wet and shrinks when dry, and that movement cracks slabs and causes settlement. If you have clay, excavate an extra 2 inches deeper than your base calculation, replace it with well-graded crushed aggregate, and compact thoroughly. In severe clay areas, a geotextile fabric between the native soil and the aggregate helps prevent the fine clay particles from migrating up and contaminating your base over time. Sandy or well-drained loam soils are far easier to work with and rarely need extra base depth beyond the standard 4–6 inches. If you dig and find soft, wet, or organic soil (anything that compresses easily underfoot), stop and address it, either excavate deeper and fill with compacted aggregate, or call a geotechnical engineer for advice before pouring over problem ground.
Frost and freeze-thaw climates
In climates with significant frost, the ground can heave, meaning it literally lifts during freeze cycles and drops when it thaws. For a freestanding patio slab (not attached to the house foundation), the standard mitigation is a free-draining aggregate base that doesn't trap water. Water is what freezes and causes the heave. A 6-inch base of compacted crushed stone that drains freely is your main defense. Check your local building code for frost depth requirements, in northern US states, frost can penetrate 3 or more feet, and attached structural slabs may require footings below the frost line. For a typical freestanding patio, a well-drained base is usually sufficient, but verify with your local building department if you're in a zone with harsh winters.
Excavation and compaction
Excavate to a depth equal to your slab thickness plus base thickness plus any extra for problem soils. For a standard 4-inch slab on a 4-inch base, that's 8 inches below your finished surface elevation. Remove all organic material (grass, roots, topsoil) completely, never pour over topsoil. Once you're at the correct depth, compact the native subgrade with a plate compactor before adding base material. Add your crushed aggregate base in layers (lifts) no thicker than 4 inches, compacting each lift before adding the next. The goal is a dense, stable platform that doesn't deflect when you walk on it. Industry standards target 90–95% of the soil's maximum dry density, which in practical DIY terms means the ground should feel firm and unyielding underfoot and the plate compactor should stop sinking on repeated passes.
Working over existing surfaces and tricky site conditions
Not every patio starts from bare ground, and some of the most common questions I get are about pouring over or next to something that's already there.
Pouring over existing concrete
You can pour a bonded overlay over existing concrete, but the requirements are strict. The existing slab must be structurally sound, no crumbling, delamination, or active settlement. You need to profile the surface (typically by shot-blasting or scarifying to achieve a ICRI CSP 3–5 profile), apply a compatible bonding agent or primer, and pour the new concrete while the bonding agent is still tacky. Minimum overlay thickness is typically around 2 inches for a bonded overlay, though many contractors recommend at least 2.5–3 inches for durability. If the existing concrete is in poor shape or has drainage issues, it's almost always better to remove it than to cover the problems. Pouring over bad concrete just buries them temporarily.
Pouring adjacent to existing concrete or the house foundation
Always place a 1/2-inch premolded fiber expansion joint strip between your new slab and any existing structure, the house foundation, steps, an existing driveway, or another slab. This isolation joint allows the two masses to move independently and prevents cracking at the junction. Do not let your new slab bond directly to the foundation wall. The expansion joint strip sits vertically against the existing surface and becomes part of your formwork on that side.
Sloped sites and drainage fixes
A steeply sloped site is actually manageable with concrete because you can step or taper your formwork to create a level or consistently sloped surface regardless of the ground underneath. The challenge is that a deep fill on the low side needs extra aggregate base (or even a short retaining wall) to avoid a very thin slab edge on one side. On very sloped ground, consider a stepped slab design, two or more level pads at different elevations connected by a step, rather than a single raked slab. If the low side of your patio has nowhere for water to go, install a channel drain (linear slot drain) at the low edge tied into a drain line before you pour the slab. Retrofitting drainage into concrete is expensive and disruptive; installing it during the pour is straightforward.
Pouring over lawns or removing existing turf
Never pour over existing lawn or topsoil. Organic material decomposes, leaves voids, and causes settlement. Strip all turf and topsoil completely, compact the subgrade, and build your aggregate base properly. Sod and organic material should be removed to a minimum of 6–8 inches below the planned finished surface, more if the topsoil layer is thick.
Setting your formwork
Formwork is the mold that gives the slab its shape, and it needs to be accurate, strong, and well-braced. Use straight 2×6 or 2×8 dimensional lumber for a 4-inch slab. Set the form boards so the top edge is at your desired finished slab elevation (accounting for your drainage slope), and drive stakes every 2–3 feet along the outside to hold them in position. Nail the boards to the stakes with duplex (double-head) nails so they're easy to pull out later. Check the forms with a level or laser level, verify the corners are square (measure diagonals, they should be equal), and wet the inside face of the lumber before the pour so the boards don't suck water out of the concrete.
Brace the corners extra well. Wet concrete exerts significant lateral pressure, and an unsupported corner can blow out mid-pour, which is a frustrating and messy disaster. For longer form runs, add double stakes and cross-bracing. Pull a string line along the top of each form board to check for any bowing before you pour.
Reinforcement: mesh, rebar, or fibers?
For a standard 4-inch residential patio, welded wire reinforcement (WWR) with a 6×6-inch grid and W1.4/W1.4 wire gauge is the most common choice. It controls crack width if the slab does crack and helps hold the pieces together. Cut the mesh 2 inches short of all form edges and support it on rebar chairs or wire spacers so it sits at mid-depth in the slab (about 2 inches from the top surface of a 4-inch slab). The most common DIY mistake with mesh is laying it flat on the subgrade and hoping to pull it up after the pour, this does not work reliably, and mesh that stays at the bottom of the slab provides very little tensile benefit. Spend the $15–20 on chairs and set the mesh properly.
For slabs that will carry vehicle loads or support concentrated weights like hot tub legs, upgrade to #3 or #4 deformed rebar on 12–18 inch centers in both directions. This takes more time to set but provides significantly better load distribution. Fibers (polypropylene or steel mixed into the concrete) are a useful supplement for reducing plastic shrinkage cracking during finishing, and some ready-mix suppliers offer fiber-reinforced mixes as a standard option, but fibers don't replace conventional mesh or rebar for structural purposes under significant loads.
Mixing and pouring the concrete
Choosing ready-mix vs. bagged
For any slab over about 1 cubic yard, order ready-mix. Mixing bags for a large slab is exhausting, time-consuming, and increases the risk of an inconsistent mix. When you order ready-mix, specify your strength (3,000 psi minimum for pedestrian patios, 3,500–4,000 psi for driveways or freeze-thaw exposure), specify air-entrainment if applicable, and ask for a slump of around 4 inches, workable without being soupy. Do not add extra water at the site to make it easier to work with; excess water weakens the mix and causes surface issues. If the mix arrives too stiff, ask the supplier about water reducer admixtures, not a hose.
The pour sequence
- Wet the aggregate base lightly — it should be damp, not puddled, so it doesn't steal water from the concrete.
- Start pouring at the far corner and work back toward the truck or mixer access. Don't walk through fresh concrete if you can avoid it.
- Spread the concrete with a square-nose shovel or come-along rake. Work it into corners and against form boards. Do not over-vibrate or overly manipulate the mix.
- Use a concrete vibrator (or work a rod up and down along form edges) to consolidate the mix and eliminate air pockets, especially along the form boards.
- Screed the surface by dragging a straight 2×4 board across the tops of the form boards in a sawing motion. Fill low spots and screed again until the surface is flat.
- Run the bull float over the entire surface in overlapping passes to close the surface, embed aggregate, and bring a thin layer of paste to the top. Keep the leading edge slightly raised.
- Wait for the bleed water sheen to disappear from the surface before any finishing work. Finishing too early — while bleed water is present — traps moisture and causes scaling.
- Edge the perimeter with a concrete edger to create a rounded, finished edge along the form boards.
- Apply your desired surface texture: a broom finish (drag a stiff broom across the surface) is the standard for outdoor patios and provides good slip resistance. A steel trowel finish looks great but gets slippery when wet.
Control joints and expansion joints: preventing cracks
Concrete shrinks slightly as it cures, and that shrinkage causes cracking. Control joints are intentional weak points that direct where the slab cracks, along a straight, planned line rather than randomly across the surface. For a 4-inch slab, cut control joints to a depth of at least 1 inch (one quarter of the slab thickness) and space them no more than 8–12 feet apart in each direction. That means a 10×12 ft patio needs at least one control joint running lengthwise down the center.
Timing matters. You can use a groover tool on fresh concrete during finishing to create joints the same day. If you're cutting with a saw, use an early-entry saw within 1–4 hours of finishing, or a standard diamond blade saw within 4–24 hours depending on temperature and mix. Cutting too late (after random shrinkage cracking has already started) defeats the purpose. Mark your joint locations with chalk lines before you begin cutting so the lines stay straight. Always place full isolation/expansion joint strips (1/2-inch fiber board) wherever the slab meets the house, steps, or any other fixed structure, these are different from control joints and must be full-depth.
Curing and sealing the finished slab
Curing is the process of keeping the concrete moist long enough for the cement to fully hydrate and develop its designed strength. This is one of the most skipped steps in DIY concrete work, and it directly affects how durable your surface will be for the next 20 years. The minimum curing period for a standard Portland cement mix under normal temperatures is 7 days. You can cure by covering the slab with plastic sheeting or wet burlap and keeping it damp, or by applying a liquid curing compound immediately after finishing (before any surface moisture evaporates). Curing compounds are convenient and effective, look for a water-based, dissipating type so it doesn't interfere with sealers applied later. Do not let the slab dry out and rewet it repeatedly, consistent moisture retention is what matters.
Once cured (28 days for full strength, though you can walk on it after 24–48 hours and drive light vehicles after about 7 days), apply a concrete sealer if the slab will be exposed to freeze-thaw cycles, road salt, or heavy staining. Penetrating silane/siloxane sealers are the best long-term option for outdoor slabs, they don't change the surface appearance and don't peel. Film-forming acrylic sealers enhance color and provide good stain resistance but need periodic reapplication. Whatever you choose, clean the surface first and apply per the manufacturer's directions.
Drilling and anchoring into your cured slab
After the slab is fully cured (wait the full 28 days if you're anchoring something structural like a pergola post), you can drill into it for anchor bolts, post bases, or railing hardware. Use a hammer drill with a SDS-plus or SDS-max masonry bit sized to match your anchor specification. Mark your hole locations carefully, drill to the specified depth (usually 2–4 times the anchor diameter for wedge or sleeve anchors), blow out the dust with compressed air, and install the anchor per the manufacturer's torque spec. Avoid drilling within 6 inches of slab edges or control joints to prevent spalling or splitting. If you're anchoring near a control joint, check which panel the joint falls in and ensure your anchor is entirely within one panel.
Project timeline and cost estimates
Here's a realistic time breakdown for a solo DIYer building a 10×12 ft patio. These are honest estimates, not best-case scenarios.
| Stage | Time Required | Notes |
|---|---|---|
| Planning, permits, material sourcing | 1–3 days | Longer if permit required |
| Excavation and subgrade prep | Half day to full day | Harder in clay or rocky soil |
| Aggregate base, compact, set forms | Half day | Have base delivered the day before if possible |
| Set reinforcement (mesh/rebar) | 1–2 hours | |
| Pour, screed, finish | 3–6 hours | Have at least one helper for anything over 1 yd³ |
| Cut control joints | 1 hour (same day or next morning) | |
| Curing period | 7 days minimum (28 days full strength) | Keep surface moist or compound-cured |
| Sealing | Half day | Apply after 28 days |
For a 10×12 ft patio, budget roughly $600–$1,000 for materials if you mix bags, or $800–$1,400 if you order ready-mix (including the short-load fee most suppliers charge for under 3 yards). Add $150–$300 for tool rentals (plate compactor, mixer if needed). A professional contractor pouring the same slab typically charges $1,800–$3,500 depending on your location, site access, and finishing requirements. The DIY saving is real, but factor in that you'll need at least one helper and a full weekend.
Troubleshooting common problems
Cracking
Some hairline cracking in concrete is essentially inevitable, concrete shrinks as it cures. The goal of control joints and reinforcement is not to prevent all cracking but to control where cracks happen and keep them tight. If you see wider cracks (more than about 1/16 inch) or cracks that are uneven (one side higher than the other), those suggest differential settlement, which means the subgrade moved. Wide, random cracks across the surface that don't follow joint lines usually mean joints were cut too late or spaced too far apart. For cosmetic hairline cracks, a penetrating concrete crack filler works well. For structural cracks or active settlement, you're looking at either slab lifting (mudjacking or polyurethane foam injection) or, in severe cases, slab replacement.
Poor drainage / water pooling
If water pools on the slab, the slope was insufficient or the form setup was off. This is difficult to fix without grinding or applying a leveling overlay, which is expensive. The prevention is checking your form slopes carefully before the pour with a level and string line. If pooling is near the house edge, it's a potential foundation issue and should be addressed promptly, either by adding a channel drain or by applying a leveling compound to redirect the water.
Surface scaling and spalling
Scaling (the surface flaking off in thin layers) in freeze-thaw climates almost always comes from either insufficient air entrainment, premature finishing (working the surface while bleed water was still present), or applying deicing salts in the first winter before the concrete is fully cured and sealed. Use air-entrained mix, wait for bleed water to disappear before finishing, cure properly for 7 days, seal before winter, and avoid sodium chloride (rock salt) on fresh concrete. Calcium magnesium acetate or sand is safer for newly placed slabs.
Safety on the job
- Wet concrete is caustic — it can cause chemical burns on skin with prolonged contact. Wear rubber gloves, long sleeves, and waterproof boots when working in and around fresh concrete.
- If concrete gets into your eyes, flush immediately with clean water for at least 15 minutes and seek medical advice.
- Concrete is heavy — an 80 lb bag is exactly that. Use proper lifting technique, or have someone help. Order delivery of aggregate and bags to minimize manual handling.
- Plate compactors vibrate intensely — wear vibration-dampening gloves and don't operate one for extended periods without breaks.
- When cutting control joints with a saw, wear hearing protection, safety glasses, and a dust mask rated for silica dust. Concrete cutting generates respirable silica dust, which is a serious long-term lung hazard.
- Call 811 (US) or your country's equivalent before any excavation to have underground utilities located and marked.
When to hire a professional
Most homeowners can successfully pour a patio slab up to about 200–250 square feet with a helper and a weekend of focused effort. The tasks are physically demanding but not technically beyond a careful DIYer. I'd recommend calling a professional if: your site has significant drainage problems or poor soil that needs engineering judgment; the slab is adjacent to or bearing against a structural foundation; you're in a regulated stormwater area with specific impervious surface rules; the slab exceeds about 400 square feet (at that scale, the logistics of timing, helpers, and equipment start to favor a pro); or if you simply don't have a helper, pouring concrete alone is genuinely dangerous and almost always produces a poor result.
Comparing your options at a glance
If you're still weighing whether a poured slab is the right approach, this comparison covers the main alternatives that come up most often for residential patios.
| Method | Durability | DIY Difficulty | Repairability | Relative Cost | Best For |
|---|---|---|---|---|---|
| Poured concrete slab | Excellent (20–30+ years) | Moderate to hard | Difficult (cut and patch) | Medium–High | Heavy loads, seamless surface, permanent structure |
| Precast / individual patio slabs on mortar | Very good | Moderate | Moderate (relay individual slabs) | Medium | Decorative surfaces, varied formats |
| Dry-laid pavers on sand/aggregate | Good (if well-maintained) | Moderate | Easy (lift and relay) | Low–Medium | Flexible, DIY-friendly, adjustable later |
| Large-format slabs on pedestals/adhesive | Good | Moderate to hard | Moderate | Medium–High | Modern aesthetics, rooftop decks |
| Gravel/loose aggregate | Fair | Easy | Very easy | Low | Informal areas, permeable drainage zones |
If you decide a fully poured slab isn't for you but you still want a solid, laid surface, the process of installing and laying individual patio slabs covers much of the same site-preparation ground in a more forgiving format. Similarly, if weight and handling of large-format pieces are your concern, there's specific guidance on working with large slabs that addresses lifting, spacing, and bedding for those heavier units. For applications where flexibility and drainage matter more than a monolithic surface, a cement-free laying method is worth considering before you commit to forming and pouring. If you want step-by-step instructions on cement-free options, see our guide on how to lay patio slabs without cement.
FAQ
What are the basic planning steps before building a poured concrete patio slab?
Check local zoning and building-permit requirements, utility locations (call 811), property lines and easements. Assess intended use and loads (pedestrian, grill, hot tub, occasional vehicle/RV), climate (freeze–thaw), and drainage paths. Sketch the patio, note existing slopes, trees, and access for concrete trucks or mixers. Decide slab size, thickness, finish, joint pattern, and whether the slab will be bonded to or isolated from an existing structure. Prepare a simple materials/tools list and timeline. If in doubt about structural loads, frost depth, or major grading, consult a pro.
What thickness should my slab be for different uses?
Common recommendations: 4 in (100 mm) for pedestrian patios and typical residential flatwork; 4–6 in for driveways/occasional vehicle loading; 6 in or more with heavier loads (RV, concentrated loads) and/or thicker compacted base. Use air-entrained concrete in freeze–thaw climates. For safety, increase thickness or reinforcement if you expect heavy concentrated loads (e.g., hot tub).
How do I calculate concrete volume and bag counts?
Volume formula (cubic yards) = Length(ft) × Width(ft) × Thickness(in) ÷ 324. Example: 12 ft × 10 ft × 4 in ÷ 324 = 1.48 yd³. To convert: cubic feet = L × W × Thickness(in) ÷ 12, then ÷27 for cubic yards. For bag mixes, typical yields: 80 lb bag ≈ 0.60 cu ft (≈45 bags/yd³), 60 lb bag ≈ 0.45 cu ft. Compute total cu ft then divide by bag yield to get bag count; add 10% for waste and spillage.
What materials and tools do I need (checklist)?
Materials: ready-mix concrete (3,000–4,000 psi common), crushed aggregate base (#57 or 3/4" minus), landscape fabric (optional), joint material (premolded expansion joints), reinforcement (6×6 WWR, rebar, or fiber), curing compound or wet-curing supplies, concrete sealer, form boards, stakes. Tools: tape measure, level/laser/rotary laser, shovel, plate compactor, wheelbarrow, mortar mixer or ready-mix truck access, vibratory screed or straightedge, bull float, magnesium float, darby, edging tool, jointer or saw, trowel, broom (for non-slip finish), saw for control joints, concrete drills/anchors for later fixes, PPE (glasses, gloves, respirator for dusty work), braces for forms. See article tables for material quantities by slab size and thickness.
How do I prepare the site and ensure proper drainage?
Remove vegetation, topsoil, and organic material to expose stable subgrade. Grade to provide positive slope away from structures—target 1/8–1/4 in/ft (≈1–2%) for patios. On clay or poor soils, remove soft material and replace with compacted granular fill; increase base thickness (6–8 in) and compact to ~90–95% of lab maximum if required. Install a 4–6 in compacted crushed stone base under a 4 in slab; increase base depth on poor soils. Consider perimeter drains or shallow swales if natural drainage is poor. For overlays on existing surfaces, follow abrasive profiling and bonding prep per ACI 546 guidance.
How should I build and brace formwork?
Use straight form boards (commonly 2×6 or 2×8) set to the final slab elevation and slope. Stake and brace to resist lateral concrete pressure—stakes every 16–36 in depending on length and board size; add corner and mid-run bracing. Ensure forms are level along the required slope and check diagonals for squareness. Coat forms with release oil if reusing. Provide openings or sleeves for utilities and drains. For long runs, use intermediate stakes and cross-bracing to prevent bowing.