You can install fake grass on a patio in a single weekend, and the result will look great and last for years if you get the prep right. The basic process is: check your patio surface drains properly, clean and level it, lay a weed barrier or drainage underlay, roll out and cut your artificial turf to fit, join any seams cleanly, then secure the edges so nothing lifts. If you are planning interlocking patio tiles instead, the installation starts by preparing a stable, level base so the units lock together and stay put secure the edges so nothing lifts. The most common mistakes happen during prep and at the perimeter, so this guide focuses hard on both.
How to Install Fake Grass on a Patio Step by Step

Clara Farrell
24 May 2026
Check your patio suitability and measure up
Most patios make a decent base for fake grass, but you need to check a few things before you order anything. The two big ones are drainage and levelness. Pour a bucket of water onto your patio and watch where it goes. If it pools in the middle or against a wall, you have a drainage problem that fake grass will make worse, not better. You want the water to run steadily toward a drain, an edge, or off the slab. A slope of at least 1% (that's roughly 10mm per metre) is the minimum to aim for.
Next, check for significant dips or high spots. Run a long spirit level or a straight piece of timber across the surface. Low spots more than about 10mm deep will cause the turf to dip and collect water, so flag those now. Also check for cracked, crumbling, or loose sections, especially on older concrete or mortar-jointed slabs. You can work around minor imperfections, but a patio that's structurally shifting underneath will eventually cause your turf to wrinkle and lift.
For measuring, keep it simple. Measure the length and width at the widest points, then add at least 100mm (about 4 inches) to each dimension for trimming allowance. If your patio has an irregular shape, break it into rectangles on paper and measure each section separately. Artificial grass typically comes in 2m or 4m wide rolls, so work out which roll width wastes the least material before you order.
Tools and materials you'll need
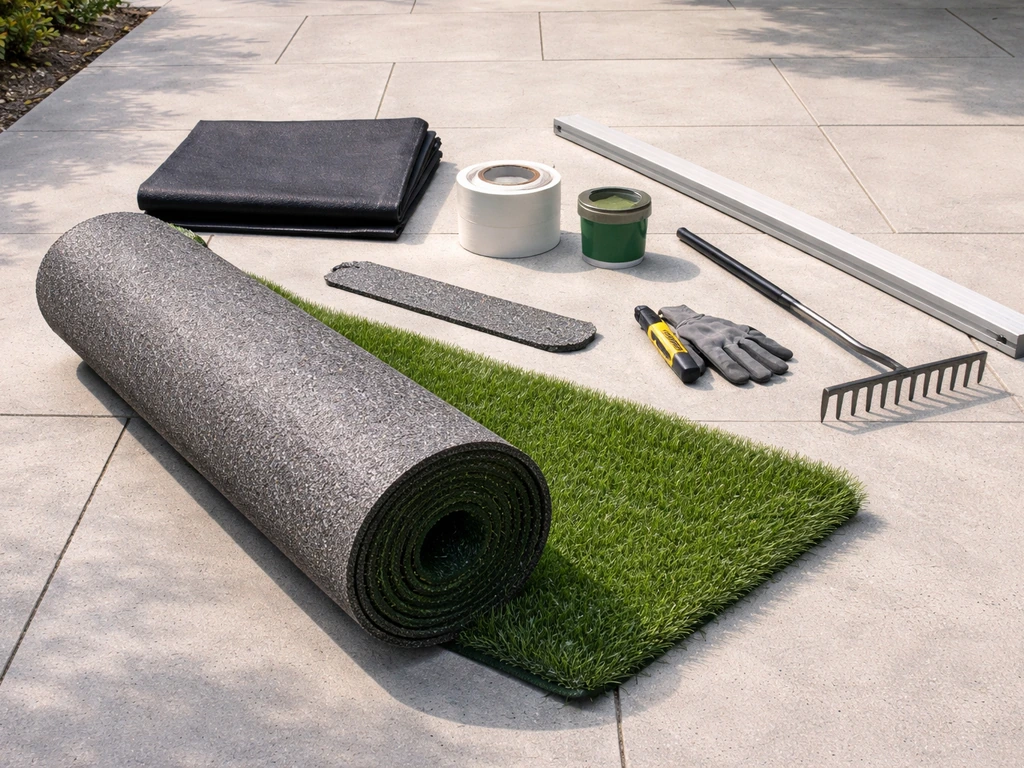
Getting everything on site before you start saves a lot of frustration. Here's what you'll need for a standard patio turf install:
- Artificial grass (with UV-stabilised backing suitable for outdoor use)
- Drainage underlay or shock-pad underlay (especially important on solid concrete)
- Weed membrane/geotextile barrier (if your patio has gaps or joints where weeds push through)
- Seam tape and seam adhesive (for joining two pieces of turf)
- Artificial grass nails or galvanised landscaping staples
- Silica sand infill (helps the fibres stand upright and adds stability)
- Self-levelling compound or flexible exterior filler (for filling low spots)
- Stiff brush or broom (for cleaning and later for brushing infill in)
- Utility knife with spare blades (you'll burn through them)
- Tape measure, chalk line or marker, and straight edge
- Kneeling pad (you'll be on your knees a lot)
- Pressure washer or stiff brush with detergent
On drainage: if you're laying on concrete, a proper drainage panel or drainage tiles placed under the turf makes a big difference. These create a small air gap between the slab and the turf backing so water can move freely to the edges rather than sitting stagnant underneath. It's not strictly essential on a well-sloped slab, but it's cheap insurance against soggy turf and unpleasant smells in summer.
Prep the patio surface properly
This is where most DIY installs go wrong, and it's also the part people want to rush. Don't. An hour of good prep is worth more than two hours of trying to fix a wonky install afterwards.
Clean the surface
Pressure wash the entire patio or scrub it thoroughly with a stiff brush and a diluted outdoor cleaner. You want to remove moss, algae, grease, and loose debris. Moss in particular is a problem: if it's alive under your turf it will keep growing and push the turf up over time. Let the surface dry fully before you move on. On a warm day in late spring that usually means leaving it a few hours.
Fix low spots and uneven areas
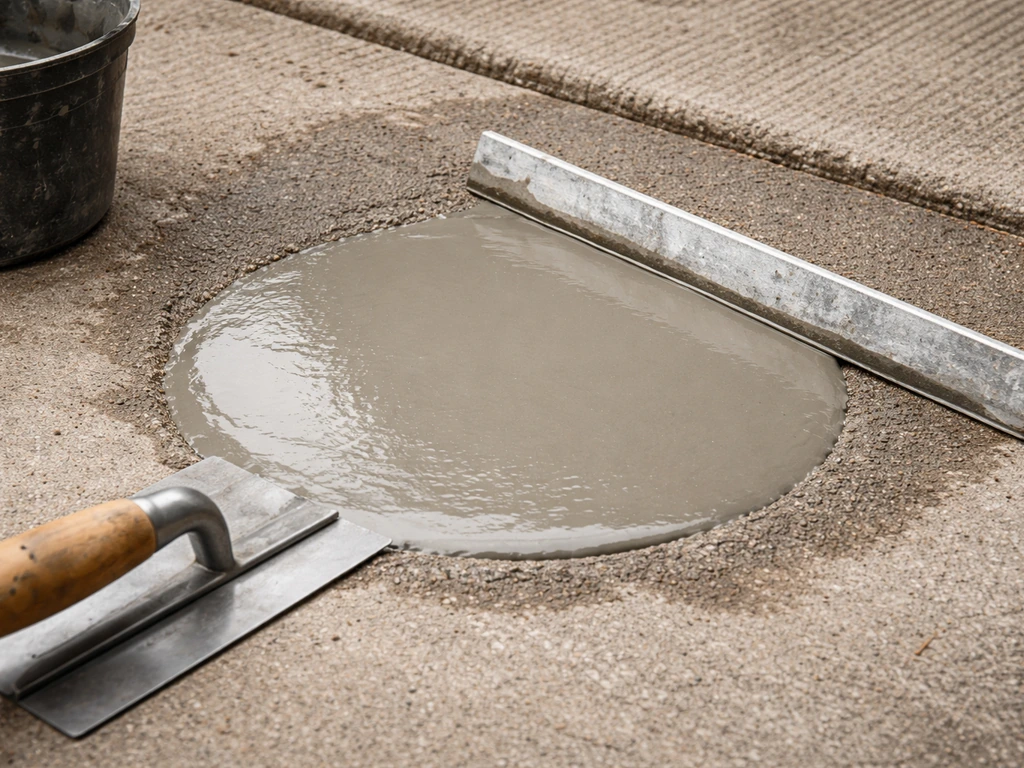
Any dip more than about 5-10mm needs filling. On concrete, use a flexible self-levelling compound or an exterior-grade patching mortar. Mix it up, pour it into the low spot, and spread it flat with a trowel, feathering the edges so there's no abrupt ridge. Let it cure fully before you lay anything on top. For patio slabs that have tilted or shifted slightly, you may be able to re-bed individual slabs, but if the whole surface is significantly unlevel, that's a job that warrants more serious thought before covering it with turf.
Sort out weed and root control
If your patio has open joints between slabs, weeds will eventually push through even under artificial turf. Apply a residual weed killer to any joints or cracks and let it work before you install. You can also point up open joints with a jointing compound to close them off. On a solid concrete slab with no joints, this step is less critical, but it's still worth applying a weed killer to any mossy or vegetated patches before laying your weed membrane.
Lay the underlay and think about drainage
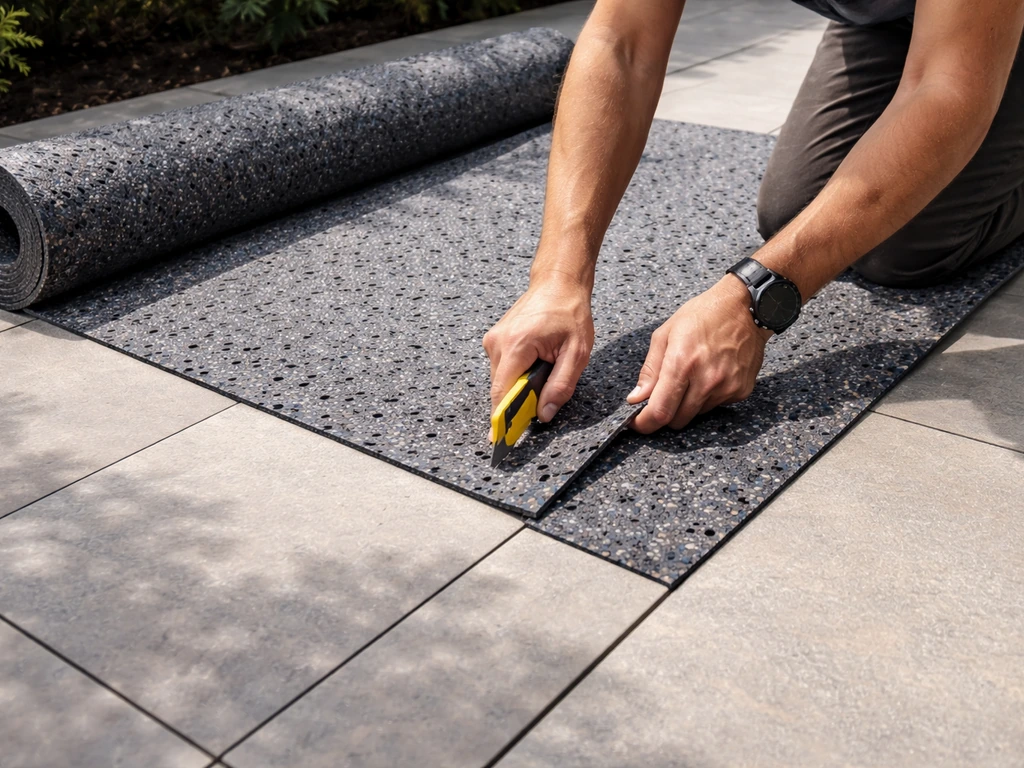
On a patio, you have two main underlay options: a simple weed membrane, or a purpose-made drainage underlay/shock-pad. A weed membrane alone is fine on a slab that drains well and has no joints, but a drainage underlay is a much better choice if your patio is fully solid concrete with limited runoff routes. The drainage underlay lifts the turf slightly off the slab and creates channels for water to escape rather than pooling underneath.
Roll or lay your underlay across the entire patio, cutting it roughly to shape and overlapping joins by at least 150mm. Tape the joins with duct tape or the appropriate joining tape to stop them shifting. At the edges, fold the underlay up slightly against any raised borders or walls, then trim it flush once the turf is in place. If you're using a weed membrane, secure it with a few nails or staples around the perimeter so it doesn't shift when you lay the turf on top.
Before you proceed, do a final drainage check. If your patio slopes slightly toward a drain or an open edge, you're good. If water could pool against a wall or a step, consider whether you need to redirect drainage (sometimes a simple channel or a small gap at the base of a wall is enough) before the turf goes down and you lose easy access.
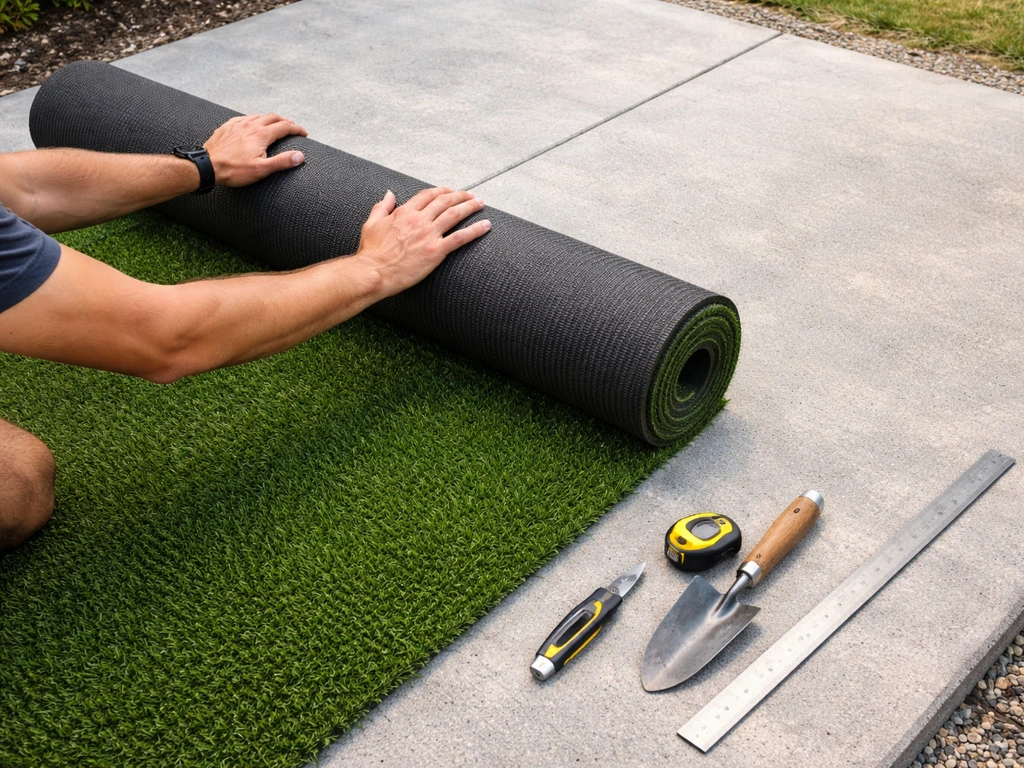
Cut, roll out, and position the fake grass
Before you cut anything, roll the turf out in full sunlight for at least one to two hours. This lets it relax and acclimatise, which means it will lie flat much more easily. Cold, freshly unrolled turf has a memory from being on the roll and will fight you the whole time. A warm afternoon in May is basically perfect for this. Leave the roll in the sun while you finish your surface prep.
Once it's relaxed, position the roll on your patio and roll it out fully. Check which direction the pile leans (run your hand across it and you'll feel the difference). On a patio viewed from one side, the pile should lean away from the main viewing point so the turf looks lush and full from where you'll be sitting. If you have two pieces, both must have the pile running in the same direction.
Leave a generous overhang at every edge (at least 50-100mm) before you do any cutting. Use a chalk line or a straight edge to mark your cut lines on the back of the turf. Cut from the back using a sharp utility knife and a straight piece of timber or metal as a guide. Take your time and use long, smooth strokes rather than short jabbing cuts, which leave a ragged edge. Replace the blade regularly because a blunt blade tears the backing rather than cutting it cleanly.
Joining seams and fitting around edges and obstacles
Getting seams right
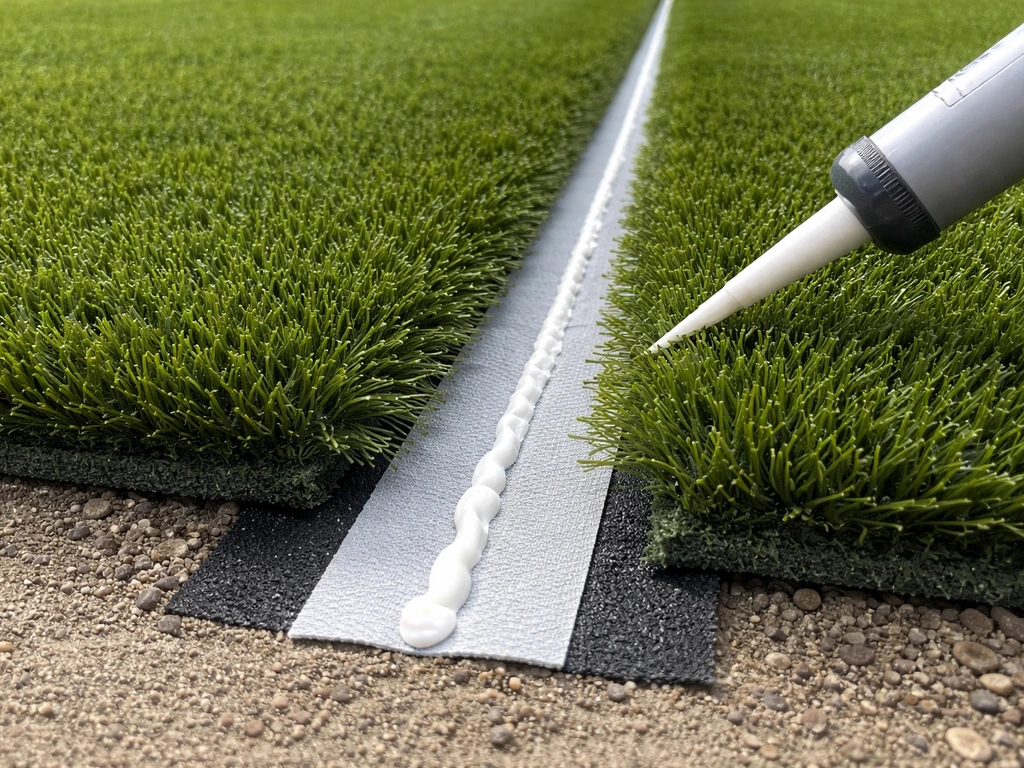
Seams are where most people get nervous, but they're manageable if you're methodical. Position both pieces of turf so they butt together with the pile running the same way. Cut a clean, straight edge on both pieces where they'll meet, using a straight edge and a fresh blade. When you fold the turf back and lay your seam tape in position (adhesive side up), allow a gap of about 2-3mm between the two cut edges when you press them onto the tape. This small gap is deliberate: it prevents the fibres from being crushed at the seam and means the join sits flatter and is far less visible.
Apply the seam adhesive to the tape following the manufacturer's instructions, usually spreading it evenly with a notched spreader. Fold one side of the turf onto the tape, press it firmly, then do the same with the other side. Work from the centre of the seam toward the ends to avoid air pockets. Once it's down, press along the seam firmly by hand or with a roller and leave it to cure before you walk on it. Once cured, brush the fibres over the seam with your hand to hide the join.
Fitting around obstacles and irregular edges
Drain covers, posts, raised planters, and steps all require relief cuts. The technique is to make a series of straight cuts from the edge of the turf inward toward the obstacle, remove the triangular flap, and gradually trim closer until the turf sits flat against the obstacle with no buckling. Work slowly and cut less than you think you need each time: you can always trim more, but you can't add it back. For curved edges on circular planters or rounded borders, make small V-shaped cuts every few centimetres to let the turf conform to the curve.
Secure the turf and finish the perimeter neatly
Once the turf is positioned and any seams are cured, it's time to lock everything in place. On a concrete patio, the most practical method is to use a strong exterior-grade adhesive or heavy-duty landscaping nails/staples around the perimeter. If you're gluing, apply a bead of adhesive to the patio surface about 50mm in from the edge, then press the turf down firmly and hold or weight it until the adhesive grabs.
At the perimeter edge, tuck the turf in so a small allowance (roughly 6-12mm, about a quarter to half an inch) folds under or against the border. This hides the raw backing edge and gives a neat, finished look. Use nails or staples along seamed areas and at any corner for extra security. Space fixings about 150-200mm apart along the edges and closer (every 100mm or so) at corners where lifting is most likely.
Finally, apply your silica sand infill. Spread it evenly across the turf and use a stiff brush or power brush to work it down into the fibres. The infill adds weight that helps keep the turf flat and in place, and it also props the fibres upright so the surface looks better. Most artificial grass piles for patio use need around 3-5kg of silica sand per square metre, though check your turf manufacturer's recommendation. Once the infill is in, give the whole surface a good brush against the pile direction to stand the fibres up, then brush with the pile for a finished look.
Common problems and quick fixes after installation
Even a well-installed lawn can have a few minor issues in the first weeks. Here's how to deal with the most common ones:
| Problem | Likely cause | Fix |
|---|---|---|
| Wrinkles or ripples in the turf | Turf not fully acclimated before laying, or insufficient infill | On a warm day, lift the affected section, allow it to relax fully, reposition and add more infill |
| Edges or corners lifting | Not enough adhesive or fixings at perimeter | Lift the edge, apply fresh exterior adhesive, press down firmly, and add extra nails or staples |
| Visible seam line | Seam gap too large, or pile running in different directions on each piece | Gently tease fibres over the seam with a stiff brush; if the seam gap is too wide, you may need to re-cut and re-tape |
| Water pooling under the turf | Insufficient drainage slope on the slab, or underlay blocking flow | Check that the slab slope is at least 1%; if not, you may need to lift and install a drainage panel underlay |
| Turf feels loose underfoot | Too little infill or fixings too widely spaced | Top up silica sand infill and add extra perimeter fixings |
| Weeds pushing through joints in slabs | Weed membrane not used or gaps in coverage | Apply residual weedkiller around the affected area and seal any open slab joints with jointing compound |
One thing worth mentioning: if you're installing fake grass over an existing patio that has large gaps or a very uneven surface, it's sometimes better to remove and relay the slabs first rather than trying to compensate with underlay. If you also want to know how to install patio tiles over grass, you should remove the turf first and check the base for stability before setting any tiles. Covering up a bad base never ends as well as sorting the base out first.
Your next steps to get started today
- Do the bucket test on your patio today to confirm drainage direction and spot any pooling areas
- Measure your patio at the widest points, add 100mm to each dimension, and sketch a rough plan to work out how many rolls you need
- Order your turf and underlay together so they arrive at the same time
- While you wait, pressure wash the surface and treat any weeds or moss in joints
- Fill any dips with exterior-grade levelling compound and allow to cure
- On installation day, roll the turf out in direct sun for 1-2 hours before you cut anything
- Work through the steps in order: underlay, position turf, seams first, perimeter last, infill to finish
If you're also weighing up other surfacing options for your patio, it's worth knowing that rubber patio tiles and interlocking tiles over grass solve some of the same problems (quick install, no concrete work) but each has different drainage and aesthetic tradeoffs compared to artificial turf. Fake grass tends to win on comfort underfoot and visual warmth, especially for patios used as outdoor living spaces.
FAQ
Can I install fake grass on a patio without removing existing paving or slabs?
Often yes, but only if the slab is stable, mostly flat, and drains properly. If you can lift or rock sections, or you have open movement joints that allow water and debris under the surface, you will likely need to re-bed or repair the patio first rather than relying on underlay and turf. For large uneven areas (more than about 10 mm), filling high spots and patching low spots is usually not enough, because turf still follows the wave and can collect water.
What’s the minimum slope I should have for a patio to avoid puddling under turf?
Aim for at least a 1% fall overall (about 10 mm per metre). If water pools against a wall, step, or planter edge even briefly, treat it as a drainage design issue. In those cases, you may need to redirect flow to an existing drain or create an outlet gap before installing, because once turf and infill are down, easy access for troubleshooting is limited.
Do I need a drainage underlay, or is a basic weed membrane enough?
If your patio is fully sealed concrete with limited runoff routes, drainage underlay (or a shock pad designed for drainage) is the safer choice because it creates lift and channels for escape. A simple weed membrane is usually fine when the patio has good fall and no open joints, but it does not solve the “water has nowhere to go” problem, especially in corners and along walls.
How do I stop smells or dampness under fake grass in summer?
The key is keeping water moving away from the slab. Make sure you clean off moss and algae thoroughly before installation, let the surface dry, and do not trap water by choosing the wrong underlay for a poorly draining patio. Also ensure perimeter edges are secured without blocking natural drainage paths, and confirm you have an outlet toward a drain or off the slab before you cut and fit the turf.
Should I use a residual weed killer if I’m already putting down a weed membrane?
Yes, especially if your patio has cracks, open joints, or small vegetation patches. Weed killers work through existing gaps and reduce the chance of new growth pushing through later, even when you also install a membrane. If your patio is a solid, joint-free slab, the urgency is lower, but treating mossy or vegetated spots before the membrane goes down still helps.
How much should I overhang the turf at the edges before trimming?
Plan on about 50 to 100 mm as a workable overhang while you align and cut. This extra length lets you seat the perimeter tuck neatly (about 6 to 12 mm under a border) and still re-trim if your first cut line is slightly off. If you cut too tight at first, you can end up with visible backing edges or lifting at corners.
What’s the best way to orient the turf pile for a patio viewed from different angles?
Orient the pile so it leans away from the main seating/viewpoint to keep the surface looking dense and consistent. If the patio has two main viewing areas, select a pile direction that minimizes noticeable color change in both areas, and make sure every turf piece uses the same pile direction. If you flip one section, the seam will be much more obvious under shifting daylight.
How do I avoid seam lines looking uneven or raised?
Use matching cut edges and keep the two turf backings aligned, then maintain the small deliberate gap (about 2 to 3 mm) when pressing them onto the seam tape. Spread adhesive evenly on the tape, work from the middle toward the ends to avoid trapped air, and press firmly along the seam after fitting. Brushing fibers over the seam only works well if the seam is cured flat first.
Do I need to brush in infill immediately, and how do I know I used enough silica sand?
Infill should be spread evenly across the full area, then brushed down into the fibers using a stiff brush. Most patio turfs want roughly 3 to 5 kg per square metre, but the manufacturer’s spec can differ by pile height and backing. You will usually see “flattening” and matting if you underfill, and you can also make the turf look dull if you overfill, so measure coverage across a test strip if you’re unsure.
How do I handle cuts around drain covers, pipes, or raised planter bases without creating buckles?
Use relief cuts, make incremental trims (remove less than you think at each step), and aim to let the turf sit fully flat against the obstacle. For rounded items, small V-shaped cuts every few centimetres help it conform without stressing the backing. If you see wrinkling during test fitting, stop and re-cut slightly closer, because once secured and filled, wrinkles tend to return.
What’s the recommended fixing method, nails, staples, or adhesive, for the perimeter on concrete?
For concrete patios, heavy-duty landscaping nails or staples are commonly used, especially along seams and corners where lifting starts. Adhesive can work well too, but apply it in controlled beads and allow it to grab before you walk on the turf. Avoid relying on fixings in the middle of the patio, focus on edges, corners, and around obstacles, and keep fixing spacing roughly 150 to 200 mm along edges (closer near corners).
What early problems should I check in the first few weeks after installing?
Look for areas that collect water, corners that start to lift, and seams that might have a slight gap or trapped air. Also check that infill has settled evenly, then brush once after it settles (lightly, in the pile direction) to restore an upright look. If moss shows up through perimeter cracks, it usually means there was an untreated gap or ongoing drainage problem at those edges.