Laying a slate patio comes down to three things done right: a solid, well-drained base, a level setting bed, and careful tile placement with proper jointing and sealing. Get those three right and your slate will look great and last for decades. Rush any of them and you'll be lifting slabs within a couple of years. This guide walks through every stage in order, from marking out the footprint to sealing the finished surface, and it covers both smaller slate tiles and larger slate slabs since the process differs in a few important ways. For a complete step-by-step walkthrough, follow these slate patio installation instructions from marking out the footprint through sealing This guide walks through every stage in order. If you want the step-by-step process, follow this guide on how to install a slate patio from planning and base prep through laying and finishing.
How to Lay a Slate Patio: Step by Step DIY Guide

Tools and materials you'll need before you start
Getting everything on site before you begin saves a huge amount of frustration. Here's what you'll need for a typical slate patio project.
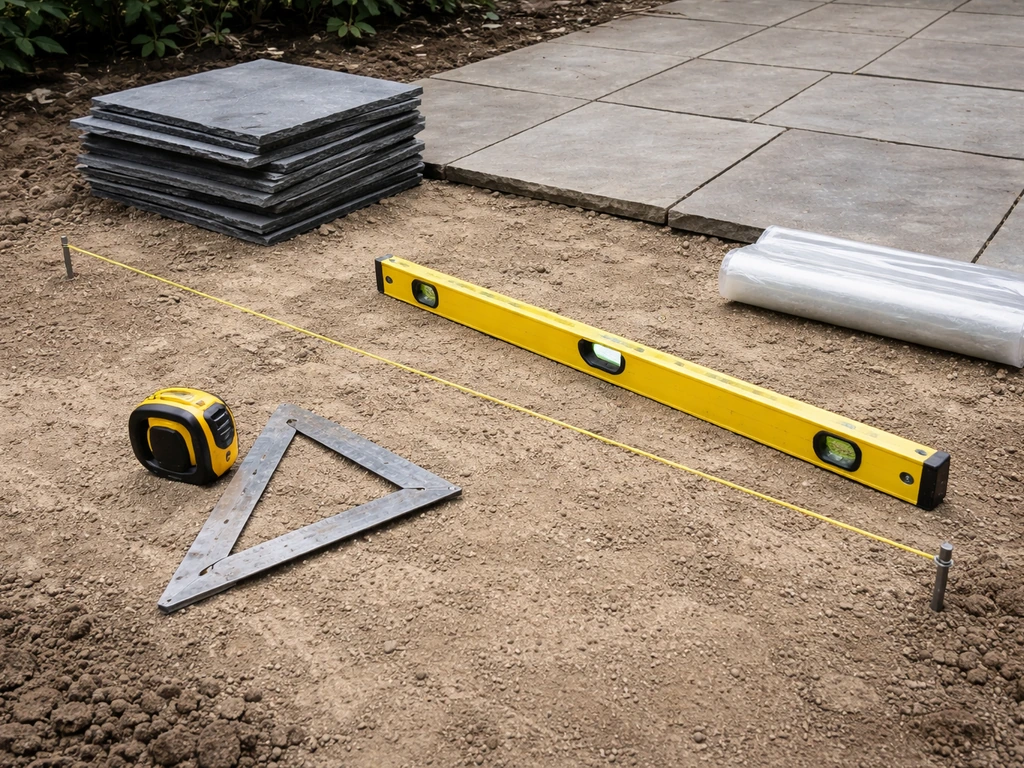
- Tape measure, builder's square, and string lines with steel pins (12mm road pins work well)
- Long spirit level (1.8m or longer) and a shorter torpedo level for individual tiles
- Rubber mallet and club hammer
- Angle grinder with a diamond blade (for cutting slate) or a wet tile saw for cleaner cuts
- Bolster chisel for any manual adjustments
- Plate compactor (hire one for a day if you don't own it)
- Wheelbarrow, shovel, and a stiff-bristled broom
- Pointing trowel, float, and bucket for mixing
- Type 1 MOT sub-base material (hardcore)
- Sharp sand and cement (for a semi-dry mortar bed) or a specialist flexible tile adhesive for smaller tiles
- Tile spacers (3mm or 5mm depending on joint width preference)
- Edging restraints or treated timber shuttering
- Jointing compound, mortar, or polymeric sand depending on joint style
- Slate-specific penetrating sealer
Plan and measure your slate patio layout
Start on paper before you touch a spade. Sketch your patio shape and note the dimensions. If you're working off a house wall, that wall becomes your reference line. The key goal at this stage is to work out how your slate tiles or slabs will fit across the space so you minimize awkward slivers at the edges, which are weak and look terrible. Divide your patio width by the tile width plus one joint (say a 600mm slab plus a 5mm joint = 605mm) and see what remainder you end up with. If you're left with less than half a tile, shift your layout by half a tile so the cut pieces at both edges are bigger and more balanced.
For setting out on the ground, bang two steel road pins into the soil at the corners of one edge and run a taut string line between them. Check it's square to the house wall using the 3-4-5 triangle method: measure 3 units along the wall, 4 units out along your string line, and the diagonal between those two points should be exactly 5 units. Use the same units (metres or feet, doesn't matter) and you've got a perfect right angle. Run a second string line at 90 degrees to create your second edge. Pavingexpert recommends checking string lines for sag if your run is long, so pin at roughly 5m intervals on longer spans to keep the line accurate and honest.
Mark out the full perimeter with pegs or spray paint so you know exactly where to excavate. Add at least 150mm beyond your finished patio edge on each side to give yourself working room for edging restraints. Also decide now where you want the drainage slope to fall. The rule is a minimum fall of 1:60, which works out to roughly 17mm drop per metre. Water should fall away from the house, toward a lawn, border, or drain. Mark your datum (highest point, usually nearest the house wall) and note your target finished height here.
Choose slate materials and understand thickness and finishes
Slate for patios comes in two main formats and it's worth understanding both before you buy, because the installation method does change slightly between them.
Slate tiles vs slate slabs
Slate tiles are typically 10mm to 15mm thick and come in regular sizes like 300x300mm, 400x400mm, or 600x300mm. These are easier to cut, lighter to handle, and are usually laid on a flexible adhesive bed over a concrete base, much like indoor floor tiles. Slate slabs (sometimes called flagstones) are generally 25mm to 50mm thick, much heavier, and are bedded on a semi-dry mortar mix directly over compacted sub-base. The thicker slabs are more forgiving on irregular ground and feel more substantial underfoot, but they need more skill and effort to level.
| Feature | Slate Tiles (10-15mm) | Slate Slabs (25-50mm) |
|---|---|---|
| Typical size | 300x300 to 600x300mm | 600x600mm to 900x600mm and irregular |
| Weight per m² | Approx 25-40kg | Approx 60-120kg |
| Setting method | Flexible adhesive on concrete | Semi-dry mortar on compacted MOT |
| Cutting difficulty | Easier with angle grinder or wet saw | Needs angle grinder, more passes |
| Best for | Smaller patios, neater finishes | Larger patios, rustic or natural look |
| Slip resistance | Check finish carefully | Natural riven surface is usually good |
On finish, slate comes either riven (split naturally along its cleavage planes, giving an uneven textured surface) or honed or sawn (smooth and flat). For outdoors, riven is almost always the better choice because it has natural grip. Honed slate can become very slippery when wet. If you love the look of smooth slate, at minimum apply a non-slip sealer and accept you'll need to re-apply it regularly. Also check the slip resistance rating (PEI or R rating) before buying if the supplier offers it. R11 or above is recommended for external use.
Thickness variation is worth mentioning, especially with natural slate slabs. Unlike manufactured concrete flags, natural slate slabs from the same pack can vary in thickness by 5mm to 15mm. This is normal but it means you'll need to adjust your mortar bed depth under each slab individually, which slows the job down. Budget Brazilian slate, Indian slate, and Welsh slate all behave slightly differently in terms of consistency. Welsh and higher-grade Indian slate tends to be more consistent. Cheaper material often has more variation and can be more brittle to cut.
Site prep: remove, excavate, and build the correct base

This is the part most people rush and then regret. A good slate patio that lasts 20 years is built almost entirely on what happens before the first slate goes down. I'd go as far as saying 80% of all failed patios come down to a bad base.
How deep to excavate
For a standard slate slab patio on firm soil, you need to excavate to a total depth that accommodates: 100-150mm of compacted MOT Type 1 sub-base, plus 30-50mm of semi-dry mortar bed (for slabs), plus the thickness of the slate itself, plus a small allowance so the finished surface sits at or just below surrounding ground level. On soft or clay-heavy soils, increase the MOT layer to 200mm. For slate tiles on a concrete base, you also need to factor in the concrete slab (100mm minimum for a patio, 150mm if you get vehicle overhang). Total dig depth for a concrete-base approach is typically 300mm or more.
Strip all topsoil and vegetation. Topsoil is not a suitable sub-grade for any patio because it compresses and breaks down over time. Once you've hit firm subsoil, rake level and compact it with your plate compactor. If you're on clay soil, the compacted subsoil layer alone isn't enough because clay moves with moisture changes. In clay conditions, a thicker MOT layer (200mm minimum) plus a geotextile membrane laid between the subsoil and the MOT is a really good idea. The membrane prevents clay migrating up into your sub-base and weakening it over time.
Laying the sub-base
Tip in your MOT Type 1 hardcore in 75mm layers and compact each one before adding more. Don't try to compact 150mm in one go, you won't get it properly consolidated in the middle and it'll settle later. Once compacted, the sub-base surface should be firm, stable, and already following your intended drainage slope. Use a long straight-edge and level to check. This slope is much easier to build in at this stage than later, so take your time here.
If you're going the concrete-base route for slate tiles, pour and level your concrete slab now (a mix of 1:2:4 cement:sharp sand:gravel, approximately 100mm deep for a pedestrian patio). Let it cure for at least 3 to 7 days before tiling. If you're going straight to a mortar bed on the MOT (the slab approach), you can move forward once the MOT is properly compacted.
Build the bed and borders: edging, sand and cement layer, and spacers
Install your edging restraints first
Before any bedding goes down, fix your edging restraints at the perimeter. These stop the whole patio slowly spreading outward over time, which is especially important without a concrete base. You can use treated timber shuttering pegged firmly, purpose-made plastic or steel landscape edging, or a haunched concrete kerb. The top of the edging should be at your target finished surface height. Use a long spirit level and your string lines to get these level and sloped correctly. Getting this right now makes everything else easier.
Mixing and laying the mortar bed (for slabs)
For large slate slabs on MOT, use a semi-dry mortar mix: 4 parts sharp sand to 1 part cement, mixed dry until it's roughly the consistency of damp sand that just holds its shape when you squeeze a handful. Don't add too much water. This mix is stiffer than ordinary mortar, which gives you more control when bedding heavy slabs and prevents slabs sinking too far. Lay your semi-dry mortar bed to roughly 30-50mm depth across an area of about 1 square metre at a time. Screed it roughly level using a notched float or by running a straight-edge over temporary level battens.
For slate tiles going onto a concrete base, use a flexible polymer-modified tile adhesive rather than ordinary sand and cement. This is important because standard rigid mortar can crack and debond on a concrete base that moves slightly with temperature changes. Apply the adhesive to both the base (back-buttering) and the tile, using a notched trowel to leave ridges. Full coverage underneath each tile is critical for outdoor use. Voids under tiles cause them to crack under foot traffic.
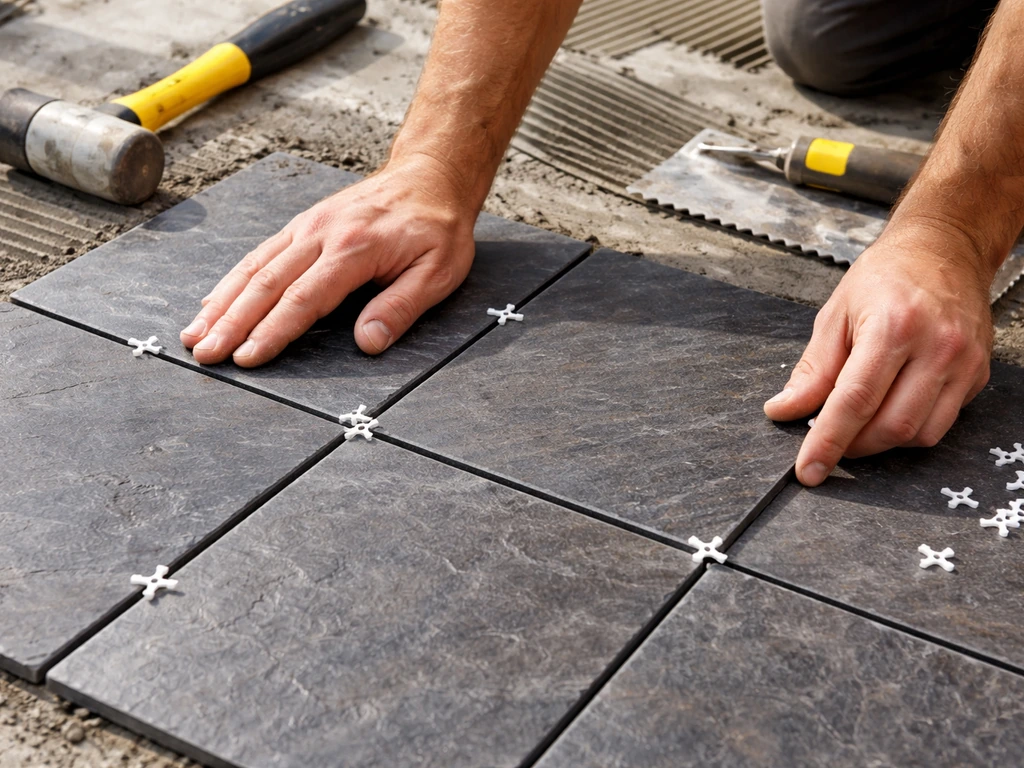
Using spacers
Whether you're laying tiles or slabs, consistent joint width matters for the finished look and for structural stability. For tiles, plastic spacers in 3mm or 5mm sizes keep joints even. For large slabs, you can use off-cuts of timber or pieces of slate as temporary spacers. A 10mm joint is common for larger slabs. Whatever you choose, be consistent. Inconsistent joints are one of those things that look minor but that you'll notice every time you look at your patio.
Set and level slate tiles and slabs: cutting, staggering, and alignment
Setting out your first row
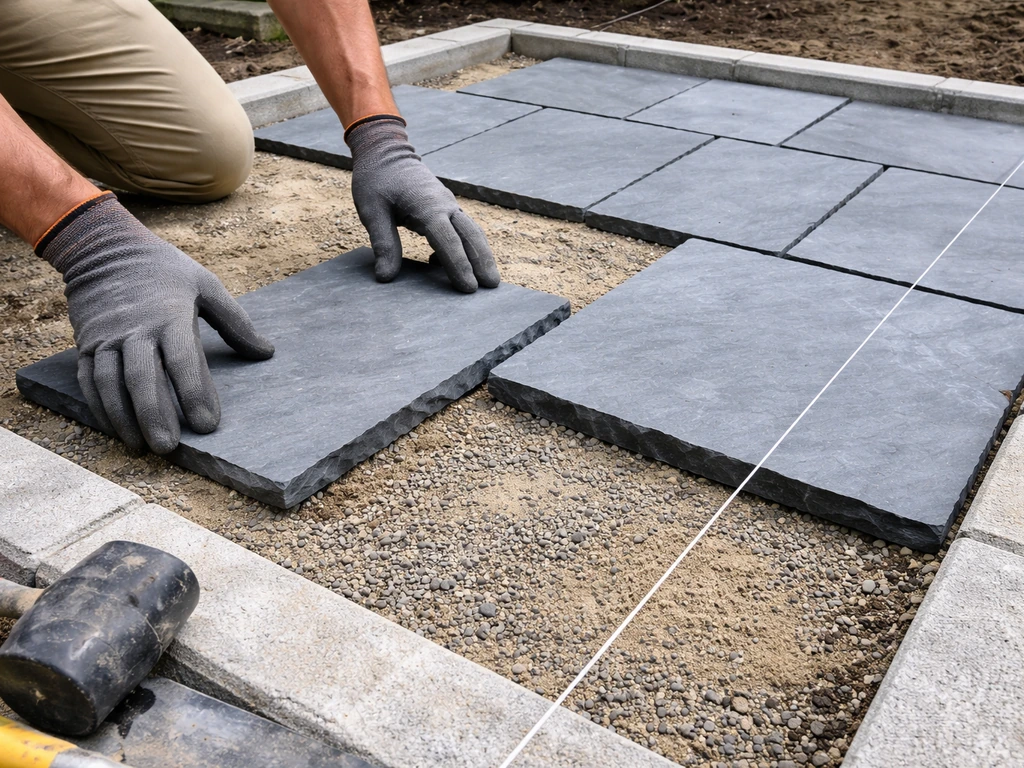
Start at the house wall or the most visible straight edge and work outward. Set your string lines at finished surface height along both axes, checking constantly against your datum level mark. Lay your first slab or tile and tap it gently into the bed with a rubber mallet until it's at the correct height and slope. Check it with your spirit level, including the fall direction. Adjust by adding or removing a little mortar or adhesive under it. Once it's correct, move to the next one.
For large slabs, a five-point bedding technique is sometimes used: a central blob of mortar and one blob near each corner, plus mortar squeezed under and adjusted as the slab is set. This works for slabs with thickness variation because it lets you compensate. However, for best results especially in wet climates, full solid bedding (a continuous mortar bed rather than blobs) gives better support and prevents water pooling in voids under the slab. Full bedding is harder but worth the effort.
Staggering joints and bond patterns
Running bond (where each row is offset by half a tile, like brickwork) is the most popular pattern for rectangular tiles and is structurally stronger than a grid pattern because it avoids continuous long joints across the surface. For irregular slate pieces, you're essentially working like a puzzle, fitting pieces together with roughly consistent joint gaps. Whatever pattern you choose, avoid four-way cross joints if you can. They're a weak point and more likely to crack or work loose.
Cutting slate to fit
Measure and mark each cut piece individually rather than assuming all cuts are identical. Walls are rarely perfectly straight and gaps accumulate. Mark the cut line with a pencil or chalk, score first with your angle grinder, and make the full cut in one or two steady passes. For curved cuts around obstacles like manhole covers or pipes, make a series of straight relief cuts to remove material in sections, then clean up the curve. Always wear eye protection and a dust mask when cutting slate. An angle grinder cutting dry slate throws sharp fragments and a significant amount of silica dust.
When you're planning cut pieces near edges, remember to blank" rel="noopener noreferrer">allow for the joint gap between the cut piece and its neighbor. This is easy to forget, and Pavingexpert specifically flags it as a source of errors: if you forget the joint width when marking a cut, you'll end up with a piece that's too wide, which then has to be re-cut. Measure to the face of the adjacent tile, subtract your joint width, and that's your cut dimension.
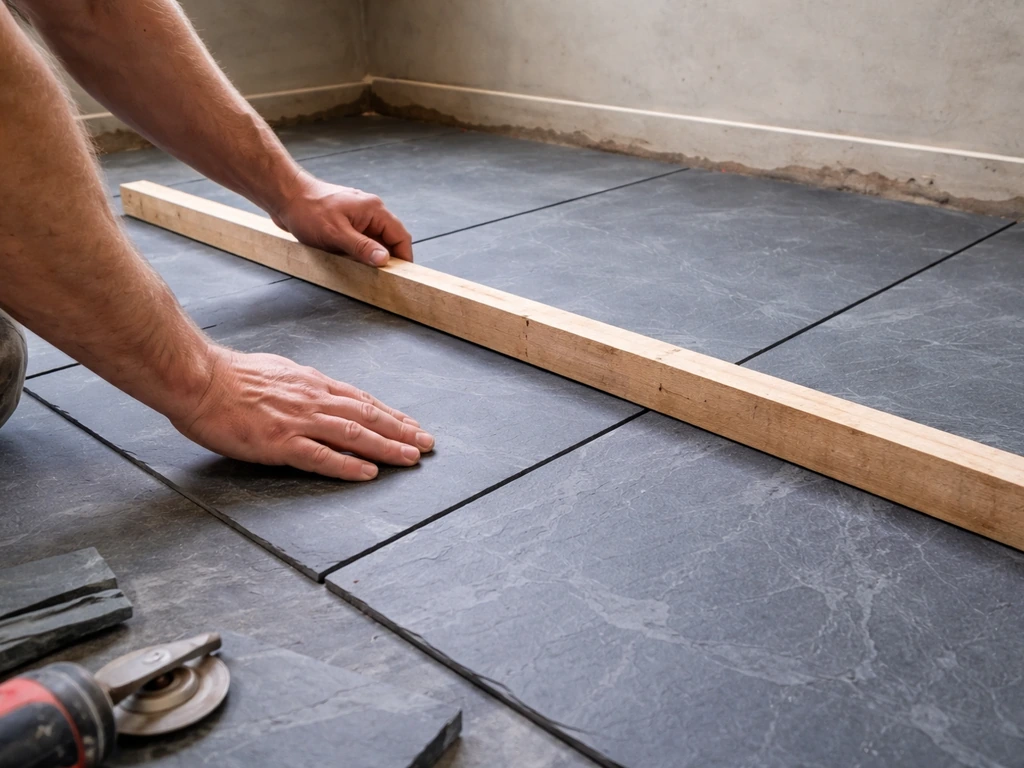
Checking levels as you go
Check each tile or slab for level in two directions and also check it's flush with its neighbors. A lipping rule (or just a straight piece of timber) laid across two adjacent slabs will show if one sits higher than the other. A lip of more than 2mm between adjacent slabs is a trip hazard and looks rough. Adjust while the mortar or adhesive is still fresh. Once mortar has started to go off (after about 45-60 minutes depending on temperature), you'll struggle to re-bed without pulling the piece out and starting again.
Common installation mistakes to avoid
- Laying on a slope that falls toward the house instead of away from it
- Under-excavating and leaving topsoil in the sub-base
- Not compacting the MOT in layers, which leads to settlement later
- Point-bedding slabs on five blobs only, leaving voids that cause cracking
- Skipping spacers and ending up with joints that taper and look amateurish
- Forgetting joint allowance when measuring cuts, causing re-work
- Rushing and checking levels too infrequently, finding problems only after the mortar has set
- Walking on freshly bedded slabs before they've had time to bond
Grouting, jointing, and sealing to protect the patio
Wait before you grout
Don't rush into jointing. Let the bedding mortar or adhesive cure fully first: for mortar this typically means 24 to 48 hours in dry warm weather, longer in cold or damp conditions. If you start pushing grout into joints before the bed has set, you risk disturbing the slabs and creating lippage. While you're waiting, you can remove any spacers and clear debris from the joints.
Choosing your jointing material
For wide joints (10mm or more on slabs), a dry mix of 3:1 fine sharp sand to cement brushed into the joints and then watered in is a traditional and reliable method. Use a watering can with a rose head to dampen the joints gently without washing the mix out. For narrower joints on tiles (3-5mm), use a purpose-made exterior tile grout. Choose a flexible, frost-resistant grout rated for outdoor use. Avoid standard interior grout outdoors: it cracks and crumbles within a season or two.
Polymeric jointing sand is another option for slabs, particularly if you want excellent weed resistance and a clean finish. It's brushed in dry, then activated with water which causes it to harden slightly and resist washing out. It's more expensive than a sand and cement mix but much easier to apply and very effective at suppressing weeds, especially in wider joints where traditional mortar can be slow.
Weed suppression
Fully pointed joints with solid mortar or polymeric sand are your best defence against weeds. Gaps in pointing let seeds in and roots do serious damage to the structure over time. If you're worried about ongoing weed pressure, lay a geotextile membrane over the compacted subsoil before your sub-base goes in. It won't eliminate weeds through well-pointed joints, but it prevents roots from pushing up from below and destabilizing the base.
Sealing your slate
Slate is naturally dense and less porous than sandstone or limestone, but it still benefits enormously from sealing, especially outdoors where it's exposed to frost, moss, algae, and staining from leaves and garden furniture. Use a penetrating impregnator sealer designed specifically for slate (not a surface coating sealer, which peels). Apply it once the grout has fully cured, which usually means waiting around 7 days after jointing. Clean the surface thoroughly first with a slate cleaner or diluted acid wash if there's any efflorescence, then apply the sealer in thin coats with a soft cloth or low-pressure sprayer. Two coats are better than one.
A good penetrating sealer won't dramatically change the colour of the slate, though some 'colour enhancing' sealers will deepen the tone if that's the look you want. In terms of longevity, expect to re-seal every 3-5 years depending on weather exposure and foot traffic. Skipping the sealer entirely is one of the most common mistakes on new patios and it leads to staining, frost damage spalling, and green algae growth that's much harder to deal with later.
Finishing up and what to do if things go wrong
Once sealed, leave the patio for at least 48 hours before bringing furniture onto it. Clean any grout haze off the surface with a damp sponge while it's still fresh, because hardened grout smears on slate are difficult to remove without potentially marking the surface. After the first winter, inspect the joints for any cracking or movement and re-point where needed. A little maintenance in year one tends to prevent bigger problems later.
If a slab sinks or rocks after a few months, it almost always means it wasn't fully supported in the bed. The fix is to lift it carefully, add fresh mortar to fill the voids, and reset it. If multiple slabs are moving, that usually points to a sub-base problem: either it wasn't deep enough, wasn't compacted properly, or the soil underneath is too soft. At that point, the honest answer is that part of the patio needs to come up and be rebuilt from the base. It's not a fun job but it's better than a patio that's a trip hazard.
For anyone looking at more complex scenarios, like laying slate without a concrete base, working on a significant slope, or dealing with drainage challenges, those variations deserve their own treatment. The core process described here gives you a solid foundation (literally) for any of those situations. If you're tackling a very large area, uneven ground, or a project that connects to existing drainage infrastructure, it's worth talking to a landscaping professional for at least a consultation before you start excavating.
FAQ
How do I tell if my semi-dry mortar mix is the right consistency for slate slabs?
For a slab patio, the semi-dry mortar should be stiff enough that it holds its shape when squeezed, but not wet enough that it slumps. If it’s too wet, slabs can creep or squeeze out, leading to voids and early rocking. If you’re unsure, do a quick test mix in a bucket and check the consistency against your intended placement.
Can I lay a slate patio on uneven ground or a gentle slope?
Yes, but treat it like a drainage and height problem. You still need a minimum fall away from the house (around 1:60), and you may have to step the sub-base heights or increase the thickness of the mortar bed in the low areas to keep slate faces consistent. Don’t rely on the tiles or slabs to “correct” the slope, they will end up lipped or under-supported.
What’s the biggest mistake with patio edging (and do I really need restraints)?
Install edging restraints before you start bedding, not after. If you skip this, the paving can spread outward as soil and frost cycles move the sub-base, which causes joint widening and lippage. Use edging that’s anchored firmly at the correct finished height, because later “tweaks” are difficult once mortar or adhesive has set.
I’m cutting slabs or tiles near a wall, how do I prevent ending up without space for the joint?
For cut slate near walls or fixed edges, you must measure for the joint gap, then cut to that adjusted size. A common failure is cutting to the apparent wall dimension, which leaves no clearance for the joint. Your fix is to re-measure to the face of the neighboring slate and subtract the chosen joint width before cutting.
What should I do if natural slate slabs from the same batch vary in thickness a lot?
Don’t assume matching thickness from one pack means everything is level. Natural slate slabs can vary, so plan for adjusting mortar bed thickness under each individual slab. If you find multiple slabs out of plane, lift and re-bed them, rather than trying to flatten by forcing slabs down, which can trap water voids underneath.
My slate patio looks patchy or dark after sealing. What usually causes that?
If you see algae staining or a darker patch after sealing, it’s often trapped moisture from poor slope or incomplete curing before sealer. Leave the patio to dry longer before applying any next coat, then inspect the joints and drainage direction. If water is pooling, you usually need base correction rather than more sealer.
Is the adhesive vs mortar-bed method still OK if the patio will sometimes have a car parked nearby?
If the patio is pedestrian only, a polymer-modified tile adhesive approach is usually appropriate for tiles on concrete. If you plan vehicle overrun or heavy point loads, consider a deeper, correctly engineered base and stronger bedding support, because standard adhesive or shallow concrete can crack and debond. When in doubt, design for load before you choose the setting method.
Can I lay slate patio slabs directly onto sand instead of MOT and mortar?
Not automatically. You should avoid laying slate directly onto compacted sand alone, because sand shifts and doesn’t provide a stable, drainage-safe support layer. The stable options described are a compacted MOT Type 1 sub-base with mortar bedding for slabs, or a properly cured concrete base with flexible adhesive for tiles.
How long should I wait before jointing, and how do I avoid moving slabs when grouting?
Before grouting, remove spacer debris and make sure joints are clean and not smeared with bedding mortar. Start jointing only after the bedding has set, typically a day or two for mortar in dry warm conditions. If you grout too early, you can disturb the slabs and lock in lippage that’s hard to correct.
What grout or jointing material should I choose for outdoor slate (especially in freezing weather)?
Use a frost-resistant exterior grout rated for outdoor use. Don’t substitute interior grout because it can crack and degrade quickly under freeze-thaw cycles, which then lets water and weeds in. For slab patios with wider joints, consider polymeric sand for weed resistance and a cleaner finish, but still ensure solid, well-pointed joints.
How do I know when my slate sealer has worn off and needs reapplying?
For re-sealing timing, weather exposure and foot traffic matter. A good rule is to plan re-sealing every 3 to 5 years, but watch the water behavior: if water stops beading and starts soaking in, it’s time. If you see moss or staining before that, it can also indicate surface drainage issues, not only worn sealer.
What’s the correct way to fix a rocking or sinking slate slab after installation?
If a slab rocks, lift it and add fresh mortar to eliminate the voids, then re-set it at the correct height. If multiple slabs move, don’t keep chasing individual slabs, it usually points to insufficient sub-base depth, poor compaction, or unstable soil. In that case, the patio typically needs a base rebuild to be truly safe.
How should I handle curved or awkward cuts around obstacles like manholes or pipes?
Yes, for irregular edges and obstacles, relief cuts work better than trying to force one large arc cut. Make several straight cuts to remove material in sections, then clean up the curve so the slate sits without stress. Always allow for the joint width at the obstacle, otherwise the piece can end up too tight and cause cracking during movement.