
Lay patio edging blocks by excavating a trench around your patio perimeter to the correct depth, compacting the base, then either bedding the blocks dry on compacted aggregate or securing them with mortar or construction adhesive depending on the load and material. Getting the levels right before a single block goes down is the real skill here, and it saves you hours of troubleshooting later. This guide walks you through every decision and every step, from choosing the right edging type to finishing the joints and knowing when the job is genuinely beyond a first-time DIYer.
How to Lay Patio Edging Blocks: Step-by-Step DIY Guide

Clara Farrell
10 Aug 2026
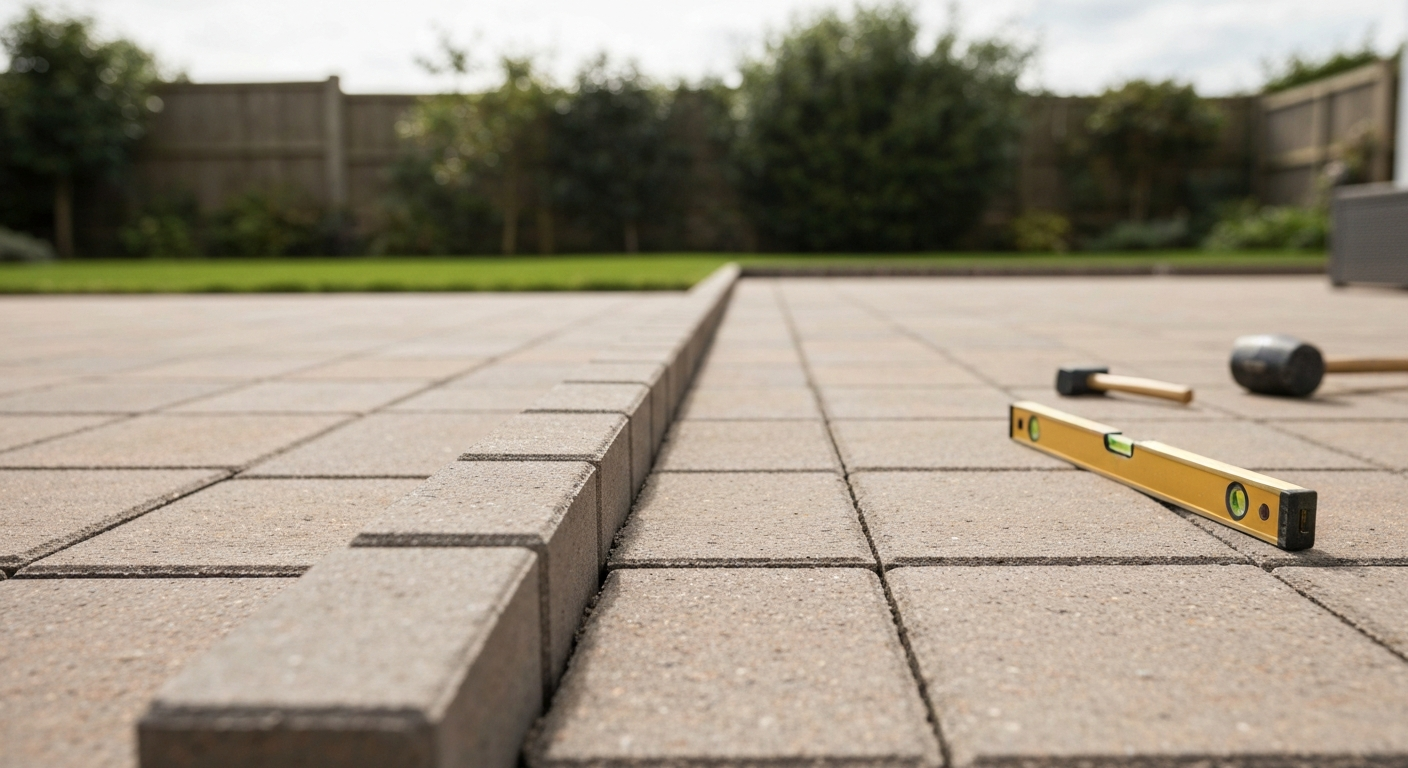
What you're getting into: scope, skill level and time
Installing patio edging blocks is a manageable first DIY project for most homeowners. You don't need specialist trade skills, but you do need patience with levelling, a willingness to dig a proper trench, and the physical stamina for compaction work. A standard garden patio perimeter of around 15 to 20 metres typically takes one full day to prep and install edging, assuming the ground isn't heavily compacted clay or riddled with roots. Factor in a second day for mortar to cure if you're using the bonded method.
On the permits question: most residential garden patios don't require planning permission in the UK or a building permit in the US, but there are exceptions. In the UK, if your patio is adjacent to a listed building, in a conservation area, or the total impermeable area of your front garden exceeds 5 square metres without adequate drainage, you may need to check with your local planning authority. In the US, requirements vary by municipality, so a quick call to your local building department before you start is always worth it. For a straightforward back garden patio with edging blocks, you're almost certainly fine to proceed.
Choosing your edging type: concrete, brick, stone or timber sleepers
The edging type you choose affects everything from how you install it to how long it lasts, so it's worth a few minutes of thought before you order anything. Here's an honest breakdown of the main options.
| Edging type | Pros | Cons | Best for |
|---|---|---|---|
| Concrete edging blocks / kerbs | Durable, inexpensive, consistent dimensions, widely available | Can look utilitarian; limited styles; heavy to handle alone | Formal patios, driveways, areas needing strong restraint |
| Brick edging | Attractive, blends with brick-built homes, good range of colours | Can crack in hard freeze-thaw if not fully bedded; needs cutting for corners | Traditional and cottage-garden styles |
| Natural or reconstituted stone blocks | Premium look, very durable, wide design range | More expensive; heavier; some need wet cutting to avoid chipping | High-end patios, period properties, feature edges |
| Timber sleepers | Warm natural look, easy to cut with a saw, good for curves and raised beds | Rot over time even when treated; not ideal for direct mortar contact; can move seasonally | Informal gardens, raised patio areas, budget installs |
My honest recommendation: for a hard-wearing patio that will last 15 to 20 years without much intervention, concrete or reconstituted stone blocks are the most practical choice. If aesthetics are the priority and you're prepared to do a little more careful cutting and bedding, brick or natural stone look fantastic. Timber sleepers are a completely different installation method, and if you're considering that route, the process for fixing sleepers as patio edging is covered in a dedicated guide on this site. For step-by-step instructions on how to lay sleepers for patio edging, see our dedicated guide.
Materials and tools you'll need
| Item | Specification / notes | Qty guide (10m perimeter) |
|---|---|---|
| Patio edging blocks or kerbs | Check manufacturer datasheets (Marshalls, Tobermore, Pavestone, etc.) for product-specific dims | Measure perimeter + 10% waste |
| Compacted road-base / MOT Type 1 aggregate | Dense-graded, 4–8" (100–200mm) depth; deeper in freeze-thaw zones | Calculate by volume (length × width × depth) |
| Bedding sand (for dry method) | Sharp sand, screeded to ~1" (25mm) | 1 bulk bag per ~5m² typically |
| Ready-mix mortar or bagged mortar mix (for bonded method) | 1:4 or 1:5 cement:sharp sand, or use pre-bagged mix | 1 bag per ~2–3 linear metres of edging |
| Construction adhesive (bonded method alternative) | Exterior-grade polyurethane or epoxy-based adhesive | As per manufacturer guidance |
| Geotextile membrane | Woven or non-woven, to prevent aggregate migration | Roll to match excavated area |
| Plastc or metal paver edge restraints (optional) | e.g., Techniseal rigid paver edging — spikes at 16–20" for patios, 8–12" for driveways | As required |
| Polymeric jointing sand | Use per manufacturer TDS; requires dry surface and careful mist activation | Coverage per product TDS |
| Diamond cutting blade | Continuous rim for porcelain/stone; segmented or turbo for concrete/brick — always match Max RPM to tool | 1–2 blades |
| Angle grinder (or circular saw) | Angle grinder for most edging cuts; circular saw with masonry blade for sleepers and straight cuts — see cutting notes | 1 tool |
| Plate compactor (hired) | For compacting sub-base; a hand tamper works for very small areas | Hire for the day |
| Builder's line and pins | For setting out straight edging runs | 2 pins + line |
| Spirit level (1.2m / 4ft) | For checking levels along edging runs | 1 |
| Rubber mallet | For seating blocks without cracking | 1 |
| Tape measure | 5m minimum | 1 |
| Spade, mattock, wheelbarrow | Excavation and moving aggregate | As available |
| Safety PPE | Safety glasses, dust mask (P2/FFP2 minimum — P3/FFP3 or powered RPE for extended cutting), hearing protection, gloves, steel-toecap boots | Per person |
Practical checklists
Before you start (pre-start checklist)
- Check for underground utilities (gas, water, electric, drainage) before any digging — call your utility provider or use a cable/pipe detector
- Confirm whether planning permission or a permit is required for your site
- Measure the patio perimeter accurately and order materials with at least 10% extra for cuts and waste
- Check manufacturer installation guides for your specific edging product before ordering (Marshalls, Tobermore and Pavestone all publish free technical downloads)
- Confirm your cutting method: do you have access to a wet-cutting saw, or will you use an angle grinder with a diamond blade and water suppression?
- Check the weather: mortar should not be laid if frost is forecast within 24 hours, or in sustained rain
- Arrange skip or disposal route for excavated soil and waste
- Hire plate compactor if needed
On the day checklist
- Put on full PPE before any cutting or compaction begins
- Set out your string lines and confirm levels before excavating
- Excavate trench before mixing any mortar
- Compact sub-base in lifts (layers), not all at once
- Check the level and alignment of every block before moving to the next
- Keep mortar covered and workable — discard any that's begun to set
- Have a bucket of water and a sponge ready for cleaning mortar off block faces before it cures
Completion checklist
- All edging blocks level and correctly aligned with string line
- Drainage fall confirmed (minimum 1: 80, roughly 12mm per metre away from the house)
- Joints filled and finished per method chosen (mortar pointing or jointing sand)
- No mortar smears on exposed block faces
- Sub-base material backfilled on the outer edge of the edging trench and compacted
- All cut edges neat and properly seated
- Site cleared and waste disposed of
Measuring and laying out your lines
Good layout work is the difference between edging that looks intentional and edging that wanders. Start by driving timber stakes or line pins at each corner of your patio, then run a builder's line tightly between them at the finished height of the edging. This is your reference line for everything that follows.
Set your drainage fall into the line from the start. Water must drain away from your house at a minimum gradient of 1:80, which is about 12mm drop for every metre of run. So if your edging run is 3 metres long heading away from the house, the far end of your line should sit 36mm lower than the near end. Use a line level or a spirit level with a straight edge to confirm this. On sloped ground you may find one side of the patio sits much higher than the other relative to the original surface, and that's fine, your edging has to follow the finished patio level, not the natural ground level.
Mark the outer edge of your edging blocks on the ground with spray line marker or a spade line. The edging should sit flush with or very slightly proud of the surrounding paving, so account for the full block width when marking your excavation line. On inside corners, mark precisely and plan your cuts now rather than when you've got wet mortar on your hands. Outside corners can often be mitre-cut at 45 degrees or managed with a purpose-made corner block if your supplier offers one.
Preparing the site and building the sub-base
This is the section most DIYers want to skip, and it's also the reason most patios fail within a few years. A well-built sub-base is everything.
Excavation depth
For a typical residential patio edging trench, you need to excavate to accommodate the edging block depth plus 100 to 150mm (4 to 6 inches) of compacted aggregate sub-base below it, plus around 25mm (1 inch) of bedding material. See Belgard Product Installation Guide – Base and bedding layer guidance (typical depths) for manufacturer-recommended base and bedding thicknesses. In practice, most standard edging blocks are 50 to 100mm (2 to 4 inches) deep, so your total excavation is commonly 175 to 275mm (7 to 11 inches) below finished grade. In freeze-thaw climates (much of the northern US, northern UK and elevated areas), go deeper: Belgard's installation guidance calls for 10 to 12 inches of compacted road-base in those conditions to prevent frost heave.
What to do with clay soil
Clay is the most common problem ground condition in UK gardens, and it moves. It shrinks when dry and swells when wet, which means a shallow or poorly-compacted base will eventually cause edging blocks to crack, rock or lift. On clay, always excavate the full depth, compact the subgrade firmly, and lay a geotextile membrane before adding aggregate. The membrane prevents the clay from migrating up into your aggregate over time, which would undermine your base. Don't be tempted to mix the excavated clay back in as fill, barrow it off site.
Building up the aggregate base
Use dense-graded crushed aggregate (MOT Type 1 in the UK, road-base in the US). Lay it in compacted layers of no more than 75 to 100mm (3 to 4 inches) at a time, compacting each lift with a plate compactor before adding the next. Belgard's installation guidance specifies compacting the subgrade to 98% Standard Proctor, with the aggregate layers above following the same principle. A plate compactor hired for the day is genuinely worth it: a hand tamper will technically work for very small areas but won't give you the compaction you need for anything bigger than a garden path.
Edging on existing paved surfaces
If you're adding new edging around an existing concrete slab or old paving, the process changes. You're not usually doing a full excavation, you're cutting a chase or removing an edge row and bonding the new edging against the existing structure with mortar or construction adhesive. The key is making sure the existing surface is structurally sound, clean, and that the new edging will sit at the correct level relative to both the existing surface and any surrounding garden soil or gravel.
How to install edging blocks: dry (no-mortar) method
The dry method is faster, easier to adjust, and perfectly adequate for garden patios where the edging won't be taking vehicular loads. For a step-by-step walkthrough and detailed diagrams on how to lay patio edging, see our dedicated guide on how to lay patio edging. It relies on tight compaction and, optionally, mechanical edge restraints to keep blocks in place.
- Excavate your trench to the required depth along the full perimeter run, following your marked lines. Check depth at multiple points with a tape measure.
- Compact the excavated subgrade with a plate compactor or hand tamper. Remove any loose material, roots or soft spots and refill with compacted aggregate if you encounter them.
- Lay your geotextile membrane across the base of the trench, overlapping any joins by at least 300mm (12 inches).
- Add your compacted aggregate (MOT Type 1 / road-base) in 75–100mm lifts, compacting each lift thoroughly before adding the next. Work to within approximately 25–30mm of your finished edging base height.
- Screed a 25mm (1 inch) layer of sharp sand over the aggregate base, levelled to the correct height so that your edging blocks will sit at the intended finished height when placed on top. Use two lengths of 25mm diameter conduit or pipe as screed rails, or use a straight edge referenced off your string line.
- Place the first edging block at a corner or fixed reference point, seating it gently on the screeded sand. Tap it down with a rubber mallet and check it against your string line for both level and alignment.
- Work along the run, placing each block tightly against its neighbour. Check level across each block and along the run every few blocks — don't wait until the end of the run to discover a problem.
- At corners, measure and mark your cuts carefully. Straight cuts can be scored with an angle grinder using a dry-rated diamond blade, but for a cleaner finish on stone or reconstituted products, use a wet-cutting diamond blade with continuous rim. Always cut with water suppression or wet cutting — never dry-cut masonry without dust control (see safety notes below).
- Once all blocks are placed and aligned, compact the edging gently with a plate compactor (with a rubber pad protector on the plate) or by hand to ensure full contact with the sand base.
- Backfill the outer side of the edging trench with compacted aggregate or topsoil, depending on your landscape design, to lock the blocks laterally. If you're using mechanical plastic or metal edge restraints, install them against the outer face of the edging now, driving the anchor spikes at the spacing recommended by the manufacturer (typically one spike every 400–500mm for patio use, or 200–300mm for higher-load areas).
- Fill the joints between edging blocks with kiln-dried jointing sand or, for a more stable finish, polymeric jointing sand. For polymeric sand, follow the manufacturer's TDS precisely: joints must be dry and fully filled, sand swept in and compacted, then carefully mist-activated. Rushing this step will leave unstable joints.
How to install edging blocks: bonded method (mortar or construction adhesive)
The bonded method gives you a stronger, more permanent installation. Use it when: the edging will be adjacent to a driveway or any trafficked area, when you're using heavy natural stone blocks that need positive fixing, when the site has unstable or sloped ground, or when you want a traditional pointing finish between edging and paving. It takes longer because you're working with mortar that has a limited open time, but the result is noticeably more solid.
- Prepare and compact your sub-base exactly as described in the dry method steps 1 through 4. Firm, well-compacted aggregate is just as important here — mortar is not a substitute for a poor base.
- Dampen the surface of the compacted aggregate lightly before applying mortar. A bone-dry base will draw moisture out of the mortar too quickly, weakening the bond.
- Mix your bedding mortar to a stiff, semi-dry consistency — it should hold its shape when squeezed in a fist and not slump. A mix of 1 part cement to 4 or 5 parts sharp sand works well. Pre-bagged bedding mortar mixes are a reliable alternative if you're not confident mixing from scratch.
- Lay a bed of mortar approximately 40–50mm (1.5–2 inches) deep along a workable section of trench, say 1 to 1.5 metres at a time. Don't lay more mortar than you can work before it starts to go off, which in warm conditions can be as little as 30 to 45 minutes.
- Bed the first block firmly into the mortar, pressing down and tapping with a rubber mallet until it aligns with your string line for level and position. Check with a spirit level in both directions.
- Butter the end of the next block with mortar to create a filled perpendicular joint, then place it hard up against the previous block. The mortar in the joint should squeeze out slightly — scrape off the excess with a pointing trowel.
- Continue along the run, checking level and line every two or three blocks. Make small adjustments before the mortar stiffens; trying to adjust a block that's nearly set will crack the mortar bed and the block above it.
- For corners, measure and cut your blocks (see cutting notes below). Mitre cuts at 45 degrees give a clean join on outside corners. For inside corners, a straight butt joint is easier and equally effective.
- At the end of each working section, step back and sight along the run at low level. This 'eye test' catches dips and humps that a spirit level alone can miss.
- If using construction adhesive instead of mortar (suitable for reconstituted stone edging onto an existing concrete base), clean both surfaces thoroughly, apply adhesive in a serpentine bead as directed by the product manufacturer, and press the block firmly into position. Brace or prop blocks if necessary while the adhesive cures.
- Allow the mortar bed to cure for at least 24 hours before filling joints. Then point up joints with a 1:4 mortar mix using a small pointing trowel or a grout bag. Work the mortar firmly into each joint and finish with a slightly recessed, smooth profile to shed water.
- Clean any mortar smear off block faces with a damp sponge before the mortar hardens. Dried mortar on natural stone or reconstituted products can be very difficult to remove without acid cleaning, which risks damaging the block surface.
Cutting blocks for corners and end pieces
Cutting is where most first-timers feel nervous, and reasonably so, it's where the safety risks and the risk of expensive block breakage both peak. The right tool for most edging block cuts is an angle grinder fitted with a diamond blade rated for your material (segmented or turbo rim for concrete/brick, continuous rim for stone or reconstituted products). For step-by-step techniques and safety tips on how to cut patio block, see our detailed guide. For sleepers, a circular saw with a masonry or timber blade is the better choice. If you need step-by-step guidance on using a circular saw for edging materials, see our practical guide on how to cut patio block with a circular saw. If you need to cut a lot of blocks accurately, a hired bench-mounted masonry saw with a water feed is the most controlled option.
On blade safety: always check that the blade's maximum rated RPM (which is stamped on the blade) is equal to or higher than your tool's no-load speed. Running a blade beyond its rated RPM is a serious hazard. Use the blade guard on your angle grinder at all times, and never apply lateral pressure to a cutting disc, they're designed for forward cutting force only.
On dust safety: cutting concrete, brick or stone generates respirable crystalline silica (RCS) dust, which causes serious and irreversible lung disease. Under OSHA's Table 1 (29 CFR 1926.1153), handheld power saws used on concrete or masonry must use an integrated water delivery system feeding water continuously to the blade when working outdoors. The UK HSE is equally unambiguous: dry cutting of masonry and engineered stone is not acceptable practice, and on-tool water suppression combined with appropriate respiratory protective equipment (RPE) is the standard requirement. At minimum, always wet-cut or use vacuum extraction, and wear at least a P2/FFP2 dust mask. For longer cutting sessions, step up to P3/FFP3 or powered RPE.
Integrating edging with the main patio surface
Edging blocks serve two functions: they look good, and they physically restrain the main paving from spreading under load. For the restraint to work, Belgard's installation guidance specifies that edge restraints must present at least 25mm (1 inch) of vertical face against the paving, and they must be installed on the compacted base before, or at the same time as, the pavers. Don't lay all your paving first and then try to wedge edging around it, you'll find gaps, misalignment and a base that's been disturbed by foot traffic.
The top of your edging blocks should be flush with, or very slightly (2–3mm) proud of, the main paving surface. This allows the paving to drain slightly towards your chosen drainage direction without creating a trip hazard at the edge. Where your patio meets a lawn, setting the edging 5–10mm above grass level makes mowing easier without scalping the edge.
Dealing with sloped ground
Sloped sites are common in UK gardens, and they create one very specific challenge for edging: the blocks at the high end of the slope will require significantly more sub-base depth (or a deeper mortar bed) than those at the low end to maintain a consistent finished height. Step the sub-base if the slope is steep, this is much easier than trying to compensate with a thick mortar bed, which is both expensive and structurally weaker. On a pronounced slope, consider whether a level patio with a retaining edge or a low retaining wall is a better design choice than trying to install a flush-edged patio on a severe gradient.
Common mistakes and how to avoid them
- Skipping proper compaction: the single most common reason for edging blocks that move, rock or sink. Compact every layer properly, full stop.
- Setting drainage fall wrong: if water pools against the house wall, you've either got no fall or the fall is running the wrong way. Always set your string line to drain away from structures before placing a single block.
- Laying too much mortar at once: mortar that starts to go off before the block is placed will result in weak, hollow-sounding beds. Work in short sections.
- Not pre-wetting blocks: dense concrete or brick edging blocks will pull moisture out of mortar too quickly if placed bone dry in hot or windy conditions, weakening the bond. A quick mist with water before bedding is enough.
- Leaving mortar smears to dry: clean faces immediately. Once mortar is fully cured on a textured block, removing it without damage is genuinely difficult.
- Using the wrong blade for the material: a blade for concrete used on porcelain or vitrified stone will chip and shatter the edge. Always match the blade type to the material.
- Not checking the line regularly: a block that's 5mm out of line looks like a mistake; twenty blocks that are 5mm out of line looks like a choice. Check every two or three blocks.
Maintenance and long-term care
Correctly installed edging blocks need very little ongoing maintenance. Once a year, check for any blocks that have moved, rocked or settled, and re-bed them before the movement affects neighbouring blocks. Check mortar joints for cracking or shrinkage, particularly after a hard winter, and repoint as needed with a fresh 1:4 mortar mix. If you used polymeric jointing sand in the joints, you may need to top it up after a couple of years as it gradually weathers and compacts.
Efflorescence (the white mineral bloom that sometimes appears on new concrete or brick edging in the first season) is normal and not a structural problem. It typically weathers away on its own within one to two years. If it bothers you, it can be cleaned with a dilute masonry efflorescence cleaner, but always test on an inconspicuous area first and rinse thoroughly.
Troubleshooting: when things go wrong
| Problem | Likely cause | Fix |
|---|---|---|
| Block sinking or rocking after installation | Inadequate sub-base compaction or insufficient base depth | Lift the affected block(s), add aggregate, compact thoroughly, relay |
| Blocks moving outward under paver load | Edge restraint not installed or inadequate; no lateral backfill | Install mechanical edge restraints on outer face; compact backfill |
| Water pooling on patio surface near edging | Drainage fall incorrect or insufficient | For dry-laid edging: lift and relay with corrected fall. For bonded: this is harder — prevention is the only real solution |
| Mortar joints cracking after first winter | Mortar mixed too wet; laid in cold/frost conditions; base movement | Cut out cracked joints with an angle grinder, repoint with fresh stiff mortar |
| Edging blocks chipping during cutting | Wrong blade type; dry cutting causing thermal stress; too fast a feed rate | Switch to continuous-rim diamond blade; use water cooling; feed more slowly |
| Blocks sitting too high or low after bedding | Screed bed or mortar bed at wrong level | For dry: lift, adjust sand bed, relay. For mortar: lift within the open time or chip out and relay fresh |
When to call a professional
Most garden patio edging is within the ability of a motivated DIYer. But there are a few situations where calling in a professional landscaper or contractor is genuinely the right call. If your site has significant ground movement (swelling clay, filled ground, high water table), a professional can specify a base build-up that a general guide like this one can't adequately cover for your specific conditions. If you're installing edging adjacent to a structural wall, retaining wall, or existing drainage run, incorrect installation can have consequences beyond the patio itself. And if you need a lot of precise cuts in expensive natural stone, a professional with a bench-mounted wet saw will waste far less material than a first-timer with an angle grinder. Knowing your limits isn't failure, it's just good project management.
FAQ
What are the main types of patio edging blocks and how do I choose one?
Common types: concrete kerb/edging blocks, brick/block pavers, natural stone (granite/flagstone), timber sleepers, and plastic/metal edge restraints. Choose by: desired look and scale (natural stone for rustic, concrete/brick for uniform look), load and restraint needs (concrete/stone for driveways/heavy loads; timber for light garden patios), durability in your climate (frost‑resistant concrete/natural stone in freeze‑thaw areas), ease of cutting/installation, and budget. Also check manufacturer installation guidance for product‑specific base and restraint requirements.
What tools and materials do I need (simple checklist)?
Materials: edging blocks/kerbs or sleepers, bedding sand (1" nominal), compacted sub‑base (MOT Type 1/dense-graded aggregate, 4–8" typical), mortar or construction adhesive (if using fixed mortar bed or block adhesive), edge restraint spikes/anchors (for plastic/metal edging), polymeric sand or jointing mortar, sealing/pointing mortar (optional). Tools: tape measure, string line and stakes, spirit level/straightedge, rubber mallet, shovel and wheelbarrow, compactor/plate vibrator, angle grinder with diamond blades or circular saw with appropriate blade and dust suppression, brick bolster/trowel, pointing tool, gloves, eye protection, hearing protection, respirator/appropriate RPE, water supply for wet cutting or HEPA LEV for dry cutting, masonry saw or block splitter (optional). Check blade max RPM and tool manuals before use.
What safety controls are essential when cutting concrete, stone or porcelain edging?
Use wet cutting with an integrated water feed on handheld saws/grinders where possible to suppress respirable crystalline silica (RCS) — OSHA Table 1/HSE recommend water suppression or LEV. If wet cutting isn't possible, use HEPA‑filtered local exhaust ventilation and appropriate respirator (RPE) per regulatory guidance. Always wear eye protection, hearing protection, gloves, and follow tool OEM instructions and blade max‑RPM ratings. Ensure wheel guards are fitted and avoid lateral pressure on cutting discs.
How do I measure and lay out the edging line?
1) Mark patio footprint and finished level. 2) Run string lines at finished patio edge and set batter boards/stakes. 3) Measure and mark block centers and spacing; account for block lengths and joint widths. 4) Transfer level using a laser level or long spirit level and straightedge; set a datum (finished patio top of paver). 5) For curves, snap additional guide points and use a flexible spline or hose to get the shape before excavating.
How deep should I excavate and what base should I use?
Typical excavation: around 8" below finished patio for pedestrian patios; 10–12" or more in freeze‑thaw climates or for vehicular loads. Compact the subgrade to ~98% Standard Proctor where possible. Add compacted dense‑graded aggregate/road‑base (MOT Type 1) 4–8" in 2–4" lifts, compact each lift. Lay a nominal 1" screeded bedding sand for pavers/blocks. Manufacturer guides (e.g., Belgard, BS 7533) provide specific depths for product and climate.
Should edging blocks be set dry, on mortar, or with adhesive?
Options: Dry set on compacted aggregate for flexible systems (pavers) with a mechanical edge restraint behind them; mortar set on a concrete bed for rigid kerbs/thresholds; construction adhesive or manufacturer's block adhesive can be used for some concrete/stone edgings for simpler installs. Choose based on product TDS and site conditions: use mortar or concrete bed where a rigid restraint is needed (driveway edges, high loads, steep slopes). Always follow manufacturer recommendations.