
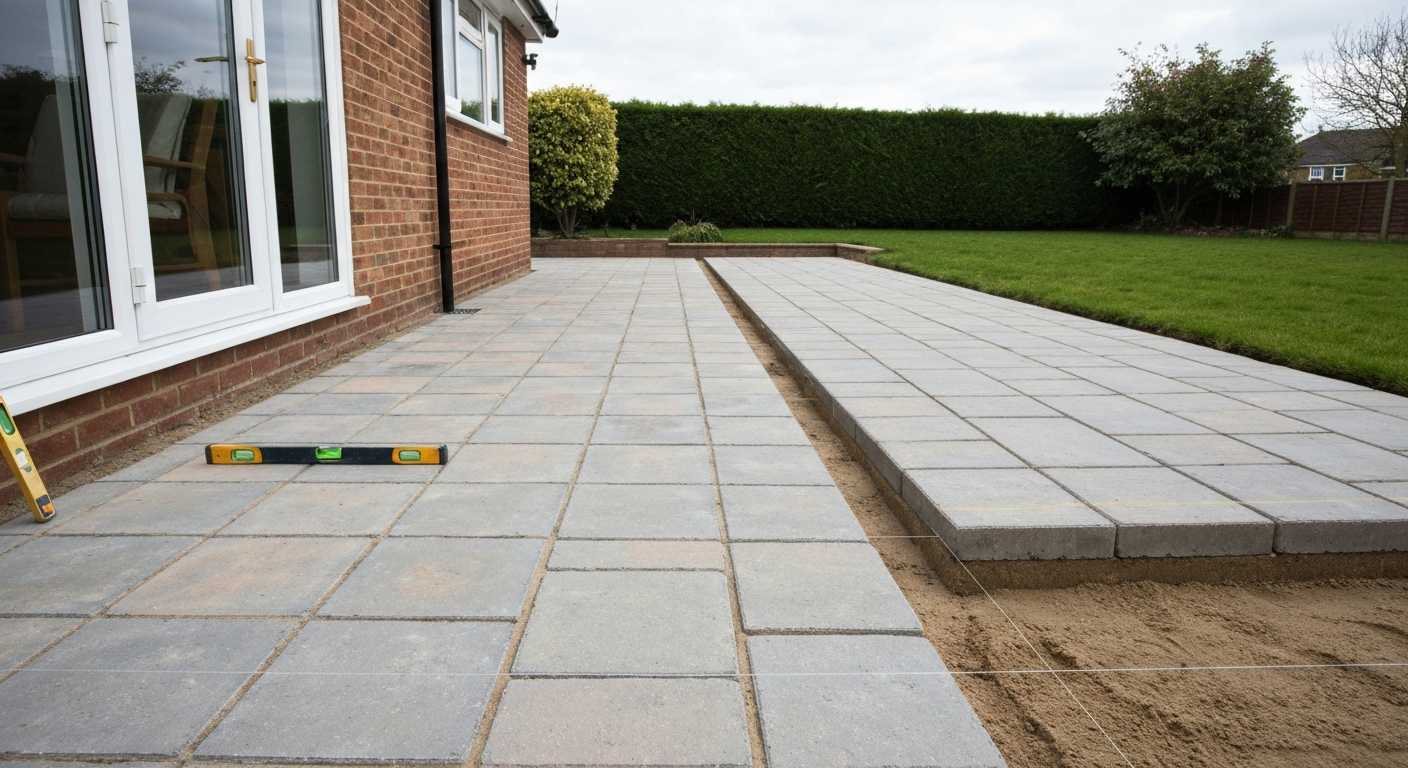
Yes, you can lay patio slabs on sand, but only certain types of slabs and only with the right preparation underneath. Pressed concrete pavers and interlocking concrete blocks are well suited to a sand bedding course. Natural stone, porcelain, and wet-moulded concrete slabs are not: those materials need a full, continuous wet mortar bed to sit safely. If you pick the right slab type, excavate to the correct depth, compact a proper granular sub-base, screed a nominal 25 mm bedding sand layer, and fit edge restraints before you lay a single slab, the result is a durable, stable patio you can be proud of.
How to Lay Patio Slabs on Sand: Complete DIY Guide

Clara Farrell
14 Jul 2026
Can you actually lay patio slabs on sand? The honest answer
The sand-bedded method works because the bedding layer is not structural: the compacted granular sub-base underneath it carries the load. The 25 mm of screeded sand simply provides a level, forgiving surface that lets you fine-tune each slab's position before you compact the whole lot down. That flexibility is also the method's biggest weakness. If you skip proper sub-base compaction, use the wrong sand, or forget edge restraints, slabs will shift, sink, and rock within a season or two. The method succeeds or fails entirely in the preparation stages, not in the laying itself.
It is also worth being clear about terminology. Some guides describe a "sand-only" base, meaning no hardcore sub-base at all, just sand directly on soil. That approach is rarely appropriate for a full patio. What we cover in this guide is the industry-standard system: compacted aggregate sub-base first, then a screeded sand bedding course, then the slabs. The sand is the bedding layer, not the foundation.
When sand bedding is the right choice
Sand bedding suits pedestrian patios on stable, well-drained ground using pressed concrete pavers or interlocking concrete block paving. UK manufacturer Marshalls explicitly allows sand bedding for pressed concrete products but directs installers to follow their full installation notes and specifically excludes other slab types. The Interlocking Concrete Pavement Institute (ICPI) similarly specifies a 25 mm screeded bedding sand layer over a compacted aggregate base as the standard for concrete paving units.
The site conditions matter as much as the slab type. Sandy or loamy soils, ground that drains freely, and patios serving pedestrian foot traffic only are the sweet spot for this method. If your ground is soft, has high clay content, or sits over a high water table, you will need a deeper or modified sub-base before you even think about bedding sand. The Architect’s Pocket Book summarises guidance from CIRIA's SuDS manual and BRE 365 and recommends geotechnical and infiltration testing where soils are weak, high in clay, or have a high water table Architect’s Pocket Book (summary referencing CIRIA SuDS manual, BRE 365 and need for geotechnical/infiltration testing). Weak soils need geotechnical consideration, not just more hardcore.
- Pressed concrete pavers and interlocking concrete blocks: suitable for sand bedding
- Stable, free-draining subgrade (sandy or loamy soil with good bearing capacity)
- Pedestrian-use patios and garden paths
- Level or gently sloping sites where proper falls can be achieved easily
- Areas where you may want to lift and relay slabs in future (for drainage access etc.)
When to use a mortar bed or a stronger sub-base instead
If you are laying porcelain, natural stone, or wet-moulded concrete flags, stop right here: those materials must go on a full wet mortar bed, not loose sand. Porcelain has very low porosity and is prone to voids and thermal movement if it is not fully supported across its entire underside. Multiple manufacturers explicitly warn against sand-only bedding for porcelain and require a continuous cementitious mortar bed with a polymer or SBR slurry primer applied to the slab underside. The guide How to Lay Porcelain Paving, Paving Slabs Direct (manufacturer/supplier installation guidance) states porcelain must be bedded on a full wet mortar bed with a slurry primer, or fixed to a concrete slab/adhesive system, and warns against sand‑only bedding due to low porosity and risk of voids and thermal movement How to Lay Porcelain Paving — Paving Slabs Direct (manufacturer/supplier installation guidance). Natural stone flags are routinely specified to a 25 mm full mortar bed following BS 7533 installation guidance. Using sand under these materials is one of the most common and costly DIY mistakes I see.
Beyond slab type, the load on the patio also changes the calculation. For vehicular use (a driveway or an area where cars park), a much deeper and more robustly compacted base is needed regardless of the paving system. Typical guidance calls for 200-300 mm of compacted aggregate for vehicular loads, compared with 100-150 mm for a pedestrian patio. If the ground is high-clay, peaty, or consistently wet, consider reading the guide on how to lay a patio on mud before proceeding, as those conditions may require a capping layer or entirely different approach before any sand or hardcore goes down.
| Slab type | Sand bedding suitable? | Recommended bedding method | Standards reference |
|---|---|---|---|
| Pressed concrete pavers / interlocking blocks | Yes | 25 mm screeded bedding sand over compacted sub-base | ICPI Tech Spec 2, Marshalls installer guidance |
| Natural stone flags | No | 25 mm full wet mortar bed | BS 7533, natural stone specifications |
| Porcelain paving | No | Full continuous mortar bed + SBR/polymer primer to slab underside | Talasey/Resiscape, manufacturer installation guides |
| Wet-moulded concrete flags | No | Full wet mortar bed | BS EN 1339, BS 7533 series |
Tools, materials, and safety checklist
Tools you will need
- Spade, mattock, and/or mini-digger for excavation
- Plate compactor (vibratory) for sub-base compaction — hire one if you do not own it
- Low-amplitude plate compactor with rubber pad or foam mat for compacting laid pavers
- Screed rails (steel or timber) and a straight-edged screed board for levelling bedding sand
- Spirit level (long 1.8 m or 2.4 m) and a string line with pins
- Tape measure, set square, and marker
- Rubber mallet for seating slabs
- Angle grinder with diamond cutting blade (or slab splitter/guillotine) for cutting pavers
- Stiff brush for sweeping in jointing sand
- Wheelbarrow and buckets
- Safety goggles, dust mask (P2 rated), knee pads, and rigger gloves
Materials you will need
- Pressed concrete pavers or interlocking concrete blocks (60 mm thick for pedestrian use, 80 mm for trafficked surfaces per ICPI guidance)
- Type 1 granular sub-base material (compactable crushed stone / MOT Type 1 or equivalent)
- Sharp sand or coarse grit sand for bedding (clean, well-graded, free of fines — not soft building sand)
- Kiln-dried jointing sand or polymeric jointing compound for finishing joints
- Edge restraint system: precast concrete edging, cast in-situ haunching concrete, or proprietary metal/aluminium L-edging with anchor spikes
- Geotextile membrane (optional but recommended on clay soils to prevent fines migrating into sub-base)
- Concrete mix for haunching edge restraints (approx. 1: 2:4 ballast mix or bagged postcrete)
Before you start: site safety
- Call your utility provider or use a cable/pipe avoidance tool (CAT scanner) before any excavation — buried services cause serious injuries
- Check planning requirements: in England, paved areas over 5 m² using impermeable material in a front garden require either permeable paving or drainage directed to a soakaway or lawn (permitted development rules)
- Wear dust PPE when cutting concrete pavers — silica dust is a serious respiratory hazard
- Keep children and pets away from the site during compaction and cutting work
- Dispose of excavated spoil responsibly — check local authority skip permit requirements
Exact layer build-up and depths
Getting the layer depths right before you start is how you avoid the awful experience of digging it all up again. Measure down from your finished patio level and work backwards so you know exactly how deep to excavate. The total excavation depth for a typical pedestrian patio with 60 mm concrete pavers is usually around 235-245 mm below finished surface level.
| Layer | Material | Compacted depth | Notes |
|---|---|---|---|
| Subgrade (existing ground) | Native soil | Proof-rolled and compacted in place | Weak/clay soils may need a capping layer or deeper base |
| Sub-base | Type 1 granular / MOT Type 1 | 100-150 mm compacted (pedestrian); 200-300 mm for vehicular | Lay in 100 mm loose lifts and compact each lift separately |
| Bedding sand | Sharp / coarse grit sand | Nominal 25 mm screeded (do not compact before laying) | Screed to final level only — do not walk on screeded sand |
| Paving unit | Pressed concrete paver | 60 mm (pedestrian) / 80 mm (trafficked) | Compact into bedding after laying using rubber-pad plate compactor |
| Joint sand | Kiln-dried jointing sand or polymeric compound | Fill joint depth completely | Brush in and repeat after initial compaction settling |
A quick worked example: finished patio level is flush with an existing door threshold. You want 60 mm pavers, 25 mm bedding sand, and 150 mm compacted sub-base. Total excavation depth from finished level: 235 mm. Add 15-20 mm for the loose sub-base material before compaction (it compacts down roughly 15-20%) and mark your dig depth clearly with a spray line around the whole area before any soil is moved.
How to prepare and compact each layer
Step 1: excavate and prepare the subgrade
Excavate to your marked depth and remove all topsoil, roots, and organic material. Topsoil and plant material compress unevenly over time and will undermine everything above them. Once excavated, run your plate compactor over the exposed subgrade in overlapping passes to proof-roll it. If the ground sinks noticeably or feels spongy underfoot, you have a problem that needs addressing before anything else goes down. On clay soils especially, lay a geotextile separation membrane before the sub-base to prevent clay fines migrating up and contaminating the aggregate over time.
Step 2: lay and compact the sub-base
Tip in your Type 1 granular sub-base in loose lifts of no more than 100 mm at a time. Compact each 100 mm lift thoroughly with the plate compactor before adding the next. This is the most important physical step in the whole job. ICPI guidance targets at least 98% of standard Proctor density for pedestrian and residential areas. You will not be doing a nuclear density test in your back garden, but the practical rule is to make at least four overlapping compactor passes over every part of the layer, and check that the surface is not deflecting under the weight of the machine. The ICPI also specifies a surface tolerance of plus or minus 10 mm over a 3 m straight edge across the finished sub-base before you screed bedding sand. Check this with a long spirit level and fill any low spots before moving on.
Step 3: screed the bedding sand
Once the sub-base is compacted and level, lay your screed rails (pipes or steel sections of a consistent diameter, typically 25 mm) across the surface at intervals of about 1.2-1.5 m. Tip sharp sand between the rails and draw your screed board across them to produce a smooth, flat 25 mm layer. The critical rule: do not compact the bedding sand before laying, and do not walk on it after screeding. Any footprints will create high spots that make your slab surface uneven. Screed one bay at a time and lay slabs into each bay immediately after screeding it.
Step 4: lay the slabs
Start from a fixed straight edge, ideally the house wall or a pre-installed edge restraint. Work outward and across, never standing on screeded sand. Lay each slab onto the sand and seat it with two or three firm taps of a rubber mallet. Check level and alignment with your string line and spirit level as you go. Maintain consistent joint widths using spacers if needed. Cut slabs at the edges using an angle grinder with a diamond blade or a slab guillotine, always wear goggles and a P2 dust mask for this step.
Step 5: compact the laid surface
Once a full section is laid, compact the whole surface with a low-amplitude plate compactor fitted with a rubber sole plate or a foam mat to protect the slab faces. Make at least two or three passes in different directions. This compaction step seats the slabs firmly into the bedding sand and is not optional. After compaction, recheck your levels and gently tap down any slightly high slabs with the rubber mallet.
Edge restraints: why they matter and how to install them
Edge restraints are non-negotiable for a sand-bedded system. Without them, the pavers at the perimeter have nothing to push against and will gradually migrate outward, causing the whole installation to loosen and spread. ICPI Tech Spec 3 documents the acceptable restraint types: cast in-situ concrete haunching, full-depth precast concrete edging, and proprietary aluminium or metal L-section edging anchored with spikes (typically 10 mm / 3/8 in. anchor pins). Each option works well, but the choice affects when in the build sequence you install them.
The preferred approach for most garden patios is to install precast concrete edging or haunched concrete before you screed the bedding sand, so the edge defines your finished level from the outset. To haunch an edge: butt the edging against the outside of your last slab row or along your boundary line, then pack a concrete mix (a 1:2:4 mix works well) against the back and base of the edging to at least two-thirds of its depth. The haunching must be keyed into the compacted sub-base, not just sitting on bedding sand. Allow the concrete to cure for at least 24 hours before loading the adjacent slabs or applying any lateral stress. Proprietary metal L-edging is quicker to install and works well for straight runs: pin it through the sub-base at roughly 600 mm intervals and backfill behind it before you lay slabs up to it.
Drainage and falls: getting water off your patio
Water that pools on a patio will eventually find its way into the joints and the bedding layer. In cold weather, that water freezes, expands, and lifts slabs. Even in mild weather, standing water saturates the bedding sand, reducing its load-bearing capacity and encouraging movement and settlement. Building in the right fall from the start is essential, and it costs nothing extra if you plan it before you set your first screed rail.
For most residential patios, a fall (slope) of around 1:60 to 1:80 away from the house and toward a suitable outfall is the commonly used target for concrete paving. Some BS 7533 and contract specifications for natural stone and flags reference minimum falls of 1:80 longitudinal and 1:40 transverse. In practice, a fall of approximately 1:60 (roughly 17 mm per metre) is a practical, visible target that sheds water reliably without being noticeable underfoot. The fall should always direct water away from the building and toward a lawn, border, drain, or soakaway, never toward a neighbour's property or a public footpath. For more detail on setting levels across a sloped site, the guide on how to lay a patio with a fall covers the levelling and string-line setup in detail.
On larger patios or in areas with high rainfall, consider installing a channel drain or linear drain at the low edge. Where the ground soaks up water naturally, a soakaway fed by a perforated pipe from the patio edge can be a clean solution. UK planning guidance also requires that new impermeable paved areas in front gardens either use permeable paving materials or drain to an approved soakaway or infiltration feature in line with CIRIA SuDS principles (C753). If you are on clay soil that drains poorly, an infiltration test (BRE 365 method) will tell you whether a soakaway is viable before you commit to one.
Step-by-step laying sequence
- Mark out the patio area, check for buried utilities, and get any necessary permissions
- Excavate to the required total depth, removing all topsoil and organic material
- Compact the exposed subgrade with a plate compactor; lay geotextile membrane on clay soils
- Install edge restraints on at least two sides (or all sides if working inward from a fixed boundary)
- Lay and compact Type 1 sub-base in 100 mm loose lifts, compacting each lift before adding the next
- Check sub-base level and tolerance (within 10 mm over 3 m); adjust as needed before proceeding
- Set screed rails to your fall gradient and screed a 25 mm layer of sharp sand between them
- Remove screed rails carefully and fill the resulting grooves with sand, lightly levelled by hand
- Lay slabs from a fixed straight edge, seating each with a rubber mallet and checking level and alignment constantly
- Cut border slabs to fit using an angle grinder with a diamond blade; always use PPE
- Compact the entire laid surface with a low-amplitude rubber-pad plate compactor in overlapping passes
- Sweep kiln-dried jointing sand into all joints, compact again lightly, then top up and sweep once more
- Install or haunch any remaining edge restraints and allow concrete to cure before use
- Check the finished surface for level and fall, and clear the area of sand residue
Jointing: finishing the gaps between slabs
For sand-bedded concrete pavers, ICPI specifies using clean, kiln-dried jointing sand brushed into the joints after compaction. Pour the sand onto the surface, sweep it into the joints with a stiff broom, then run the plate compactor over once more to vibrate it fully into the gaps. Repeat the sweeping and compaction cycle two or three times until the joints are consistently full to within about 3-5 mm of the surface. Do not do this on a windy day or if rain is forecast within a few hours, as you want the sand to settle undisturbed.
For longer-term joint stability, particularly in areas prone to weed growth or heavy foot traffic, polymeric jointing compound is worth the extra cost. It binds with moisture after application and sets semi-rigidly in the joint, greatly reducing weed ingress and ant activity. Apply it the same way as kiln-dried sand but follow the manufacturer's instructions for activation (usually a fine water mist over the surface after sweeping). Avoid over-wetting, which can draw polymeric binder out of the joint and leave a hazy residue on the slab face.
Troubleshooting common problems
Slabs sinking or rocking
Sinking is almost always caused by inadequate sub-base compaction or by organic material left in the excavation. To fix it, lift the affected slabs, remove the bedding sand beneath them, and investigate the sub-base. If it is moving or soft, you need to compact it further or add more material and recompact before re-screeding and re-laying. Rocking slabs are usually a bedding sand issue: the slab is bridging across a void rather than being fully supported. Lift, add a small amount of sand to the low area, and re-lay.
Slabs spreading outward at the edges
This is almost always a missing or inadequate edge restraint. Lift the spreading slabs, haunch concrete edging behind the perimeter row, allow it to cure, then re-lay and compact. Do not simply push the slabs back and refill the joints without fixing the root cause.
Weeds growing through joints
Weeds do not grow up through the sub-base and bedding; they germinate in airborne seeds that settle into the joints. The solution is to keep joints full and tightly packed with kiln-dried or polymeric jointing sand. A geotextile membrane under the sub-base prevents soil-borne weed rhizomes from growing upward but will not stop seeds germinating from above. Re-sweep jointing sand annually and consider switching to a polymeric compound if weeds are persistent.
Frost heave in winter
If water is getting into the bedding layer and freezing there, slabs will lift and crack. The fix is drainage: ensure your fall is effective and that joints are kept full so water cannot pool and percolate down. In areas with very cold winters, a slightly deeper sub-base (towards the 150 mm end of the range) gives more thermal mass and reduces the risk. Make sure water is actively running off the patio surface rather than sitting and soaking in.
Dealing with slopes, curves, and difficult sites
Sloped ground changes the excavation and sub-base geometry considerably and requires careful string-line planning before any digging begins. Curved layouts introduce additional cutting and edge restraint challenges. Both scenarios are achievable for a capable DIYer but require extra planning time. The guides on how to lay a patio with a fall and how to lay a curved patio go through these specific situations with dedicated step-by-step instructions. If your ground is genuinely muddy or soft at the base of your excavation, the guide on how to lay a patio on mud explains the additional stabilisation steps needed before a standard sub-base can go down. For techniques specific to softer soils, see our guide on how to lay patio tile on dirt.
Maintenance to keep your sand-bedded patio in good shape
- Sweep jointing sand back in and top up annually, especially after a wet winter
- Pressure-wash the surface every year or two to remove algae and moss, then re-apply jointing sand afterwards
- Inspect edge restraints each spring for movement and re-haunch with concrete if any sections have shifted
- Re-compact any individual slabs that have started to rock before they become trip hazards
- Avoid parking heavy vehicles or placing very concentrated point loads (e.g. scaffold tower feet) on a pedestrian-rated sand-bedded patio
When to call a professional
Most homeowners can handle a straightforward rectangular patio on stable ground using concrete pavers. Where I would genuinely recommend getting a professional involved: if your excavation reveals very soft, waterlogged, or unstable ground; if the patio is adjacent to a house foundation and getting the level wrong could affect drainage back to the building; if the area is over 30-40 m² and you have no experience operating a plate compactor; or if you discover buried services that are not clearly marked on utility records. Getting the sub-base wrong on a large area is an expensive mistake to rectify, and a good groundworker will often save you more money than their labour costs.
FAQ
Can I lay patio slabs on sand?
Yes — but only for suitable products and site conditions. Concrete pressed paving units (manufactured concrete flags and block pavers) can be laid on a screeded layer of clean bedding sand over a properly compacted granular sub‑base following industry guidance. Natural stone and porcelain slabs generally must not be laid on loose sand; they normally require a full wet mortar bed or an engineered fixing system per manufacturers' instructions and relevant codes (BS 7533/industry guidance).
When is sand‑only bedding appropriate vs when do I need a compacted sub‑base or mortar bed?
Sand bedding (nominal 20–25 mm screeded layer) is appropriate for concrete unit pavers only and always over a compacted granular sub‑base sized to the design load and soil strength. Sand directly on uncompacted/soft ground is not acceptable. Natural stone or porcelain usually require a continuous wet mortar bed or structural fixing onto a concrete slab/adhesive system; manufacturers explicitly advise against sand‑only bedding for these materials.
What tools and materials will I need for a sand‑bedded patio?
Checklist: excavator or shovel, tape measure/strings/line levels, spirit level and straight edge, plate compactor (suitable plate and rubber mat for final passes), adjustable screed rails and screeding bar, clean sharp/washed bedding sand (kiln‑dried for jointing), Type 1/aggregate sub‑base, edging restraint units or concrete haunch, paving slabs or concrete pavers, jointing sand or polymeric jointing compound, mortar and trowel if pointing, protective gloves/goggles, wheelbarrow, tamper, and finishing brushes. For porcelain/natural stone follow manufacturer’s specified adhesives, primers and mortar.
What layer depths and compaction targets should I use?
Typical guidance: excavated depth to achieve compacted subgrade plus sub‑base and 25 mm bedding. For pedestrian patios a compacted granular sub‑base is commonly 100–150 mm (150 mm typical); increase to 200–300 mm for vehicular use. Screeded bedding sand: nominal 20–25 mm for concrete units (ICPI states ~25 mm). Compact sub‑base to specified compaction (industry: min. ~98% of standard Proctor for pedestrian/ residential per ICPI); ensure base tolerance (±10 mm over 3 m) before bedding. Adjust depths to suit slab thickness and site assessment.
How do I handle edge restraints and why are they required?
Edge restraints prevent lateral migration of bedding sand and pavers. Acceptable solutions: cast‑in‑situ concrete haunching, full‑depth precast concrete edging, metal L‑edging fixed into aggregate, or manufacturer‑approved profiles fixed/haunched into the compacted base. Restraints must be anchored to the compacted sub‑base (not to loose sand) and installed to the desired finished level before laying units.
What about falls and drainage for a patio on sand?
Provide positive falls to an appropriate outfall (typical practice: minimum falls to shed water; some specifications use 1:80–1:40 depending on material and location). Do not rely on bedding sand for drainage. Consider SuDS principles: check infiltration (BRE 365) and route runoff to existing drains, soakaways or attenuation. Where impermeable paving increases runoff, plan suitable drainage or permeable alternatives.