
You cannot lay patio tile directly on loose dirt and expect it to last. Tile needs a rigid, stable, well-drained base beneath it or it will crack, sink, and shift within a season or two. What you can do is prepare that dirt properly, excavate to the right depth, build up a compacted subbase, and then choose one of three proven installation methods depending on your soil, climate, and budget. Get that foundation right and a tiled patio on a dirt site is a completely achievable DIY project.
How to Lay Patio Tile on Dirt: DIY Guide with Base Chart & Tips

Clara Farrell
26 Jul 2026
Can you really lay tile on dirt? The honest answer
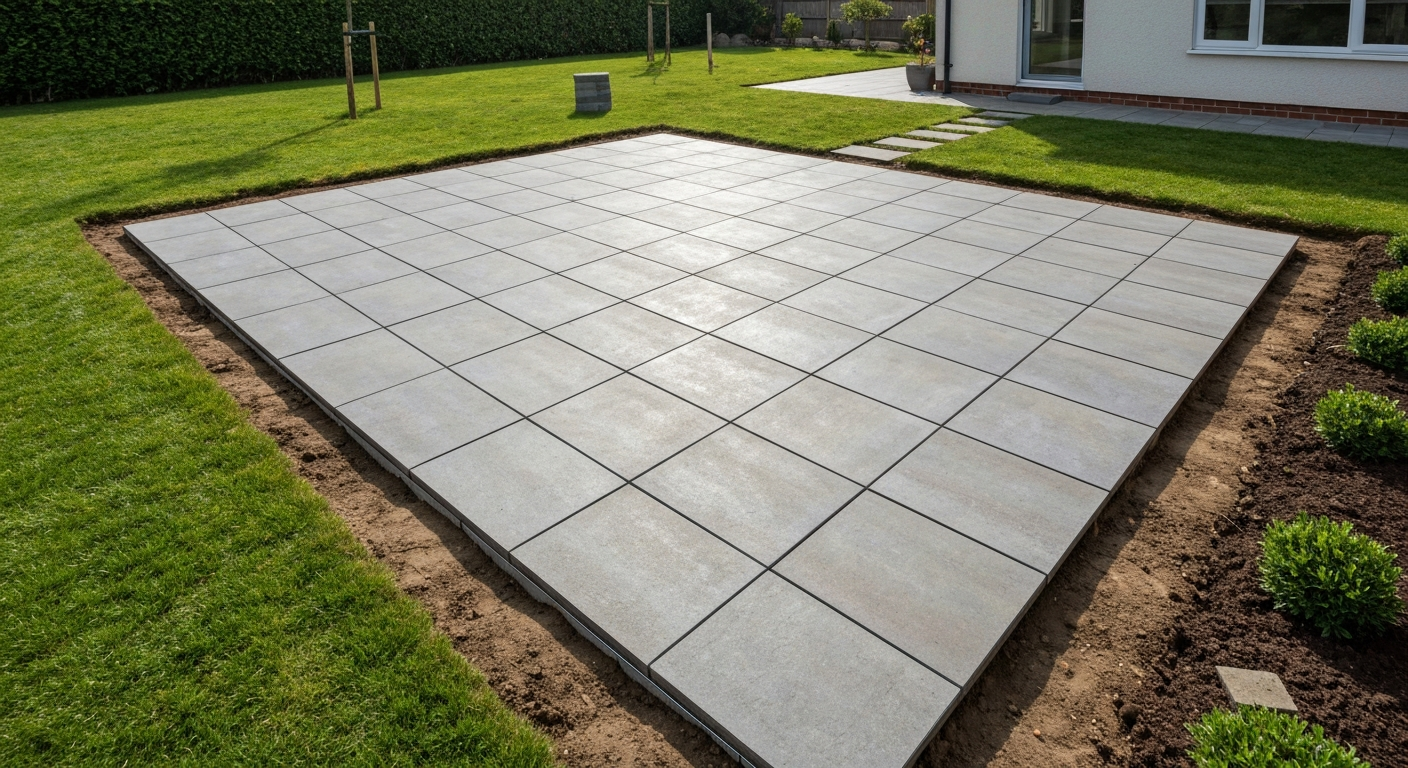
Tile is a bonded, rigid surface. Unlike loose pavers or gravel, it cannot flex or shift without cracking. Bare dirt compresses unevenly under foot traffic and furniture, swells when wet, heaves when it freezes, and never provides the flat, consistent support tile needs. So no, you cannot tile directly onto unprepared ground. What you can do is convert your dirt subgrade into a stable platform using compacted aggregate, a concrete slab, or a mortar bed. The dirt is your starting point, not your base.
There are also situations where no amount of DIY preparation will make a tile patio viable. If your site has a high seasonal water table, permanently saturated or boggy ground, deep organic or peat soils, or highly expansive clay that swells dramatically with moisture, you are looking at an engineered solution, a different paving type, or a raised deck. UFC 3-220-20 (Foundations & Earth Structures), problem soils and heave (discussion of expansive clays, water table and mitigation) recommends engineered solutions (over‑excavation, geotechnical mitigation, structural slab or alternate paving) for sites with high seasonal water tables, organic or peat soils, highly plastic (expansive) clays, or steep, unstable slopes UFC 3-220-20 (Foundations & Earth Structures) — problem soils and heave (discussion of expansive clays, water table and mitigation). Tile-on-dirt works reliably on stable, well-draining soils with a sensible slope. This guide will help you work out which camp your garden falls into before you buy a single tile.
Pick your method before you pick your tiles
There are three proven ways to build a tile patio over a dirt subgrade. Each suits different soil conditions, budgets, and skill levels. Here is how to choose.
| Method | Best for | Key materials | Skill level | Relative cost | Limitations |
|---|---|---|---|---|---|
| Compacted aggregate + sand/paving-sand bed | Stable, free-draining sandy or loam soils in mild climates | Crushed stone, paving sand, edge restraint, tile | Beginner-intermediate | Low-medium | Not suitable for frost-heave zones, clay, or large-format porcelain in wet climates |
| Concrete slab + polymer-modified thinset | Any stable soil; best for frost-prone or wet regions, large-format tile | Concrete, rebar/mesh, polymer-modified LHT mortar, tile | Intermediate-advanced | Medium-high | Requires concrete work; slab must cure before tiling |
| Mortar bed over compacted subbase | Irregular surfaces, natural stone, areas needing precise level correction | Crushed stone, cement:sand mortar bed, tile, thinset or back-butter | Intermediate | Medium | Labour-intensive; mortar bed must be set before tiling; not ideal for DIY beginners on large areas |
As a general rule: if you are in a climate with hard winters and ground that freezes to depth, go straight to the concrete slab method. If your soil is stable and your climate mild, the compacted aggregate and sand method is simpler and cheaper. The mortar bed is a specialist middle ground that suits natural stone or situations where a poured slab is impractical. The step-by-step installation procedures later in this guide walk through each method in detail.
Everything you need: tools and materials checklist
This list covers all three methods. You will not need every item for every approach, items marked with an asterisk are specific to the concrete slab method. Tick off what applies to your chosen route before ordering anything.
- Spade and flat-bottomed digging spade
- Wheelbarrow (at least one, ideally two for larger projects)
- Plate compactor (hire if you don't own one — essential, not optional)
- Hand tamper (for edges and tight corners the compactor can't reach)
- Long straight edge or screed board (at least 1.2 m / 4 ft)
- Spirit level (at least 1.2 m / 4 ft long)
- String lines and pegs for layout and slope
- Tape measure
- Chalk line or tile spacers
- Tile saw (wet saw strongly recommended for clean cuts on porcelain or stone)
- Angle grinder with diamond blade (for awkward cuts)
- Rubber mallet
- Notched trowel (size to match tile and mortar manufacturer spec — typically 10–12 mm notch for large tiles)
- Grout float
- Sponges, buckets, mixing paddle and drill
- Knee pads (you will thank yourself later)
- Safety glasses and dust mask (essential when cutting tile)
- Geotextile landscape fabric
- Crushed stone / compactable aggregate: #57 (19 mm) stone or crusher-run/roadbase — minimum 4 inches (100 mm) compacted depth for stable soils, more for clay or wet conditions (see depth chart below)
- Coarse bedding sand or paving sand (50 mm / 2 inches screeded bed — sand-set method only)
- Plastic or aluminium edge restraints and fixing spikes (sand-set method)
- Exterior-grade polymer-modified thinset mortar or LHT (Large and Heavy Tile) medium-bed mortar for porcelain or large-format tiles
- Tiles rated for exterior/freeze-thaw use (water absorption ≤ 0.5% for frost climates)
- Tile spacers or self-spacing tiles
- Exterior-rated sanded grout or epoxy grout
- Grout sealer and tile/stone sealer (for natural stone and textured porcelain)
- Flexible movement joint sealant / exterior caulk in matching colour
- * Ready-mix concrete or bagged concrete mix (slab method)
- * Rebar (10 mm / 3/8 inch) or wire mesh for slab reinforcement
- * Formwork timber (slab method)
- * Vapour barrier / polythene sheet (slab method, 250-micron minimum)
- * Plastic rebar chairs to keep reinforcement off ground
- * Curing compound or plastic sheeting for concrete curing
Assess your site before you do anything else
This step gets skipped more than any other, and it is the biggest reason DIY tile patios fail. Spend an hour on site assessment and you will know exactly what method to use, what depth to excavate, and whether a tile patio is even the right choice for your ground.
Know your soil type
Grab a handful of damp soil and squeeze it. Sandy or loam soil crumbles apart when you open your hand, that is good, free-draining ground that compacts well. Clay soil holds together in a smooth, sticky lump and smears between your fingers. Clay expands when wet and contracts when dry, which is exactly the movement cycle that breaks tile. If you have deep, heavy clay, your options narrow to a concrete slab that spans the movement or a different surface entirely. For formal identification, the USDA Natural Resources Conservation Service publishes free county-level soil maps at their Web Soil Survey, which will tell you soil texture, drainage class, and depth to the seasonal high water table for your specific address.
Check your slope and drainage
A finished tile patio needs a minimum fall of 1:80 (roughly 12 mm per metre, or 1/8 inch per foot) away from any structure, and 1:40 to 1:60 is better in wet climates. Before you excavate, use a long straight edge and spirit level to map where water currently flows. Any low spot that collects standing water after rain will do the same under your tiles if you don't address it. Note that managing drainage fall correctly is covered in detail in the guide on laying a patio with a fall, which is worth reading alongside this one if your site has any slope complexity.
Water table and mud conditions
Dig a test hole about 500 mm (20 inches) deep in your patio footprint and check it after a day of rain. If water seeps in and sits, your water table is high. A tile patio in that location will heave, sink, and fail regardless of how careful your installation is. This is the scenario covered in the guide on laying a patio on mud, and in many of those cases, a raised timber deck or a permeable paving solution is a far more honest answer than any tile installation.
Frost depth and freeze-thaw risk
If you are in a climate where the ground freezes in winter, you need to know how deep that frost penetrates. Your local building department sets minimum footing depths for your area, call them and ask, or look it up online. The National Weather Service North Central River Forecast Center also publishes seasonal frost-depth maps. As a working rule: any compacted aggregate base needs to extend below the frost line, or the ground will heave and lift your tiles every winter. In practice, this means frost-prone sites almost always require the concrete slab method, with the slab sitting on a sub-base that reaches below the freeze depth.
Locate utilities before you dig
This is non-negotiable. Call 811 (USA) or your country's equivalent utility marking service at least a few days before you excavate. Gas, water, electrical, and telecoms lines can all run at shallow depths in garden areas. Marking is free and takes minutes to arrange. Hitting a gas line with a spade is not a DIY problem, it is a life-safety emergency.
Choose the right tile and adhesive for outdoors
Tile selection: not every tile belongs outside
For any outdoor patio in a freeze-thaw climate, specify tiles with a water absorption of 0.5% or less (tested to ASTM C373 or ISO 10545-3). This puts you firmly in the porcelain / impervious category under ANSI A137.1. Standard ceramic wall tiles, terracotta, and many natural stones absorb far more water and will spall and crack when that water freezes inside them. Porcelain pavers are the most practical choice for most DIYers: they are frost-resistant, hard-wearing, low maintenance, and available in large formats. If you want natural stone (slate, sandstone, granite, travertine), confirm the specific product is rated frost-resistant by the supplier, not just sold as 'outdoor', those are not the same thing.
Slip resistance matters outdoors, especially when wet. Look for tiles with a minimum R11 slip rating (DIN 51130 scale) or a coefficient of friction (COF) of at least 0.6 (wet, DCOF AcuTest). Heavily textured, matte, or brushed finishes are much safer on a patio than polished or semi-polished surfaces. Rectified tiles (precision-cut to exact dimensions) allow narrower grout joints but demand a flatter substrate, something to bear in mind if you are going sand-set rather than slab.
Mortar and adhesive: use the right product for the substrate
Standard unmodified thinset is not appropriate for low-absorption porcelain outdoors. Low-absorption tiles struggle to bond with unmodified mortars because there is no tile porosity to assist adhesion. The TCNA Handbook (the tile industry's primary North American installation reference) and manufacturers including MAPEI and Laticrete consistently specify polymer-modified thinset for exterior porcelain. For tiles larger than 400 x 400 mm (16 x 16 inches) or heavier stone formats, use an LHT (Large and Heavy Tile) medium-bed mortar, these are non-slump formulations that support large tiles without them sagging or rocking. For the mortar-bed method, a traditional cement:sand mortar (typically 1:3 or 1:4 mix) forms the levelling bed, with thinset or back-buttering used to fix the tile to it.
How deep does your base need to be? A chart by soil condition
These depths are practical working values based on ICPI (Interlocking Concrete Pavement Institute) technical specifications, IRC R506.2.2 guidance for slabs on grade, and standard industry practice. Local frost depths and AHJ (Authority Having Jurisdiction) requirements may increase these figures, always check your local building department for the final word.
| Soil condition | Excavation depth (below finished surface) | Compacted aggregate subbase | Sand bedding layer | Concrete slab (if used) | Notes |
|---|---|---|---|---|---|
| Stable, free-draining sandy or loam soil, mild climate | 200–250 mm (8–10 in) | 100 mm (4 in) compacted | 50 mm (2 in) screeded | N/A — sand-set method viable | Compact subgrade to ≥95% Standard Proctor before placing aggregate |
| Stable loam, mild climate, concrete slab method | 250–300 mm (10–12 in) | 100 mm (4 in) compacted | N/A | 100 mm (4 in) reinforced slab | Minimum slab thickness per ACI 302.1R; reinforce with 10 mm rebar or wire mesh |
| Moderately wet or heavy loam, mild climate | 300 mm (12 in) | 150 mm (6 in) compacted, use #57 crushed stone for drainage | 50 mm (2 in) paving sand or mortar bed | Preferred: 100 mm slab | Install geotextile between native soil and aggregate |
| Clay soil (non-expansive), moderate climate | 350–400 mm (14–16 in) | 200 mm (8 in) compacted crusher-run or #57 | 50 mm (2 in) paving sand (if sand-set) or mortar bed | Strongly preferred: 100–125 mm reinforced slab | Over-excavate and replace expansive clay with compactable fill; geotextile mandatory |
| Frost-prone soil (any type), freezing winters | To below local frost depth + 100 mm aggregate below that | At least 150 mm (6 in) compacted; more in severe freeze zones | N/A | Required: 100–125 mm reinforced slab | Concrete slab is effectively mandatory in hard-freeze climates; check local frost/footing depth requirements |
| Highly expansive clay, high water table, organic/peat soil | Not applicable | Not applicable | Not applicable | Not applicable — tile patio not recommended | Engineered solution, alternative paving type, or professional geotechnical assessment required |
Method 1: compacted aggregate with a sand bed, when it works and when it doesn't
This is the most accessible method for first-time DIYers. You excavate the area, lay geotextile fabric, compact a crushed stone subbase in lifts, screed a 50 mm (2-inch) sand bedding layer, and set your tiles into it. It requires no concrete work, no waiting for a slab to cure, and the materials are relatively cheap and widely available.
The method works well on stable, free-draining sandy or loam soils in climates that do not experience hard ground freezes. It is the approach most commonly used for larger-format natural stone pavers and porcelain patio tiles in the UK and in mild US regions. The bedding sand allows minor adjustments as you lay and can be re-levelled if individual tiles sink slightly in the first season.
The limitations are real, though. Sand-set tile is not bonded, which means it depends entirely on the stability of the compacted base beneath it. In clay soils, freeze-thaw climates, or areas with poor drainage, that base will move and your tiles will follow. Large-format porcelain (especially rectified tiles with narrow joints) is also less forgiving in a sand-set system because any slight base movement shows up immediately as lippage (tiles at different heights). For those tile types in anything but ideal conditions, jump ahead to the slab-and-thinset method.
Method 1 step-by-step: laying tile on compacted aggregate and sand
Step 1: Mark out and excavate
Set out your patio boundary with string lines and pegs, checking for square using the 3-4-5 triangle method. Add at least 150 mm (6 inches) all around your finished area to allow for edge restraints. Calculate your excavation depth using the chart above, for stable soil in a mild climate, you are typically digging out 200–250 mm (8–10 inches) below your intended finished tile surface. That accounts for 100 mm aggregate, 50 mm sand, and your tile thickness (typically 18–20 mm for outdoor porcelain). Mark the target depth on your pegs so you are not guessing as you dig.
Remove all topsoil and organic material. Roots, grass, and organic matter compact poorly and decompose over time, creating voids. If you hit a soft spot, old tree roots, fill material, disturbed ground, dig it out and replace it with compactable aggregate rather than trying to compact over it. Check your excavated level frequently with a long straight edge and spirit level.
Step 2: lay geotextile and add aggregate subbase
Before adding any aggregate, line the excavated area with a non-woven geotextile landscape fabric. Overlap joins by at least 300 mm (12 inches) and run the fabric up the sides of the excavation. This fabric does two jobs: it stops the aggregate from migrating down into the native soil over time, and it prevents weeds from pushing up through the base. It does not waterproof anything, it is permeable by design.
Add your crushed stone subbase in layers no deeper than 75–100 mm (3–4 inches) at a time. Use #57 (19 mm) crushed stone for good drainage or crusher-run/roadbase for a very firm compactable base, many installers use crusher-run as the main structural layer and a thin layer of #57 on top for drainage. Compact each lift thoroughly with a plate compactor before adding the next. Industry guidance recommends adding crushed stone subbase in 75–100 mm lifts, compacting each lift to at least 95% Standard Proctor, and providing a minimum 100 mm structural base for pedestrian slabs Paver & Patio Installation: Technical summary (RemodelCalculators / ICPI‑based guidance). This is not optional: uncompacted aggregate is not a stable base. Run the plate compactor in overlapping parallel passes and then diagonal passes. Compact the edges with a hand tamper. Aim for a compacted subbase that does not shift or indent when you walk on it.
Step 3: install edge restraints
Before you screed your sand, install plastic or aluminium edge restraints around the perimeter. These hold the sand bed and tile in place laterally, without them the edge tiles will gradually migrate outward. Fix restraints with the manufacturer's spikes driven into the compacted aggregate at the intervals specified (typically every 300–450 mm). Set the restraints at a height that accounts for your sand bed depth plus tile thickness, so the finished tile surface is flush with or very slightly proud of any adjoining surface.
Step 4: screed the sand bedding layer
Spread coarse paving sand or ASTM C33 concrete sand over the compacted aggregate to a depth of approximately 50 mm (2 inches) uncompacted. Set two parallel screed rails (lengths of 32 mm or 38 mm steel pipe work well) on the aggregate at the right height to give you a 50 mm sand bed, and pull a straight screed board across them to level the surface. Work in manageable sections, do not screed more than you can tile in a day, as foot traffic will disturb a screeded sand surface. The screeded sand should be level, consistent, and not compacted, you will be pressing tiles into it, which does the final levelling.
Build in your drainage fall at this stage. Your string lines should already be set to the correct fall (minimum 1:80 away from structures), so your screed rails and sand surface should follow that slope. If you are working on a more complex sloped site, the guide on laying a patio with a fall covers setting fall lines in detail.
Step 5: set the tiles
Start from a straight, visible reference edge, typically the wall or house edge of the patio. Work outward so that any cut tiles end up at the far edges where they are less visible. Lay out a dry run first to check your joint spacing and confirm the tile layout works before you set anything into the sand. For a straight layout, use chalk lines or string lines to keep rows aligned. If you are planning a curved section, the guide on laying a curved patio covers how to set out curves accurately.
Place each tile gently onto the screeded sand and press down firmly with both hands, then check with a spirit level across adjacent tiles. Adjust by lifting and either adding a small amount of sand underneath or pressing slightly deeper. Use a rubber mallet to tap tiles to level, checking constantly. Use tile spacers to maintain consistent joint width, for outdoor paving, a minimum 3 mm joint is recommended, and 6–10 mm is common with natural stone. Joints wider than the tile manufacturer recommends will need to be addressed with the correct grout specification.
Step 6: cutting tiles
Measure each cut tile individually rather than assuming they are all the same size. For straight cuts, a wet tile saw is the cleanest and safest option, it cuts porcelain precisely without the chipping that a score-and-snap cutter produces on thick outdoor tiles. For L-shaped cuts around obstacles, mark the cut line with a pencil or tape, make two wet saw cuts, and knock out the waste piece with a tile nipper or angle grinder. Always wear eye protection and a dust mask when cutting. Porcelain dust is hazardous to breathe.
Step 7: grouting and finishing
Allow any settling to happen before grouting, ideally overnight or longer. Sweep paving sand (polymeric jointing sand works particularly well for sand-set applications) into the joints if using a mortar-free approach, compacting it in two or three passes with the plate compactor (use a rubber pad under the plate to protect tiles). For a fully grouted finish, use an exterior-rated sanded grout mixed to the manufacturer's specification. Apply with a grout float, press firmly into joints at a 45-degree angle, and remove excess with a damp sponge before it sets. Clean grout haze off the tile surface with a barely damp sponge, not soaking wet, and buff dry with a clean cloth.
Install flexible movement joints (exterior caulk in a matching colour, not rigid grout) anywhere the tile meets a wall, step, or a change in substrate. This is a requirement in the TCNA Handbook and for good reason: rigid grout at a fixed boundary will crack as the patio moves seasonally. A 6–10 mm caulk joint there is invisible when done neatly and prevents a lot of future cracking.
Methods 2 and 3 in brief: slab-and-thinset and mortar bed
Method 2: concrete slab with polymer-modified thinset
This is the most durable and frost-resistant approach. You excavate deeper (to below frost depth plus your aggregate and slab thickness), compact a 100 mm (4 inch) minimum aggregate sub-base, pour a 100–125 mm (4–5 inch) reinforced concrete slab, let it cure for a minimum of 28 days (or at least 7 days before tiling if using a high-early-strength mix), and then tile directly onto the slab using a polymer-modified thinset or LHT medium-bed mortar. The slab must be prepared with control joints to manage cracking, and those control joints must be honoured through the tile layer with movement joints in the same location. Following ACI 302.1R guidance, concrete should be mixed to at least 25 MPa (3500 psi) and adequately cured to avoid surface dusting or cracking. For most residential patio slabs, this is achievable with ready-mix concrete delivered by truck or with bagged concrete on smaller projects. This method requires the most upfront work but gives you a tile installation that is effectively permanent in most soil conditions.
Method 3: mortar bed over compacted subbase
A traditional mortar-bed installation uses a semi-dry cement:sand mortar mix (roughly 1 part cement to 3–4 parts sand) placed over a compacted aggregate base to a depth of 50–75 mm (2–3 inches). The bed is tamped and screeded level (or to the required fall), allowed to firm up slightly, and then tiles are set into it using a neat cement slurry or thinset bond coat on the back of each tile. This method has excellent levelling capability and works well for natural stone on uneven ground, but it is labour-intensive and demands experience with mortar mixing and screeding. For most DIYers tackling a first patio, the slab method is more reliable and easier to get right.
Drainage, fall, and frost: the details that determine long-term performance
A tiled patio without proper drainage fall is a patio that will fail slowly and expensively. Water pooling on a tiled surface has nowhere to go except into the joints and down into the base, and once it gets into a sand bed or beneath a slab, freeze-thaw cycling does severe damage. Set your drainage fall when you set your string lines at the very beginning of the project, and check it at every layer: excavated subgrade, compacted aggregate, sand bed or slab surface, and finally finished tile surface. The target is a consistent 1:80 minimum gradient across the whole surface, sloping away from the house or any structures.
In frost-prone regions, frost heave is the single biggest cause of tile patio failure. The mechanism is simple: water in the soil beneath your base freezes, expands by up to 9% in volume, and physically lifts everything above it. A well-drained base (no standing water to freeze) combined with a base depth that extends below the frost line is the only reliable solution. No tile type or adhesive will resist frost heave if the base conditions allow it to happen. Porcelain tiles with ≤0.5% water absorption resist freeze-thaw damage to the tile itself, but they do nothing to prevent heave in the base.
Finishing details: edging, steps, and transitions
A patio that just stops at a rough edge looks unfinished and will erode at the perimeter. On sand-set installations, your edge restraints do the structural job, but you still need a visual edge treatment. Options include bull-nose tiles (rounded-edge tiles that cap the perimeter), cut stone edging, poured concrete edging, or timber sleepers set into the ground. Whatever you choose, make sure the edge is fixed and stable before you finish grouting.
Where your patio meets a lawn, path, or driveway, a transition strip prevents a trip hazard and protects the tile edge. Metal transition profiles are available for tile-to-other-surface junctions and are far tidier than a raw tile edge. Steps require special attention: outdoor stair nosings should have a pronounced slip-resistant profile, step risers must be consistent in height (building codes typically specify 150–190 mm / 6–7.5 inches for residential steps), and the entire step structure needs its own compacted base or structural support, a step built on uncompacted backfill will sink independently of the patio.
Time and cost: what to realistically expect
Material costs and labour time both vary significantly by method, tile choice, patio size, and your location. The figures below are rough working estimates for a mid-size patio of around 20 square metres (215 sq ft) in 2026, to help with initial budgeting. They do not include tile cost, which ranges from under $10 per sq ft for basic porcelain to $30+ per sq ft for premium natural stone.
| Method | Approx. material cost (excl. tiles) | DIY time estimate (20 m²) | Hire costs to factor in |
|---|---|---|---|
| Compacted aggregate + sand bed | $400–$800 USD | 2–3 weekends for a first-timer | Plate compactor hire: $80–$150/day; wet saw hire: $60–$100/day |
| Concrete slab + thinset | $900–$1,800 USD | 3–4 weekends (plus 28-day cure wait) | Plate compactor, concrete delivery or mixer hire, wet saw |
| Mortar bed over subbase | $600–$1,100 USD | 3–4 weekends | Plate compactor hire, mixer hire, wet saw hire |
These estimates assume you are doing the work yourself. If you hire a contractor for any stage, concrete pouring is a common one, add labour costs accordingly. Be realistic about your time: first-time DIY patios almost always take longer than expected. Budget for a contingency of 10–15% on materials for waste and cuts.
Common mistakes and how to fix them
- Skipping or under-compacting the subbase: the most common and most damaging mistake. There is no shortcut here — hire the plate compactor and compact in lifts. If tiles are already sinking, you will need to lift them, re-compact the base, re-screed, and relay.
- Laying tile directly on topsoil or organic material: organic matter decomposes and creates voids. Excavate all topsoil, no exceptions.
- Not building in drainage fall: pooling water damages grout, accelerates freeze-thaw damage, and makes the patio slippery. Set your fall in string lines before you start, and check it at every layer.
- Using unmodified thinset on low-absorption porcelain: bond failure, tile lifting, and delamination follow. Always use polymer-modified mortar for outdoor porcelain, as specified in the TCNA Handbook and by every major mortar manufacturer.
- Grouting movement joints instead of caulking them: rigid grout at a wall or structure junction will crack within one or two seasonal cycles. Use flexible exterior caulk at every fixed boundary.
- Ignoring utility locations: always call before you dig.
- Buying non-frost-rated tile for a freeze-thaw climate: spalling and surface failure within the first winter. Check ASTM C373 water absorption data — ≤0.5% is the threshold for frost resistance.
- Using the wrong sand for the bedding layer: play sand and fine sand pump out under traffic and cause sinking. Use coarse paving sand or ASTM C33 concrete sand.
- Tiling too close to a slab control joint without continuing the joint through the tile layer: the slab will crack and the tile directly above will crack with it. Honour slab control joints with corresponding movement joints in the tile layer.
- Lippage on sand-set large-format tile: sand-set is less forgiving for tiles over 600 mm (24 inches). For large porcelain formats, the slab-and-thinset method gives much better flatness control.
When to call a professional instead
There is no shame in recognising that a project has moved beyond what a DIYer should tackle alone. Consider getting professional help if: your site has expansive clay, a high water table, or saturated ground and you are set on a tile finish rather than an alternative surface; you need to pour a large concrete slab (anything over about 15 m² starts to be genuinely difficult to manage DIY without concrete finishing experience); your site has significant level changes that require retaining walls or step structures; or local building permits are required and the inspection process is more complex than a straightforward patio. A good contractor will also give you a fixed price and take on liability for the result, on a challenging site, that peace of mind has real value.
Maintenance: keeping your tile patio in good shape
A well-built tile patio is genuinely low maintenance. Sweep it regularly to stop grit and organic debris building up in joints. Wash it down with clean water and a stiff brush once or twice a year, or use a pressure washer on a low setting, keeping the nozzle at least 300 mm (12 inches) from the surface to avoid blasting out grout or jointing sand. Re-apply grout sealer every 1–2 years on standard cement-based grout, and apply stone sealer annually on natural stone to prevent staining and water ingress. Inspect the perimeter and movement joints each spring after freeze-thaw season: if caulk joints are cracking or pulling away, replace them promptly before water gets in behind them. If individual tiles have shifted or show lippage, it almost always means the base has moved, re-levelling that area sooner rather than later prevents the problem spreading.
When a different surface is the better answer
Tile is beautiful and durable when conditions suit it, but it is not the right answer for every site. If your ground is persistently wet, your soil is heavily expansive clay, or your budget cannot stretch to the slab and mortar work a proper tile installation demands, consider alternatives honestly. Porcelain or natural stone pavers on a sand-and-aggregate base (covered in the guide on laying patio slabs on sand) offer a similar visual result with more tolerance for base movement. Permeable block paving handles drainage naturally. A composite or hardwood deck lifts the surface entirely off problem ground. Choosing the right surface for your conditions is not admitting defeat, it is good building sense.
FAQ
Can you lay patio tile directly on dirt?
No — you should not lay tile directly on loose soil. Dirt shifts, settles, and holds moisture, which causes tiles to sink, crack, debond, or suffer frost‑heave. A stable, well‑drained subbase is required (compacted aggregate with a sand bed, a concrete slab, or a bonded mortar bed) depending on soil conditions and chosen tile/method.
How do I assess my site before starting?
Check soil type (sand, silt, clay, organic), slope and existing drainage, depth to seasonal high water table, and frost depth for your area. Use local soil maps or county resources and consult building‑department frost/footing depth. Avoid tile installs on saturated, organic, or highly expansive clay soils without engineered mitigation.
What are the three proven base methods for tile on dirt?
1) Compacted aggregate base + bedding sand (paver‑style) — for granular soils and good drainage; 2) Full concrete slab + polymer‑modified thinset — best for unstable sites or where a structural slab is required; 3) Mortar (dry pack/treated) bed over prepared subbase — traditional bonded approach for stone or large tiles where a thick, sloped mortar bed is needed.
When should I choose compacted aggregate + sand vs concrete slab vs mortar bed?
- Aggregate + sand: choose if subgrade is stable, drains well, and you want a simpler, lower‑cost install. Requires edge restraint. - Concrete slab: choose for poor soils, high loads, or where a monolithic stable surface is preferred; better frost/heave resistance if properly detailed. - Mortar bed: choose for large format stone/tiles needing a true bedding support and slope for drainage; requires more labor and skill.
What base depths are recommended by soil condition?
Typical industry guidance (adjust for frost depth and local code): - Granular, well‑draining soil: compact to 4"–6" aggregate base + 1"–1.5" bedding sand. - Moderately cohesive or seasonal moisture: 6"–8" compacted crusher‑run (roadbase) + bedding/mortar as needed. - Poor or expansive soils: over‑excavate and replace with 8"–12" engineered aggregate or pour a minimum 4"–6" reinforced concrete slab (follow local frost requirements). Always compact in lifts to ≥95% Standard Proctor where specified.
What tiles and adhesives should I use outdoors?
Exterior use: frost‑rated, low‑absorption tiles (porcelain with ≤0.5% water absorption) or natural stone rated for freeze‑thaw. For thinset on concrete/slab use polymer‑modified or LHT/medium‑bed mortars suited for large/low‑absorption tiles. For mortar bed set installations use appropriate exterior mortar mixes and sloped mortar beds. Follow tile manufacturer and TCNA/ANSI recommendations.