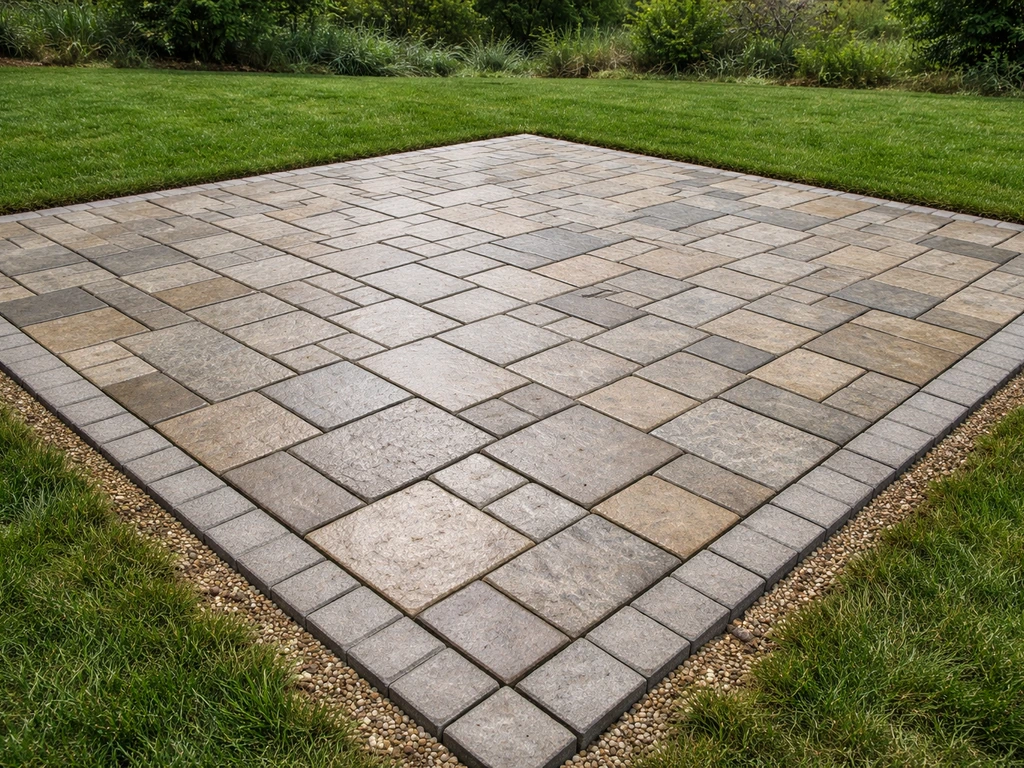
You can lay a rock patio yourself in a weekend or two if you follow the right sequence: excavate deep enough, build a compacted gravel base of at least 4 inches, add a 1-inch leveling layer of sand or stone dust, set your stones, cut and edge the perimeter, then lock the joints with polymeric sand. Get that order right and your patio will stay flat, drain well, and won't shift or sink. Skip or rush any of those steps and you'll be relaying stones within a few years.
How to Lay a Rock Patio: Step-by-Step DIY Guide

Clara Farrell
28 May 2026
Planning and choosing the right rock patio style
Before you buy a single bag of gravel, you need two decisions locked in: what type of rock and how you want to set it. Both choices affect your tools, your budget, your base depth, and how long the whole thing lasts.
Picking your rock
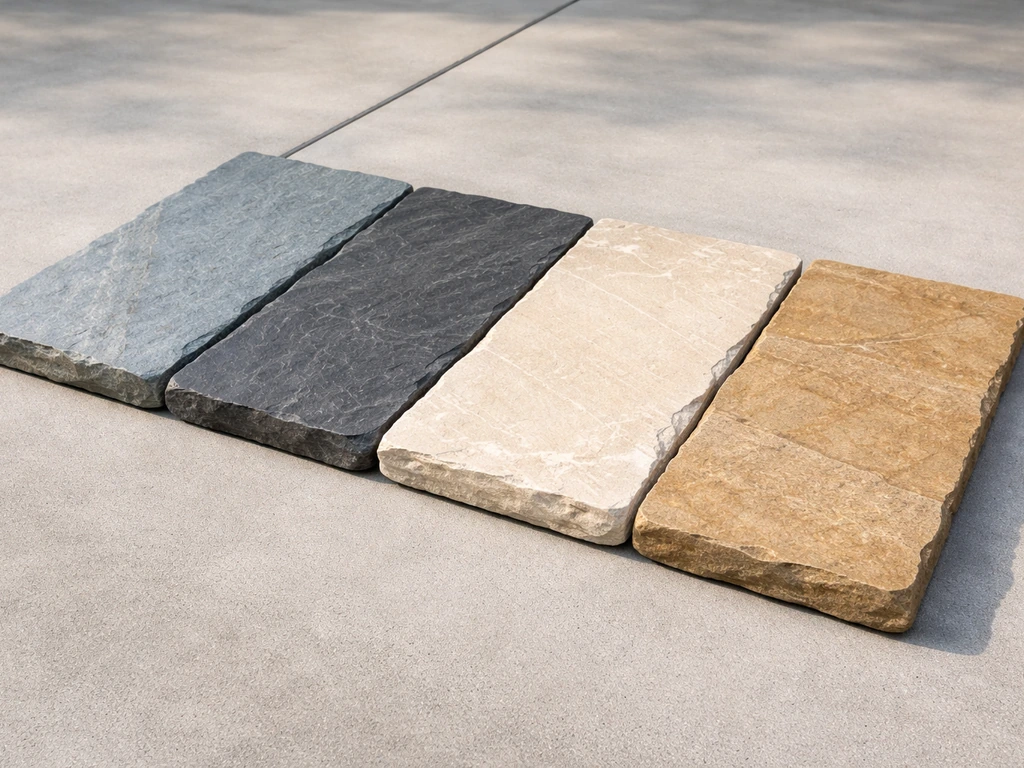
Flagstone is the most popular choice for a natural rock patio. It includes bluestone, slate, limestone, sandstone, and granite, all available as irregular shapes or cut slabs. Each has a different hardness and look. Limestone and sandstone are softer and easier to cut but can absorb more water. Granite and bluestone are harder and extremely durable. If you're drawn to a specific material, there are detailed guides on laying granite and limestone patios that go deeper into their quirks.
For irregular flagstone, budget for roughly 15 to 20 percent waste from cuts and breakage. For cut (rectilinear) slabs, 10 percent waste is usually enough. Measure your patio footprint in square feet, add your waste factor, then check with your supplier on stone thickness. For a dry-laid patio, stones 1.5 to 2.5 inches thick are ideal. If you plan to mortar stones onto a concrete slab, you can go as thin as 1 inch, but thinner stones are more fragile to cut and chip.
Dry-laid vs. mortar-set: which is right for you?
These are the two main installation methods, and choosing between them changes almost everything downstream.
| Feature | Dry-Laid (Sand/Gravel Base) | Mortar-Set (Concrete Slab) |
|---|---|---|
| Skill level | Beginner to intermediate | Intermediate to advanced |
| Base required | 4" compacted gravel + 1" sand/stone dust | Existing or new concrete slab |
| Stone thickness | 1.5"–2.5" recommended | 1" minimum |
| Repairs | Easy — lift and relay individual stones | Hard — must chip out mortar |
| Drainage | Excellent — water drains through base | Relies on surface slope only |
| Frost heave risk | Low if base is deep enough | Low on a properly built slab |
| Cost | Lower upfront | Higher (slab adds cost) |
| Best for | Most DIY patios | Thin stones, very high-traffic areas |
For most homeowners doing this for the first time, dry-laid is the way to go. It's forgiving, repairable, and drains naturally. The rest of this guide focuses on the dry-laid method because it's the most practical DIY approach. If you already have a concrete slab and want to lay stone over it, the base prep section is different but the stone placement and finishing steps still apply.
Sizing up your space and calculating materials
Sketch your patio shape and dimensions. For a simple rectangle, multiply length by width. For an L-shape or freeform, break it into rectangles, calculate each, and add them together. Then calculate your materials using this stack: 4 inches of compacted gravel base, 1 inch of bedding sand or stone dust, and your stone thickness. Your total excavation depth will be the sum of all three layers, plus about a quarter inch so the finished surface sits just slightly above grade for drainage. A 10x12 foot patio with 2-inch stone, for example, needs roughly 7 to 7.5 inches of total excavation.
Site prep: layout, excavation, and slope and drainage basics
This is the step most DIYers underestimate, and it's where most patios fail. Poor drainage and uneven grades cause water pooling, joint sand erosion, and the freeze-thaw damage that makes stones shift and sink every year. Get this part right and everything else is manageable.
Marking out the patio
Use stakes and mason's line to define your patio boundary precisely. Drive a stake at each corner, run the line taut between them, and check your corners for square using the 3-4-5 triangle method (measure 3 feet along one side, 4 feet along the adjacent side, and if the diagonal between those two points is 5 feet, the corner is square). Once you're happy with the shape, mark the perimeter on the ground with marking paint or a can of inverted spray paint. This line is your guide for excavation.
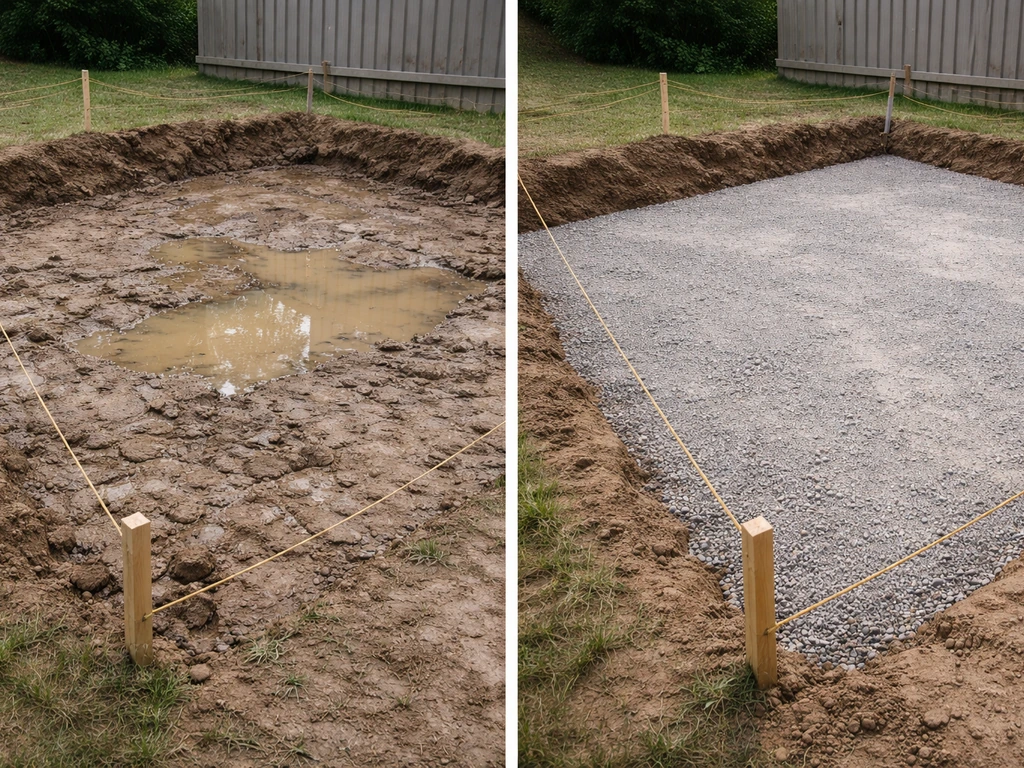
Excavating to the right depth
Dig out all the soil inside your marked area to your calculated depth (typically 7 to 9 inches for most flagstone setups). Remove all grass, roots, and organic matter. The excavated area should extend a few inches beyond your marked edge on all sides to give you room to set edging and support the outer stones properly. Aim to extend your base at least 4 to 6 inches beyond the patio edge so edge stones don't rock or cantilever over unsupported ground.
If you hit tree roots, remove them. If you hit soft, spongy soil or obvious clay, don't ignore it. Clay drains poorly and expands when wet, which is one of the main reasons patios heave and shift over time. More on that in the base section.
Setting the right slope for drainage
Poor drainage is the single most common cause of outdoor stone installation failure. Your patio needs to slope away from any structure (your house, garage, or fence) at a rate of about 1/8 to 1/4 inch per foot. So a 10-foot-wide patio should drop about 1.25 to 2.5 inches from the high edge near the house to the low edge away from it. Use a long level and a tape measure to check your slope as you work. Set your mason's lines at the correct slope before excavation so you can reference them throughout the build. This slope needs to be established at the subgrade level and maintained through every layer you add on top.
Building the base: gravel layers, compaction, and common ground conditions
The base is what your patio actually rests on. A beautiful stone surface laid on a poor base will always fail. Think of it like a mattress on a broken bed frame. No matter how nice the top looks, it won't stay level.
Geotextile fabric: use it or skip it?
Lay a non-woven geotextile fabric on the bottom of your excavation before adding any gravel. This fabric acts as a permanent separation barrier between your native soil and the aggregate base. It lets water drain through while preventing soil from migrating up into your gravel and breaking down the base over time. Skipping this step can significantly reduce how long your patio lasts, especially in clay or silty soils. Use non-woven geotextile specifically. Woven fabric is not permeable enough for drainage under patios and can actually contribute to hydrostatic pressure and frost heave in cold climates.
Adding and compacting the gravel base
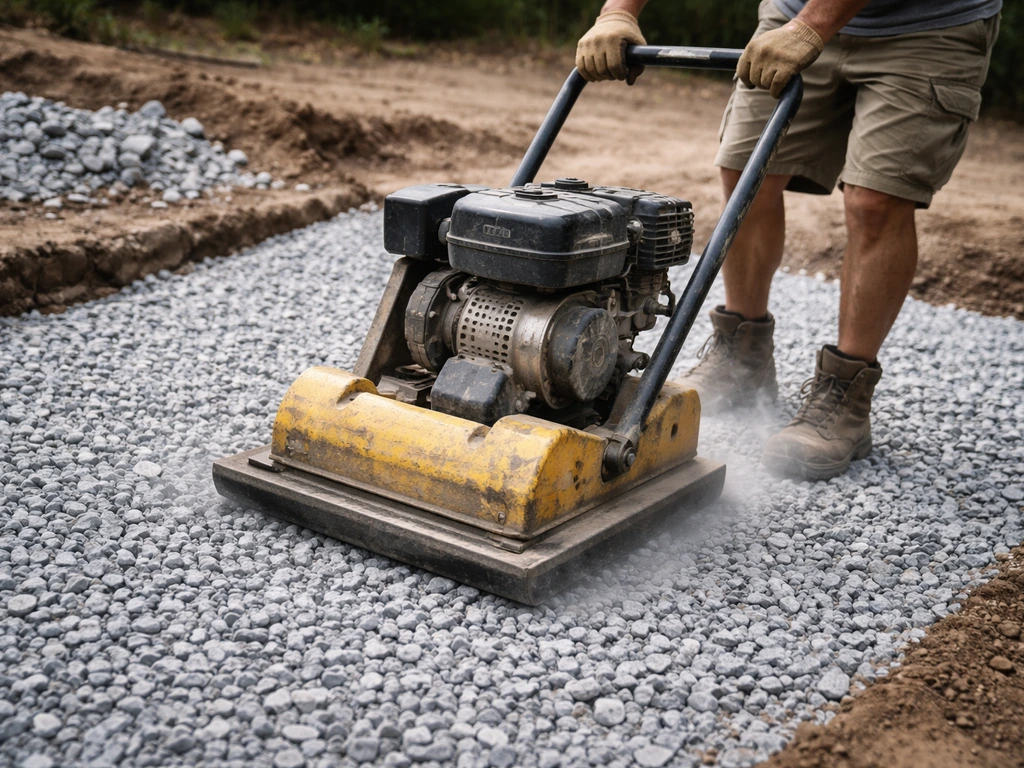
Use crushed stone or crushed gravel (sometimes labeled as processed gravel, road base, or compactable gravel). You want angular crushed stone, not rounded river gravel. Rounded stone doesn't compact tightly and will shift under load. Spread the gravel in layers no thicker than 3 to 4 inches and compact each layer with a plate compactor before adding the next. A plate compactor is absolutely worth renting for this job. Tamping by hand is not sufficient for anything bigger than a very small accent area. Your finished, compacted gravel base should be a minimum of 4 inches deep, and in areas with cold winters, heavy clay soil, or poor drainage, aim for 6 inches.
One of the most common base mistakes is using too little depth or skimping on compaction passes. Outdoor Escapes of VA attributes excessive stone and patio shifting to installation issues beneath the stone, pointing especially to insufficient base depth as a common cause most common base mistakes is using too little depth. Low spots, sinking stones, and shifting joints almost always trace directly back to improper compaction or insufficient aggregate depth. Do not rush this step. Run the plate compactor in overlapping passes across the entire area. Check grade frequently with your level. The compacted surface should feel rock solid underfoot with no give at all.
Handling clay soil and sloped ground
Clay soil is the nemesis of patios. It holds water, swells when wet, shrinks when dry, and moves with frost. If your subgrade is predominantly clay, you have a couple of options: excavate deeper and replace with compactable gravel (going 8 to 10 inches deep instead of the standard 7), or install a perforated drain pipe at the base of your excavation to route water away from the area. On sloped ground, your base layer itself needs to maintain a consistent thickness even as the surface grade changes. Use your slope references consistently at each layer, not just at the top.
Laying the stones: bedding, placement patterns, and leveling
With your base compacted and graded, you're ready for the fun part. But take a breath before you start dropping stones. The bedding layer and how you set each stone makes the difference between a patio that looks handmade in the best way and one that looks crooked and amateurish.
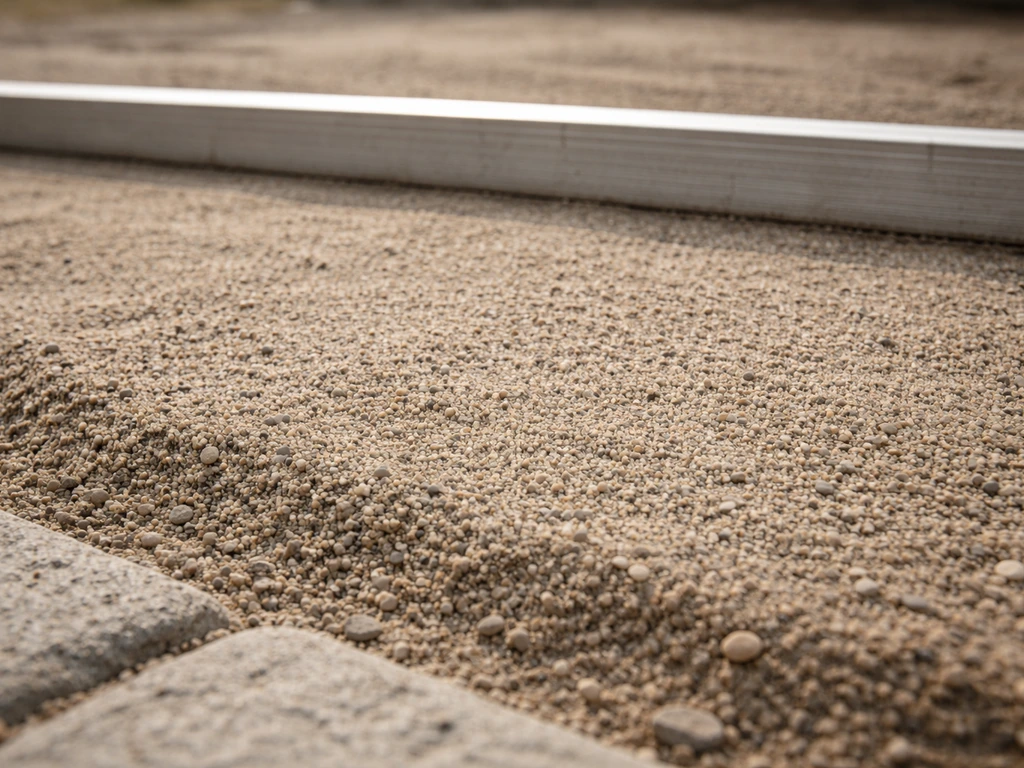
The bedding layer
Spread coarse sand or stone dust (also called granite screenings or quarry dust) over the compacted gravel base. This layer should be exactly 1 inch thick after screeding. Use two parallel pipes or wooden dowels as screed guides, set them to the right height at your correct slope, and drag a straight board (a 2x4 works fine) across them to create a perfectly flat, consistently thick surface. Do not compact this layer. It needs to stay loose so you can make fine adjustments when setting stones. Screed only as much area as you can cover with stone in a session. If you leave the screeded sand exposed overnight, it can shift or settle unevenly.
Dry-run layout before committing
For irregular flagstone, do a complete dry run before touching the bedding layer. Lay all your stones out on a flat surface nearby (a driveway works great) and puzzle-piece them together until you're happy with the pattern. Aim for joints of roughly 1 to 2 inches and avoid long, unbroken straight joints running across the patio (these look unnatural and create structural weak points). Once you have a layout you like, number the backs of stones with chalk and take a photo so you can replicate the arrangement when you actually set them.
Setting the stones
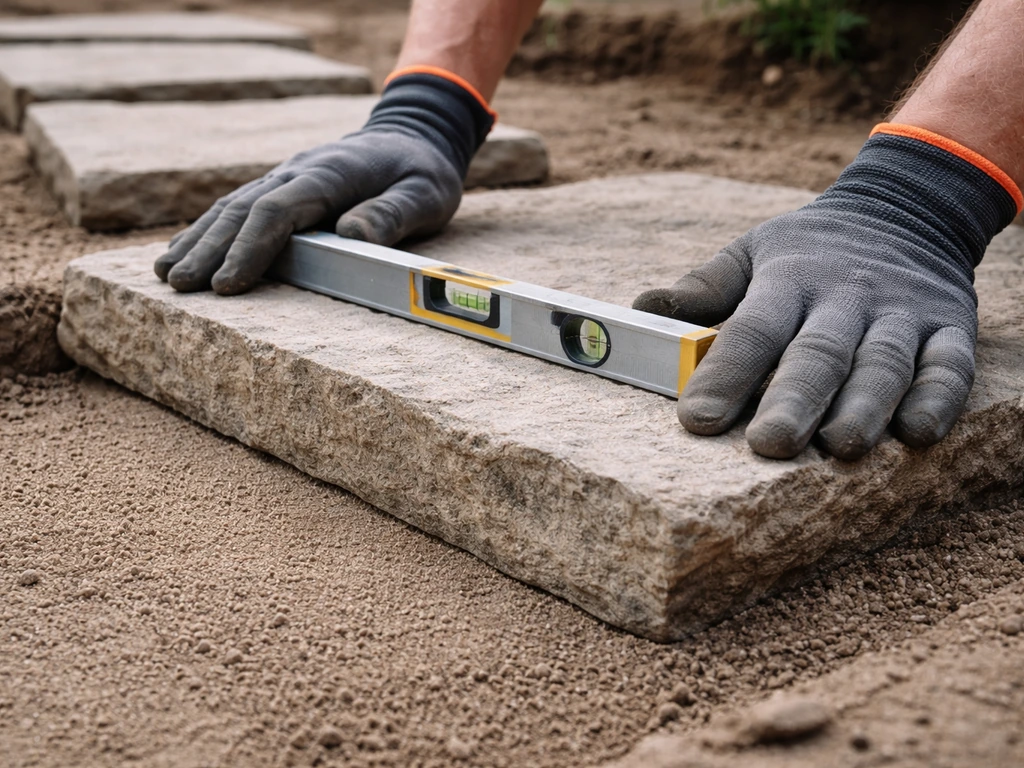
Place each stone gently onto the screeded bedding layer, following your planned layout. Press it down firmly and check it with a level in multiple directions. If a stone rocks, remove it, add or remove a small amount of bedding material, and try again. Do not shove grit or small pebbles under corners to prop stones up. Those specks of material create contact points that let the stone rock or shift later on. Every stone should have full, even contact with the bedding layer beneath it. Use a rubber mallet to tap stones into position gently.
Work from one end to the other, stepping only on stones you've already set (not on the screeded bedding layer). Check your slope and level every few stones. It's easy to drift out of grade gradually without noticing. Keep checking back to your reference lines. The goal is a surface that flows consistently without any individual stone sitting noticeably higher or lower than its neighbors.
Cutting, edging, and finishing for a tight professional look
Cuts and edges are what separate a patio that looks finished from one that looks like someone just dropped rocks in their yard. You don't have to be a stonemason to get clean results, but you do need the right tools and a bit of patience.
Cutting flagstone
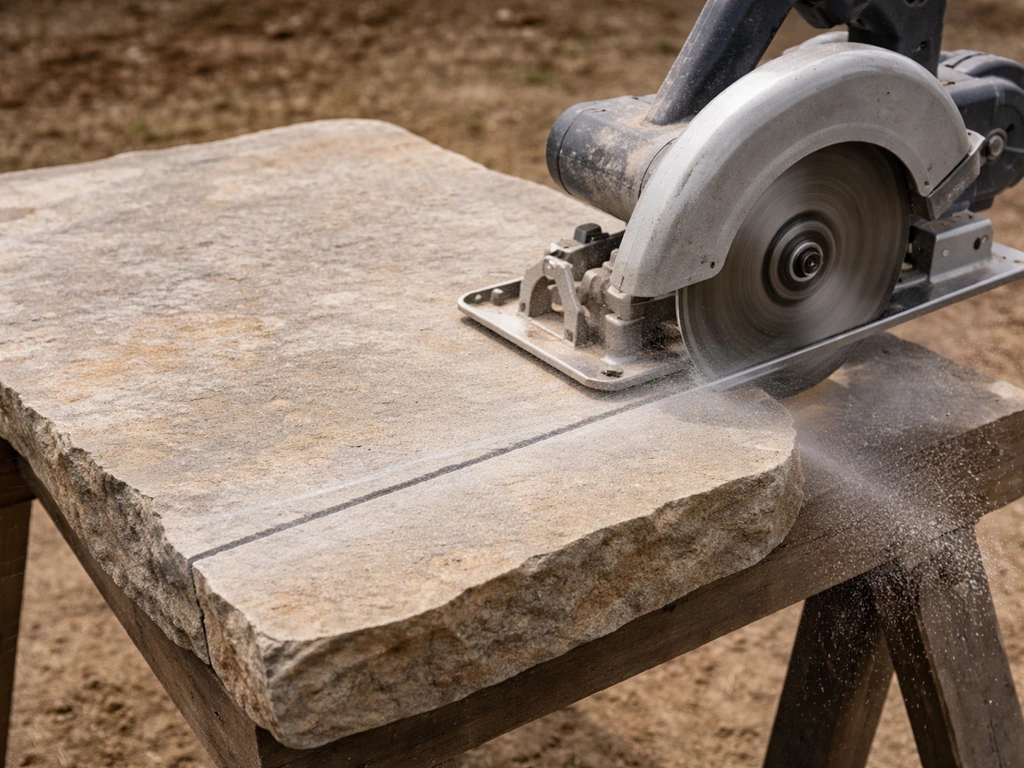
For straight cuts, a circular saw with a diamond blade or an angle grinder with a stone cutting disc works well. Score the cut line first with a few light passes, then make the full cut. Wear eye protection, a dust mask, and hearing protection. For curved cuts or irregular edges, an angle grinder gives you more control. If you need to make a lot of cuts (or cuts in very hard stone like granite), renting a wet saw for the day is worth every dollar. It keeps the blade cool, reduces dust, and gives you much cleaner results.
For splitting irregular flagstone along natural fault lines, you can score the stone with a chisel and then strike firmly with a hammer. This works best on softer stones like sandstone and limestone. It's faster than sawing but less precise. Practice on off-cuts before trying it on a stone that's already fitted into your layout.
Installing edging
Edge restraints are not optional. Without them, the outer stones have nothing to push against and will slowly migrate outward over time. For flagstone patios, your options include metal landscape edging, plastic paver edging, or concrete edge restraints. Plastic paver edging spiked into the ground is the most common DIY choice. Drive the spikes through the edging and deep into the compacted gravel base at intervals of about 12 inches. Make sure the edging sits flush with or just below the top surface of your stones.
If your edging is uneven, your patio perimeter will be uneven. Run your mason's line back along the edge to check alignment before driving all the spikes. Pay special attention to corners and curves. Some edging systems use separate corner pieces. Others can be cut and bent to form gentle curves. Take your time here because poorly installed edging is one of those things that's obvious and frustrating to fix after the fact.
Jointing, final compaction, cleanup, and keeping it looking great
You're in the home stretch. The stones are down, the edges are set, and now you need to lock everything together and protect it. Jointing and final compaction are what transform a collection of set stones into a solid, unified surface.
Choosing your joint material
For dry-laid patios, you have two main options: regular coarse sand or polymeric sand. Regular sand is cheaper and easier to work with, but it can wash out over time, allows weeds to grow in joints, and needs occasional topping-up. Polymeric sand contains a polymer binder that activates with water and hardens the joint, making it much more resistant to washout, ants, and weeds. For most patios, polymeric sand is worth the extra cost.
Applying polymeric sand correctly (and avoiding the common pitfalls)
Make sure all your stone surfaces are completely dry before you start. This is important. Sweep polymeric sand across the entire patio, working it into all the joints with a push broom. Then run a plate compactor over the whole area (put a rubber pad or a piece of carpet under the plate to protect the stone surface). This seats the stones firmly and vibrates the sand deeper into the joints. Sweep again to refill any joints that settled. Repeat the sweep and compact cycle until joints are filled to within about a quarter inch of the stone surface.
Once joints are filled, sweep all excess polymeric sand completely off the stone surfaces using a hard-bristle broom first, then a softer broom. Do not skip this step. Any sand left sitting on the stone surface will bond there when you activate it with water, and it's very hard to remove after the fact. Once the surface is clean, activate the polymer by wetting the patio with a hose set to a gentle shower setting. Apply enough water to saturate the joints without washing the sand out. Allow it to soak in, then apply a second pass of water. Let the surface cure undisturbed for at least 90 minutes before walking on it, and keep it dry for 24 hours if possible.
Common polymeric sand mistakes to avoid: working on a wet surface, leaving excess sand on top of stones before watering, using too much water pressure and washing the sand out of joints, or compacting when the bedding material is wet underneath. Any of these will either prevent the polymer from bonding or blow the sand right out of the joints.
Cleanup and long-term maintenance
Once everything is cured, do a final cleanup. Blow or brush off any remaining dust or debris. Check every stone one more time for rocking or unevenness. If you find a problem stone, you can still lift it, adjust the bedding material, and re-set it before the joints are fully hardened.
Going forward, inspect your patio each spring after the ground has thawed. Look for stones that have heaved, joints that have washed out, or edging that has shifted. Small issues caught early are easy fixes. Ignored, they turn into expensive relays. Top up any joints that have eroded with fresh polymeric sand, re-spike any edging that has lifted, and re-set individual stones that have shifted before the problem spreads.
Sealing natural stone is optional but recommended for porous stones like sandstone and limestone. A penetrating stone sealer helps repel water and staining without changing the look of the surface. Apply it to a clean, dry surface about a month after installation to let the joints fully cure first.
Your tools and materials checklist
- Stakes and mason's line (for layout and slope reference)
- Marking paint or inverted spray paint
- Shovel and mattock for excavation
- Wheelbarrow
- Plate compactor (rent one — do not skip this)
- Long level and tape measure
- Screed pipes or wooden dowels (1 inch diameter) and a straight 2x4
- Rubber mallet
- Angle grinder with stone cutting disc, or circular saw with diamond blade
- Safety glasses, dust mask, hearing protection
- Non-woven geotextile landscape fabric
- Compactable crushed gravel (4 to 6 inches worth after compaction)
- Coarse sand or stone dust for bedding layer (1 inch)
- Your chosen stone (quantity plus 15 to 20 percent waste for irregular, 10 percent for cut)
- Plastic paver edging and spikes
- Polymeric sand
- Hard-bristle broom and soft broom
- Garden hose with adjustable nozzle
- Rubber screed pad or old carpet (to protect stones during final compaction)
The sequence to follow from start to finish
- Choose your stone type and setting method (dry-laid vs. mortar-set)
- Measure the space, calculate materials, and order everything plus waste
- Mark the patio perimeter with stakes and mason's line
- Excavate to the correct depth (typically 7 to 9 inches) and extend 4 to 6 inches beyond the perimeter
- Lay non-woven geotextile fabric over the excavated subgrade
- Add compactable gravel in 3 to 4-inch lifts, compact each layer fully
- Check slope at the gravel surface (1/8 to 1/4 inch per foot away from structures)
- Screed a 1-inch bedding layer of sand or stone dust
- Do a dry-run layout of stones, number and photograph the arrangement
- Set stones onto the bedding layer, check level constantly, use a rubber mallet to seat each stone
- Cut border stones to fit, working around the perimeter
- Install edging restraints and spike them into the gravel base
- Sweep polymeric sand into joints, compact, and repeat until joints are full
- Remove all excess sand from stone surfaces
- Activate polymeric sand with a gentle shower of water and allow to cure
A rock patio is genuinely one of the most satisfying DIY projects you can tackle. The work is physical and the margin for error is real, but none of it is beyond a motivated homeowner with the right information. Follow the sequence, don't rush the base, and you'll have a patio that looks great and stays solid for decades. If you want the clearest step-by-step plan, follow this guide for how to lay a resin patio from start to finish. If you want a pebble patio instead of flagstone, the build sequence is similar, so use this guide on how to lay a pebble patio as you plan your materials and layout.
FAQ
Can I lay a rock patio directly on the ground without gravel or sand?
It’s strongly not recommended. Without a compacted crushed-stone base and a bedding layer, the patio has no stable support, water has nowhere to go, and stones will rock and sink. If you’re trying to go thinner, the minimum that still works is geotextile plus a compacted gravel base (at least 4 inches), then bedding sand or stone dust (about 1 inch).
What if my patio area already has a concrete slab or existing pavers?
You can still place stones, but you generally shouldn’t bury the old surface under loose material. If you’re placing dry-laid flagstone over concrete, you’ll need a different base prep so drainage and leveling work properly, and you must ensure the stone thickness and jointing method fit the surface. If the slab has cracks or water issues, fix them first to avoid repeating failure below the stones.
How do I choose the right slope if my patio is next to a garage door or fence line?
Use the drainage requirement as the goal, but watch the “high side” you create. If the patio abuts a garage slab or a foundation, slope away from that structure, aiming for about 1/8 to 1/4 inch per foot. If the low end discharges toward a fence, confirm the discharge area won’t undermine the fence posts, add a gravel swale or drain pathway if needed, and keep the discharge away from landscaping that can erode.
Do I need geotextile fabric if my soil is sandy?
Geotextile still helps, but the stakes are higher in clay, silty, or organic soils. In sandy ground, soil migration is slower, so you can sometimes get away without it, but it can still prevent fine particles from pumping up into the bedding and base. If you skip it, be extra strict about base thickness, compaction, and preventing organic debris from getting mixed into the layers.
What should I use for edging if my patio has tight curves?
Flexible metal edging or properly cut-and-bent edging systems often work better than straight plastic runs. The key is that the edging must sit flush with or slightly below the stone tops so the outer stones have continuous lateral support. For very tight radii, dry-fit sections first, and plan on corner pieces or tailored cuts so you don’t leave gaps that let stones creep outward.
How can I tell if I compacted the gravel base enough?
After compacting, the surface should feel rock solid with no visible pumping, and your feet should not leave noticeable ruts. Also check grade with a level and straightedge in multiple directions, because compaction that’s uneven leads to “hidden” low spots that won’t correct themselves once stones are set. If you can sink a tool slightly into the base, you’re not done compacting or you have inconsistent base depth.
How do I prevent polymeric sand from failing around weeds or drainage channels?
Two common triggers are leftover sand on the stone surface and over-watering during activation. Keep the stone faces clean before wetting, sweep off all residue, then wet with gentle shower flow to saturate joints without washing them out. If you have a drainage channel, ensure the slope carries water away from the patio, otherwise joint sand will be repeatedly exposed and can wear down.
Can I walk on the patio immediately after jointing?
Don’t. After activating polymeric sand, keep the surface undisturbed for at least 90 minutes, and try to avoid foot traffic for 24 hours if possible. If you must work nearby, place boards over the stones to distribute weight so you don’t disturb joints before the polymer cures.
What’s the best way to handle small uneven stones after the patio is set?
Lift and reset the stone rather than “shimmying” it with grit under the corner. Remove the stone, scrape away the bedding where needed, add or remove bedding material, then set it again with full contact. This avoids creating point loads that let the stone rock later, and it keeps the top surface consistent with your reference lines.
Should I seal a flagstone patio right away or wait?
Wait for cure before sealing. A typical approach is to seal about a month after installation, which lets joints fully cure and reduces the chance of trapping moisture in the bedding. Prior to sealing, confirm the surface is clean and dry, and use a penetrating sealer that matches porous stones like sandstone and limestone.