
Laying a pebble patio comes down to three things done right: a solid compacted base, a properly installed edging frame to keep pebbles in place, and a 30–50 mm layer of the right pebbles on top. Get those three things right and you'll have a patio that looks great, drains well, and won't turn into a weedy mess by next summer. Skip any one of them and you'll be raking pebbles back into place every few months.
How to Lay a Pebble Patio: Step-by-Step DIY Guide

Clara Farrell
6 Jul 2026
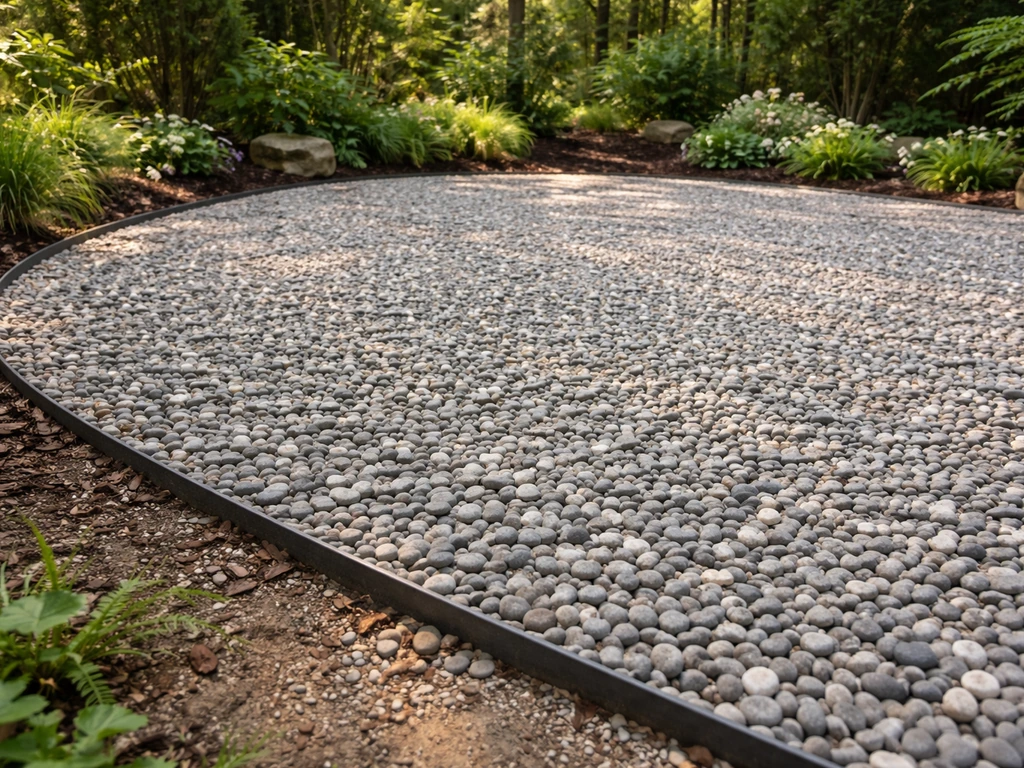
Planning your pebble patio layout and budget
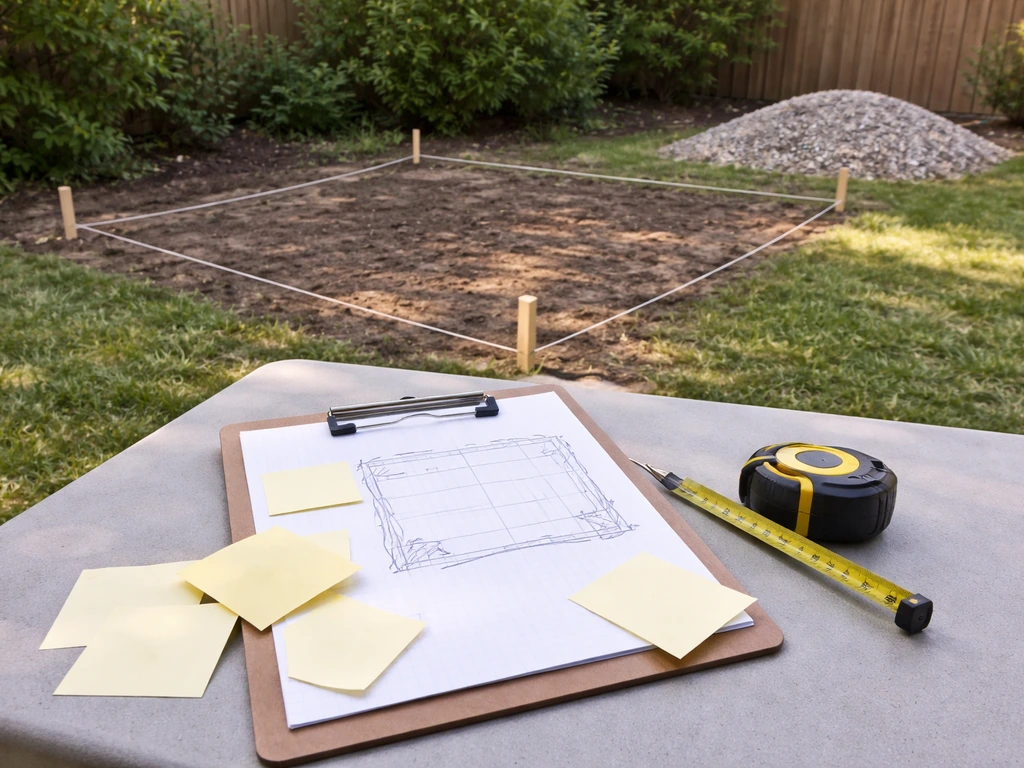
Before you dig anything, spend an hour on paper. Measure the area you want to pave and sketch it out, even a rough drawing helps you spot awkward corners, slopes, or existing features like drains that will affect your design. A tape measure, four pegs, and some string are all you need to mark the boundary on the ground.
For materials, work from the top down. You'll need pebbles to a depth of around 40 mm (the sweet spot for most stone sizes), a compacted sub-base of 75–100 mm of MOT Type 1 crushed stone, and a weed-suppressing membrane in between. Add edging around the perimeter and you have your full shopping list. To estimate pebble quantities, multiply your area in square metres by 0.04 (for 40 mm depth) to get a cubic metre figure, then convert using your supplier's density data, as a rough guide, a 10 m² patio at 40 mm depth needs around 700–900 kg of pebbles depending on stone type.
Budget-wise, the sub-base and edging materials often cost as much as the pebbles themselves, so don't be caught out by only pricing the top layer. If you're covering a larger area, hiring a plate compactor for a day is worth every penny, trying to compact MOT Type 1 by hand leads to a soft, spongy base that shifts under foot traffic within months.
Choosing a pattern and edging style
Loose pebbles don't have a pattern the way block paving does, the visual interest comes from pebble colour, size, and the shape of the patio itself. Curved edges look more natural and work well with rounded pebbles. Straight-edged rectangular patios suit angular slate chippings or Scottish cobbles. Either way, mark your final shape clearly with string lines before you start digging.
Preparing the base: removing turf, grading, and compacting
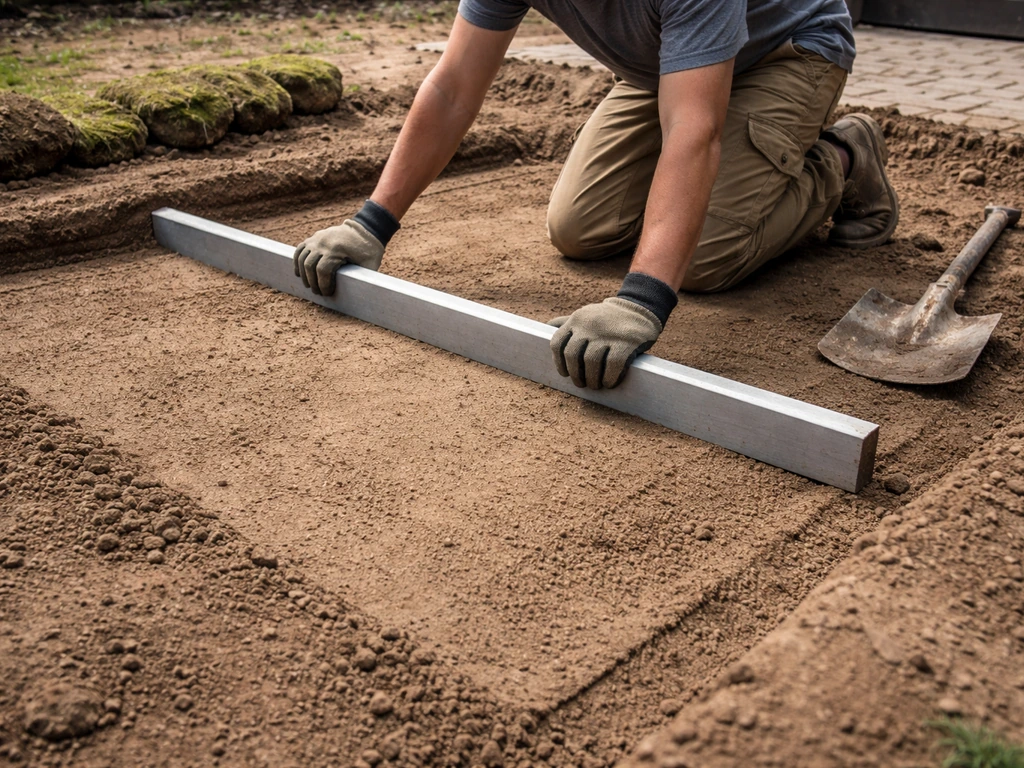
This is the stage most people rush, and it's the reason most pebble patios fail. The ground prep takes longer than the pebble installation itself, budget a full day just for excavation and compaction on a typical garden patio.
How deep to dig
Work backwards from the finished surface level. You need roughly 40 mm for pebbles, 25 mm for a sand or fine grit bedding layer (optional but helpful for levelling), and blank" rel="noopener noreferrer">100–150 mm for a compacted Type 1 sub-base. That puts your blank" rel="noopener noreferrer">total excavation depth at around 165–215 mm (roughly 7–8 inches) below finished level. If you want something sturdier, you can apply the same base principles to how to lay a granite patio. On soft or clay soil, go to the deeper end of that range.
- Mark out your patio area with pegs and string, checking corners are square.
- Strip the turf with a spade or turf cutter and remove it entirely — don't bury it.
- Dig down to your target depth and remove all topsoil and organic material.
- Check the base is roughly level, then rake it flat and remove any large stones or roots.
- Compact the exposed subgrade with a plate compactor or hand tamper before adding any base material.
Grading for drainage
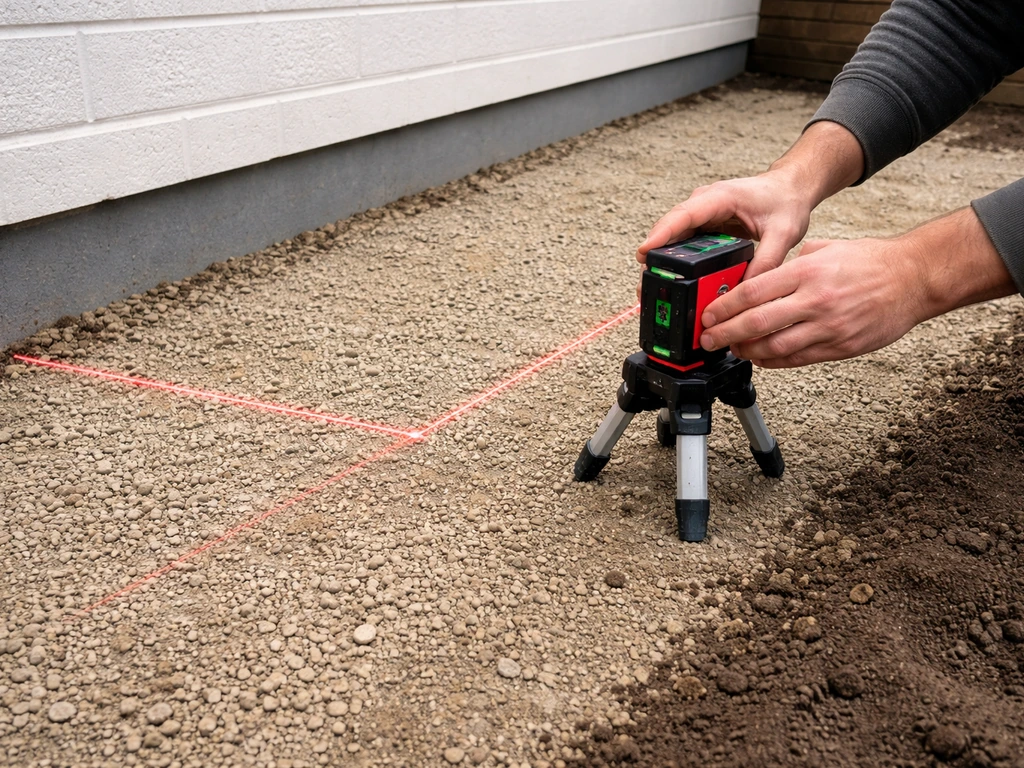
A pebble patio needs a very slight fall away from the house, around 1:60 is the standard (about 15 mm drop per metre). This is subtle enough that you won't notice it underfoot, but it makes all the difference to how water moves off the surface. Set your string lines to this fall before you add any base material so the slope is built into every layer from the ground up. If you want a firmer, more permanent finish, follow the same base preparation steps and use limestone patio pieces with the right bedding and jointing approach.
Compacting the sub-base
Spread MOT Type 1 in layers no deeper than 75 mm loose at a time, then compact each layer before adding the next. You can't dump 150 mm of loose stone and compact it all at once, the bottom layer won't be properly compacted and the surface will feel firm but gradually sink. Two passes with a plate compactor over each layer is the minimum. Hire a compactor if you don't own one; it's a one-day job and will cost a fraction of having to redo the whole patio.
Choosing materials: pebble type, edging, weed barrier, and base options
Which pebbles to use
The two main choices are loose decorative pebbles (like Scottish cobbles, Mexican beach pebbles, or white quartz) and angular chippings (like slate or gravel). Rounded pebbles look softer and more natural but are more likely to roll underfoot if laid too shallow. Angular chippings interlock better and feel more stable to walk on. For a patio that gets regular foot traffic, go for angular stone or keep rounded pebbles to a larger size (40–60 mm) so they don't scatter. For purely decorative areas, you have more freedom with size and shape.
| Pebble Type | Best For | Stability | Typical Size |
|---|---|---|---|
| Scottish cobbles (rounded) | Decorative, low-traffic areas | Moderate | 20–40 mm |
| Mexican beach pebbles (rounded) | Feature patios, relaxed aesthetic | Moderate | 40–75 mm |
| White quartz chippings (angular) | Bright, modern look, light traffic | Good | 20–40 mm |
| Slate chippings (angular) | Contemporary, high-traffic areas | Very good | 20–40 mm |
| Gravel/crushed limestone (angular) | Practical, budget-friendly | Very good | 10–20 mm |
Weed barrier
A woven geotextile membrane is essential. Avoid thin plastic sheeting, it doesn't allow drainage and will degrade faster. A good weed-suppressing fabric lets water through, stops weeds pushing up from below, and helps stabilise the pebble layer. Lay it directly on top of your compacted sub-base and overlap joins by at least 150 mm. Pin the edges down before you start placing pebbles.
Edging options
Edging is what keeps your pebbles from spreading into the lawn or flower beds over time. Steel or aluminium landscape edging is the most discreet option and works well for curved designs. Timber sleepers or gravel boards give a more rustic look and are easy to cut to length. Brick or block edging is the most permanent and suits formal designs.
Whatever you choose, install it before you lay the membrane and pebbles, not after, it needs to be set into the ground with the base material behind it for proper support. If you are learning how to lay a limestone patio instead, use the same base principles, then set the limestone on the right bedding and grout or seal as recommended for your stone lay the membrane and pebbles.
Mortar or loose-lay: which system?
Most garden pebble patios are loose-laid (pebbles placed directly on a compacted base and membrane). This is easier to install, allows drainage, and lets you adjust things as you go. Mortared pebble patios, where pebbles are set into a mortar bed, are more stable and better for mosaic-style designs, but they're more labour-intensive and less forgiving if levels are wrong. For a first project, go loose-lay unless you specifically want a decorative mosaic or are working on a steep slope where movement would be a problem.
Step-by-step installation: setting the base and placing pebbles
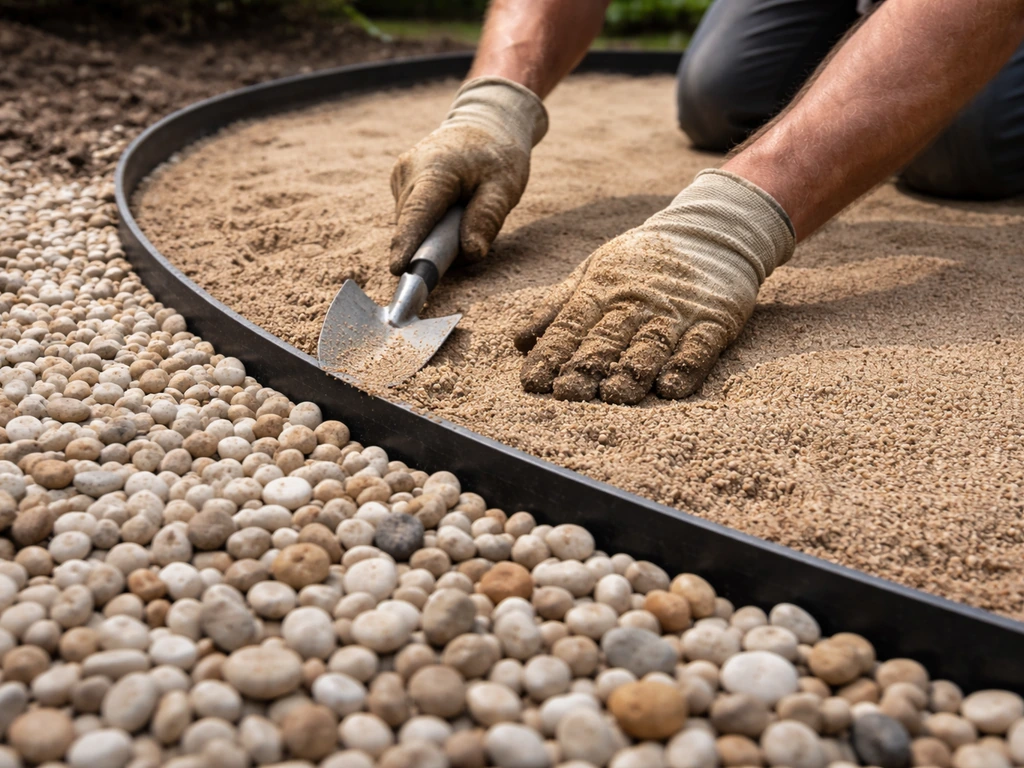
- Install your edging first. Dig a narrow trench around the perimeter to the correct depth and set edging in place, checking it's at the right height for your finished surface level. Pack compacted hardcore or concrete behind it to hold it firm.
- Lay the weed membrane over the compacted sub-base, cutting it to size and overlapping joins by at least 150 mm. Pin it down at the edges and along any joins with U-shaped membrane pins.
- Optional: add a 25 mm layer of coarse grit or sharp sand on top of the membrane if you want a slightly more levelled bedding layer. Rake it flat to your graded fall lines.
- Pour pebbles in sections rather than tipping the whole load in one spot. Work from one end of the patio to the other, spreading pebbles with a rake to an even depth of 30–50 mm (aim for 40 mm as your target).
- As you spread, check depth regularly with a depth gauge — a short piece of marked timber works perfectly. Adjust as you go rather than trying to fix uneven areas at the end.
- Once all pebbles are spread, rake the surface smooth and walk the entire area to feel for low spots, high spots, or soft patches. Redistribute pebbles as needed.
- For mortared installations: mix a semi-dry mortar (4:1 sharp sand to cement) and lay it at 40–50 mm depth over the compacted base. Press each pebble firmly into the mortar by hand to at least half its depth, keeping joints consistent. Work in small sections before the mortar sets.
One tip that saves a lot of frustration: don't walk on the membrane before the pebbles are in place, especially on sandy ground. Foot traffic pushes the membrane into the sub-base and can create dips that are awkward to level out later.
Finishing details: edging, joints, sealing, and cleanup
Finishing and securing the edging
Once the pebbles are laid, go around the edging and check it's still sitting at the right height. Pebbles should sit just at or slightly below the top of the edging so they're contained but not hidden. If any edging has shifted during installation, re-pack the back of it with compacted stone dust or mortar and allow it to set before use.
Sealing: do you need it?
For loose-laid pebble patios, sealing isn't necessary and in most cases isn't appropriate, you can't effectively seal loose stone. If you've gone the mortared route, a patio sealer or impregnating stone sealer applied after the mortar has fully cured (usually 28 days) will help lock in colour, reduce staining, and make the surface easier to clean. Always test on a small hidden area first, as some sealers darken stone noticeably.
Final cleanup
Rake the surface one final time to even out any disturbed areas from walking on it. Remove any membrane that's visible above the pebble line and tuck or trim it neatly behind the edging. Sweep or blow away any debris, and hose down the pebbles lightly to bring out their colour and settle any fine dust from the stone surface.
Drainage, maintenance, and common problems to fix early
Drainage
One of the big advantages of a loose pebble patio over a solid paved surface is natural drainage, water can pass through the pebble layer and membrane into the sub-base below. This means it doesn't usually need a formal drainage channel, as long as you've built in that 1:60 fall and the sub-base is free-draining. On clay soil, it's worth adding an extra 25 mm to the sub-base depth and considering a French drain at the lowest edge of the patio to carry water away from the house. If puddles form on the surface, the membrane may have sagged into a low spot, this is usually fixable by carefully lifting pebbles, re-tensioning the membrane, and re-spreading the stone.
Ongoing maintenance
A loose pebble patio is genuinely low maintenance, but not zero maintenance. Expect to do a light rake-over once or twice a year to redistribute pebbles that have been kicked or scuffed to the edges. If you have trees nearby, you'll need to remove leaf litter regularly, leaves decompose into the pebble surface and create a layer of organic material where weeds can seed above the membrane. A leaf blower on a low setting makes this quick work.
Common problems and how to fix them
- Weeds appearing: If weeds are coming from below, the membrane has failed or wasn't installed properly. Lift the pebbles in the affected area, check and replace the membrane, then relay. If weeds are growing in debris on top of the membrane, improve your cleanup routine and consider a pre-emergent weed killer on the surface.
- Pebbles spreading beyond the edging: The edging has moved or wasn't deep enough. Re-set edging sections and pack firmly with concrete or compacted hardcore behind them.
- Uneven or spongy surface: The sub-base wasn't adequately compacted. You'll need to lift the pebbles and membrane, add more Type 1, and re-compact in proper layers. There's no shortcut fix for this one.
- Puddles forming after rain: A low spot in the membrane or sub-base. Lift pebbles in the affected area, re-grade the sub-base or re-tension the membrane, and relay.
- Pebbles sinking or disappearing: Pebble depth was too shallow (under 30 mm), or the membrane has torn and pebbles are working their way into the sub-base. Add a top-up layer of matching pebbles to restore depth, and repair any membrane tears.
Most of these problems are fixable because loose-laid pebble patios are easy to lift and re-lay in sections. That's actually one of the reasons pebble patios are a great first project, mistakes aren't catastrophic and materials are reusable. If you've previously looked at options like gravel patios or resin-bound systems, pebble patios sit comfortably between the two in terms of effort: more stable and polished-looking than a simple gravel surface, but far less demanding to install than a fully bound resin finish. If you're considering a resin-bound finish instead, the steps for laying and curing the resin vary, so it's worth reviewing a dedicated guide on how to lay a resin patio resin-bound systems.
Once your pebble patio is down and settled, give it a week or two before moving heavy garden furniture onto it, and check the edging after the first heavy rain to make sure nothing has shifted. A well-built pebble patio on a good compacted base should look good for many years with nothing more than a seasonal rake and the occasional top-up of pebbles where wear is heaviest.
FAQ
Do I need a sand layer under the pebbles, or can I lay straight on the membrane and sub-base?
You can omit the sand or fine grit bed, but it helps you fine-tune levels without over-compacting the sub-base. If you skip it, use extra care when topping up MOT Type 1 and keep the fall consistent across the whole area, especially near the edges where height errors show up first.
How do I stop pebbles washing out if there are gaps where the edging meets the ground?
Before placing pebbles, pack the back of every edging section with compacted stone dust or mortar so the edging is fully supported. If you later see pebbles migrating, lift a small section of the top layer, re-seat the edging, then re-lay pebbles to the correct height, contained by the top of the edging.
What fall should I use if the patio is not level but already has a slope?
Use the same target idea, about 1:60 away from the house, but follow the ground reality so water still exits at the lowest boundary. Set your string lines using the finished height at the house side and the chosen outlet side, then check low spots where water can collect, not just the overall trend.
Can I lay a pebble patio over old paving or existing patio slabs?
Usually no, because you still need a compacted free-draining sub-base and the correct total excavation depth below finished level. If you leave old slabs in place, you can end up with an uneven, non-compacting base and poor drainage. The safer approach is to remove the existing surface to achieve the required layer build-up.
Which is better for first-timers, loose pebbles or mortared pebbles?
Loose-laid is generally more forgiving because you can adjust levels during installation and lift sections to correct mistakes. Mortared pebble patios are more stable for mosaics or areas with heavy impact, but they require accurate levels and longer cure time, so small errors are harder to fix later.
How thick should the pebble layer be if I use larger stones?
Larger pebbles can need more depth to reduce rolling and maintain coverage. The guide assumes around 40 mm for most stone sizes, if you choose bigger rounded pebbles, keep them to the upper size range (for example 40–60 mm) and ensure the bedding and fall are spot on so the stones interlock rather than move.
How can I tell if I’ve compacted MOT Type 1 enough?
After compaction, it should feel firm with minimal give when stepped on, and the surface should not pump or deform under the plate compactor. If it looks loose, cracked, or soft after a pass, you likely need more passes or smaller lift thicknesses. Never compact very thick lifts in one go.
Should I put a weed membrane over the whole patio area or only between the pebbles and soil?
Install it directly over the compacted sub-base across the entire paved footprint, including under where you expect water to flow. Make sure joins overlap by at least 150 mm, pin the edges, and avoid wrinkles that can create low spots and later pooling.
What’s the best way to handle a pebble patio boundary next to a lawn or planting bed?
Use edging set into the ground with supporting base material behind it, then trim membrane neatly behind the edging line. This keeps the pebble layer contained and prevents weeds from entering from the sides. After the first rain, recheck that the edging height hasn’t shifted where the lawn pushes or where soil is soft.
Why do puddles form even when I installed a fall?
Most puddles come from a local low spot, membrane sagging into that dip, or a height mismatch at the edges. Check the patio after heavy rain, then fix by lifting the pebbles in the affected area, re-tensioning and re-leveling the membrane, and re-spreading the stone to the correct depth.
Can I walk on the membrane while installing pebbles?
Avoid it. Foot traffic can push the membrane into the sub-base on sandy ground and create dips that are hard to correct without lifting stones. If you must move around, use boards to distribute your weight until the pebbles are in place.
Do I need to seal a loose pebble patio to stop staining or algae?
For loose-laid pebble patios, sealing is usually unnecessary and generally not suitable because loose stone cannot be effectively sealed as a uniform surface. Instead, manage algae and staining by keeping organic debris off the surface and doing periodic raking and gentle hosing.
How soon can I place heavy items, like a barbecue or shed, on the patio?
Wait about one to two weeks after installation, then confirm the edging is still stable after a heavy rain. For very heavy loads, position feet on a wider base area where possible, and avoid dragging objects across the stones, since movement can create surface unevenness over time.