Putting down concrete patio blocks correctly comes down to one thing more than anything else: getting what's underneath them right. If you follow the steps for how to lay patio block, you will get a level, properly drained base that stays locked in place Putting down concrete patio blocks correctly. If your base is solid, level, and properly drained, the blocks on top will stay put for years.
How to Put Patio Blocks Down Step by Step Guide

Clara Farrell
30 May 2026
If it isn't, you'll be releveling and resetting blocks within a season. The full process runs from digging out the existing ground, building up compacted gravel and sand layers, installing edge restraints, laying the blocks in your chosen pattern, cutting pieces to fit, and then sweeping in jointing sand and compacting everything down to lock it all together. If you want a full step-by-step walkthrough, use this guide on how to set patio blocks from start to finish.
Planning and materials before you dig anything
The most common DIY mistake happens before anyone picks up a shovel: not accounting for the full depth of the build-up. A typical concrete block patio uses 60mm thick pavers, a 25–40mm compacted sand bedding layer, and at least 100mm of compacted Type 1 (MOT1) granular sub-base. Add those together and you're removing roughly 200mm (about 8 inches) of material from ground level. That's more than most people expect.
Before ordering anything, sketch your patio footprint and calculate your square meterage. That number drives everything: how much Type 1 gravel you need, how many bags of sharp sand for bedding, how many blocks, and how much jointing sand. For blocks, always order 5–10% extra to account for cuts and breakages. For jointing, you have two main choices: standard kiln-dried sand or polymeric jointing sand. Polymeric sand (like QUIKRETE HardScapes or Techniseal SmartSand) bonds when wetted and resists weed growth and wash-out better, but it requires joints to be at least 40mm deep to polymerize properly. Standard kiln-dried sand is simpler to apply and easier to top up later.
| Material | Spec/Grade | Typical Quantity |
|---|---|---|
| Concrete block pavers | 60mm thick | Area m² + 10% wastage |
| MOT Type 1 sub-base | Graded granular / DTp1 | 100mm compacted depth |
| Sharp sand (bedding) | Grit/sharp sand, not building sand | 25–40mm compacted depth |
| Kiln-dried jointing sand | Fine, dry, clean | Per joint area (check bag coverage) |
| Polymeric jointing sand (optional) | Polymer-modified graded sand | Per joint area, joints min. 40mm deep |
| Edge restraints | Concrete kerb or proprietary plastic restraint | Full perimeter length |
| Concrete for edging | Ready-mix or bagged C20/ST2 | Haunching around restraints |
Also check your local surface water drainage rules before you start. If the patio drains onto a public highway or into a drainage system, some areas have regulations about impermeable surfaces. Most residential patios that drain into a garden or soakaway are fine, but it's worth a quick check.
Site prep: excavation, levels, and compacting the subgrade
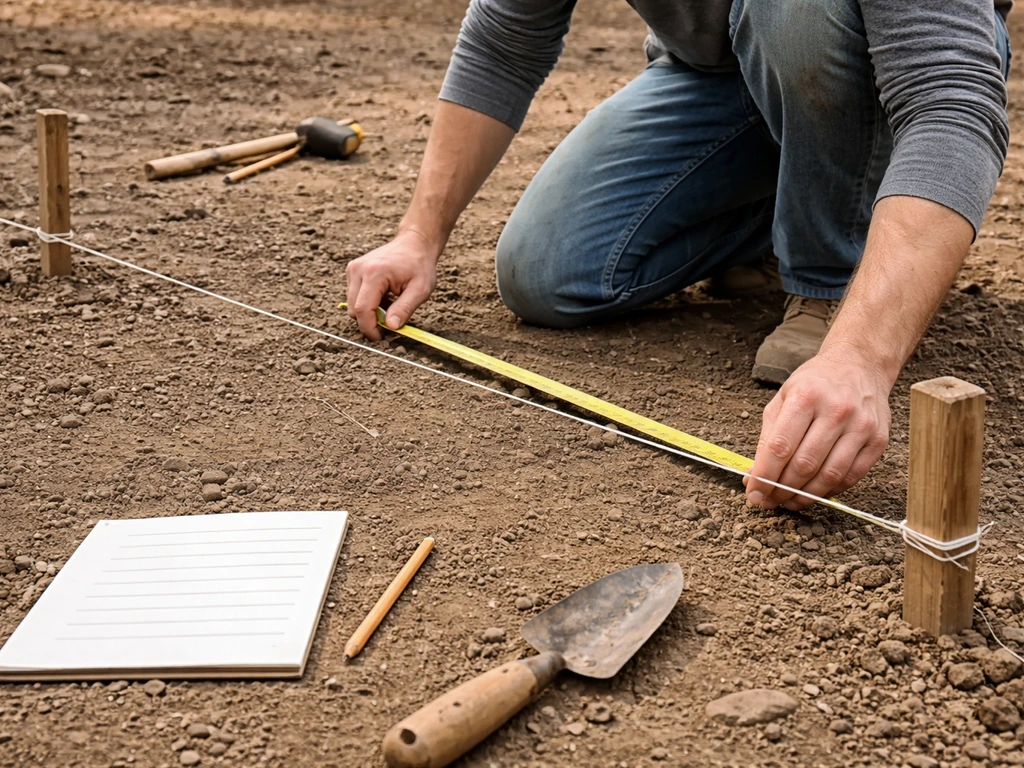
Mark out your patio area with pegs and a string line, then dig out the entire area to your calculated depth. Remove all topsoil, grass, and organic material completely. If you're laying patio blocks directly on dirt, the key is still the same: remove topsoil, rebuild a compacted sub-base and bedding layer, and only then lay and compact the blocks how to lay patio blocks on dirt.
Roots left behind rot and create voids, which leads to the surface sinking over time. Once you've reached the subgrade (the natural firm ground underneath), compact it with a wacker plate (plate compactor). Don't skip this step, even if the ground feels firm. Any loosened soil from digging needs to be re-consolidated before you build up on top of it.
While you're at this stage, set your finished level and drainage fall. A patio that sits flat will puddle. The minimum gradient for surface drainage is 1 in 40 (that's 25mm of fall per metre of patio), though on smaller residential patios a fall of 1 in 60 is normally adequate. The fall should direct water away from your house and ideally toward a planted area or a drain. Set string lines at the correct finished height and fall angle, because every layer you build up from here references back to these lines.
On flat sites where you genuinely can't slope the whole patio one way, you can use a 'summits and valleys' approach where the surface is subtly crowned or channeled to direct water to the edges. It's more complex to set out, but it works well on larger patios.
Building the base: sub-base layers, screeding, and edge restraints
Getting the sub-base right
Spread your MOT Type 1 over the compacted subgrade in layers no more than 75–100mm thick before compaction. If you're putting down 100mm compacted depth, you may need to spread it in two passes depending on your compactor. Run the plate compactor in overlapping passes (at least two full passes in perpendicular directions) until the surface is tight and doesn't shift under foot.
Extreme How To recommends using multiple passes per lift when compacting a paver patio base, commonly about 3 to 4 passes with a plate compactor, and notes that moisture conditions affect how well the material compacts Run the plate compactor in overlapping passes. Any voids in this layer will allow the sand above to trickle down over time and cause the patio to sink. Proper compaction here is non-negotiable.
Installing edge restraints before you screed
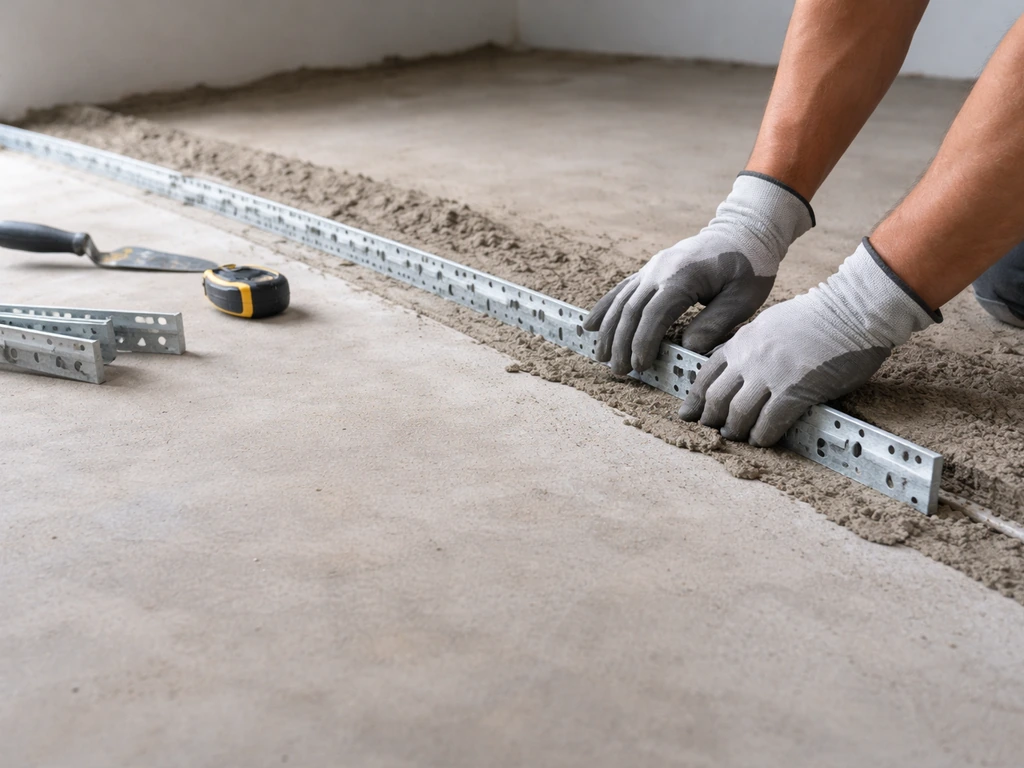
Edge restraints go in before you lay a single block. Without them, your blocks will creep outward under load and the whole surface will start to spread. Edging can be a proprietary plastic paving restraint or a concrete kerb haunched in with concrete on a bed directly over the sub-base. The top of the edging must sit at your finished paving level, so set them carefully using your string lines. The concrete haunch should be on the outside of the restraint so it doesn't interfere with the bedding sand depth inside your patio area. Let the concrete cure (ideally 24 hours) before you start laying.
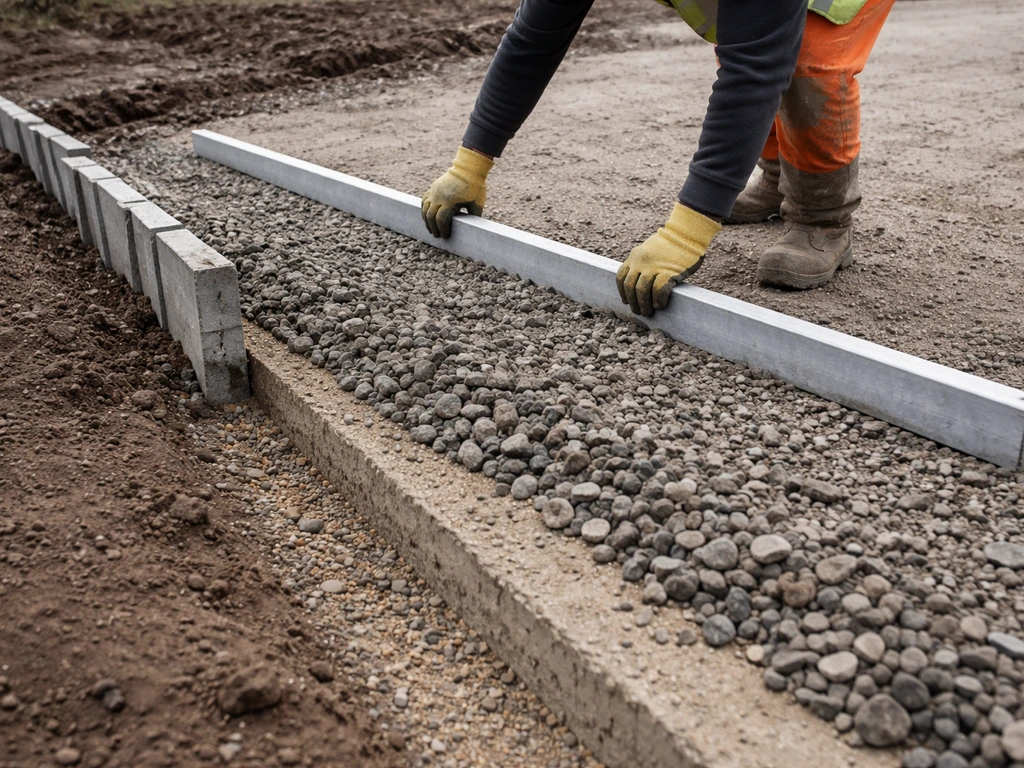
Screeding the sand bedding layer
Use sharp (grit) sand for bedding, not soft building sand. Soft sand compresses inconsistently and holds moisture, both of which cause problems. Spread the sharp sand over the compacted sub-base and screed it to a depth of roughly 50–53mm below your finished paving level.
Pavingexpert recommends a recommended screed depth below the finished paving level for the paver thickness you are installing, and links acceptable final height variation to proper consolidation so the finished height and falls stay correct screed it to a depth of roughly 50–53mm below your finished paving level.
That sounds counterintuitive (blocks are only 60mm thick), but the blocks will be 'proud' by 7–10mm before final compaction, then the plate compactor drives them down into the sand to sit at the correct finished height. If you screed the sand at exactly the right finished level, your blocks end up too low after compaction.
For DIY projects, a straight 100x19mm timber board works well as a screed board. Position two screed rails (lengths of metal or timber pipe) at the correct depth on opposite sides of your working area, rest the screed board across them, and drag it toward you in a sawing motion. Lift the rails before you lay blocks, because you can't walk on the screeded sand without disturbing it. On larger areas, divide the work into lanes so you're not stretching too far across a freshly screeded surface.
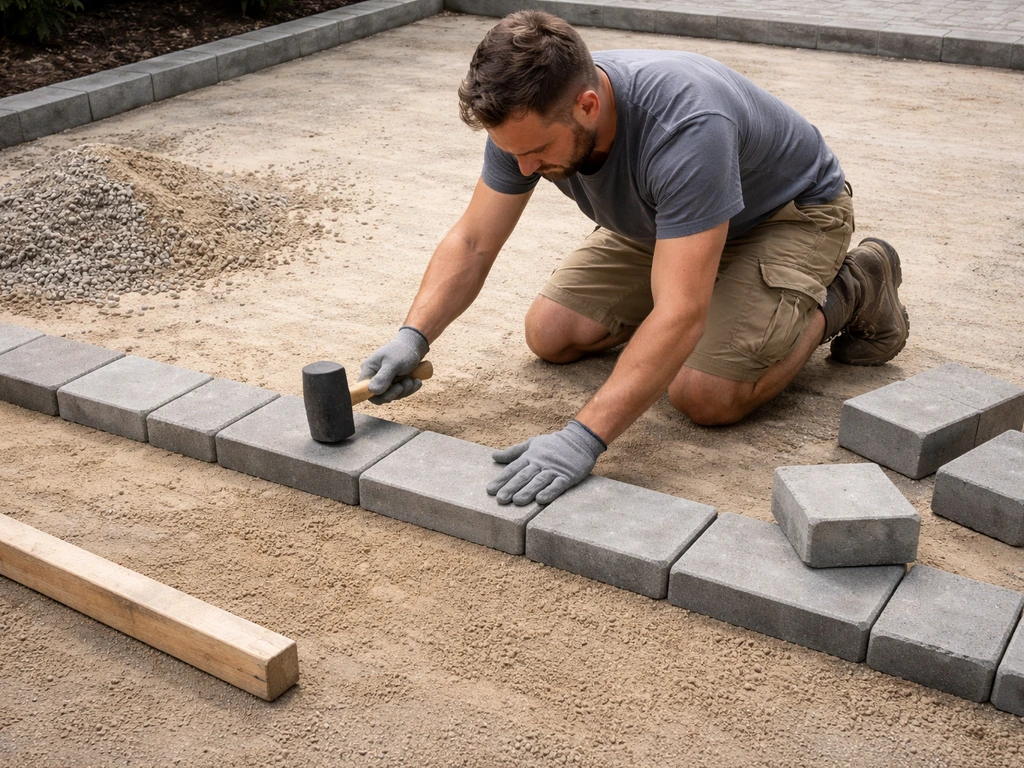
Laying the blocks: pattern, spacing, and staying level
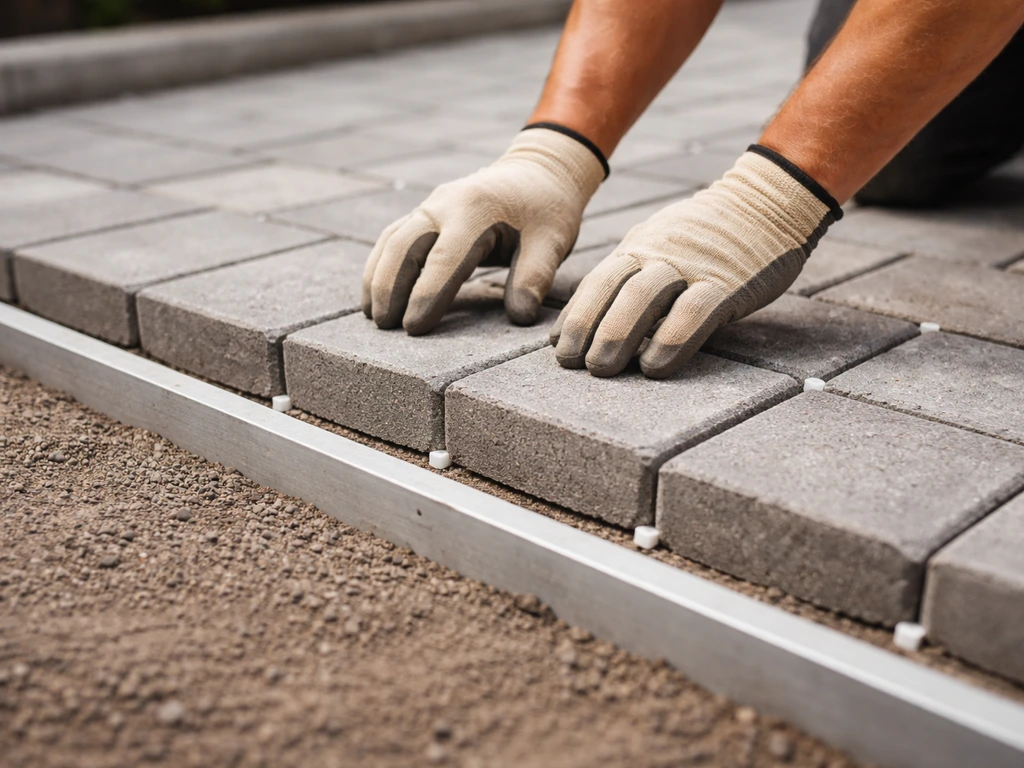
Start from a straight, fixed edge, ideally one of your installed edge restraints. Lay full blocks first, working across the area and leaving the cut pieces at the edges until all whole blocks are down. Do not stand or kneel on the screeded sand. Kneel on the blocks you've already laid, or use a board to spread your weight. Every footprint on unsupported sand creates an uneven spot that's very hard to correct later.
For pattern, the three most common choices for concrete block paving are stretcher bond (running bond), herringbone, and basketweave. Herringbone is the strongest option structurally because the interlocking angle distributes load better, which is why it's often recommended for driveways. For a patio, any of the three works well. Just pick one before you start and stick to it, because changing patterns mid-lay creates alignment headaches.
Keep a taut string line running across your laying direction and check alignment after every metre or so (roughly 10 courses). Block manufacturing tolerances are around plus or minus 3mm, which means two adjacent blocks can create a lip of up to 6mm if they stack at opposite ends of their tolerance range. Catching drift early means you can adjust; catching it after 20 rows means you're pulling up blocks. Also check height regularly with a straight edge and spirit level. Any block sitting noticeably higher than its neighbors needs to come up, have a small amount of sand removed, and be re-laid.
Cutting blocks to fit edges and obstacles
Once all full blocks are down, measure and cut the border pieces to fit. A diamond blade fitted to an angle grinder or a dedicated paver saw is the right tool here. Concrete blocks are abrasive and will destroy a standard masonry disc quickly. Use a diamond blade rated for concrete/hard pavers and, if you're doing a lot of cuts, use a wet-cutting setup to cool the blade and keep dust down. Dry cutting generates heat fast, which shortens blade life and throws a lot of fine dust into the air. If you're only making a few straight cuts, a dry diamond blade on an angle grinder works, but wear a properly rated dust mask either way.
For awkward shapes around drainage grates, pipes, or curved beds, make a card template first. Transfer the shape onto the block and cut in stages rather than trying to make a complex curve in one pass. Blocks can be nibbled to shape with repeated smaller cuts. A bolster chisel and club hammer can handle simple straight cuts on standard concrete blocks, but for anything curved or on chamfered decorative pavers, a saw gives a much cleaner result.
Bedding and jointing: the step most people rush
This is where a lot of DIY patios fall short, not because it's complicated, but because it feels like you're almost done and the temptation to wrap up quickly is real. Do not rush jointing and compaction.
Before you compact, sweep kiln-dried jointing sand across the surface and brush it into the joints. This is especially important if your blocks have a pencil chamfer (a small beveled edge) or no chamfer at all. Filling the joints partially before compaction helps the blocks interlock and prevents edge cracking during the compaction pass. Don't worry about filling them perfectly at this stage. You'll do a proper fill afterward.
Now run the plate compactor over the entire surface. Use a compactor that's big enough to span at least two blocks in each pass so you get even consolidation. If your blocks are decorative or have a textured/polished face, fit a rubber mat or proprietary rubber pad under the plate to prevent marking and surface damage. Make a minimum of two full passes in perpendicular directions. This is what drives the blocks down into the sand bedding to their final level and creates the proper interlock.
After compaction, sweep another full application of jointing sand across the surface and work it into the joints with a stiff brush. Some joints will need a third pass. The goal is joints filled to within a few millimeters of the top of the block. Do not leave them more than half full. Unfilled joints allow water to undercut the bedding sand and cause the surface to sink unevenly.
If you've chosen polymeric jointing sand instead of standard kiln-dried sand, the process is similar but with one critical difference: once the joints are filled, you activate the polymer by saturating the surface with a fine water mist. Do not soak it, just mist it evenly and then leave it alone. The sand must dry completely to polymerize, which typically takes 24 hours in dry conditions. Don't use the patio during this time. Polymeric sand needs joint depth of at least 40mm to work properly, so check your specific product's data sheet before applying.
Finishing up: sealing, drainage checks, and keeping it looking good
Once jointing sand has settled after the first week or two of use, check the joints and top them up where needed. This is completely normal. Sand settles with rain and foot traffic, especially in the first season. Just sweep in more kiln-dried sand and brush it in. It takes a minute and prevents weed seeds from getting a foothold.
Sealing is optional but worth considering. A good concrete paver sealer (penetrating or impregnating type) protects against staining, reduces moss and algae growth, and can enhance the color of the blocks. Apply sealer only after the jointing sand has fully cured and the surface is completely dry, at least 2–4 weeks after installation for standard sand and longer for polymeric. Read the specific product instructions because application methods vary. Avoid film-forming sealers on uneven or textured surfaces as they can flake.
Do a final drainage check by running a garden hose over the surface after installation. Water should sheet off clearly toward your intended drainage direction with no pooling. If you spot a low spot holding water, mark it, let the surface dry, lift the relevant blocks, add a small amount of sand, re-lay, and re-compact. It's a straightforward fix when you catch it early.
Ongoing maintenance
- Top up jointing sand annually or whenever you notice joints looking low or weeds appearing
- Brush off fallen leaves promptly in autumn as they break down and stain concrete blocks
- Clean the surface with a patio cleaner or diluted bleach solution and a stiff brush (avoid high-pressure washing directly into joints as it blasts out the jointing sand)
- If a block cracks or settles, lift it, correct the bedding sand underneath, and relay it. The modular nature of block paving makes individual repairs easy
- Check edge restraints annually. If any have shifted, rehaunch with fresh concrete before the movement spreads inward
The mistakes that cause most patio failures
Most patio problems trace back to a handful of recurring errors. Skipping or skimping on the sub-base is the biggest one. A 50mm sub-base instead of 100mm will eventually fail under regular use, full stop. Using soft building sand instead of sharp sand for bedding is another: it shifts, holds water, and compresses unevenly.
Not installing edge restraints, or installing them after laying instead of before, means the patio will spread at the edges within a few seasons. Filling joints and then compacting (instead of compacting and then filling) causes joint sand to get driven into uneven depths and can crack block edges. And laying in wet conditions on a freshly saturated sub-base creates the same kind of compaction problems as not compacting at all.
If your project involves laying blocks on an existing grass area or directly on bare dirt, the preparation steps are similar but the excavation depth matters even more because you're starting from organic or loose material. The same applies when working around specific block sizes. If you're dealing with a specific size like 16x16 slabs, the bedding depth and cutting considerations work the same way but you'll be managing heavier individual units. If you’re using 16x16 patio blocks, focus on getting the bedding depth and edge restraint setup right so the blocks sit at the correct finished height and stay level 16x16 slabs.
Take the prep seriously, follow the layer order, and this is genuinely a project most homeowners can complete over a long weekend with rented equipment. The results, when done right, last for decades with minimal upkeep.
FAQ
How do I know my patio depth is correct before I start digging?
Measure from the string line at the finished patio height down to your planned sub-base and bedding totals, then add your paver thickness and the small “proud” amount you need before compaction (about 7 to 10mm for 60mm blocks). Recheck with a tape measure at multiple spots, because ground height varies even when the area looks level.
Can I lay patio blocks directly on top of compacted sand instead of gravel?
It’s not recommended. The gravel sub-base (often MOT Type 1) provides structural support and drainage stability, so sand-only builds tend to shift and sink under load. If you’re constrained on depth, reduce risk by increasing compaction quality and still keep the gravel layer rather than skipping it.
What should I do if I hit roots, bricks, or rubble during excavation?
Remove loose and organic material fully. For roots, cut and remove them to below the build-up depth, then compact the exposed subgrade carefully. For buried rubble or bricks, either fully excavate and replace with compactable sub-base, or remove the offending pieces so you don’t create a hard spot that telegraphs through the bedding.
Why does my patio feel solid while building but starts sinking later?
Most sinking comes from inadequate compaction of either the subgrade or the Type 1 layer. Another common cause is stepping on the screeded bedding sand before laying, which creates dips that blocks follow. If you catch it after a season, lift the affected sections, add a small amount of compacted sand, re-lay, and re-compact.
How much jointing sand should I leave at the top of the blocks before compaction?
Aim to brush in jointing sand so joints end up mostly full, but not capped with a thick mound. After compaction, sweep in more and refill to within a few millimeters of the top. Avoid joints left more than about half full, because water can reach the bedding and undermine blocks.
Can I use regular sharp sand for both bedding and jointing?
Use sharp grit sand for bedding, but jointing sand is often chosen for its particle size (and for polymeric options, its chemistry). If you use mismatched sand types, joints may not lock properly or can wash out faster, so verify the sand is suitable for both bedding and jointing (or use separate products as specified).
What if my blocks are slightly higher or lower after laying, not just one area but across the patio?
Check whether your string lines or screeded sand depth were set correctly, then address high and low zones systematically. Don’t try to fix widespread height differences by adding lots of joint sand, joint sand is not structural. Lift blocks in affected lanes, adjust bedding sand depth, re-screed where needed, then re-lay and re-compact.
Do I need to remove all topsoil and grass, even if it seems thin?
Yes. Even thin topsoil contains organic material that decomposes and creates voids, leading to sinking. Remove it completely down to firm subgrade, then compact that layer before adding Type 1 and bedding sand.
How should I handle drainage around a drain, channel, or slope transition?
Set your fall so water sheets toward the intended outlet without creating a “bathtub” effect at transitions. Use string lines to lock the finished heights, and cut blocks to maintain the drainage fall. After installation, do a hose test specifically across those features, then lift and adjust any low spots early.
Is a plate compactor required, or can I just tamp by hand?
For patio blocks, a plate compactor is strongly recommended. Hand tamping usually cannot achieve the same uniform consolidation in MOT Type 1 and bedding sand, which leads to uneven settlement. If you rent equipment, prioritize compaction passes rather than adding extra joint sand.
Can I install polymeric jointing sand and still wash it down like normal after?
No. With polymeric sand, you mist it evenly to activate, then you must not soak it. Leave it alone for the required drying window (often around 24 hours in dry conditions), and avoid foot traffic during that time so it can fully polymerize.
When is it safe to walk on the patio after jointing?
With standard kiln-dried jointing sand, you can walk carefully once the sand has been brushed in, but avoid heavy loads until it’s been fully compacted and joints are filled to the right level. With polymeric sand, avoid use until it has fully dried and polymerized, and don’t re-mist to “finish” it later.
Do I need expansion joints or gaps between the patio blocks and a wall?
You typically need a controlled edge detail where the patio meets a house or boundary, using edging restraints and leaving an appropriate allowance so the surface can move slightly without pushing into fixed structures. A rigid, flush contact can crack blocks or restrict drainage at the edges, so plan the edge transition before you start.
How can I prevent weeds if my joints keep settling?
Top up joints after the first week or two (and after heavy rain or foot traffic) by sweeping in kiln-dried sand and brushing it fully into gaps. Don’t use loose debris to “fill” joints. Keeping joints near full reduces the path for weed growth.
Can I cut blocks with an angle grinder for every cut, including curves?
Angle grinders can work for straightforward cuts, but they are harder to control for curves and complex shapes. For curved or awkward areas, use a cardboard template and take staged cuts, and consider a dedicated paver saw for cleaner edges. Avoid using the wrong blade type, concrete blades are abrasive and wear quickly.