
You can lay a patio on damp ground, but you cannot lay one on waterlogged or saturated ground and expect it to last. The difference matters enormously. Slightly moist soil is perfectly workable if you use the right sub-base method. Standing water, spongy ground that moves underfoot, or soil that holds water for days after rain is a different problem entirely, and pushing ahead without fixing it first is the single most common reason DIY patios crack, sink, and shift within a couple of years.
Can You Lay Patio on Wet Ground? DIY Guide for Homeowners

Clara Farrell
19 Jul 2026
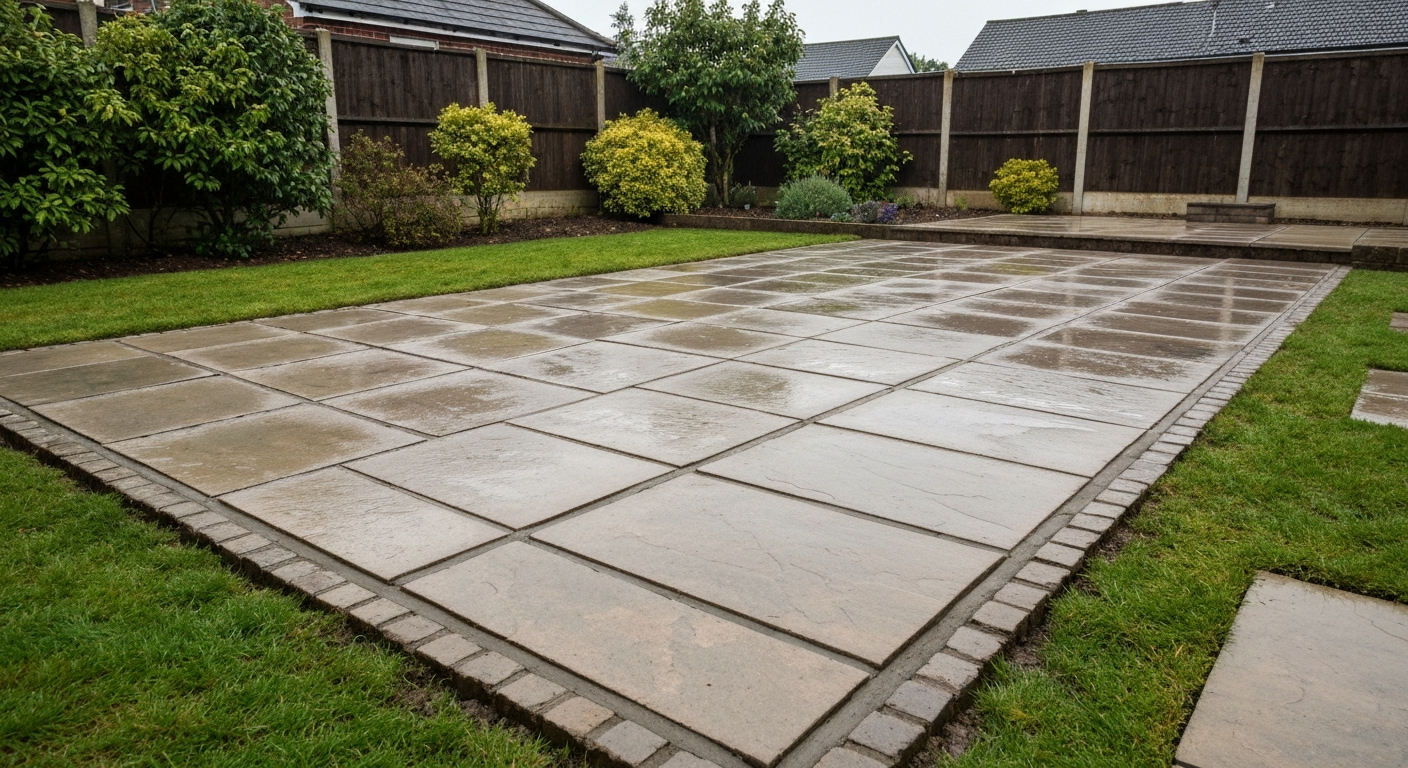
This guide walks you through the full decision process: how to read your ground conditions, a clear yes-or-no framework for whether you should proceed, and three practical installation methods suited to wet or marginal sites. Whether you end up using a stabilised geotextile and Type 1 sub-base, a poured concrete slab, or a sand and mortar bed, you will find the steps, materials, and tools covered here in enough detail to get it right first time.
Should you proceed? A yes/no decision framework
Before you order a single pallet of slabs, spend ten minutes honestly assessing your site against the conditions below. This is the framework I use before starting any job, and it has saved me from expensive mistakes more than once.
Green light: you can proceed with the right method
- The ground is moist but firm underfoot, with no surface ponding after recent rain.
- Water drains away within a few hours of rainfall.
- You can dig down 150 mm without hitting standing water in the hole.
- The soil is sandy, silty, or a light loam that crumbles rather than smears.
- Any dampness is seasonal or the result of recent wet weather rather than a persistent drainage problem.
Amber light: proceed only after improving conditions
- Clay soil that is currently wet and sticky. Wait for a dry spell or improve drainage before compacting your sub-base.
- Slow infiltration (water in a test hole takes more than 12 hours to fully drain). Consider a French drain or soakaway first.
- Slight surface ponding that clears within 24 hours. Re-grading the area by 1: 80 fall away from the house may be enough.
- Ground frost is present. Frost heave will disrupt any sub-base you compact until conditions improve.
Red light: stop and get professional advice
- Standing water is visible on the surface or appears in a test hole within 300 mm of the surface.
- The soil is peat or highly organic (dark, spongy, smells earthy). Organic soils offer no structural support and must be removed entirely.
- The ground moves or 'pumps' when you walk on it, indicating a saturated subgrade.
- Persistent saturation is present at or above 1.0 m depth. BRE Digest 365 guidance notes that a soakaway is generally unsuitable when groundwater sits within 1.0 m of the proposed base level, and a patio over saturated ground faces the same structural risk.
- The area is prone to seasonal flooding from an adjacent watercourse or high water table.
If you are in amber territory, the solutions are usually straightforward: wait for dry weather, install a simple French drain, or re-grade the topsoil before you start. Red-light conditions need a drainage engineer or groundworks professional to assess before you spend money on materials.
How to assess your site moisture, drainage and soil type
You do not need expensive equipment for a useful site assessment. These are the tests I recommend to every first-time DIYer before they start digging.
The ribbon test: identify your soil type by feel
Take a small handful of damp (not soaking) soil and squeeze it into a ball, then press it between your thumb and forefinger to form a ribbon. A long, smooth ribbon of 25 mm or more means you have significant clay content. A ribbon that breaks apart quickly or will not form at all indicates sandy or silty soil. Clay soils shrink and swell with moisture changes, which puts stress on any rigid paving surface above. On clay you will need a thicker sub-base (150 to 200 mm of compacted Type 1 rather than the standard 100 mm) and a geotextile separator to stop clay fines migrating up into your aggregate. The CIRIA SuDS Manual (site soils and suitability considerations) advises that peat/organic soils are generally unsuitable as a formation layer and often must be removed or replaced, and that clay, silt and sandy soils require different sub‑base thicknesses and geotextile separation to prevent fines migration and ensure long‑term pavement stability. A jar sedimentation test (a handful of soil shaken in a jar of water and left to settle overnight) shows you the rough proportions of sand, silt, and clay by the distinct bands that form.
The percolation test: how well does water drain?
Dig a test hole roughly 300 mm square and 300 mm deep in the area where your patio will sit. Fill it with water, let it drain once (this pre-soaks the soil), then fill it again and time how long a 30 to 50 mm depth of water takes to disappear. If it drains within an hour or two, you have reasonable infiltration. If water is still sitting there after 12 hours, drainage is poor and you need to address it before paving. BRE Digest 365 formalises this approach for soakaway design, specifying trial pit sizes, staged filling, and timed water-level measurements to compute an infiltration value. Percolation test / BRE365 procedure summary (CivilWeb guidance) explains the BRE 365 trial pit sizes, staged filling and timed measurements used to compute infiltration rates for soakaway design. For a DIY patio assessment, the simplified version above gives you a reliable first read.
The slope and water-table check
Look at how the land around your proposed patio area drains. Is water coming onto the site from a higher neighbouring garden or a path? Even a gentle slope toward the house can funnel significant water into your patio area during heavy rain. Dig down 600 mm in two or three spots around the patio footprint and check for mottled grey or blue-grey soil colours, which are a reliable sign of a high water table or periodic saturation. If you hit standing water at this depth, that is a red-light condition. For a more objective strength assessment, a Dynamic Cone Penetrometer (DCP) can be hired and pushed into the ground at regular intervals; the blow-count readings correlate to the subgrade's CBR (California Bearing Ratio), giving you a clear picture of how much load-bearing capacity the soil has when wet.
Visual signs that should give you pause
- Persistent puddles or water marks on the surface long after rain has stopped.
- Rushes, sedge grass, moss, or other water-tolerant plants growing in the area.
- Soil that smears like clay or sticks to your spade rather than crumbling away.
- A soft, springy feel underfoot when you walk across the proposed patio area.
- Rust-coloured streaks or mottled grey-blue soil visible in trial holes.
Which installation method fits your wet site?
Once you know what you are dealing with, you can choose the right approach. The table below summarises the three methods covered in this guide and when each one is the best fit.
| Method | Best suited to | Key advantage | Main limitation |
|---|---|---|---|
| Geotextile and Type 1 sub-base | Damp clay or silty ground with reasonable drainage | Stable, flexible, DIY-friendly | Not suitable for standing water or peat soils |
| Concrete slab | Weak or unstable subgrade needing a rigid base | Very strong and load-bearing | Standing water must be fully removed before pour; needs curing time |
| Sand or mortar bed over prepared base | Firm damp ground after sub-base is in place | Easy to lay and relay; good for slabs and pavers | Relies entirely on the sub-base being solid first |
In practice, Method 1 (geotextile and Type 1) is the right starting point for most damp domestic sites. Method 3 (sand or mortar bed) sits on top of Method 1 once the sub-base is compacted. Method 2 (concrete slab) is the better choice when your subgrade is genuinely weak or you want a rigid base for a large, heavy patio.
Materials and tools you will need
Core materials for all methods
- Type 1 MOT aggregate (also called Clause 803 granular sub-base), 0/63 mm crushed material
- Non-woven needle-punched geotextile fabric, minimum 200 g/m² for wet or soft ground
- Sharp sand (for bedding) or dry mortar mix (5: 1 sharp sand to cement ratio)
- Patio slabs, pavers, or blocks of your choice
- Haunching mortar for edge restraints and pointing
Tools required across all methods
- Spade, mattock, and wheelbarrow for excavation
- String lines and pegs for setting levels
- Spirit level (1.2 m or longer) and tape measure
- Vibrating plate compactor (wacker plate), ideally 50 to 100 kg plate weight for hire
- Rubber mallet and bolster chisel
- Screeding rails and a straight-edged plank or screed board
- Knee pads (essential for anyone who has not laid slabs before)
- Safety boots, gloves, and eye protection
Additional items for the concrete slab method
- Timber formwork boards (treated softwood, 25 mm minimum thickness)
- Steel reinforcement mesh (A142 or A193 mesh for a domestic patio slab)
- Concrete spacer chairs to keep mesh at correct cover depth
- Ready-mix concrete ordered to the correct mix design, or bagged cement, ballast, and water for small areas
- Plastic sheeting or curing membrane for covering the wet slab
Method 1: Geotextile and Type 1 sub-base (the go-to for most damp sites)
When to use this method
This is the method I recommend to most homeowners tackling a damp site. It works well on clay, silt, or any ground that is moist but not waterlogged. The geotextile does two important jobs: it separates the aggregate sub-base from the soft soil beneath so fines cannot migrate upward and weaken your base over time, and it allows water to filter through. Type 1 MOT aggregate, compacted in even layers, then forms a dense, load-bearing platform that distributes weight across the weak subgrade. It is worth knowing that Type 1 compacts to a near-impermeable layer once fully compacted, so it works best under traditional solid paving rather than permeable paving systems, which need open-graded aggregate.
Step-by-step preparation and installation
- Excavate to the required depth. For a domestic patio on damp clay or silty ground, excavate at least 250 to 300 mm below finished patio level to allow for 150 to 200 mm of compacted Type 1, 30 to 50 mm of bedding, and the slab thickness. On sandy or well-drained soil, 200 mm of excavation may be enough.
- Remove all organic material, roots, and any loose or saturated soil from the formation level. Probe the base with your boot; it should feel firm and consistent. If any soft spots remain, dig them out and fill with compacted Type 1.
- Lay the geotextile directly onto the excavated formation. Unroll it across the full area and up the sides of the excavation by at least 150 mm. On damp or soft ground, use lap overlaps of at least 500 mm where sheets meet. For very soft subgrades, heavier non-wovens above 200 g/m² with welded or taped overlaps give better performance, as manufacturer installation guidance from suppliers such as Mirafi/Polyfelt recommends.
- Add the first lift of Type 1 MOT aggregate to a loose depth of around 100 to 120 mm. Spread it evenly with a rake. Do not add more than 150 mm of loose material per pass for a typical plate compactor.
- Compact the first lift with a vibrating plate compactor (wacker plate). Work in overlapping passes, going over each area at least twice. The aggregate will visibly densify and lose the loose look as it locks together.
- If your total sub-base depth is 200 mm or more, add a second lift and repeat the compaction process. Each compacted lift should finish at around 75 to 100 mm. Continue until you reach your target formation level, checking with a straight edge and spirit level.
- Fold the edges of the geotextile up over the compacted aggregate at the perimeter. This keeps the material wrapped and prevents the aggregate from spilling out before your edge restraints are set.
- Set your edge restraints (concrete haunching or edging units) to define the final patio outline. These should be haunched with a stiff mortar mix and left to cure before you proceed to bedding.
One lesson I have learned the hard way: do not rush the compaction. Under-compacted Type 1 is the most common reason a patio settles unevenly in its first winter. If your plate compactor is bouncing around rather than bedding into the aggregate, the material is either too dry (dampen it slightly) or too wet (wait for it to drain a little before compacting).
Method 2: Concrete slab on wet ground
When a concrete slab is the right call
A poured concrete slab makes sense when your subgrade is genuinely weak and you need a rigid, load-bearing base, when you are covering a large area that will take heavy use, or when you want a base that will not flex or shift even if the ground below remains slightly variable. It is more work and more expensive than a granular sub-base, but it is the most robust foundation you can put under a patio. That said, it comes with one non-negotiable rule: you must not pour concrete onto standing water or a saturated subgrade. This is a fundamental requirement in concrete placement practice (referenced in ACI 301 placement guidance), and ignoring it leads to weakened concrete, poor curing, and premature failure.
Preparing the ground and formwork
- Excavate to at least 200 mm below finished slab level, removing all organic material. On clay, go to 250 mm.
- Lay a 100 mm compacted hardcore or Type 1 sub-base at the base of the excavation to provide a firm, free-draining platform under the slab. Compact this thoroughly.
- If the ground is wet but not actively waterlogged, allow it to drain as much as possible before proceeding. Pump or bail out any standing water. Never pour into a puddle.
- Lay a polythene damp-proof membrane (DPM), minimum 1200 gauge, over the compacted sub-base. This is especially important on damp sites because it stops ground moisture wicking up into the fresh concrete and interfering with the hydration process.
- Build timber formwork around the perimeter of the slab using 25 mm treated softwood. The top edge of the formwork sets your finished slab level. Peg it firmly and check it is level in all directions with your spirit level.
- Place steel reinforcement mesh (A142 mesh is sufficient for a domestic patio) on plastic spacer chairs at approximately 40 mm cover from the bottom of the slab. This reinforcement is particularly important on damp sites where subgrade strength may be variable.
Mixing, pouring, and curing in damp conditions
- For areas over 10 square metres, order ready-mixed concrete rather than mixing by hand. Specify a C25 or ST4 mix for a domestic patio slab, with a maximum water-to-cement ratio of 0.55 to avoid over-watering on a damp site.
- Pour the concrete in one continuous operation where possible to avoid cold joints. Work quickly and methodically, using a raking action to fill the formwork evenly.
- Screed the surface level with the top of your formwork using a straight-edged board in a sawing motion.
- As soon as you have a smooth surface and the bleed water has evaporated, cover the slab with polythene sheeting or a purpose-made curing membrane. On a damp or wet-weather day, damp conditions can actually slow moisture loss from the surface, which is not necessarily a problem, but you still need to protect the slab from rain striking the surface in the first 24 hours, which can crater the finish.
- Leave the slab to cure for a minimum of 7 days before applying any loading. Full strength develops over 28 days. Do not remove the formwork for at least 24 to 48 hours.
If you are laying your patio in wet or cold weather, read the guidance on winter patio installation, which covers the additional precautions needed for concrete work when temperatures drop. Frost on a freshly poured slab is one of the most damaging things that can happen during a patio build.
Method 3: Sand or mortar bed over a prepared base
When this method applies
A sand or mortar bed is not a standalone solution for a wet site. It is the final bedding layer you apply after your sub-base (Method 1 or 2) is in place and solid. On damp sites, mortar bedding is generally preferable to dry sharp sand because it sets firmly and does not wash out if some residual moisture works its way up through the base. Dry-lay sand bedding is fine on stable, well-drained sub-bases but is vulnerable on sites with any persistent moisture movement. This method applies to laying patio slabs, pavers, block paving, or natural stone on top of a prepared base. If you're considering a gravel base, see the guide Can you lay patio slabs on gravel for when it's appropriate and how to prepare the surface laying patio slabs on gravel. If you are considering installing new paving directly over an existing patio, see our guide on laying a new patio over an existing patio for the specific risks and preparatory steps.
Building the correct bed on a damp site
- Check that your compacted sub-base is firm, level to your desired fall (typically a 1:80 gradient away from the house or any structure), and free from loose material. Any soft spots must be dug out and re-compacted before you proceed.
- For mortar bedding on damp ground, mix a semi-dry mortar at 5 parts sharp sand to 1 part cement. It should be just damp enough to hold its shape when squeezed in your hand, but not wet enough to slump. On a wet site, avoid adding excess water; the moisture in the substrate and the slab will provide enough for curing.
- Spread the mortar bed to a consistent depth of 30 to 50 mm using screeding rails set to your finished height. A 30 mm bed is typical for standard concrete slabs; use 40 to 50 mm for heavier natural stone to allow for any thickness variation.
- Lay each slab onto the mortar bed and tap it down firmly with a rubber mallet, checking level and fall with your spirit level after each one. Leave a joint gap of 10 to 15 mm between slabs for pointing.
- Do not walk on freshly laid slabs for at least 24 hours. On a damp site with cooler temperatures, allow 48 hours before any foot traffic.
- Point the joints once the bed mortar has cured (24 to 48 hours). Use a brush-in pointing mortar or a wet mortar mix pressed firmly into the joints and tooled smooth. On damp sites, brush-in epoxy or resin-based joint compounds outperform standard mortar in the long run because they resist moisture infiltration better.
One thing worth mentioning here: if you are considering laying slabs on top of an existing patio or over a gravel base, the principles are similar, but the existing surface introduces additional factors around levels and load paths. Both of those scenarios are covered in more depth in their own dedicated guides on this site. See our dedicated guide on how to lay decking on patio for step‑by‑step instructions when you prefer decking over paving.
Common failure modes and how to fix them
Even with careful preparation, damp-site patios can develop problems. Here are the most common ones I have seen and what you can do about them.
| Problem | Likely cause | Fix |
|---|---|---|
| Slabs rocking or dipping | Under-compacted sub-base or soft spot in subgrade | Lift affected slabs, dig out and re-compact the sub-base, relay with fresh mortar |
| Pointing crumbling or washing out | Mortar laid too wet or on saturated slab surface | Rake out joints, dry the area, re-point with semi-dry mortar or resin compound |
| Surface water pooling on patio | Insufficient fall or sub-base too impermeable | Check fall direction; consider cutting a drainage channel at the low edge |
| Slab heave in winter | Frost action on saturated sub-base | Improve drainage around patio perimeter; ensure sub-base is free-draining Type 1 |
| Concrete slab cracking | Poured onto wet or saturated ground; insufficient reinforcement | Fill cracks with flexible joint sealant for minor cracks; significant cracking may need professional assessment |
Keeping your patio in good shape long-term
A patio on a wet site needs a little more attention over the years than one built on well-drained ground. Keep an eye on the pointing in the first autumn and winter after laying: this is when any movement in the sub-base will show up as cracked or lifted joints. Check that surface water is still running away from the house at the correct fall; if slabs have settled very slightly, water can pool where it did not before. Clear leaves and debris from the patio surface regularly because organic material holds moisture against the slabs and promotes moss growth, which makes the surface slippery and encourages freeze-thaw damage. On clay sites, inspect the edges of the patio each spring for signs that the ground has lifted or shifted seasonally, particularly if the winter was wet. Catching a small problem early, before it propagates across multiple slabs, means a straightforward repair rather than a full relay.
When it is time to call a professional
Most damp-site patios are well within DIY capability once you understand the principles. But some situations genuinely need professional input. Call a drainage engineer or groundworks contractor if: standing water cannot be resolved by simple regrading or a French drain; trial holes show a water table within 300 to 500 mm of your finished sub-base level; the ground moves or pumps underfoot even after the area has had time to dry; or you are dealing with peat, made ground, or fill of unknown depth or composition. Spending a few hundred pounds on a professional assessment before you buy materials is always cheaper than relaying a patio that has failed because the ground conditions were never suitable in the first place.
FAQ
Can you lay a patio on wet ground?
Short answer: sometimes — but not onto standing water or a permanently saturated subgrade. If the site is only damp and drains within a day or two, you can prepare a stable sub‑base and proceed. If there is standing water, very slow infiltration, a high water table, peat/organic topsoil, or persistent saturation, you must dewater, improve or replace the formation first or choose an alternative system.
How do I decide quickly whether I can proceed or must wait/repair?
Decision framework in three quick steps: 1) Remove any standing water — don’t place concrete or bedding onto pools. 2) Do a simple drainage test: dig a 300–450 mm trial hole, fill with water and time how quickly it falls. If water drains in a few hours (good), you can usually proceed with standard sub‑base. If it takes many hours or days (poor), treat the ground (replace/top up with engineered sub‑base, install drains or a soakaway) or wait for drier weather. 3) Check soil type by feel (ribbon test) — clay/peat needs more intervention than sand/gravel.
What are the main soil types and how do they affect patio installation?
Sandy soils: fast drainage but can migrate fines; need separation and well‑compacted base. Silty soils: moderate drainage but prone to pumping — require geotextile and thicker base. Clay: slow drainage, shrink/swell — need deeper engineered sub‑base (150–200 mm+), geotextile separation and possibly sub‑drains. Peat/organic: unsuitable — remove and replace with engineered fill.
What materials and products will I need to lay a patio on damp or wet ground?
Typical materials: non‑woven geotextile (suitable weight for separation), Type 1 / MOT Type 1 crushed aggregate (0/63 or similar), coarse free‑draining sub‑base (open‑graded aggregate for permeable paving), sharp sand or kiln‑dried sand for jointing, bedding mortar or concrete if using slab bed, cement for concrete/slab base, edging restraints, hardcore/cleanfill, optional crushed stone for temporary dewatering. Recommended tools: spade, trenching shovel, plate compactor (wacker plate), spirit level/laser level, rake, wheelbarrow, brick bolster, mixing tub or mixer, tamping tool, protective gloves, eye protection, tape measure, rubber mallet.
When should I use a geotextile and what type?
Use a non‑woven geotextile when the subgrade is soft, silty or contains migrating fines — it provides separation and filtration and reduces contamination of the aggregate. Choose a robust non‑woven (heavier g/m² for very soft ground), follow manufacturer recommended overlaps (typically 300–500 mm or more on soft ground) and ensure continuous coverage under the aggregate. Avoid using a geotextile as a fine filter where heavy silt will cause clogging unless it is a designed filter layer.
Step‑by‑step method: installing a paving patio on damp ground using geotextile + Type 1 sub‑base
1) Clear vegetation and remove top organic soil to formation level. 2) Excavate to allow for edging, compacted Type 1 depth (typically 100–150 mm for patios; increase for weak soils) plus bedding and slab thickness. 3) Probe subgrade; remove any standing water; if very soft, consider deeper excavation or import fill. 4) Lay non‑woven geotextile with correct laps and overlap. 5) Place Type 1 crushed aggregate in 75–100 mm lifts and compact each lift with a plate compactor until the required compacted depth/density is achieved. 6) Check levels and falls (minimum 1:80–1:100 fall away from the house). 7) Lay bedding (concrete/sand/mortar bed as specified) or use a compacted sand screed for block paving. 8) Lay paving, cut and finish joints; compact pavers with a rubber‑soled plate compactor. 9) Joint and seal as required.