Yes, you can lay a patio in winter, but only within a specific temperature window and with a few important changes to how you work. The hard rule is this: do not lay any mortar, bedding mix, or concrete if the air temperature is at or below 3°C and falling, or below 2°C even on a rising thermometer. For mortars and concretes, Pavingexpert’s rule of thumb is not to use them unless the [ambient temperature is 3°C and rising](https://www. pavingexpert.
Can You Lay a Patio in Winter? Yes or No and How

Clara Farrell
23 Jun 2026
com/faq_weather01), citing BS EN 998-2:2016 and IS EN 1996/SR 325. Below those thresholds, cement hydration basically stops, your mix won't cure properly, and a freeze overnight can destroy your bond entirely. Work within those limits, protect your materials and freshly laid paving from frost, and a winter patio is absolutely achievable.
Is laying a patio in winter actually feasible?
The honest answer is: it depends more on the week than the season. Winter doesn't automatically mean you can't pave. Plenty of patios get laid successfully between October and March in the UK because we get plenty of mild spells. What you're really managing is a combination of temperature, frost risk, and ground saturation. Get those three things right and the process is almost identical to a summer build. Get them wrong and you'll end up with slabs that rock, mortar that crumbles, or a base that heaves once spring arrives.
The biggest enemies of a winter patio are hard frost and heavy rain. Frost kills fresh mortar and concrete by freezing the water before cement hydration can complete. Rain on a dug-out area turns your subgrade into soup, making proper compaction impossible. If you can work around those two threats, you're in good shape.
Weather and ground conditions to check before you start

Temperature
Check both air temperature and the forecast for the next 48 hours before you mix anything. The industry guidance is clear: don't lay bedding or joint paving if the temperature is below 3°C on a falling thermometer, or below 2°C on a rising one. For fresh concrete specifically, Sika advises the mix must not drop below 0°C (to prevent the mix water from freezing and expanding), and keeping it above 5°C is critical for strength development. In practical terms, if tonight's low is forecast at 2°C or below, delay until conditions improve.
Ground temperature matters too, and it lags behind air temperature. Just because today's mild doesn't mean the soil 100mm down has thawed. Push a metal spike or screwdriver into the soil. If the ground is still frozen solid, stop. Pavingexpert makes this point directly: paving over a frozen sub-grade means you're building on a surface that will sink and shift once it thaws. That's how you end up with a patio that looks fine in March and is rocking by April.
Frost risk
Always check a five-day forecast before committing to laying. You need temperatures to stay above 2°C for at least 48 hours after laying for your mortar or concrete to reach enough strength to resist a frost. Sika's guidance suggests aiming for concrete to reach above 5 N/mm² (ideally above 10 N/mm²) before it faces freezing temperatures. That typically takes around 48 hours when the mix is kept above 5°C, but can take much longer in cold conditions. If a frost is forecast within that window, you either need to protect the work with insulating fleece or hessian, or wait for a better spell.
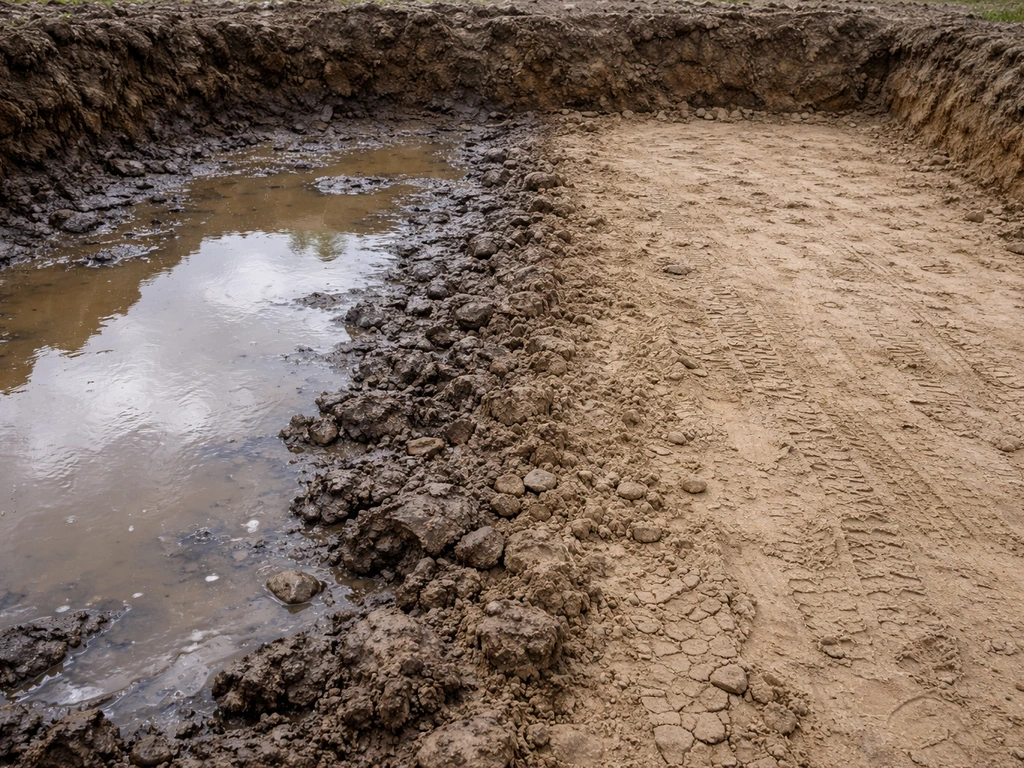
Rain and wet ground
Heavy rain is the other major problem. A waterlogged excavation makes compaction nearly impossible, and a sub-base laid onto saturated ground won't achieve the density you need. MOT Type 1 aggregate compacts best at a moisture content of around 8 to 13%. Too wet, and the material just shifts under the plate compactor rather than knitting together. If you've had significant rain in the last 24 hours and water is pooling in your excavation, hold off until it drains or dries slightly.
Wind
Wind matters more than most people realise in winter. Cold wind accelerates the chilling of fresh mortar and can cause the surface to dry too fast while the body of the mix stays weak underneath. If you're working on an exposed site with a biting wind, use temporary windbreaks (even old fence panels or plastic sheeting on stakes) to protect your working area. It's a small effort that makes a real difference.
Getting the ground prep right for a winter install
Excavation
Excavate to your required depth (typically 150 to 200mm for a domestic patio: 100 to 150mm sub-base plus your bedding and slab thickness), but don't leave the excavation open and exposed if rain or frost is forecast. A saturated or frozen subgrade is far harder to recover than one that's been protected. If you dig out and then get a week of bad weather, cover the excavation with a tarpaulin to keep rain off and reduce heat loss into the soil.
Drainage and falls
Get your falls right from the start. A finished patio should slope at least 1:80 (around 12mm per metre) away from the house or towards a drainage point. In winter this matters even more because standing water on a fresh patio will freeze, expand, and can force slabs apart or crack the bedding. Plan your drainage before you lay a single slab.
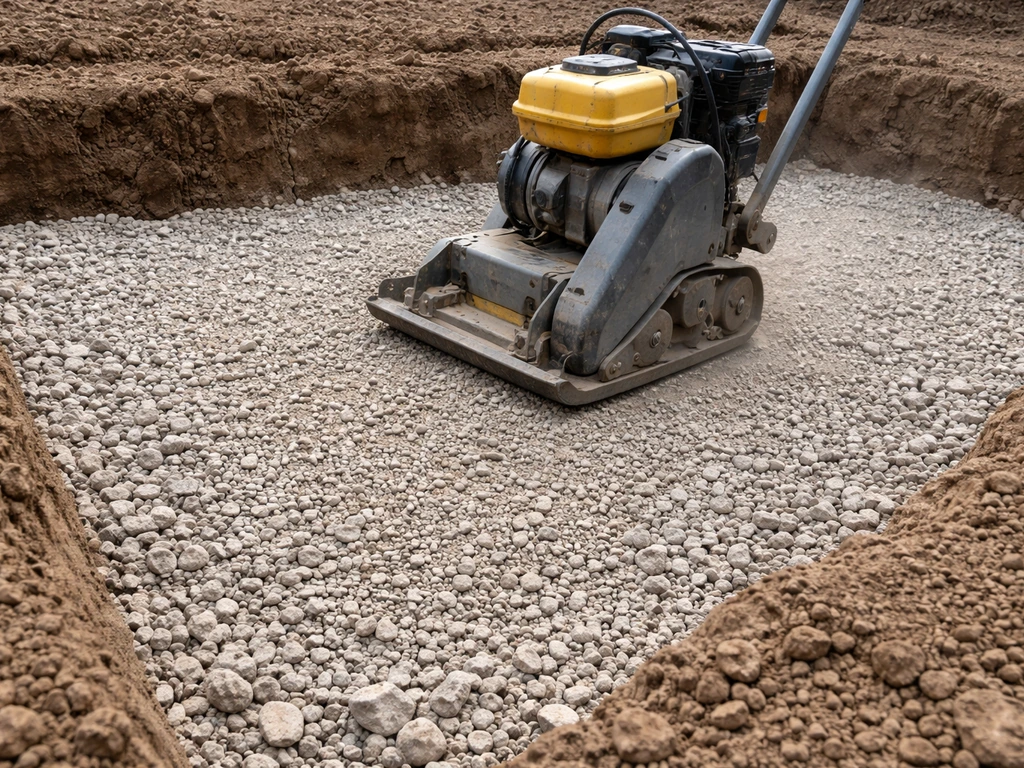
Sub-base compaction
Use MOT Type 1 (sometimes called Type 1 granular sub-base or 40mm to dust) as your sub-base material. Lay and compact it in layers of no more than 150mm at a time using a plate compactor. Don't try to do it all in one deep pass. In winter, make sure the Type 1 is not frozen or waterlogged before you compact it. If it's frozen solid, the particles can't bind together properly and you'll get settlement once it thaws. Let it thaw and drain slightly before compacting.
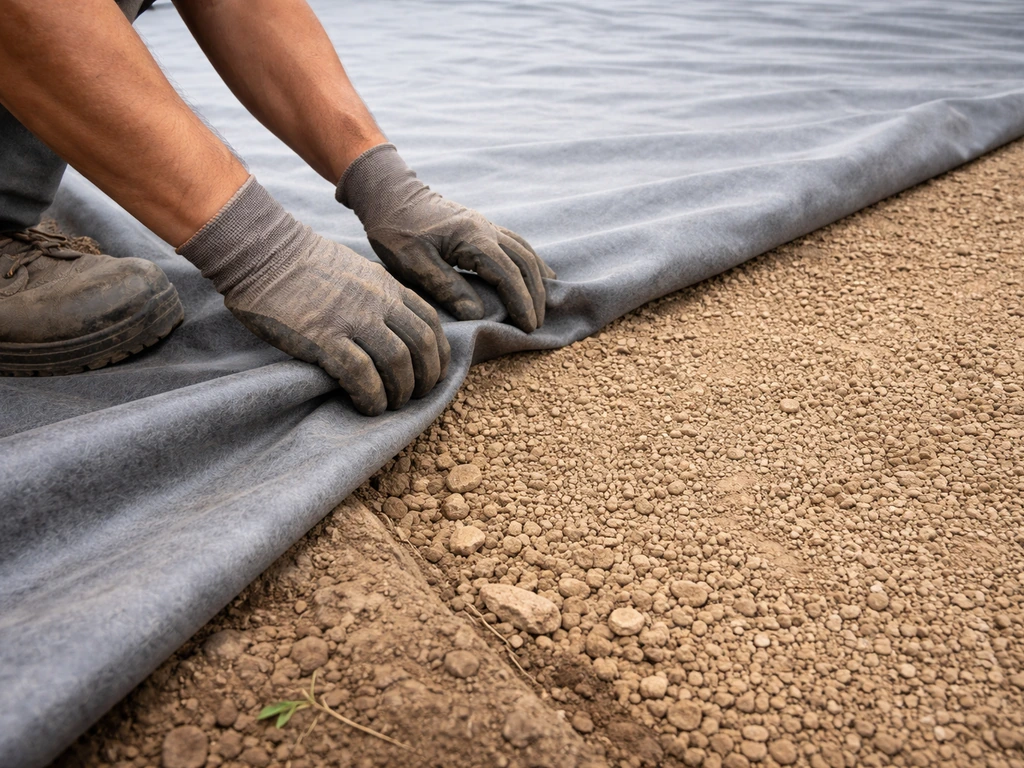
Weed membrane
Lay a geotextile separation membrane between your subgrade and the Type 1 sub-base. In winter, this is especially useful as it also helps prevent the sub-base mixing with soft, potentially saturated soil below. Make sure the membrane surface is dry before you overlap sections. Moisture on the surface, including frost or condensation, prevents overlap seams from bonding properly. Check this on cold mornings before you proceed.
Choosing materials and methods that hold up in cold weather
Not all laying methods are equally suitable for cold weather. Here's how the main options stack up.
| Method / Material | Cold Weather Suitability | Key Considerations |
|---|---|---|
| Cement mortar bed (traditional) | Moderate | Do not use below 3°C. Protect for 48+ hours post-lay. Consider cold-weather admixtures. |
| Semi-dry mortar (5:1 screed bed) | Moderate | Same temperature rules apply. Less water in the mix means slightly less frost risk but still needs protection. |
| Unbound sand bed (flexible lay) | Poor in winter | Sand bedding can freeze solid at shallow depth, making it impossible to compact and level. Slabs will shift once it thaws. |
| Cement-based tile adhesive | Poor below 5°C | Cement hydration stalls below 5°C. Use cold-weather rated adhesives with a stated working temperature, or delay. |
| Resin-based mortar / adhesive | Better than cementitious, but slow | Not directly impaired by low temps in the same way, but cures much slower in cold. Still at risk from frost before cure. |
| Concrete sub-base / footings | Moderate with protection | Keep fresh concrete above 5°C for at least 48 hours. Insulate with hessian or thermal blankets after placing. |
| Block paving (flexible, kiln-dried sand joints) | Reasonable | The paving itself is fine. Risk is in the sand bed and jointing sand freezing. Ensure base is not frozen before laying. |
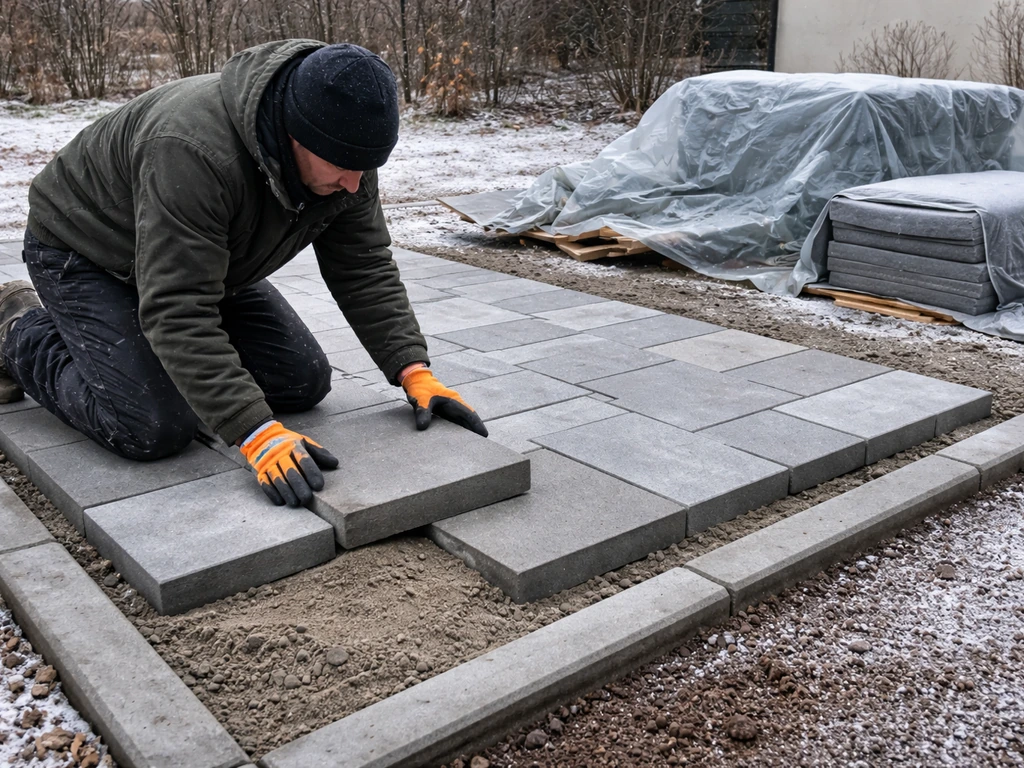
For most homeowners doing a slab or flag patio in winter, a semi-dry mortar bed is your best option. It has less free water than a wet mortar, which reduces the amount of moisture that can freeze within the mix. You still need to protect it from frost, but the risk window is slightly narrower than with a wet mix. You still need to protect it from frost, but the risk window is slightly narrower than with a wet mix avoid unbound sand beds. Avoid unbound sand beds entirely in cold spells. As Pavingexpert explains, a shallow unbound layer will freeze solid, making proper compaction and levelling impossible.
If you're working with cement-based tile adhesives for a porcelain or slate patio, check the technical data sheet. Most standard products have a minimum working temperature of around 5 to 7°C. Forbo Eurocol are explicit that cement-based products should never be processed below 5°C because the chemical reaction is effectively at a standstill. Some manufacturers offer cold-weather rated alternatives, so look for those specifically if you're working in marginal temperatures. And if you have any liquid latex additives or polymer admixtures in your kit, store them somewhere that won't freeze overnight. Frozen polymer additives must be allowed to thaw fully before use or they lose their performance properties.
Curing times and how to avoid frost heave and bond failure

Why frost heave damages patios
Frost heave happens when freezing temperatures penetrate the soil below your patio. Water in the soil migrates toward the freezing front and forms ice lenses, which grow and push soil upward. This upward movement can be significant and is largely unpredictable in terms of depth and amount. The result is slabs that lift, crack, or become uneven. It's not just an aesthetic problem. A heaved slab is a trip hazard and often signals that the mortar bond below has been broken entirely.
The main defence against frost heave is a proper, compacted, well-drained sub-base. A 100 to 150mm layer of well-compacted MOT Type 1 beneath your bedding provides a non-frost-susceptible layer (granular materials generally don't heave the way fine, water-retaining soils do). Crucially, never pave over a frozen or waterlogged subgrade. If you do, the problem is essentially baked in and will surface the moment temperatures swing.
Protecting fresh mortar and concrete
Once you've laid slabs on a mortar bed, your job isn't finished for the day. You need to protect the fresh mortar from frost for at least 48 hours, and ideally longer. Sika's guidance for concrete work recommends maintaining the material at above 5°C for at least the first 48 hours, and above 10°C if you're using a thermal protection method (blankets, insulated covers, or a tent with a heater). For a residential patio, the most practical approach is to drape hessian or thermal insulating fleece over the slabs immediately after laying, and cover with a tarpaulin on top to keep rain off. Weight the edges down so wind can't lift it.
Don't walk on newly laid slabs in winter until the mortar has had at least 48 hours to cure in temperatures above 5°C. If you had a cold night in that window, add more time. Tapping a slab gently and listening for a hollow sound is a good field test. A solid thud means the mortar has bedded. A hollow ring means it hasn't fully bonded yet.
Jointing and pointing in cold weather
Leave pointing until conditions are reliably above 5°C and stable. Pointing is actually the most vulnerable part of the build because it's the thinnest layer and the most exposed to freeze-thaw cycling. If you point in marginal conditions and a frost hits before it cures, you'll be raking it all out and starting again in spring. Be patient with this step.
Step-by-step winter patio build plan
- Check the five-day forecast. Confirm overnight lows will stay above 2°C for at least 48 hours after you plan to lay. If not, wait for a better window.
- Excavate to depth (typically 150 to 200mm below finished patio level). Cover the excavation with a tarpaulin immediately if rain or frost is expected before you continue.
- Allow any frozen or waterlogged subgrade to thaw and drain before proceeding. Test by pressing a spike into the soil. It should penetrate easily and the ground should feel firm, not spongy or icy.
- Lay your geotextile separation membrane over the subgrade. Ensure it is dry and free of frost or condensation before overlapping seams.
- Spread and compact MOT Type 1 sub-base in layers of no more than 150mm, using a plate compactor. Check the material isn't frozen or overly wet before compacting. Achieve your drainage falls at this stage.
- Prepare your mortar bedding mix. For cold weather, a semi-dry 5: 1 (sharp sand to cement) mix is preferable to a wet mix. Only mix what you can lay within 30 to 45 minutes, and don't mix if the temperature is at or below 3°C.
- Lay slabs individually, checking levels and falls as you go. Keep your working area small. Don't leave open mortar bed exposed to wind or cold for long periods.
- Once slabs are laid, cover immediately with hessian or insulating thermal fleece, then a tarpaulin. Weight the edges down. Leave covered for a minimum of 48 hours, longer if nights are cold.
- Check the mortar cure by tapping slabs. A solid thud means bonded. A hollow ring means more time is needed. Do not allow foot traffic until fully cured.
- Only point or grout joints once temperatures are reliably above 5°C and no frost is forecast for at least 48 hours post-application. Use a polymer-modified pointing mortar for better flexibility and frost resistance.
Safety, planning, and when to stop or call a pro
Planning ahead for a winter build
Store all your materials somewhere frost-free. Bags of cement and mortar left outdoors can absorb moisture and partially set before you use them. Liquid admixtures and polymer additives must not freeze. If you're hiring a plate compactor or other equipment, factor in the weather window and only hire it when conditions are genuinely right, not just 'probably okay'.
Personal safety on site
- Frost on excavated ground and on slabs is a slip hazard. Wear grip-soled boots and be extra careful when moving materials.
- Working in low temperatures is physically harder and more tiring. Take regular warm breaks and don't rush, especially when lifting slabs.
- Keep hands warm and dry. Cold hands lead to sloppy work and a higher chance of dropping slabs or tools.
- If you're using a petrol plate compactor, be aware that cold weather affects engine starting. Have a plan if equipment doesn't fire up.
- Don't work alone on a large excavation in winter. Cold ground can be unstable and having someone nearby is good practice.
When to postpone the project
Postpone if the five-day forecast shows overnight lows consistently at or below 2°C. Postpone if the ground is frozen more than a couple of centimetres down and you can't let it thaw before continuing. Postpone if heavy rain has saturated your excavation and you can't get the water to drain. It's genuinely better to wait two weeks for a mild spell than to rush a patio that will fail by spring.
If you are thinking about laying one patio on top of another, the key is making sure the existing base is stable, sound, and properly prepared so you don't end up with settlement or rocking slabs lay one patio on top of another. A broken bond, a rocking slab, or a heaved patio costs far more to fix than it did to lay correctly the first time.
It's also worth knowing that wet ground creates its own set of challenges that aren't unique to winter. If wet conditions are a persistent issue on your site, it's worth reading about laying patio on wet ground as a related problem with its own specific guidance.
When to call a professional
Call a pro if your site has significant drainage problems that you can't resolve with grading and a standard sub-base. Call one if you're working on a large area (anything over about 20 square metres) in genuinely cold conditions, because the curing protection logistics become complex quickly.
If your subgrade is clay, which is highly frost-susceptible and prone to swelling and shrinkage, getting the sub-base specification right is critical and a professional groundworker can advise on whether you need additional measures like a thicker sub-base or a concrete slab rather than a granular bed. And if you're dealing with an unusual surface situation, like whether you can lay over an existing patio, that adds another layer of complexity that's worth professional input in winter conditions.
If you're wondering can you lay a new patio over an old one, the key is assessing the base and making sure you avoid locking in moisture or movement whether you can lay over an existing patio.
Winter patio laying is genuinely doable. The process isn't fundamentally different from a summer build. What changes is how carefully you have to time each stage, how diligently you protect fresh work, and how honestly you assess the conditions before you start. If you want to follow a step-by-step approach, review how to lay decking on patio to plan the structure, spacing, and finishing details correctly solid patio. Get those things right and you'll have a solid patio that lasts just as long as one laid in July.
FAQ
What temperature should I aim for in winter before I start laying paving?
Don’t rely on the day’s high. Check a falling and rising trend: avoid bedding and jointing mixes at or below 3°C on a falling thermometer, or 2°C on a rising one. For concrete, keep the mix from dropping below 0°C, and plan for strength gain by keeping it above 5°C for roughly the first 48 hours if you can.
If it’s sunny during the day but frosts at night, can I still lay slabs?
Usually no, unless you can protect the work through the night. Winter problems come from overnight freezing before curing, so you need insulation or covering that holds temperatures above freezing for at least the first 48 hours, plus longer if the day temperatures stay marginal.
Can I lay paving if the ground feels hard but not obviously frozen?
Test it at subgrade depth, not just on the surface. If a metal spike or screwdriver can’t penetrate more than a little and it feels solid several centimetres down, treat it as frozen and stop. Laying over semi-frozen ground often leads to settlement once it thaws.
How long should I keep covers on newly laid patio slabs?
At minimum, protect for 48 hours after laying. If you had a cold night or forecasts remain close to the limit, keep insulation in place longer. Remove covers gradually if conditions warm up quickly to reduce moisture condensation on bedding and joints.
Is hessian enough to protect mortar in winter?
Hessian helps, but it mainly reduces radiative heat loss and surface frost risk. For more severe forecasts, thermal insulating fleece and a weatherproof top layer (tarpaulin) are safer. Make sure the edges are weighted down so wind cannot lift it and create cold gaps.
What’s the safest way to compact MOT Type 1 in cold weather?
Only compact when it is thawed and not waterlogged. If Type 1 is frozen solid, the particles will not interlock correctly, which can show up as settlement later. Give it time to thaw and drain slightly, then compact in thin layers (about 150 mm) to reach a consistent density.
Do I need a membrane in winter, or is it optional?
A separation membrane is especially useful where subgrade moisture is uncertain. It helps stop fine, saturated soil mixing into the Type 1 layer and reduces the chance of a weakening sub-base. Ensure overlaps and the membrane surface are dry so seams bond properly and don’t act as channels for water.
Can I use a wet mortar bed instead of semi-dry in winter?
Semi-dry is typically lower risk because it contains less free water that can freeze. Wet mortar can work only if conditions are mild enough and protection is reliable, otherwise you increase the chance of bonding failure from internal freeze-thaw.
How can I tell if a slab is bonded before I finish the patio?
Use a simple sound test after the initial curing window. A gentle tap that produces a hollow sound suggests incomplete bedding and bonding, while a more solid thud generally indicates better contact. If it’s still hollow in cold weather, delay walking and pointing.
Should I grout or point right away in winter?
Wait until temperatures are consistently above about 5°C and stable. Pointing is thin and exposed, so freeze-thaw cycling before it cures can force you to rake out and redo in spring.
What if rain starts after I lay the base but before I place slabs?
Don’t just rely on drying out later. If the excavation becomes waterlogged, compaction becomes unreliable and you may have to re-work the sub-base. Best practice is to cover the excavation when bad weather is forecast, and resume only when water has drained and the subgrade is not saturated.
Can I lay a patio over an existing patio in winter?
You can, but winter makes the risk of trapping moisture and movement much harder to manage. The key decision is whether the existing base is stable, well-drained, and not already affected by settlement or frost damage. If there’s any rocking, cracking, or dampness, treat it as a winter red flag and get advice.
Is there a minimum patio size where DIY winter laying becomes unrealistic?
Larger areas become harder because you need consistent curing protection and continuous work before bedding starts to cool or freeze. As a practical rule, consider professional help for anything around 20 square metres or more in genuinely cold conditions.
When should I hire a pro even if the forecast looks okay?
Hire help if you have persistent drainage problems, a clay subgrade that is prone to frost susceptibility, or an unusual base condition. Also consider it if you cannot guarantee protection for the first 48 hours, because protection logistics often decide whether the build survives winter.