
Yes, you can lay a patio on top of another patio, but only if the existing surface is structurally sound, reasonably flat, properly drained, and free from active movement or widespread damage. If it ticks those boxes, overlaying is faster and cheaper than a full dig-out. If it does not, you are better off rebuilding from scratch, because no overlay method can rescue a slab that is crumbling, hollow, or heaving. For a step-by-step guide and full considerations, see our article titled "can you lay a new patio over an old one".
Can You Lay a Patio on Top of Another Patio? Guide

Clara Farrell
7 Aug 2026
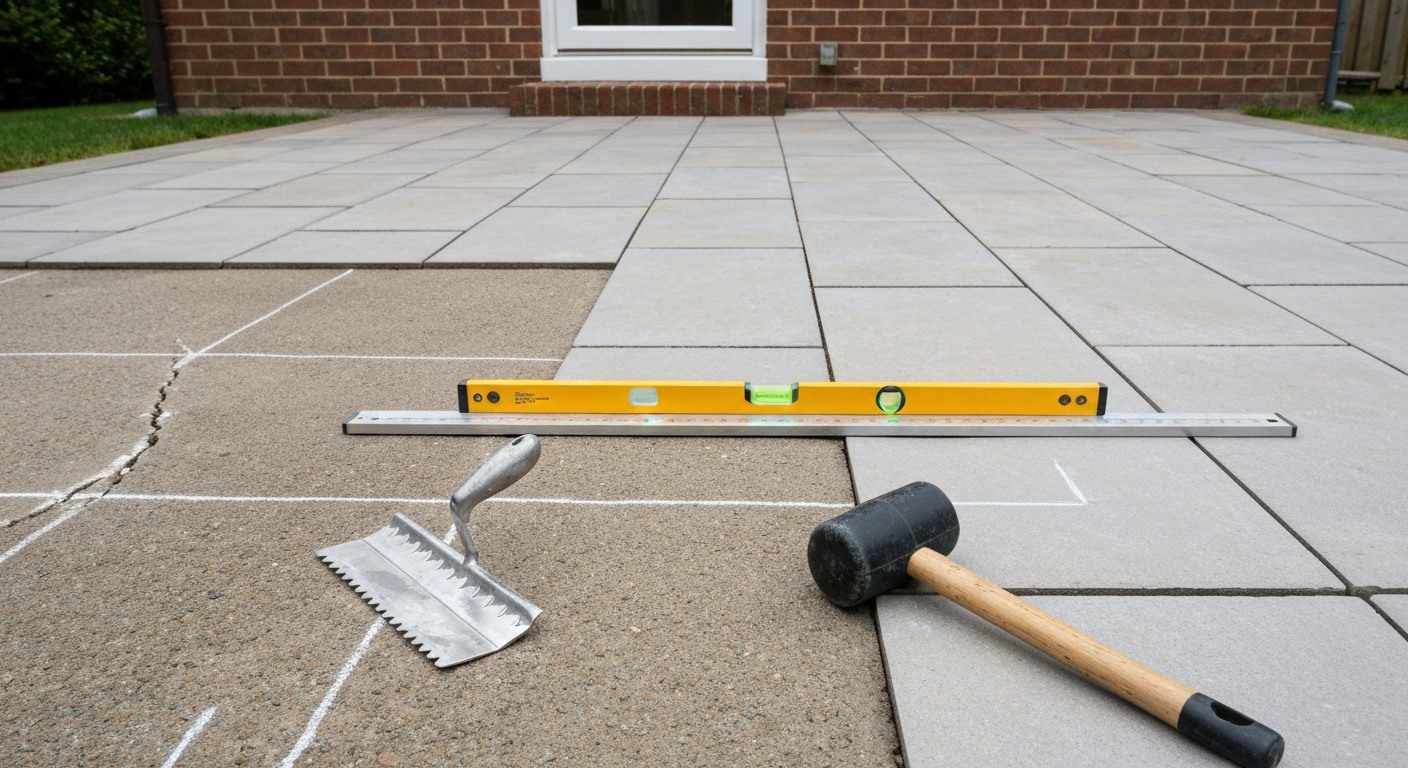
Overlay vs rebuild: what's actually involved
Overlaying means placing a new surface layer directly onto the existing patio without removing it. Rebuilding means breaking out everything down to the sub-base or subgrade and starting fresh. Each route has clear advantages and real trade-offs, and the right choice depends almost entirely on the condition of what is already there.
| Factor | Overlay | Full Rebuild |
|---|---|---|
| Cost | Lower — no skip hire or breaking-out labour | Higher — disposal, excavation, new sub-base |
| Time | Faster — often 1–2 days for a small patio | Slower — 3–7+ days depending on size |
| Height gain | Adds 20–80+ mm to finished level — affects thresholds and drainage | No height change unless you raise the design level |
| Suitability | Sound, flat, well-drained existing surface only | Needed for damaged, uneven, or poorly drained slabs |
| Longevity | As good as a new build if done correctly over a sound base | Maximum lifespan — full control over every layer |
| Planning/regs risk | Height gain near DPC or door thresholds can be an issue | Clean slate — easier to comply with drainage rules |
| DIY difficulty | Moderate — preparation is critical | Hard — requires breaking out, disposing, and full reinstatement |
One thing I have learned from doing this myself and watching plenty of others make the same mistake: the appeal of overlaying is the time and money saved up front, but if you skip a proper inspection and bond a new surface onto a failing slab, you will be pulling it all up again within a couple of years. The preparation work is where the job is won or lost.
Should you overlay or rebuild? A simple decision flow
Work through these questions in order. The first answer that points to a rebuild means you should stop and plan for full removal instead.
- Is the existing patio concrete, stone, or a solid bonded surface (not loose gravel or sand)? No = rebuild or consider a pedestal system.
- Are there cracks wider than 3 mm, or does the surface move, deflect, or pump water when you walk on it? Yes = rebuild.
- When you tap the slab with a metal bar or hammer, do large areas sound hollow? Yes = rebuild or repair those areas before overlaying.
- Is the surface draining away from the house at roughly 1: 80 to 1:100 (about 10–12 mm fall per metre)? No fall at all or fall toward the house = address drainage before any overlay, or rebuild.
- Is the existing surface level enough for your chosen overlay method (within about 10 mm under a 3 m straight edge for mortar bedding, or as specified by your adhesive/tile manufacturer)? No = significant remediation or rebuild needed.
- Will adding 20–80+ mm of new material raise the finished level dangerously close to or above the damp-proof course (DPC) of the house, or create a trip hazard at door thresholds? Yes = rebuild at the correct finished level, or consider a pedestal system where the height suits the context.
- Is the existing surface heavily contaminated with oil, failed paint, or deep biological growth that cannot be fully removed? Yes = bonded methods will not work reliably; consider pedestals, resin-bonded gravel, or rebuild.
- If all the above pass, overlaying is feasible. Choose your method based on budget, finish, and height available.
Inspection checklist before you touch a trowel
Do not skip this step. Spend an hour on inspection and you will save yourself days of rework. Here is what to check, and how to check it.
Surface type
Identify what you are working with. A poured concrete slab is the best candidate for most overlay methods. Existing mortar-bedded flags or concrete blocks can work if well compacted and stable. A surface laid on loose sand or gravel without a solid bound base underneath is generally not a suitable substrate for bonded overlays, the whole thing can shift. For guidance on using gravel as a base, see can you lay patio slabs on gravel.
Structural soundness
Walk every square metre of the patio, pressing firmly with your foot. Any rocking, flexing, or movement is a red flag. Then do a tap test: use a metal bar, a large bolt, or a hammer handle and tap the surface systematically in a grid. A solid slab returns a clear, dense sound. A hollow one sounds dull and drum-like. Mark hollow areas with chalk. If hollow areas cover more than about a third of the surface, a bonded overlay is not a sensible option. Hollow spots indicate voids or delamination beneath, and any bonded material placed over them will crack and lift as the void flexes. If your slab is concrete, the practical rule used by most overlay specifiers is that the near-surface compressive strength should be at least 20–25 MPa for bonded systems to work reliably. For a DIY assessment, a sound slab that was poured to normal residential standard (100 mm nominal thickness for pedestrian use) and has been in place for several years without crumbling is usually adequate.
Level and flatness
Lay a 2–3 m straight edge across the surface in multiple directions and measure the gap underneath. For adhesive-bonded tiles or thin overlays, follow the tile or adhesive manufacturer's specification, many call for no more than 3–5 mm variation under a 3 m straight edge. For mortar-bedded flags, up to about 10 mm under 3 m is workable because the bedding layer can compensate. Mark any high spots or dips and note how much build-up would be needed to correct them.
Drainage and falls
Check which direction the existing patio drains. The correct fall for any external paving is roughly 1:80 to 1:100, which works out at about 10–12 mm of drop per metre away from the house. Use a spirit level and tape measure or a long straight edge with a level to verify this. If the patio already drains correctly, a new overlay can usually maintain that fall. If it does not drain properly, adding another layer on top does not fix the problem, it traps water between layers, causes frost damage in winter, and can push damp toward the house. For guidance on working when the base is wet, see Can you lay a patio on wet ground? for practical advice on drying methods, temporary measures, and when to delay the job.
Frost damage
Look for spalling (flaking or popping of the surface layer), widespread fine cracking in a map or crazing pattern, or areas where the surface has lifted and shattered in small chunks. These are signs of freeze-thaw damage. Minor surface spalling can sometimes be ground back and primed, but deep or widespread frost damage usually means the concrete has been weakened throughout and is not a reliable base. For guidance on working in cold conditions, see can you lay a patio in winter.
Contamination
Oil stains, paint, sealers, wax, algae, moss, heavy efflorescence (white salt deposits), and old curing compounds all destroy adhesion. Manufacturer guidance (Marshalls Bricks & Masonry Technical Manual, cleaning and removal guidance (efflorescence, oil, moss)) specifies removing contaminants by mechanical methods, detergents or emulsifiers, poultices for deep oil, and low‑pressure or neutralising acid washes for efflorescence, then verifying pull‑off strength and surface profile Marshalls Bricks & Masonry Technical Manual — cleaning and removal guidance (efflorescence, oil, moss). Be honest with yourself here. A couple of small oil spots can be degreased. A patio that has had years of barbecue grease, oil drips, and repeated sealer applications may need mechanical treatment (grinding or scarifying) to expose clean concrete. Any contamination that cannot be fully removed rules out bonded overlay methods, you would need a pedestal system or a resin-bonded gravel approach instead.
Getting the existing patio ready for overlay
Whatever overlay method you choose, the preparation work is the same. Rushing this is the single most common mistake I see, and it is almost always the reason overlays fail within a season or two.
Cleaning
Start with a stiff brush to remove loose debris, then pressure-wash the whole area. Allow it to dry fully before moving on. For oil or grease, apply a purpose-made concrete degreaser or a strong emulsifier, scrub it in, leave it for the dwell time on the product label, then rinse thoroughly. Deep oil contamination may need a poultice (an absorbent paste mixed with solvent, applied thick and left to draw the oil out). For efflorescence and algae, use a dilute acid wash (or a proprietary patio cleaner) following the manufacturer's guidance, then neutralise and rinse. After cleaning, check the surface again for any missed contamination.
Crack and void repairs
Fill any cracks wider than about 1–2 mm with a flexible exterior-grade filler or polyurethane sealant for active cracks, and with a rigid cementitious repair mortar for dormant (non-moving) cracks. Hollow areas identified in the tap test should be cut out back to sound concrete using an angle grinder with a diamond blade or a cold chisel, profiled with straight edges (not feathered), primed with a bonding agent, and filled with a cementitious repair mortar. Let repairs cure fully before proceeding.
Priming and bond testing
For bonded methods (adhesive tiles or mortar bedding), apply a suitable primer or bonding slurry as specified by your adhesive or mortar manufacturer. Do not skip this step outdoors, where concrete surfaces are often carbonated and dusty. Before committing to the whole area, do a test bond: bed a slab or tile in a corner, let it cure for the period specified, then try to lift it. blank" rel="noopener noreferrer">ASTM C1583/C1583M - Standard Test Method for Tensile Strength (Pull-off Method) is the field standard for measuring tensile (pull-off) bond strength of overlays and is commonly specified for bond testing. If it comes up cleanly with little resistance, stop. The surface needs more preparation or the product is not right for your substrate. A properly bonded tile or slab should be very hard to remove and should show adhesive transfer onto both surfaces when it does come away.
Method 1: Adhesive-bonded tiles or slabs
When this method suits your project
Adhesive bonding is best suited to flat, sound concrete slabs where the height gain needs to be kept to a minimum. It works well with porcelain paving tiles (typically 18–20 mm thick), natural stone tiles, and thin concrete or vitrified slabs. The existing surface must be clean, dry, profiled, and flat to the manufacturer's tolerance. This is not a suitable method over mortar-bedded flags that have any movement, over cracked or hollow areas, or where contamination cannot be fully removed.
Step-by-step installation
- Complete all preparation, cleaning, repairs, and priming as described above. The surface must be sound, clean, and primed.
- Set out your layout dry first, marking a starting line with a chalk line across the widest or most visible face of the patio. Account for the required drainage fall in your set-out.
- Mix the external-grade flexible tile adhesive (S1 or S2 class for outdoor use) to a smooth, lump-free consistency following the manufacturer's ratio. Do not add extra water.
- Using a notched trowel (typically 6 mm or 10 mm notch for most paving tiles), comb a layer of adhesive onto the substrate. Also back-butter the tile fully, especially for large-format slabs. For tiles over about 600 mm, full-bed coverage is critical — avoid spot bedding.
- Press each tile firmly into position with a slight twisting motion to collapse the ridges and achieve full contact. Use a rubber mallet to bed it in level.
- Check drainage fall every few tiles using a spirit level and packing wedges or tile spacers as needed. Do not rely on the substrate fall alone — verify it as you go.
- Point joints with an exterior-grade flexible grout or jointing mortar after the adhesive has cured (typically 24 hours, longer in cool weather). Use a sponge and clean water to remove excess.
- Keep foot traffic off for the full curing time stated on the adhesive packaging — usually 24–48 hours for light foot traffic and up to 7 days for full cure.
Pros and cons
| Pros | Cons |
|---|---|
| Minimal height gain (adds ~25–35 mm total with tile and adhesive) | Substrate must be very flat and very clean |
| Clean finish with tight joints — professional look | More expensive per m² than mortar bedding |
| Works well for porcelain and natural stone tiles | Adhesive failure if surface is contaminated or too weak |
| No sub-base disturbance | Cannot correct significant falls or level problems |
Method 2: Mortar or sand-and-cement bedding over a sound slab
This is the most traditional overlay approach and suits situations where the existing slab is sound but not perfectly flat, or where you are using thicker paving flags (40–50 mm) that need a levelling bed. The bedding layer also gives you more scope to adjust falls. The slab beneath must still be structurally sound and clean, the mortar bed will not compensate for structural failure.
Step-by-step procedure
- Prepare and clean the existing slab thoroughly as described. Apply a bonding slurry (PVA-based or SBR-modified cement slurry depending on the manufacturer's recommendation) immediately before bedding — do not let it skin over.
- Mix a semi-dry mortar bed: approximately 4 parts sharp sand to 1 part cement (or follow your product recommendation). The mix should hold its shape when squeezed but not be wet enough to slump. This is your bedding layer.
- Lay the mortar bed at a depth of approximately 30–50 mm (40 mm is a common working depth for flag laying). Screed it flat using gauge pegs or rails set to the correct finished height and drainage fall. A straight screed board or tamping beam helps here.
- Butter the underside of each flag or slab with a thin coat of wet cement slurry immediately before placing. Lower the slab carefully onto the bed and tap down firmly with a rubber mallet.
- Check level and fall with a spirit level across adjacent slabs after every three or four pieces laid. Adjust by lifting and adding or removing mortar before the bed stiffens.
- Leave joints of approximately 8–15 mm between slabs and point them with a stiff brush-in jointing mortar or a wet mortar mix once the bedding has set (usually the following day).
- Protect finished areas from rain, frost, and foot traffic for at least 48–72 hours, and do not load the surface heavily for at least 7 days.
Practical tips
- Pre-wet concrete flags before laying to stop them pulling moisture out of the mortar bed and causing a weak bond.
- Avoid laying in temperatures below 5°C — mortar will not cure properly and frost will ruin it. The related topic of laying in cold weather is worth reading through before you start in autumn or early spring.
- Do not lay on wet or waterlogged surfaces. If the existing patio is saturated, wait. Similarly, avoid working when rain is forecast within 24 hours of laying.
- The total height gain with this method is typically 70–100 mm (bedding plus slab thickness), so check door thresholds and the DPC height carefully before committing.
Method 3: Paving pedestals (raised paving)
When pedestals are the right tool
Adjustable paving pedestals let you lay slabs as a floating, ungrouted deck above the existing surface without any bonding at all. They are ideal when the existing patio is too contaminated for bonding, when you need to create a level deck over a sloped surface without heavy mortar build-up, or when access to drainage or services beneath is useful. They are also the cleanest solution when height constraints are tight, because the pedestal height can be adjusted to bring the finished level precisely where you need it. If you prefer timber decking instead of slabs, read how to lay decking on patio for step‑by‑step guidance. Systems from manufacturers like Buzon are designed and load-rated for pedestrian use, with compression capacities in the kN range that comfortably handle garden furniture, people, and normal patio loads.
Step-by-step installation
- Clean the existing patio surface of debris. With pedestals, you do not need to profile or prime the surface, but you do need it free of loose material that could rock a pedestal.
- Calculate your pedestal layout. Typically, one pedestal sits at each corner where four slabs meet. Follow the pedestal manufacturer's spacing charts for the slab size and thickness you are using.
- Set out the perimeter row first, using a string line or laser level to establish the finished height. Adjust each pedestal to the required height by turning the top section. Most systems allow fine incremental adjustment of several millimetres per turn.
- Work from one corner inward, placing pedestals and dry-laying slabs as you go. Check the level of each slab and the fall across the deck as you build out.
- For drainage, deliberately allow a slight fall across the pedestal heights (or use built-in slope correctors that most pedestal systems include) so that water flows through the open joints between slabs and drains away underneath. This keeps the substrate surface beneath the deck drier and avoids ponding.
- At the edges and perimeter, use edge-trim or facade profiles to finish neatly and contain the slabs.
- Slabs on pedestals are not grouted — the open joints are intentional and allow drainage. This also means individual slabs can be lifted easily for maintenance or inspection underneath.
Drainage and inspection notes
The open-joint design of pedestal systems is one of their best features for drainage. Water passes through the joints and runs off the existing slab below. Make sure the existing patio does still have some drainage fall, even if it is minimal, so water does not pool beneath the deck permanently. Because the slabs are ungrouted and easily lifted, you can also inspect what is happening beneath the deck at any time, useful if you suspect a drainage issue or need access to pipes.
Method 4: Resin-bound or resin-bonded gravel overlays
Suitability
Resin systems work differently from any of the above methods. Rather than placing discrete slabs, you mix aggregate (gravel, stone, or recycled glass) with a resin binder and trowel or screed it as a continuous layer over the existing surface. Resin-bound systems (where aggregate and resin are mixed together) are SUDS-compliant and permeable, allowing water to pass through the surface itself. Resin-bonded systems (where aggregate is scattered onto a resin-coated surface) are not permeable and are less durable underfoot. Resin-bound is the better choice for patios.
These systems work well over sound concrete when the existing surface is structurally sound and has a good drainage fall. The overlay is typically 15–18 mm thick, making it one of the lowest height-gain options available. However, because the system is bonded, the surface preparation requirements are just as demanding as for tile adhesive methods.
Preparation and application
- The existing concrete must be clean, dry, and structurally sound. Shot-blast or mechanically grind the surface to remove any sealers, laitance, or contamination and to open up the surface texture. The surface profile should match what the resin manufacturer specifies — typically in the mid-range of the standard CSP (Concrete Surface Profile) scale, roughly CSP 3–6 depending on the product.
- Repair any cracks with a compatible polyurethane or epoxy crack filler. Allow to cure fully.
- Prime the surface with the resin manufacturer's specified primer and allow to tack dry. Do not apply resin over wet or damp concrete.
- Mix the resin and aggregate together in the specified ratio in a forced-action mixer (not a drum mixer, which does not mix evenly enough). Work in manageable batches — resin has a limited pot life, typically 20–30 minutes depending on temperature.
- Trowel the mixed resin-bound material onto the primed surface using a stainless steel trowel, working in a consistent direction. Aim for an even depth of 15–18 mm.
- Feather edges neatly with an edging trowel and ensure there are no joins or ridges between batches.
- Allow to cure per the manufacturer's data sheet before foot traffic — typically 4–8 hours depending on temperature and humidity, with full cure in 24 hours.
Permeability and drainage notes
A properly installed resin-bound surface is permeable, meaning water soaks through the aggregate layer itself rather than running off the surface. This is a genuine advantage for planning purposes in England and Wales, where laying an impermeable surface over 5 m² in the front garden requires planning permission under Permitted Development rules. Resin-bound installations over permeable sub-bases are generally treated as permeable surfaces and fall outside this requirement, though you should always verify the rules for your specific situation and location. On an existing solid concrete base, the permeability of the resin layer itself is maintained, but water still needs to go somewhere at the base, ensure there is a drain or soakaway available at the edge of the patio.
Height, thresholds, drainage rules, and when to call a pro
Every overlay method adds height to your finished patio level, and this is the most commonly overlooked practical problem. Before choosing any method, measure the height from the existing patio surface to the bottom of your door threshold, the base of any window frames at ground level, and critically, the damp-proof course (DPC) of your house. The DPC is usually a thin slate or plastic layer visible in the brickwork, typically at least 150 mm above ground level per standard building practice. If your overlay would bring the finished patio level to within 150 mm of the DPC, or above it, you risk bridging the DPC and allowing damp into the wall. This is the most common reason an overlay is not appropriate and a rebuild at a lower level is needed instead.
On drainage, any overlay that increases the impermeable surface area of your garden may be subject to planning regulations in your area. In practice, most rear garden patios replacing an existing patio fall within Permitted Development rights in England and Wales, but front garden installations and any work in Scotland or Northern Ireland have different rules. If in doubt, check with your local planning authority before starting.
Call a professional if the existing slab has structural movement, if you find the sub-base has failed or washed away, if the DPC situation is borderline, or if the area involved is large (above about 40–50 m²) and accuracy of drainage falls is critical. Getting a quote for professional assessment or laying does not mean abandoning the project, sometimes having a professional install the tricky bits while you handle the preparation and clearing saves money and gives you a result you can trust.
Tools, materials, time, and cost to expect
| Method | Key tools needed | Approx. added height | DIY time (20 m²) | Rough material cost per m² |
|---|---|---|---|---|
| Adhesive-bonded tiles | Notched trowel, rubber mallet, tile spacers, angle grinder, spirit level | 25–40 mm | 1–2 days | £30–£80+ (excl. tiles) |
| Mortar-bedded flags | Mixing equipment, screed rails, tamping board, rubber mallet, spirit level | 70–100 mm | 1–2 days | £15–£40 (excl. slabs) |
| Paving pedestals | Laser level or long spirit level, rubber mallet, tape measure | 30–150+ mm (adjustable) | 1 day | £20–£50 (pedestals only, excl. slabs) |
| Resin-bound gravel | Forced-action mixer, stainless trowel, angle grinder/shot blaster for prep | 15–18 mm | 1 day (+ prep day) | £40–£80 |
Common mistakes and how to avoid them
- Skipping the tap test and bonding over hollow or delaminated areas — the new surface will crack and lift within months.
- Laying on a damp surface — moisture trapped under a bonded overlay is the fastest route to failure, especially through winter freeze-thaw cycles.
- Ignoring the drainage fall — adding a new surface over one that already drains poorly makes the problem worse, not better.
- Using interior tile adhesive or standard sand-and-cement outdoors — always use products specified for external, frost-resistant use.
- Feathering mortar to a thin edge at repairs or along borders — thin mortar edges crack and blow off. Always cut back to a minimum of about 10–15 mm depth before patching.
- Not checking door and DPC heights before choosing the overlay thickness — realising the problem after the slabs are laid is an expensive mistake.
- Working in cold or wet weather without appropriate precautions — mortar and adhesive need temperatures above 5°C to cure properly. The guidance on laying a patio in winter covers this in detail.
- Rushing the curing time and loading the surface too early — this causes adhesive or mortar failures that are not immediately obvious but appear as cracked joints and rocking slabs within the first year.
When you genuinely need to rebuild
Some situations make overlaying a waste of time and money. Be honest with yourself when you find any of the following: large cracks (wider than about 3 mm) that are still actively moving; areas that pump, rock, or deflect underfoot; widespread hollow spots covering more than roughly a third of the area; evidence that the sub-base has eroded or washed away beneath the slab; the existing surface is made up of loose or unstable materials with no solid bound layer; or the finished height of any overlay would compromise the DPC or create a flooding risk.
If you need to rebuild, the process follows a standard sequence: break out and dispose of the existing surface (hire a skip, a breaker, and PPE), excavate to the correct depth for your sub-base and slab, lay a compacted hardcore sub-base (typically 100–150 mm MOT Type 1), blind with sharp sand or lay a concrete slab as appropriate, then install your new paving at the correct finished level and drainage fall. It is more work, but it gives you a surface that will last 20 years or more. The investment in a correct rebuild almost always costs less in the long run than repeatedly patching or re-overlaying a failing base.
FAQ
Can you lay a patio on top of another patio?
Yes — in many cases you can install a new patio over an existing patio, but feasibility depends on the existing surface condition, structural soundness, drainage, and the chosen overlay method. Bonded overlays (adhesives, thin polymer toppings) require a sound, high‑strength substrate and verified pull‑off capacity; unbonded systems (pedestals, decking, loose gravel or resin-bound on a separating layer) are more forgiving but change finished height and drainage. If the existing slab is cracked, delaminated, contaminated, or structurally unsound, full removal and rebuild is usually required.
What are the main pros and cons of overlaying vs full removal and rebuild?
Pros of overlaying: faster, less waste, lower cost, less disruption. Cons of overlaying: limited by substrate condition, added finished height, potential for hidden failures if substrate deteriorates, stricter prep and testing for bonded systems. Pros of full removal/rebuild: control over new base, correct falls and drainage, long‑term reliability. Cons of rebuild: higher cost, longer time, more disturbance and waste.
How do I inspect the existing patio before deciding? (Inspection checklist)
Surface type: concrete, mortar bed, paving slabs, or natural stone. Structural soundness: look for delamination, popouts, spalling, widespread cracking or movement. Level/flatness: check falls toward drains (target ~1:80–1:100) and straight‑edge gaps (follow overlay spec). Drainage: ponding, blocked outlets, or impermeable overlays nearby. Frost damage: scaling, freeze‑thaw distress. Contamination: oil, paint, curing compounds, salts, biological growth, laitance. Testing: follow manufacturer/industry guidance — do multiple ASTM C1583 pull‑off tests and, where needed, core/compressive tests (ASTM C39) to confirm substrate strength and bond capability.
What overlay methods are viable and when should I use each?
Adhesive‑bonded tiles/slabs: use when existing concrete is sound, clean and meets pull‑off requirements (check product TDS). Mortar or sand‑cement bedding over sound slab: use when slab is level and strong; use a compacted 30–50 mm bedding and cement‑modified mortar. Paving pedestals (adjustable): good for drainage, slope correction and when you want an unbonded, raised system; useful over imperfect substrates. Resin‑bound or bonded gravel overlays: use on sound, properly prepared substrates and only with systems that allow the substrate profile; check manufacturer for CSP and pull‑off requirements. Timber/composite decking on joists or pedestals: choose when you need a higher finish level and want a ventilated cavity; good over poor concrete. Slab‑on‑gravel (new slab laid over compacted aggregate): use when rebuild is not possible but a new independent slab is desired; requires edge restraint and compaction.
Step‑by‑step: adhesive‑bonded tiles/slabs over existing concrete
1) Inspect and test substrate (pull‑off tests, check CSP requirement per product). 2) Clean and remove contaminants mechanically (shotblast, grind) to required CSP. 3) Repair cracks, spalls and level deviations; fill voids and allow repairs to cure. 4) Prime or apply bonding slurry if required by adhesive TDS. 5) Use the adhesive or polymer mortar specified by the tile/slab manufacturer; bed tiles per recommended bed thickness and jointing. 6) Allow manufacturer‑specified cure times before loading. 7) Verify drainage and threshold clearances after installation.
Step‑by‑step: mortar or sand–cement bedding over sound slab
1) Confirm slab is structurally sound and flat enough for bedding; perform repairs. 2) Prepare bedding screed: typically 30–50 mm cement‑modified sand bedding, screed to falls. 3) Apply bonding slurry to substrate if required. 4) Lay slabs on bedding, compact and adjust to line/level. 5) Point joints with suitable external grout or jointing sand. 6) Cure per materials’ guidance and protect from frost/wet during initial set.