
Yes, you can lay interlocking patio tiles on grass, but whether that's a good idea depends entirely on the tile type you choose and what you want the finished patio to do. Plastic grid tiles and some rubber tiles can go down on a mowed, firm lawn for light-duty, temporary use. Concrete interlocking pavers, composite deck tiles, and anything you want to last more than a season nearly always need the grass removed and a compacted base underneath. This guide walks you through the full decision, the prep work, and the installation steps for each common tile type so you can get it right the first time.
How to Install Interlocking Patio Tiles on Grass: DIY Guide!

Clara Farrell
9 Aug 2026
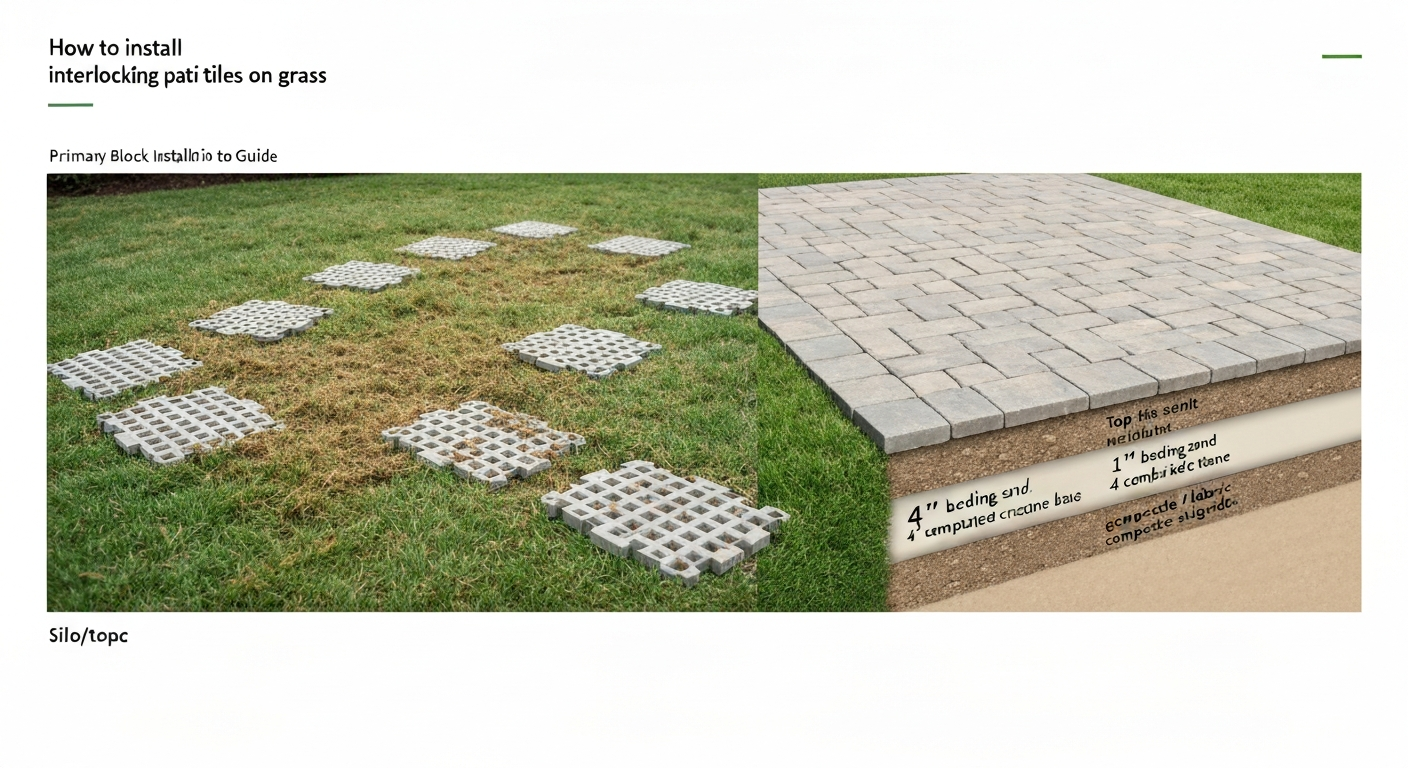
Should you lay tiles directly on grass or remove the turf first?
This is the question I get asked more than any other, and the honest answer is: it depends on a short checklist. Run through the points below before you buy a single tile. If you tick even one of the 'remove the turf' boxes, skipping that step will cost you more time and money later than doing it now.
Decision checklist: tiles on grass vs. remove the turf
| Condition | Tiles directly on grass OK? | Remove turf and build a base |
|---|---|---|
| Tile type: plastic/PP open grid (e.g., ECORASTER-style) | Possibly, for very light foot traffic only | Recommended for any load-bearing or permanent use |
| Tile type: interlocking rubber tiles | Sometimes, on firm level ground for low-traffic areas | Preferred for long-term stability and warranty compliance |
| Tile type: composite/wood-look deck tiles | No — manufacturers explicitly prohibit installation on grass or soil | Always required |
| Tile type: concrete interlocking pavers | No — pavers need compacted aggregate base + bedding sand | Always required |
| Soil type: clay or silt | No — retains water, prone to frost heave and settlement | Always required |
| Soil type: sandy or gravelly, well-drained | Possible for temporary setups only | Still recommended for anything permanent |
| Patio use: heavy furniture, BBQ, heavy foot traffic | No | Always required |
| Patio use: occasional seating, kids' play mat, temporary event | Possibly | Not always essential |
| Climate: hard winters with ground freeze | No — frost heave will shift tiles repeatedly | Always required |
| Slope: more than 2% (about 1/4 in. per foot) | No — tiles will migrate downhill over time | Always required |
| Drainage: area that pools or stays wet | No — standing water under tiles accelerates turf decay and instability | Always required |
If you cleared that checklist and still want to try tiles directly on existing grass, go in with realistic expectations: this is a temporary or semi-permanent solution. The grass underneath will die within weeks from lack of light and airflow. The tiles will shift as the turf decomposes and the soil softens beneath them. Plan to revisit the installation within a year or two at most.
Why removing the turf is almost always worth it
I know removing turf feels like a lot of extra work, especially when the packaging on a tile says 'easy DIY install.' But here's what happens when you skip it. The grass underneath dies and decomposes, creating a spongy, uneven base. Water collects in that layer instead of draining away. In areas with cold winters, that moisture freezes, expands, and pushes your tiles up and sideways, a process called frost heave. See the USDA ARS overview: Soil freezing, frost heave and related processes for federal research explaining how freezing moisture in fine-grained soils causes frost heave and why drainage and aggregate bases mitigate it. Fine-grained soils like clay are especially frost-susceptible, and repeated freeze-thaw cycles will leave your patio looking like a jigsaw puzzle that's been kicked across the room.
- Drainage: dead turf and decomposing organic matter trap moisture under the tiles rather than letting it drain away; this accelerates settling and creates ideal conditions for weeds and moss
- Load capacity: living or decaying grass provides almost no structural support; furniture legs and foot traffic create pressure points that sink into the soft layer beneath
- Longevity: a properly compacted aggregate base (minimum 4 inches for pedestrian patios on well-drained soils) is the single biggest factor in how long your patio lasts without re-levelling
- Frost heave: clay and silty soils hold water and are highly frost-susceptible; without a free-draining granular base, ice lenses form beneath the tiles and heave them upward season after season
- Aesthetics: tiles laid directly on grass develop an increasingly uneven, wavy surface as the turf beneath breaks down unevenly; removing turf gives you a flat, level canvas to work from
Pros and cons: tiles on grass vs. proper sub-base
| Factor | Tiles directly on grass | Turf removed, compacted base built |
|---|---|---|
| Installation time | Fast — hours to a day | Slower — 1 to 3 days depending on area size |
| Physical effort | Low to moderate | Moderate to high (excavation, compaction) |
| Upfront cost | Lower — no base materials | Higher — crushed aggregate, sand, geotextile, rental of plate compactor |
| Long-term stability | Poor — tiles shift as turf dies and soil softens | Excellent when base is properly compacted |
| Drainage | Poor to moderate | Good to excellent with correct slope (1.5% minimum away from structures) |
| Frost performance | Poor in freeze-thaw climates | Good with proper aggregate depth and drainage |
| Suitable tile types | Open plastic grids, some rubber tiles (light use only) | All tile types including concrete pavers |
| Longevity expectation | 1–3 years before significant issues | 10–25+ years with correct installation |
| Weed control | Difficult — weeds push through from below | Good with geotextile and jointing sand |
| Best for | Temporary setups, camping areas, kids' play zones | Permanent patios, entertaining areas, year-round use |
The main interlocking tile types and how they handle grass installations
Not all interlocking tiles are created equal, and the marketing images showing tiles dropped onto a lawn can be misleading. Here is what each common type actually needs.
Plastic and PP open-grid tiles
These are the permeable plastic grids (sometimes branded as grass-reinforcement grids or turf protection tiles) designed to allow grass or gravel to grow or sit within the cells. Systems like ECORASTER are often marketed for this use. The important caveat: manufacturer installation guides for these products are clear that a base layer is normally required for any load-bearing application. ECORASTER's own guidance states: 'If you do not build a base layer, surface drainage is not assured.' For truly light-duty uses (occasional garden foot traffic on firm, well-drained sandy soil), you might get away with laying these on closely mowed, firm ground temporarily. For anything more demanding, excavate at least 4 inches, lay geotextile fabric, compact a granular sub-base, and then install the grid on top. For step-by-step instructions specific to turf installations, see our guide on how to install patio tiles over grass.
Rubber interlocking tiles
Interlocking rubber tiles are popular for patios because they're lightweight, cushioned underfoot, and easy to cut. Most manufacturers say they perform best on flat, stable substrates like a concrete slab, compacted asphalt, or compacted aggregate. Some retailers describe them as suitable for floating on 'reasonably firm, level compacted soil,' but long-term stability and most product warranties require a solid base. On grass, rubber tiles will flex and shift as the ground moves beneath them, and the interlocking tabs can disengage over time. For a permanent rubber tile patio, remove the turf and build a compacted base. If you want a quick seasonal rubber tile area for a play space or outdoor gym, mow the grass short and accept that you'll need to re-level tiles regularly. The separate guide on how to install rubber patio tiles covers base options in more detail.
Composite and wood-look deck tiles
These are the interlocking tiles that mimic hardwood decking and are made from composite or capped PVC. Do not put these on grass. Manufacturer installation guides (and product Q&A sections on major retail sites) are explicit: these tiles must be installed on a clean, smooth, flat, solid surface. Grass and soil are specifically excluded. Even slight unevenness causes the tiles to rock, the interlocking connectors to crack, and the surface to become a trip hazard. If you like the look of composite deck tiles on a patio, you need either an existing concrete slab or a freshly laid, compacted base with a smooth laying course.
Concrete interlocking pavers
Concrete interlocking pavers are the most durable and longest-lasting option, but they have the most demanding base requirements. Industry guidance from the Interlocking Concrete Pavement Institute (ICPI) specifies a minimum 4-inch compacted aggregate base for pedestrian patios on well-drained soils, plus a 1-inch screeded layer of bedding sand, plus rigid edge restraints set on the compacted base (not on the bedding sand or soil). None of this is compatible with laying tiles on existing grass. The grass must come out, the subgrade must be compacted to at least 95% Standard Proctor density, and the base must be built up properly. ICPI / Paver installation guidance (industry installation doc) recommends compacted aggregate base installed in 2–4" lifts with mechanical compaction to meet specified density (many specs call for ≥95% Standard Proctor) and notes poor compaction is the most common cause of paver failure/settling. Skimping on any of these steps, and especially using extra bedding sand to hide an uneven base, is described in ICPI guidance as the most common cause of paver failure. That said, concrete pavers are worth the extra effort: done correctly, they last 25 years or more with minimal maintenance.
Tools and materials you'll need
General tools for any interlocking tile installation
- Tape measure and long straight edge (at least 6 ft.)
- String lines and wooden stakes for marking layout
- Spirit level (4 ft. minimum) and line level
- Rubber mallet
- Utility knife or box cutter
- Safety glasses, work gloves, and knee pads
- Wheelbarrow and square-mouth shovel
- Garden rake and landscape rake
- Plate compactor (rental, typically $60–$100/day) for any base work
- Screed rails or 1-inch diameter conduit for setting bedding sand depth
- Broom (stiff bristle) for sweeping jointing material into joints
Materials for a properly prepared base (all tile types except temporary setups)
- Crushed aggregate base (3/4-inch clean crushed stone or road base): calculate volume as length x width x base depth (at minimum 4 inches for pedestrian use on well-drained soil, 6 inches on clay or high-traffic areas)
- Geotextile separation fabric (non-woven, e.g., Mirafi 500x or equivalent): sized to cover the excavated base area with 12-inch overlap at seams; particularly important over clay or silty soils
- Coarse bedding sand (concrete sand, not play sand): 1 inch depth for concrete pavers; not needed for rubber or plastic grid tiles
- Polymeric jointing sand (for concrete pavers): fills joints and resists weed growth and ant erosion
- Plastic or metal edge restraints with 12-inch galvanized spikes: one set per linear foot of perimeter (concrete pavers)
- Your chosen interlocking tiles: add 10% to your calculated area for cuts and waste
Additional tools and safety gear for concrete pavers
- Wet diamond blade cut-off saw or angle grinder with diamond blade: wet cutting is strongly preferred to control silica dust
- NIOSH-approved P100 respirator: required if dry cutting at any point; silica exposure from dry-cutting concrete is a serious respiratory hazard under OSHA 29 CFR 1926.1153
- Hearing protection (earplugs or ear muffs) for saw use
- Low-amplitude plate compactor with protective rubber pad for final compaction pass over pavers
- Chisel set and hand hammer for fine splitting
Additional items for rubber tile installations
- Circular saw or jigsaw with a fine-tooth blade for cutting rubber tiles
- Straight edge or speed square for marking cuts
- Rubber tile adhesive or perimeter double-sided tape (check manufacturer guidance — some tiles float freely, others require adhesive at edges)
- Outdoor rubber tile cleaner for maintenance
Additional items for plastic/PP grid tiles
- Hacksaw, jigsaw, or angle grinder for cutting grid panels
- Geotextile weed membrane (in addition to separation fabric if filling cells with gravel)
- Pea gravel or angular gravel for cell infill (if not using grass infill)
- Topsoil and grass seed for grass infill applications
Assess your site before you spend a penny
I learned this the hard way on my first patio project: spending 20 minutes assessing your site properly will save you from making a very expensive mistake. Walk the area after heavy rain and after a dry spell. Watch how water moves across the lawn. Probe the soil with a screwdriver or a thin rod. All of this tells you what you're really working with.
Soil type
Dig a small test hole about 12 inches deep and look at what comes out. Sandy or gravelly soil drains quickly and has reasonable bearing capacity, still needs a compacted base for permanent tiles, but it's easier to work with. Clay soil holds water and becomes plastic (squishy and mobile) when wet. It also expands when it freezes, making it highly frost-susceptible. If you're on clay, you'll need a deeper base with geotextile separation fabric to prevent the fine clay particles from migrating up into your aggregate layer and contaminating it over time. Silty soil behaves similarly to clay for frost and drainage purposes.
Slope and drainage
Your finished patio surface needs to slope at least 1.5% (roughly 1/8 to 1/4 inch per foot) away from any structure, wall, or building. This is not just a guideline, it's the standard minimum specified in industry installation guides. Use a long spirit level with a shim to measure your existing lawn slope. If the ground slopes toward your house, you'll need to re-grade as part of your preparation. If the slope is greater than 2% across the patio area, you'll need to cut and fill to create a level terrace before building your base, or step the patio. Tiles on a sloped lawn without base preparation will migrate downhill.
Load requirements
A standard residential pedestrian patio (seating, outdoor dining, foot traffic) requires a minimum 4-inch compacted aggregate base on well-drained soil. If you're parking a vehicle, running a heavy hot tub, or placing a very large pergola or outdoor kitchen, you need a structural engineer's input and a deeper, engineered base, that's beyond the scope of this guide and firmly in professional territory.
Hidden constraints: utilities and tree roots
Before any digging, contact your local utility locating service (in the US, call 811 at least a few days before you dig). Buried gas, water, electrical, and telecom lines are more common than people expect, even in back gardens. Also look up and around: large trees near the patio will have surface roots that grow over time, eventually lifting tiles. The general rule is to stay at least as far from a tree as the tree is tall, though this varies by species. If tree roots are already present in your excavation area, reconsider the location or consult an arborist.
Preparing the area and laying out your design
Good preparation is where most DIY patio projects succeed or fail. This phase takes longer than you think, and that's completely normal. Don't rush it.
Take photos before you start
Before you touch anything, photograph the area from several angles and from above if you can. Take close-up photos of any drainage features, slope changes, existing edging, utility covers, and the condition of the lawn. These photos are invaluable if something goes wrong later, and they're a great way to document the transformation for your own satisfaction. Take another full set of photos after you've marked your layout with string lines, and another after excavation is complete.
Measuring and marking your layout
- Measure your patio area and sketch it on paper with dimensions. Note any irregular edges, steps, or features.
- Calculate the total tile area plus 10% for waste and cuts. For a rectangular patio, multiply length by width. For irregular shapes, break them into rectangles.
- Decide your starting point: for most patios, start from the most visible corner or the corner adjacent to the house. Tiles should work outward so the cut tiles end up at the least visible edges.
- Drive wooden stakes at the corners of your planned patio and run string lines between them, pulled taut. Use a builder's square or the 3-4-5 triangle method to check your corners are true right angles.
- Use spray marking paint or chalk line to transfer the string line positions to the ground. Walk the boundary and check everything looks right from the house and from the garden.
- Mark the direction and amount of slope you want to build in: use a line level on your string line and set one end 1/4 inch lower per foot of run away from the house (or per your drainage plan).
Turf prep options: mow, cut sod, or full removal
What you do with the grass depends on which installation method you've chosen. If you're wondering about methods and step-by-step guidance, read our short guide on how to install turf on patio for a clear walkthrough. If you're considering artificial turf instead of tiles, see a step-by-step guide on how to install fake grass on a patio.
- Mow very short only: this is only appropriate for truly temporary, light-duty plastic grid or rubber tile installations on firm, well-drained soil. Mow the area as short as possible (scalp it down to about 1 inch or less), rake off all clippings, and let it dry for a day or two before laying tiles. Expect the grass to die under the tiles within a few weeks.
- Cut sod and remove top layer: for any semi-permanent installation, cut around your marked perimeter with a spade or sod cutter, and remove the top 2–3 inches of turf and roots. Sod cutters can be rented for around $60–$100 per day and make this job much faster than manual cutting on anything larger than about 50 square feet. Dispose of the sod by composting it or placing it upside down in garden beds.
- Full excavation: required for all concrete paver and composite tile installations, and recommended for permanent rubber tile and plastic grid installs. Excavate to the depth of your base (minimum 4 inches of compacted aggregate plus 1 inch of bedding sand for concrete pavers, so typically dig 5–6 inches below your desired finished surface). On clay soil, go deeper: 6 inches of aggregate is the safer choice. Keep the excavation edges clean and vertical. Compact the subgrade with a plate compactor before adding any base material.
First-timer tips for the preparation phase
- Rent a sod cutter for any area over about 50 square feet — it's genuinely worth the money and your back will thank you
- Hire a skip (dumpster) or arrange a soil/turf collection before you start, not after — excavated material expands to roughly 1.3 times its in-ground volume and is surprisingly heavy
- If you hit a patch of very soft, saturated, or black organic soil during excavation, dig it all out and replace it with compacted aggregate — building a base over soft spots is asking for future settlement
- Compact the subgrade before you add any aggregate, even if it looks firm — use the plate compactor in two perpendicular directions for even coverage
- Lay geotextile fabric before adding aggregate, especially if your subgrade is clay or silt — this prevents the fine soil particles from being pumped up into your aggregate layer by water movement over time
FAQ
Can homeowners install interlocking patio tiles directly on existing grass?
Sometimes — but usually no for long‑term stable patios. Lightweight snap‑together plastic or rubber tiles temporarily sit on turf, but most manufacturers and industry guidance require a flat, firm surface or a prepared aggregate base. Concrete interlocking pavers and permeable grid systems normally require excavation, geotextile, and a compacted aggregate base for load support, drainage, and to prevent settling or frost heave.
How do I decide whether I can lay tiles directly on the lawn or must remove the grass first?
Decide by checking tile type, soil, slope, intended use, and permanence. If tiles are rigid/heavy (concrete), or you expect seating/planters/regular foot traffic, remove grass and build a base. If soil is sandy/well‑drained, slope is minimal (<2%), and tiles are lightweight temporary decking for occasional use, you might float rubber/plastic tiles on well‑compacted turf after cutting the grass very short — but warranty and long‑term performance are unlikely. When in doubt, remove turf and install an aggregate base.
What are the basic installation steps for plastic/PP grid (open) tiles on lawn?
1) Evaluate site drainage and grade (1–2% slope away from structures). 2) Mark and measure; remove sod where grid base will sit (typically 2–4 in. depth recommended by manufacturers). 3) Install geotextile if required. 4) Place and compact a granular base (washed angular gravel) in 2–3 in. lifts to required depth; screed to level. 5) Snap grids together per manufacturer, infill with topsoil/seed or gravel per design. 6) Install edge restraints anchored to compacted base. 7) Seed/establish turf if grass infill. Note: many grid systems require base prep — don’t rely on existing turf alone.
What are the basic steps for rubber interlocking tiles outdoors on lawn or soil?
1) Confirm manufacturer guidance — many require a solid substrate. 2) If using on compacted soil, mow and remove top vegetation, then compact the soil with a plate compactor and add a thin (1–2 in.) crushed stone leveling layer. 3) Lay geotextile if soil is soft or weedy. 4) Lay tiles in pattern, tapping edges flush and installing perimeter restraint (edging or paver strip). 5) For long‑term durability, install on compacted aggregate or concrete slab rather than directly on grass.
How are concrete interlocking pavers installed over lawn?
You must remove turf and excavate to allow for the compacted base (typically 4 in. compacted aggregate minimum for pedestrian patios over well‑drained soils). Steps: remove sod/subsoil to depth, place geotextile (if needed), install angular crushed aggregate in 2–4 in. lifts and mechanically compact to specified density, screed a 1 in. bedding sand (do not use sand to level an uneven base), lay pavers with 1/8"–1/4" per foot fall for drainage, install edge restraints anchored to the compacted base, compact pavers with a plate compactor using a protective pad, and sweep polymeric or joint sand into joints as recommended.
What materials and tools will I need for a DIY install (three tile types)?
Common materials: geotextile fabric, angular crushed stone (base), bedding sand (for pavers), edge restraints (metal/plastic/curb), joint/polymeric sand, paver edging spikes, tiles/pavers, topsoil/seed or infill gravel (for grid). Tools: shovel, wheelbarrow, plate compactor, rake, screed board, level/straightedge, string line, tape measure, rubber mallet, circular saw/wet saw (for cutting), safety gear (gloves, eye/respirator for cutting pavers), plate compactor pad (protective) and tamper. Manufacturer guides may list specific extra tools.