
You can install outdoor carpet on a concrete patio in a single weekend using a solvent-free SBR-emulsion adhesive, a notched trowel, and a rented 75–100 lb floor roller. Clean and patch the slab, spread adhesive, let it flash for 5–15 minutes, lay the carpet, roll the entire surface, and trim the edges. For wood decks or pavers, mechanical fastening or a pressure-sensitive adhesive is a safer approach. The process is well within DIY range as long as you do the surface prep properly, and that prep is almost always the step people skip too fast.
How to Install Outdoor Carpet on Patio: Step-by-Step Guide

Clara Farrell
22 Jul 2026
Is outdoor carpet actually worth it on a patio?
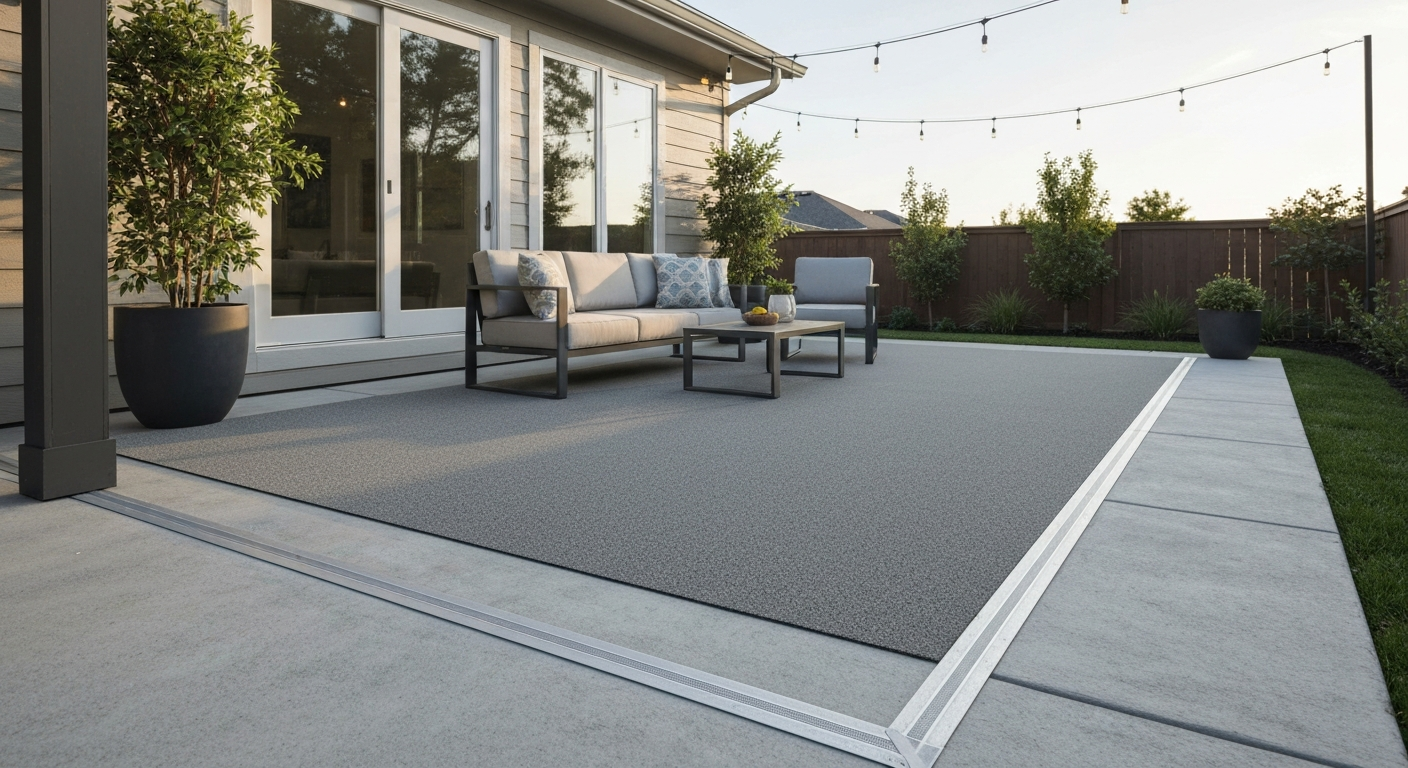
Outdoor carpet transforms a bare concrete or paver slab into something that genuinely feels like an outdoor room. It softens the surface underfoot, reduces heat reflection on sunny days, hides discolored or patched concrete, and adds traction in areas that get wet. It is also one of the most affordable patio surface options, typically running $1–$4 per square foot for the carpet itself, making it a smart choice when you want a quick upgrade without tearing out existing hardscape.
That said, outdoor carpet is not the right answer for every situation. If your patio has a serious drainage problem, puddles after rain, or sits in constant shade where it stays damp for days, you need to sort out the water management first. Industry guidance calls for at least 1/4 inch per foot (a 2% slope) away from the house for reliable drainage, and a carpet laid over a flat or back-pitched slab will trap moisture, grow mildew, and fail within a season. More on handling slope and drainage in a dedicated section below.
Everything you need before you start
Pulling together the right materials and tools before you start saves a lot of back-and-forth mid-project. Here is a complete checklist broken into categories.
Carpet and padding
- Outdoor carpet roll: solution-dyed polypropylene (olefin), UV-stabilized, with marine-grade rubber or perforated drainage backing
- Closed-cell foam pad or open-grid polypropylene drainable pad (if using padding rather than direct-bond install)
- Extra carpet for waste: add 10% on a simple rectangle, 15–20% for angled cuts or multiple seams
Adhesives, tape, and fasteners
- Shaw 3800 (or equivalent SBR-emulsion outdoor carpet adhesive, VOC <17 g/L) for concrete substrates
- Shaw 7300 two-component urethane adhesive for critical seam bonding or high-performance direct-bond installs
- Outdoor-rated seam tape (heat-activated or pressure-sensitive, depending on product recommendation)
- Carpet tacks or galvanized ring-shank nails (for wood deck installations)
- Aluminum or stainless-steel carpet edge trim/transition strip with mounting screws
- Exterior-grade construction adhesive (for securing edge trim to concrete)
Surface prep materials
- Concrete degreaser or TSP cleaner
- Exterior-rated polymer-modified cementitious patching compound (for cracks and low spots)
- Self-leveling underlayment rated for exterior use (for larger low areas)
- Concrete primer/sealer compatible with your chosen adhesive
- Calcium chloride moisture test kit (ASTM F1869) or in-situ RH probes (ASTM F2170)
- pH test strips or meter for concrete surface
- Diamond grinding pad or belt sander (rented) for light surface abrasion
Tools
- Notched trowel (size specified by adhesive manufacturer, typically 1/16" x 1/16" x 1/16" V-notch for broadloom)
- 75–100 lb floor roller (rented from most tool rental shops)
- Carpet cutter or heavy-duty utility knife with fresh blades
- Straightedge or chalk line (minimum 4 ft metal straightedge)
- Measuring tape (at least 25 ft)
- Seam iron or heat gun (if using heat-activated seam tape)
- Stiff-bristle push broom or carpet brush
- Oscillating multi-tool or circular saw (for trimming edge trim)
- Hammer and nail set
- Power drill with masonry bit (for anchoring trim to concrete)
Personal protective equipment (PPE)
- Nitrile or latex gloves (adhesive contact is a skin irritant)
- Safety glasses or goggles (for grinding and cutting)
- Dust mask rated N95 or higher (for slab grinding and patching)
- Knee pads (you will spend a lot of time on the slab)
Picking the right outdoor carpet and padding
Not all outdoor carpet is the same, and the differences matter a lot in a patio environment where rain, UV rays, foot traffic, and temperature swings are constant. Here is what to look for when choosing.
Fiber and pile
Solution-dyed polypropylene (also sold as olefin) is the go-to fiber for outdoor carpet. The color is locked into the fiber itself during manufacturing, so UV exposure does not fade it the way surface-dyed fibers fade. It resists mildew, dries quickly, and holds up to foot traffic and furniture dragging. Polyester is softer but slower to dry and less UV-stable. Nylon is durable but rarely specified for outdoor use because it absorbs moisture. Stick with solution-dyed polypropylene unless a specific product sheet says otherwise.
Pile height for patios should be low to medium, roughly 1/4 inch to 1/2 inch. A low, dense pile drains faster, collects less debris, and handles outdoor furniture legs without crushing. Anything over 3/4 inch pile tends to mat down, hold moisture, and feel unpleasant after a rain.
Backing
The backing determines how well the carpet handles moisture and how it bonds to the substrate. For a covered patio or a slab that drains quickly, a standard latex-backed outdoor carpet works fine. For a patio that gets rained on directly or sits in a damp climate, specify marine-grade rubber backing, which is waterproof and rot-resistant. Perforated or drainage-hole backings are worth considering when you want water to pass through rather than pool under the carpet, but they require a direct-bond or open-grid pad installation to work properly.
Padding options compared
| Pad Type | Best For | Water Handling | Notes |
|---|---|---|---|
| Closed-cell foam | Covered patios, light moisture | Water-resistant, does not absorb | Comfortable underfoot; not ideal where pooling occurs |
| Open-grid polypropylene | Exposed patios, drainage-critical areas | Drains freely through grid | Best outdoor choice; allows water to reach substrate drain slope |
| Felt/organic pad | Indoor use only | Absorbs and holds moisture | Do not use outdoors; will rot and mildew quickly |
| No pad (direct bond) | Any patio, simplest installation | Depends on carpet backing | Most common for concrete; eliminates moisture-trap risk |
For most concrete patio installations, a direct-bond approach with no separate pad is the simplest and most durable option. The carpet bonds directly to the slab, there is no pad to trap moisture, and the installation profile stays thin. If you want cushion underfoot, choose an open-grid polypropylene pad and make sure the slab slope is adequate to drain water through.
Adhesives, seam tape, and mechanical fasteners
The fastening method depends on the substrate. Concrete gets adhesive as the primary method. Wood and composite surfaces can use adhesive, mechanical fasteners, or both. Pavers generally require a different approach entirely.
Adhesives for concrete
Shaw 3800 is a widely specified SBR-emulsion adhesive designed specifically for bonding outdoor and broadloom carpet to concrete. It is solvent-free, has a VOC content under 17 g/L, and is safe to use in outdoor conditions within its temperature range. The working time at 70°F is roughly 15–30 minutes after a 5–15 minute flash period on porous concrete, which gives you enough time to position a typical patio carpet section before it sets. Light foot traffic is safe after 24 hours; heavy furniture and full traffic should wait 72 hours. Coverage rate and exact trowel specifications are on the product data sheet, so follow those rather than guessing. Alternatives from other manufacturers with similar SBR-emulsion chemistry will work, but always confirm they are rated for exterior/outdoor use and verify the moisture and pH limits for your slab.
Seam adhesives
For seams, Shaw 7300 is a two-component urethane adhesive that cures fast and creates a high-strength bond at the joint. This matters because seams are the most common failure point in any carpet installation, especially outdoors where thermal expansion and contraction put repeated stress on joints. For lower-traffic areas or smaller patios where you are lucky enough to install without any seams, standard outdoor seam tape used alongside your field adhesive is sufficient. If you do have seams, invest in the stronger seam adhesive.
Fasteners for non-concrete substrates
On wood decks, galvanized or stainless-steel carpet tacks along the perimeter and at seams provide secure mechanical fastening that does not require waiting for adhesive cure. You can also use a bead of exterior-grade construction adhesive beneath the carpet combined with staples at the edges for a belt-and-suspenders approach. On composite decking, check with the deck manufacturer before using adhesives, as some composite products will not bond reliably or may be damaged by solvent-based products. Mechanical fastening (stainless staples or tack strips rated for exterior use) is the safer default. Pavers present their own challenge: the jointed surface makes full adhesive bonding impractical, so the typical approach is double-sided carpet tape at seams and perimeter, with edge trim at the borders to hold everything down.
Getting a concrete patio ready for carpet
I cannot overstate how much surface prep matters here. A perfectly chosen carpet installed on a dirty, damp, or cracked slab will fail. A basic carpet installed on a properly prepared slab will last for years. Plan to spend at least half your total project time on this step.
Step 1: Clean the slab
Start by removing everything from the patio: furniture, planters, grill. Sweep away loose debris, then scrub the entire surface with a concrete degreaser or TSP solution to remove grease, oils, and grime. Rinse thoroughly and let it dry completely. Any sealer or curing compound on the slab must also come off, because adhesive will not bond through those coatings. Refer to ASTM F710 - Standard Practice for Preparing Concrete Floors to Receive Resilient Flooring for detailed guidance on removing curing compounds and acceptable substrate conditions. Mechanical abrasion with a rented diamond grinding pad is the most reliable removal method and is the approach referenced in ICRI surface preparation guidance. Acid etching works as a backup when grinding is not feasible, but it is less reliable for heavy contamination and requires careful neutralization and rinsing before you move on.
Step 2: Repair cracks and low spots
Any crack wider than a hairline needs to be filled before you lay carpet. Use an exterior-rated polymer-modified cementitious patching compound, forced into the crack and feathered smooth. FCICA references ARDEX and other polymer-modified cement patching compounds and self-leveling underlayments, noting manufacturer-specific priming, cure, and moisture limits and advising selection of an exterior-rated patch for outdoor use FCICA (Flooring Contractors Association) references to ARDEX and polymer-modified patching products (self-leveling and patching guidance). For low spots deeper than about 1/4 inch, a self-leveling underlayment rated for exterior use is the cleanest fix. Let patching compounds cure fully per the manufacturer's instructions, then check that the repaired area is flush with the surrounding slab. An uneven surface will telegraph through the carpet and create a tripping hazard.
Step 3: Moisture testing
Moisture is the silent killer of outdoor carpet installations on concrete. Before applying any adhesive, you need to know the slab's moisture level. Shaw's specification for the 3800 adhesive requires either an ASTM F1869 calcium chloride test with a moisture vapor emission rate (MVER) below 8 lb per 1,000 sq ft per 24 hours, or an ASTM F2170 in-situ relative humidity probe reading below 90% RH. Both test kits are available online. If the slab fails, do not proceed with the adhesive installation until you understand where the moisture is coming from and address it, whether that is improving drainage around the slab or applying a moisture-mitigation primer.
Step 4: pH testing
Shaw also specifies a concrete pH between 5.0 and 9.0 per ASTM F710. High pH (alkaline concrete) can attack adhesive bonds over time. Test with pH strips or a digital meter moistened with distilled water on the slab surface. Freshly poured concrete often tests above 10; older slabs are usually within range. If the pH is too high, a light acid wash followed by thorough rinsing will typically bring it into spec.
Step 5: Prime if needed
On very porous concrete, the adhesive can be absorbed into the slab too quickly, robbing it of its bonding strength. A concrete primer compatible with your adhesive slows that absorption and creates a more consistent bonding surface. Check the adhesive product data sheet to see if priming is recommended for your slab condition.
Preparing wood decks, pavers, and composite surfaces
Not every patio is poured concrete, and each substrate has its own preparation requirements and limits.
Wood decks
Check the deck boards for rot, loose fasteners, and protruding nail heads or screws. Every fastener needs to be flush or countersunk, and any rotted boards replaced before carpet goes down. Sweep and hose off the deck, let it dry, and sand down any raised grain or splinters. Wood decks move seasonally with moisture and temperature, so a full adhesive bond can crack and release over time. Mechanical fastening with galvanized tacks at the perimeter plus seam tape at joints is a more forgiving approach for wood. If you do want to use adhesive on wood, choose a product specifically rated for wood substrates and accept that the bond may need refreshing in a few years.
Pavers
Pavers are an awkward substrate for glued carpet because the grout joints and the slight height variation between pavers make full bonding unreliable. The most practical approach is to treat the paver surface as a floating installation: use double-sided exterior carpet tape at the perimeter and over seams, and secure the edges with a metal edge trim anchored with masonry anchors into the paver surface. Make sure the pavers are clean, joints are stable, and no single paver is rocking before you lay carpet.
Composite decking
Composite decking surfaces are often too smooth or too chemically non-receptive for standard carpet adhesives to hold long-term. Check the composite manufacturer's guidance before using any adhesive or tape, as some products will void the deck warranty if adhesives are applied. Mechanical fastening is the safe default here. Also note that composite decks have gaps between boards for drainage, so an open-grid pad or perforated-back carpet is important to prevent moisture from building up under the carpet.
Measuring, layout, and cutting
Good layout work before you touch the adhesive can is the difference between a professional-looking job and one that bugs you every time you look at it.
Measuring and waste allowance
Measure the length and width of your patio at the longest and widest points. Add 3–4 inches of overage on every edge so you have material to trim flush after laying. For a simple rectangle, a 10% waste allowance on your square footage is usually enough. If your patio has angles, cutouts around columns, or requires more than one piece with seams, budget 15–20% extra. Carpet rolls have a standard pile direction (the direction the fibers lean when you brush them), and all pieces in a multi-piece installation must run in the same pile direction or the color will look different in adjacent sections under light.
Planning seams
Place seams away from the main traffic paths if at all possible. Seams perpendicular to the primary entry point are less visible than seams running parallel to it. Avoid seams within 6 inches of a door threshold or step edge. Sketch the layout on paper before cutting anything, marking where each piece starts and ends, which direction the pile runs, and where seams will fall.
Cutting
Cut outdoor carpet face-down using a sharp utility knife and a metal straightedge. Score the backing in a single clean pass rather than sawing back and forth, which frays the pile. For seam cuts, use a row-finder or carefully follow a single yarn row to get a straight edge that the adjacent piece will butt cleanly against. Dry-fit every piece before opening any adhesive. Lay the carpet on the slab, let it relax for 30 minutes in warm weather so any curl from the roll settles out, then check the fit at all edges and seams.
Step-by-step installation on a concrete patio
With your slab clean, tested, repaired, and your carpet cut and dry-fitted, you are ready for the actual installation. Work on a day when the temperature is between 65°F and 85°F and rain is not expected for at least 48 hours. For a full step-by-step walkthrough on how to install patio carpet, see our dedicated guide.
- Fold back half the carpet: Roll or fold one half of the carpet back onto the other half, exposing the bare slab on one side. This is how you will work: adhesive one half, lay it, then fold back the other half and repeat.
- Mix or stir the adhesive: Open the Shaw 3800 or equivalent adhesive and stir it thoroughly. It should be smooth and lump-free. Do not thin it.
- Spread adhesive with a notched trowel: Starting at the fold line, spread adhesive across the exposed slab at a 45-degree trowel angle, using the notch size specified on the adhesive data sheet. Work in sections you can cover before the working time runs out (15–30 minutes at 70°F on porous concrete, shorter in heat). Spread to within 1/2 inch of the edges but do not go under where seams will fall yet.
- Let it flash: Wait 5–15 minutes on a porous concrete surface (longer on a dense or primed slab). The adhesive surface should be tacky but not wet or stringy when you press a knuckle to it. Do not rush this step. Laying carpet into wet adhesive produces a weak bond.
- Lower the carpet onto the adhesive: Starting at the fold line, carefully lower the carpet onto the adhesive, working the edge down first and then pressing from the center outward toward the edges to push out air. Avoid dragging the carpet sideways once it contacts the adhesive.
- Roll the carpet: Using the 75–100 lb roller, roll the entire bonded area in both directions (lengthwise then widthwise) to ensure full contact between the carpet backing and adhesive. This step is non-negotiable. Missing it leaves air pockets that become visible bumps within days.
- Fold back the second half and repeat: Fold the uninstalled half back, spread adhesive on the remaining slab, flash, lower, and roll as before.
- Seam work (if applicable): Before folding back the second piece, apply seam adhesive (Shaw 7300 or equivalent) in a narrow bead along the seam edge of the installed piece. Then butt the second piece tightly against it, press down firmly, and roll across the seam. The seam should be tight with no gap and no overlap.
- Trim the edges: Using a straightedge and sharp utility knife, trim the carpet flush with the slab edge or to the inside edge of your transition strip. Take your time with this cut because ragged edges show.
- Install edge trim and transitions: Nail or screw aluminum edge trim over the carpet perimeter where it meets a door threshold, step edge, or lawn. Use masonry screws and anchors where trim meets the concrete. The trim cap presses down over the carpet edge and locks it in place.
- Clean up adhesive squeeze-out: Any adhesive that squeezed out at edges or seams should be wiped away immediately with a damp cloth while still wet. Cured SBR adhesive is much harder to remove.
- Cure time: Keep the patio free of foot traffic for 24 hours and free of heavy furniture for 72 hours while the adhesive reaches full strength.
Slope, drainage, and what to do when the patio does not drain well
This is the section most installation guides skip, and it is the reason a lot of outdoor carpet fails prematurely. The standard for patio drainage is at least 1/4 inch per foot (a 2% slope) away from the house. If your patio falls short of that, water pools under or on top of the carpet, mildew grows in the pile, and the adhesive bond degrades.
If your existing slab has inadequate slope, you have a few practical options before laying carpet. A tapered cementitious overlay can build slope into a flat slab, though this adds cost and needs to cure fully before carpet goes down. A linear drain or channel cut across the low end of the patio and connected to a storm drain is a more permanent fix, and it pairs naturally with a carpet installation because you can terminate the carpet at the drain edge. Perimeter drains or scuppers at the lowest edge are another option for smaller patios. If the slope deficiency is minor (a flat area in the middle of an otherwise sloping slab), an open-grid polypropylene pad under the carpet allows water to move through to the slab and find its way to the sloped sections. For more detail on patio drainage solutions, the drainage channel installation guidance on this site covers the topic thoroughly.
Edge trim, transitions, and finishing details
Edge treatment is one of those finishing details that separates a clean installation from a sloppy one. At every exposed carpet edge, whether it meets a door threshold, a step, a lawn, or a wall, you need a transition or trim piece. Aluminum Z-bar transition strips are the most common choice for concrete patios; they are inexpensive, available in several finishes, and lock the carpet edge under a metal cap that prevents fraying and lifting. For a step edge, a nose trim or stair-riser cap protects the carpet at the leading edge where it gets the most foot contact. Screw these into the concrete with masonry anchors at 8-inch intervals, and make sure the cap is pressed down firmly over the carpet before fastening.
Where carpet meets an interior threshold or sliding door track, a low-profile reducer strip keeps the transition flush enough that it does not become a tripping hazard. Test the door swing over the finished carpet height before committing to the trim height; sometimes a thicker carpet plus pad combination requires adjusting the door stop or trimming the door bottom slightly.
Time and cost to expect
| Task | Estimated Time | Typical DIY Cost |
|---|---|---|
| Surface cleaning and degreasing | 1–2 hours | $20–$40 (cleaner, supplies) |
| Crack repair and patching | 2–4 hours including cure time | $30–$80 (patching compound) |
| Moisture and pH testing | 24–48 hours (calcium chloride test dwell time) | $30–$60 per test kit |
| Carpet and materials purchase | N/A | $1–$4/sq ft carpet, $0.50–$1.50/sq ft pad |
| Adhesive, tape, trim | N/A | $50–$120 depending on patio size |
| Tool rental (roller, grinder) | N/A | $40–$80/day |
| Cutting and dry-fitting | 1–2 hours | Included in materials |
| Adhesive application and laying | 2–4 hours | Included above |
| Rolling, trimming, edge trim install | 1–2 hours | Included above |
| Total project (typical 200 sq ft patio) | 1–2 weekends including cure | $350–$900 all-in DIY |
Professional installation typically costs $3–$6 per square foot in labor on top of materials. If your slab needs significant crack repair, moisture mitigation, or slope correction, it is worth getting a flooring contractor or concrete professional involved for the prep work even if you handle the carpet installation yourself.
Maintaining outdoor carpet so it actually lasts
Solution-dyed polypropylene outdoor carpet is genuinely low-maintenance, but it is not zero-maintenance. Blow or sweep debris off the surface weekly during heavy use seasons. Rinse the carpet with a garden hose monthly to flush out dirt that has settled into the pile. For deeper cleaning, a diluted outdoor carpet cleaner and a stiff brush work well; avoid bleach unless the product data sheet specifically permits it, as it can degrade some backing materials. After cleaning, let the carpet dry fully before replacing furniture.
Check the edges and seams twice a year. If a seam is lifting or an edge is starting to pull away from the trim, address it immediately with a compatible seam adhesive or edge re-glue. A small repair done quickly prevents a large re-installation done expensively. Also check that drainage is still working as intended; debris can block a linear drain or scupper over time, causing the pooling issues you went to trouble to prevent.
Common problems and how to fix them
Bubbles or bumps appearing after installation
This almost always means the rolling step was skipped or done too lightly, or the adhesive was too wet when the carpet was laid. Small bubbles can sometimes be re-rolled within the first few hours while the adhesive is still somewhat workable. Larger bubbles that have cured in place may require slicing, re-gluing, and pressing flat with the roller. This is why dry-fitting and proper flash time are not optional steps.
Edges lifting
Edge lifting is usually caused by insufficient adhesive at the perimeter, a contaminated slab edge, or inadequate edge trim. Clean the area with a solvent-appropriate to the adhesive, apply fresh adhesive, press down, and re-secure the trim strip. If the carpet itself has curled from thermal cycling, a heat gun used carefully on the backing can help relax the curl before re-gluing.
Mildew smell or staining
Mildew under or in outdoor carpet is a drainage problem, not a cleaning problem. If you clean the mildew off and do not fix the standing water causing it, it will return. Identify where water is pooling, address the slope or drain issue, and if the carpet backing has visible mildew growth through it, replacement is likely more practical than treatment.
Seam gaps opening over time
Carpet seams can open if the seam adhesive used was not strong enough for exterior thermal cycling, or if the pieces were not butted tightly before the adhesive set. For repairs, apply Shaw 7300 or a comparable urethane seam adhesive into the gap, press the edges together, weight with boards overnight, and roll the next day. If the gap is too large to close without distorting the pile, a seam strip of matching carpet glued over the joint is the practical fix.
When to call a professional instead
Most homeowners can handle a straightforward outdoor carpet installation on a reasonably flat, sound concrete patio. Where I would suggest bringing in a professional: if the slab has significant structural cracks (wide or moving cracks indicate a foundation or substrate problem, not just a surface fix), if moisture testing shows the slab is persistently wet and you cannot identify the source, if the patio is on a significant slope that requires custom drainage engineering, or if the patio connects to a gas line or electrical conduit that would be disturbed by core drilling for drain retrofits. If your project involves modifying gas services, consult a guide on how to run a gas line under a patio and follow local codes or hire a licensed plumber. For the installation itself, the main professional advantage is their access to larger rollers, commercial-grade trowel machines, and experience reading how adhesive behaves in varying temperatures. If you are comfortable following the steps above and doing the prep work honestly, the installation is well within DIY reach.
If you are still deciding between outdoor carpet and other surface options, it is worth comparing this approach to wood patio flooring and standard patio carpet installations. Wood patio flooring adds warmth and a different aesthetic but requires more maintenance and more complex substrate preparation, particularly around moisture management. Standard patio carpet (as distinct from outdoor broadloom) sometimes refers to lighter-weight or area-rug-style products that are easier to swap out seasonally but offer less permanent coverage. Both are worth understanding before committing to an adhesive-bonded broadloom installation.
FAQ
What materials and tools do I need to install outdoor carpet on a concrete patio?
Materials: solution-dyed polypropylene (olefin) outdoor carpet with marine or drainable backing; outdoor-rated seam adhesive (e.g., two-component urethane for heavy-duty seams like Shaw 7300); outdoor broadloom adhesive or SBR-emulsion adhesive rated for exterior concrete (e.g., Shaw 3800); seam tape (if required by carpet manufacturer); closed-cell or open-grid outdoor pad (if using padding); exterior patch/repair mortar or polymer-modified underlayment for low spots; primer for leveling product if specified; edge trim/transition strips, aluminum or PVC threshold; seam sealer/cold weld for turf-style products. Tools: tape measure, chalk line, utility knife with heavy blades, straight edge/rule, notched trowel(s) per adhesive TDS, margin trowel, 75–100 lb roller, heavy-duty scissors, seam iron or seam roller (per product), knee pads, broom/vacuum, diamond grinder or shot blaster (or acid etcher as secondary), patching tools (mixing drill, trowel), caulk gun, clamps/weights for seams, personal protective equipment (gloves, eye protection, dust mask/respirator).
How do I select the right outdoor carpet and padding for a patio?
Choose solution-dyed, UV-stable polypropylene (olefin) pile for colorfastness and mildew resistance. For wet or frequently exposed locations pick marine-grade or perforated/drainable backing. For occasional rain use open-grid polypropylene or closed-cell foam pads; avoid organic/felt cushions that retain moisture. Confirm manufacturer recommendations for outdoor use, backing type, and compatibility with your chosen adhesives and seam systems.
What pre-installation checks and tests should I perform on a concrete patio?
Verify the slab is structurally sound and sloped for drainage (recommended ~1/4 in/ft away from the house). Remove paints, sealers, oils, and old adhesives. Test substrate moisture using ASTM F2170 (in-situ RH probes) or ASTM F1869 (calcium chloride MVER) and confirm values meet your adhesive/carpet manufacturer's limits (example: Shaw 3800 requires RH <90% or MVER <8 lb/1000 ft²/24 hr). Test slab pH per ASTM F710 and ensure it falls within manufacturer limits (example pH 5.0–9.0 for some adhesives).
How should I prepare a concrete surface before applying adhesive?
Mechanically abrade the surface (diamond grind or shot blast) to remove contaminants and achieve an appropriate profile per ICRI CSP guidance; this is the preferred method. Repair cracks and low spots with an exterior-rated polymer-modified patch or self-leveling underlayment; prime if product requires. Clean thoroughly—vacuum and remove dust—then allow substrate to dry. Follow ASTM F710 recommendations for cleaning and removal of curing compounds or sealers.
What are the step-by-step installation steps for outdoor carpet on concrete?
1) Measure patio and buy 5–10% extra for waste/seams. 2) Dry-lay carpet to plan seams and orientation (pile direction). 3) Trim carpet to rough size, leaving extra at edges. 4) Prepare substrate per previous steps; confirm moisture/pH within limits. 5) Apply adhesive per manufacturer TDS with the recommended notched trowel, keeping to specified spread rate and flash time (spread at 45°). 6) Lay carpet into adhesive, maintaining seam alignment and pile direction; use seam tape/urethane seam adhesive where required. 7) Roll entire area with a 75–100 lb roller to ensure full contact and remove air pockets. 8) Install edge trims/transition strips mechanically at perimeter; trim excess carpet flush. 9) Allow cure times per adhesive (protect from light traffic ~24 hours, heavy traffic ~72 hours for many products). 10) Clean up, inspect seams, and perform any seam sealing.
How do I handle seams and seam strength on outdoor carpet?
Butt seams tightly with pile running same direction. Use manufacturer-specified seam tape or a high-performance seam adhesive (two-part urethane like Shaw 7300 is common for heavy-duty/seam-critical installs). For tape methods, apply tape centered beneath the seam and heat-activate or adhere per instructions. For urethane seaming, dispense adhesive into the seam and clamp/weight until cured. Trim selvages and clean excess adhesive promptly. Always follow the carpet maker's recommended seam method for warranty compliance.