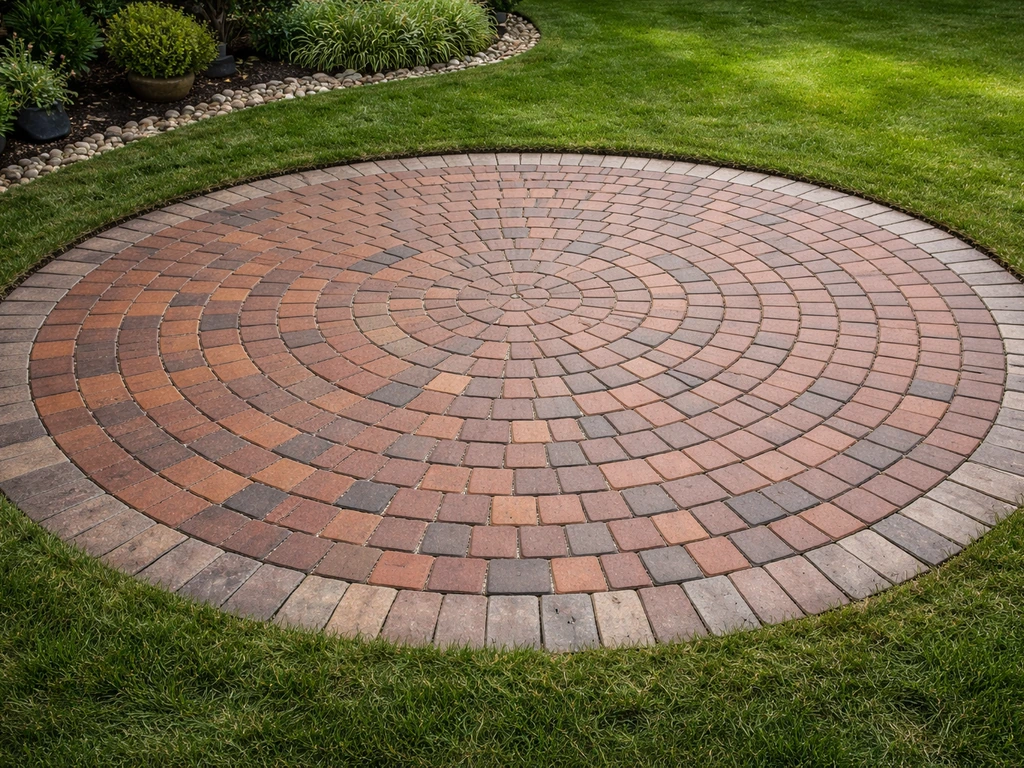
You can lay a circular brick patio yourself by marking the circle from a fixed center point, excavating to around 200mm depth, compacting a hardcore base, screeding sharp sand to 30–40mm, then laying bricks in radial arcs outward from the center. The key things that make a circular patio different from a straight one are managing the joint widths as you move outward, cutting bricks cleanly on the inner curves, and locking everything in place with solid edging before you compact. Get those three things right and the result looks professional and lasts for years. If you want the full step-by-step approach, see our guide on how to lay brick patio for a complete rundown of the process.
How to Lay a Circular Brick Patio Step by Step

Clara Farrell
31 May 2026
Choosing the right design, materials, and brick pattern
Before you touch a spade, decide on the diameter and pattern. A circle of 3 metres across is a comfortable starting size for a seating area, while 4–5 metres gives you room for a table, chairs, and a bit of breathing space. Sketch it on paper first, then mark it out on the ground temporarily with a cane and string so you can see how it actually feels in your garden.
For the bricks themselves, you have two main options: traditional clay bricks or concrete block pavers. Clay bricks give a warmer, more classic look and age beautifully, but they vary slightly in size, which you need to account for in your jointing. Concrete pavers are more uniform and easier to cut cleanly, which makes them the better choice if this is your first circular project. Either way, aim for a brick or paver that is roughly 200mm x 100mm x 65mm, the standard UK block size, as this proportion works well with radial patterns.
The most popular pattern for a circular patio is a radial or fan layout, where bricks fan outward from the center in wedge-shaped rows, like the spokes of a wheel. This is the pattern you see most often and for good reason: it naturally follows the curve and minimises cutting. A herringbone or stretcher bond laid inside a circle is possible but requires significantly more cutting and is harder to keep level. If you want a herringbone finish, consider it as an inset pattern within a circular edging ring rather than as the primary layout.
| Option | Appearance | Cutting required | Best for |
|---|---|---|---|
| Radial / fan pattern | Classic circular spoke look | Minimal, mainly inner rings | First-time builders, clean circles |
| Circular ring pattern (concentric) | Rings of brick around a central feature | More cutting on each ring | Smaller patios, feature circles |
| Herringbone within circular edging | Zigzag field, round border | Heavy cutting on perimeter | Experienced DIYers, larger areas |
| Random / rustic sett layout | Organic, cobbled feel | Variable, can be minimal | Informal gardens, reclaimed brick |
For the edging, you need something that can follow a curve. Flexible plastic or metal paving restraint edging is the easiest option and holds the circle shape without cracking. Pre-curved concrete kerb blocks are another choice, but they come in fixed radii, so check they match your planned diameter before ordering. If you are laying reclaimed bricks, a soldier course of the same brick set on edge makes a beautiful and sturdy edge. If you are wondering how to lay a reclaimed brick patio, the key is choosing a strong edging detail and then following the same steps for the base, bedding, and jointing laying reclaimed bricks.
Marking out a perfect circle on the ground
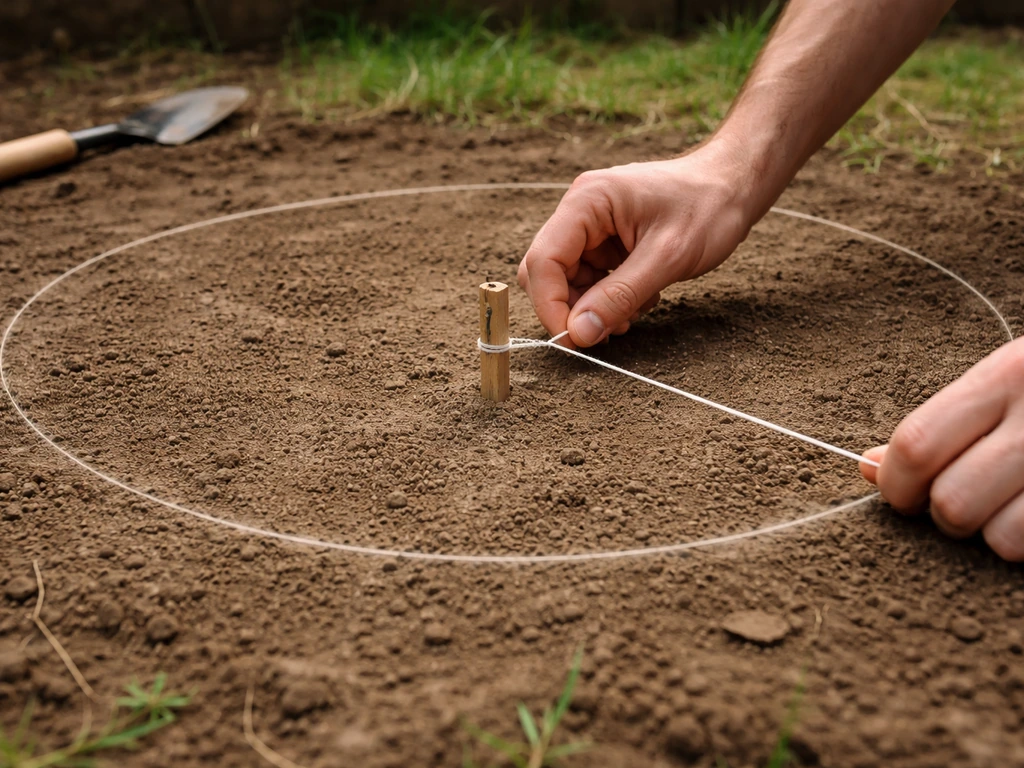
Getting the circle right before you dig is the most important step of the whole job. A wobbly outline leads to wobbly edges no matter how carefully you lay the bricks. The good news is that marking a perfect circle takes five minutes with basic kit.
Find your center point and knock in a sturdy metal pin or wooden stake. This is your pivot for everything. Tie a length of string or builder's line to the pin, measure out the full radius of your patio (half the diameter), and tie a can of line-marking spray paint or a sharpened stick to the other end of the string at that exact measurement. Walk around the pin in a full circle, keeping the string taut, and mark as you go. You get a perfect circle every time.
- Metal pin or wooden stake (at least 300mm long so it stays fixed)
- Builder's line or strong string (non-stretch type)
- Tape measure to set the exact radius
- Line-marking spray paint or sand for the outline
- A second pin and string set at radius minus edging width to mark the inner dig line
Mark a second inner circle about 150mm inside the first. This inner line is your rough excavation guide, and the outer line is your finished edge. Keep the center pin in the ground throughout the entire build. You will use it again when laying bricks to check that each row sits on the correct radius. If the pin gets knocked out, you lose your reference and the whole circle can drift.
Excavating and preparing the base for a curved patio
Dig out the entire circle to a depth of around 200mm below where you want the finished surface to sit. This gives you room for 100–150mm of compacted hardcore, 30–40mm of bedding sand, and the brick itself (usually 65mm). If your soil is particularly soft or you are on clay, go a little deeper and use a geotextile membrane to separate the subgrade from your hardcore.
Clay soil is the enemy of patios. It shrinks in summer and swells in winter, which heaves bricks and opens up joints. If you have clay, do not skip the geotextile, and consider increasing your hardcore depth to 150mm and using a weed-suppressing geotextile under the sub-base. Lay the membrane before the hardcore goes in, folding it up the sides of the excavation slightly so it does not slip.
- Mark the circle on the ground and remove any turf or surface material
- Excavate to 200mm below finished patio level across the whole circle
- Check the subgrade is firm. If it is soft, compact it with a wacker plate or hand tamper before adding anything on top
- Lay a geotextile membrane across the base and up the sides
- Add 100–150mm of MOT Type 1 hardcore (crushed stone)
- Compact the hardcore in two layers of 75mm each using a wacker plate, working from the edges inward
- Check your fall as you compact: aim for a 1:60 slope (roughly 15–17mm per metre) away from the house for drainage
The drainage fall is non-negotiable. Even a perfectly laid patio will turn into a puddle trap if the base is flat. Set your slope away from any walls or structures, and think about where the water will actually go when it runs off the edge. If it is heading toward a fence or border, that is fine. If it is heading toward a neighbour's garden or a drain-less corner, sort out a drainage solution before you lay a single brick.
Laying and screeding your bedding sand
Once your compacted hardcore base is solid and set to the right fall, you add the bedding layer. Use sharp sand (also called grit sand or concreting sand), not soft building sand, which is too fine and compresses unevenly. Aim for a consistent depth of 30–40mm across the whole circle.
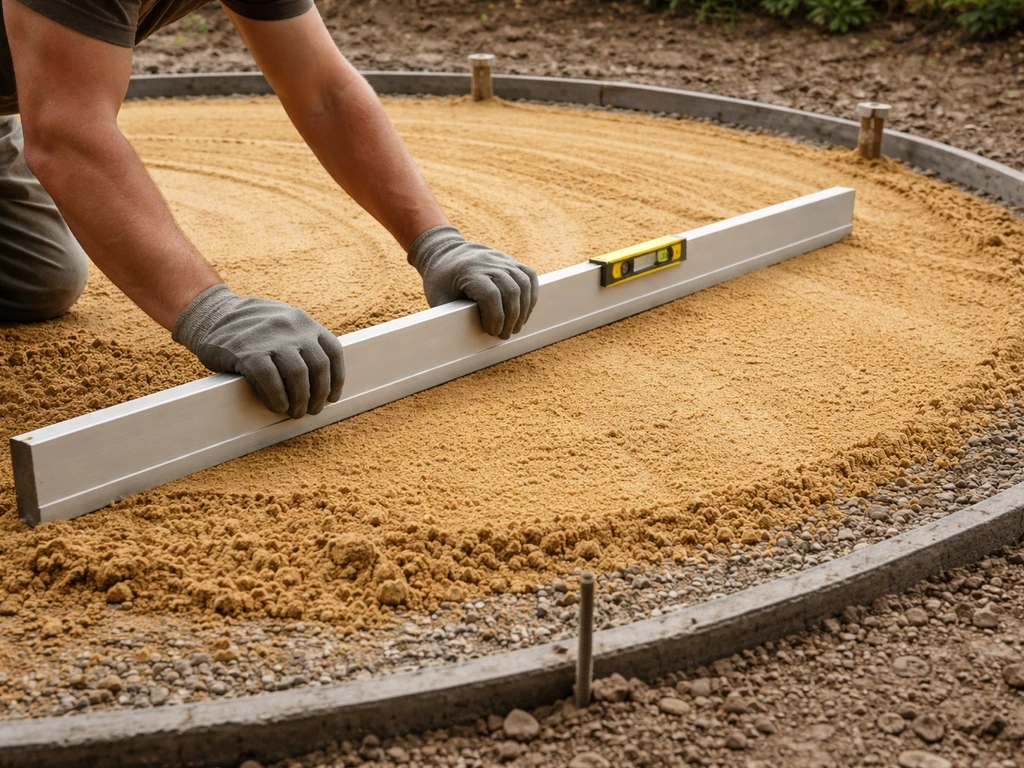
Screeding a circle is slightly trickier than screeding a straight run because you cannot drag a long screed board from edge to edge in one pass. Instead, use two short screed rails set in the sand across the diameter, screed in sections, then remove the rails and fill the channels before you start laying bricks. Work from the center outward, which keeps you off the freshly screeded sand.
A useful trick: cut a piece of timber to your exact brick thickness (65mm) and use it as a depth gauge. Lay it on top of the compacted hardcore and measure to the finished level. Your sand surface should sit that exact distance below the finish line. Maintain the same drainage fall in your sand layer that you set in the hardcore. Use a spirit level on a straight edge to check the fall regularly as you screed outward.
Do not walk on the screeded sand. Lay a kneeling board as you work to spread your weight. Footprints in the sand cause dips under bricks, which leads to rocking and cracking over time. This is one of those small habits that makes a real difference to the finished result.
Laying bricks in radial arcs without losing the curve
This is the part most people feel nervous about, and honestly, once you understand the geometry it becomes straightforward. The principle is simple: bricks fan outward from the center, and as each ring gets larger, the gap between the outer ends of adjacent bricks gets wider. You manage this by cutting bricks on the inner rings and by accepting slightly wider joints on the outer rings.
Start from the center and work outward
Place your first brick at the center, then lay bricks around it in a ring, keeping joints at around 5–8mm. From there, lay each subsequent ring outward. On the inner two or three rings, the outer edges of bricks will want to splay apart more than the inner edges, creating a natural wedge shape in the joint. This is exactly what you want. Keep checking back to your center pin with a string line to make sure each row sits on a consistent radius.
For joint widths, aim for 5–8mm as a general target across most of the patio. On very tight inner rings, you may need to cut bricks slightly narrower at one end (tapering them) so they sit flush without creating enormous gaps at the outer edge. As the rings get larger, the joint width variation becomes less noticeable and a rustic approach with slightly varying joints is perfectly acceptable, especially with clay bricks that already have natural variation in size and colour.
Cutting bricks for the curves
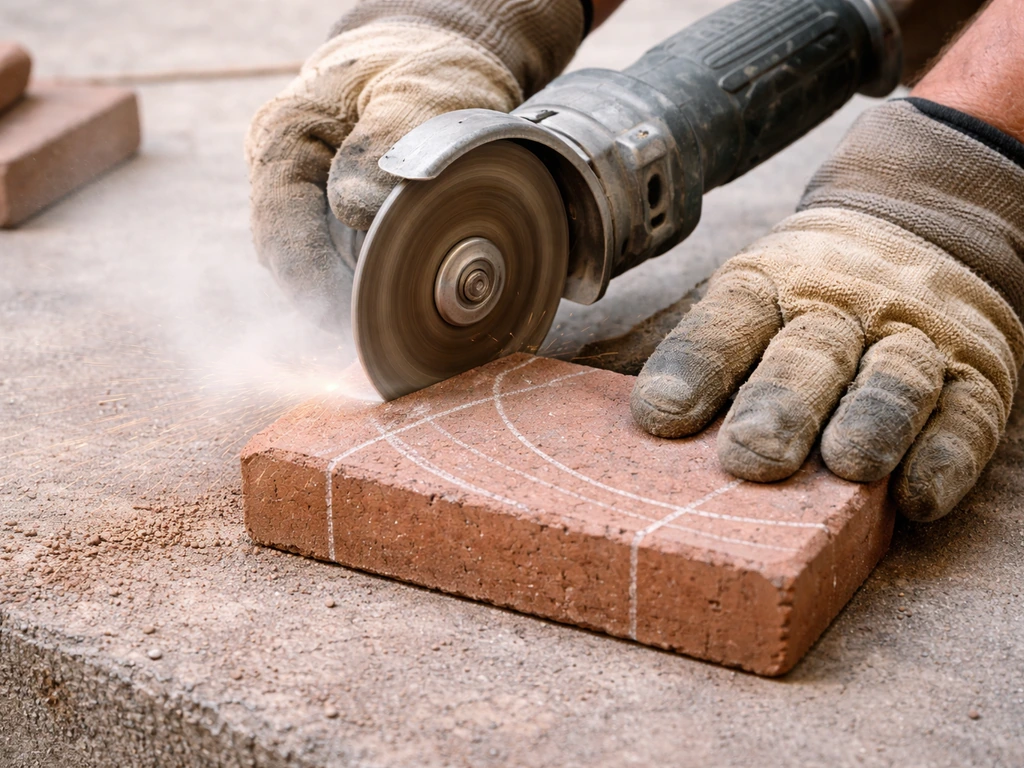
You will need an angle grinder with a diamond blade or a brick splitter for straight cuts, and an angle grinder for any angled or tapered cuts. Mark each cut with a pencil or chalk before cutting. For tapered cuts (where one end needs to be narrower than the other to follow the arc), mark both faces of the brick and cut carefully. Always wear eye protection, a dust mask rated for silica dust, and gloves.
Cut bricks as you go rather than pre-cutting a batch. The exact amount you need to remove from each brick depends on where it sits in the arc, and it varies ring by ring. Measure, mark, cut, test the fit dry (without mortar or pressing into sand), then lay it. If a cut piece is a sliver less than about a third of the full brick width, discard it and adjust the spacing of nearby bricks instead. Tiny cut pieces pop out, look wrong, and are hard to keep in place during compaction.
Keeping the arc true as you lay
Every three or four rings, reattach your string to the center pin at the new radius and walk around checking that the outer edge of your current ring stays on the line. Small deviations creep in gradually, and catching them early means a minor adjustment rather than lifting and relaying a whole section. Use a rubber mallet to tap bricks into the sand. Never use a steel hammer directly on the brick face.
Check levels constantly with a spirit level and a straight edge. The patio should be flat (no rocking bricks) while also maintaining the drainage slope. A 1.8-metre spirit level is useful here. Any brick that rocks on the sand needs to come back out, add or remove sand underneath, and go back in. Do not try to fix a rocking brick by tapping it harder. You will just crack it or create a low point in the sand.
Edging, compaction, and getting the finish right
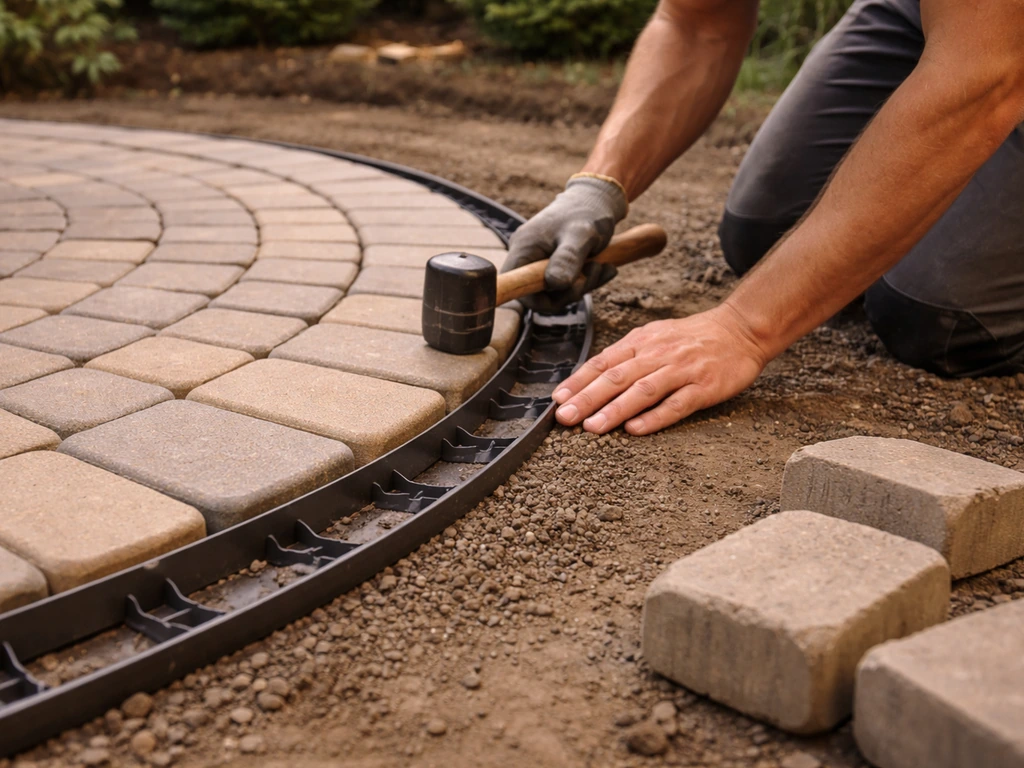
Before you compact the whole patio, install the edging. Edging locks the outer ring of bricks in place and stops the whole patio from spreading outward under the plate compactor. Without edging, compaction will push bricks outward and open up your carefully managed joints.
For a circle, flexible plastic paving edging (the kind sold in rolls with fixing stakes) is the easiest to use. Curve it around the outside of your last row of bricks, push the stakes into the ground, and secure them so the edging sits tight against the brick face. For a more attractive finish, lay a soldier course of bricks on edge set in a haunched concrete collar around the perimeter instead. Mix a fairly stiff concrete (3:1 sharp sand to cement) and haunch it up behind the edging bricks to about halfway up their depth. Let this cure for at least 24 hours before proceeding.
Once edging is secure, run the plate compactor over the whole patio in overlapping passes. Start from the outside and work inward in circles. Do not run the compactor over cut pieces or thin slivers at the edge. Compact those by hand with a rubber mallet. After the first pass, the surface will look slightly lower and the joints will have tightened up. This is exactly what you want.
Now fill the joints with kiln-dried jointing sand. Marshalls describes its joint filling sand as special kiln-dried sand with a fine grading that falls easily into joints kiln-dried jointing sand. This is a fine, dry, specially graded sand that flows easily into gaps. Tip it onto the patio, sweep it across the surface with a soft broom working it into every joint, then run the plate compactor over the patio again to vibrate the sand down. Repeat this two or three times until the joints are consistently full and the sand stops disappearing. Brush off any excess, as kiln-dried sand left sitting on the surface of lighter-coloured bricks can stain them.
Sealing is optional but worthwhile, especially with natural clay bricks or lighter-coloured materials. A patio sealer adds a slight sheen (or a matte finish, depending on the product you choose), helps repel stains, and reduces weed growth in the joints. Apply it to a clean, dry surface at least a week after the jointing sand has settled. Follow the manufacturer's instructions for your specific brick type.
Fixing common problems before and after they happen
Wavy or uneven edges
This almost always comes from losing the center pin reference mid-build or not checking the string line often enough. If you notice a section drifting inward or outward by more than 10mm, lift those bricks, re-string from the center, and relay. Catching it at three or four rings out is much easier than trying to correct it once you are near the perimeter. If the edging itself is wavy, it is usually because it was installed before the bricks were checked against the string line. Always verify the final brick row is true before fixing edging.
Uneven surface levels
High or low spots after compaction mean the sand was not consistent depth before laying. The fix after the fact is to lift the offending bricks, add or remove sand, and relay. Do not try to grind down high bricks or pack mortar under low ones. Both approaches fail quickly. Prevention is straightforward: screed carefully and test with your depth gauge before you start laying.
Gaps opening up in the outer rings
Large gaps on the outer rings happen when you try to keep the same joint width as the inner rings without adjusting for the increasing circumference. As rings get bigger, the outer face of each brick spans a longer arc, which naturally opens the joint. Accept slightly wider joints on the outer rings (up to about 10mm on larger circles) or cut a few bricks per ring to a slightly narrower width to keep the joints consistent. The rustic look with slightly variable joints is also a genuine design choice, not a compromise.
Water pooling on the patio
If water sits on the surface after rain, the drainage slope is either absent or heading the wrong direction. Check the fall with a long spirit level and a ruler under one end. A 1:60 slope means the low end of a 1-metre straight edge should sit about 16mm higher than the high end. If the patio is already laid and draining poorly, the only real fix is to lift the offending section, re-screed with the correct fall, and relay. It is a painful job but better than a permanently wet patio. This is why getting the fall right in the base is so important.
Bricks shifting or lifting after a winter
Frost heave on clay soils is the most common cause of bricks popping up over winter. If your area has clay soil and you did not use a geotextile or enough depth of hardcore, the freeze-thaw cycle will work bricks loose year after year. Lift the affected bricks, excavate deeper, add more hardcore, re-compact, and re-lay. Going forward, a 150mm hardcore base on a geotextile is your insurance policy on clay ground.
Your next steps: start measuring today
The best thing you can do right now is go outside and mark a rough circle with a cane and string at your intended diameter. Stand back and look at it. Is it the right size? Does it sit in the right spot? Adjust it before you order anything. Once you are happy with the size and position, calculate your material quantities: measure the area (radius squared times 3.14 for square metres), add 10% for cuts and waste, and work out your brick count from there. Most suppliers sell bricks by the square metre, so this is straightforward.
A circular patio is genuinely one of the most satisfying DIY projects you can take on. The geometry sounds intimidating but the actual work is methodical and manageable. The centre pin and string do the hard geometric work for you. Focus your energy on getting the base right, keeping the sand consistent, and checking levels constantly, and the bricklaying itself will fall into place. If you are planning this in the UK, follow these steps alongside local material and drainage considerations specific to patio projects there how to lay a brick patio UK. If you are also interested in how the process compares to a standard rectangular layout or specific brick colours like red brick, those variations share the same base preparation principles but differ in how you handle pattern and cuts at the edges.
FAQ
How big should the joint be between bricks on a circular patio, and does it change toward the outer edge?
Use a consistent target of about 5 to 8mm, but expect it to open slightly on larger circles. If the outer joints become uncomfortably large, you can taper a few inner bricks or allow up to roughly 10mm on the outer rings for bigger patios, keeping the overall look intentional rather than accidental.
What’s the best way to cut bricks for inner curves without ending up with weak slivers?
Do not pre-cut a whole batch, cut one ring at a time, dry-fit each cut, then discard pieces that end up too narrow (for example, if the cut brick becomes less than about a third of the original width). If you get repeated slivers, adjust the spacing and re-mark your next cuts to protect the pattern.
Can I lay a circular patio over existing paving slabs or a garden path base?
Usually no. To get reliable drainage and stability, you need full excavation to the planned build-up, compacted hardcore, and correct fall. If you try to tile over slabs without re-establishing the slope and a bound base, you can trap water and get rocking bricks.
What should I do if the center pin comes loose or gets knocked out during construction?
Stop and reset immediately. Re-string from a new fixed center point, then re-check the radius at a few rings before you continue. If you notice the drift early (within a few rings), you can lift and re-lay a manageable section rather than fixing the whole perimeter later.
How do I maintain the drainage fall when screeding a circle in sections?
Set the fall first in the hardcore, then carry the same fall through the 30 to 40mm bedding layer. Use a short depth gauge to match the finished level and check the fall frequently with a spirit level and straight edge while you screed outward, keeping the surface consistent between sections.
Is it okay to compact before installing edging if I’m worried about alignment?
Install edging first. Edging prevents the outer ring from spreading during plate compaction, which otherwise distorts the carefully managed joint geometry and makes joints look uneven. You can hand-fix thin edge slivers, but compact the main field only once the perimeter is locked.
Do I need kiln-dried jointing sand for a circular patio, and how many compaction passes are enough?
Kiln-dried jointing sand helps because it flows and packs down reliably into gaps. Plan for two or three sweep-and-compact cycles until joints stop “disappearing.” Afterward, brush off excess so lighter bricks don’t stain from sand sitting on the surface.
How long should I wait before sealing the patio after jointing sand is installed?
Wait until the joints have settled, typically at least a week on a dry week. Seal only on a clean, fully dry surface, and follow the product guidance for your brick type (especially important for unglazed clay and lighter colours that can show staining or uneven sheen).
What’s the easiest way to verify the patio is flat and not rocking during brick laying?
Check continuously with a spirit level and straight edge, not just at the perimeter. If a brick rocks, remove it and correct the sand beneath. Avoid repeatedly tapping it harder, since that can crack the brick or create a low point that becomes worse after compaction.
What if water still pools after rain, even though I set a fall during construction?
Re-check the direction of flow and the actual fall with a long straight edge across the whole circle. If pooling persists, the fix is usually lifting the affected section, re-screeding with the correct slope, and re-laying. Avoid trying to solve it by adding more joint sand alone, it will not correct base drainage.
How do I handle clay soil, and is geotextile required for every circular patio?
On clay, geotextile is strongly recommended to reduce subgrade mixing and movement. Also consider increasing hardcore depth (for example up to about 150mm) and keep it fully compacted. If you already have clay and no membrane, frost heave can lift bricks repeatedly, and you may need to excavate and rebuild the sub-base.
How should I estimate materials for a circular patio if suppliers quote in square metres?
Calculate area using radius squared times pi (3.14 is fine for estimation), then add at least 10% for cuts and waste. For brick count, work from the same square metre figure because many suppliers sell bricks by area, but confirm their unit coverage for your chosen brick size and intended joint width.