
To lay a circular patio, you drive a stake at the center of your chosen spot, tie a string equal to your desired radius, and use that string to mark out the perimeter, excavate, and keep every layer perfectly consistent all the way around. That center stake is your single most important tool for the whole job, every measurement, every check, every cut comes back to it. Whether you're building from individual pavers or installing a purpose-made circular patio kit, the process is the same: prep the ground properly, build a solid compacted base with a slight drainage fall, and work outward from the center to keep the arc true.
How to Lay Patio Circle Step by Step DIY Guide

Clara Farrell
9 Jul 2026
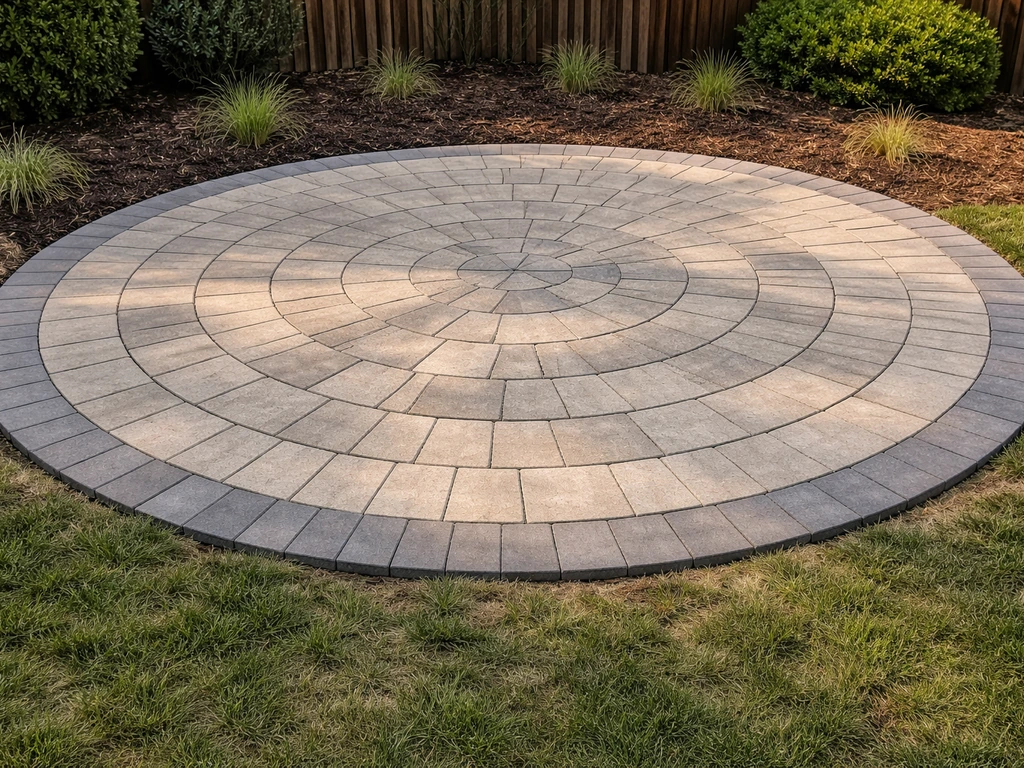
Planning your materials and measuring the circle
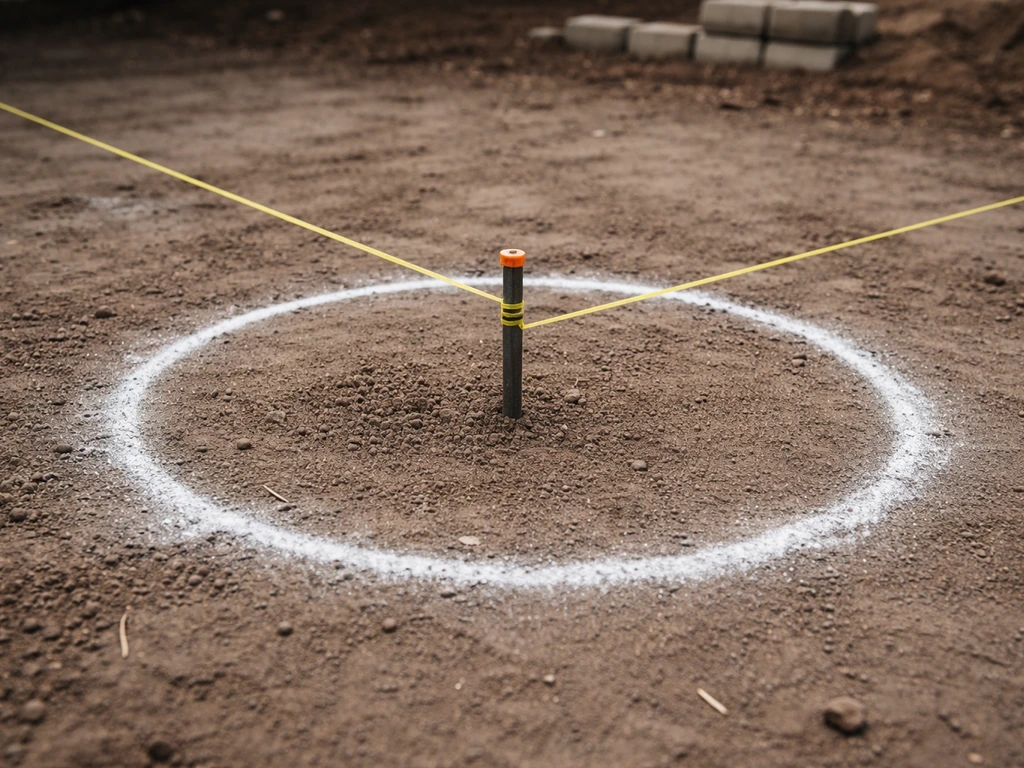
Before you dig a single sod, work out your diameter and calculate what you need. The formula for your circle's area is π × r² (where r is the radius, which is half the diameter). So a 3-metre diameter circle has a radius of 1.5 m, giving an area of roughly 7.07 m². That's your starting number for ordering pavers, sand, and subbase material.
For pavers or kits, always add a waste factor on top of your calculated area. Circular layouts waste more material than straight ones because of edge cuts, budget around 15 to 20 percent extra. If you're using a circular patio kit (products like Mutual Materials' Old Dominion or Basalite circle kits), the kit itself tells you the coverage. A small circle kit, for example, might cover a diameter of around 212 cm (roughly 83.5 inches) and an area of about 3.65 m², so check your kit's spec sheet against your planned size before buying.
For the base layers, you'll need MOT Type 1 crushed limestone (or equivalent compactible gravel) for the subbase, and sharp sand for the bedding layer. Before you start laying, plan your red brick patio layout and make sure your base and bedding depths match the patio thickness. A standard build-up uses around 100 mm of compacted Type 1 plus 50 mm of sharp sand, though clay-heavy subsoil may push that subbase closer to 125–150 mm compacted depth. Work out your material volumes using your circle area multiplied by the depth of each layer, then add about 10 percent for compaction losses.
| Material | Typical Depth | Notes |
|---|---|---|
| MOT Type 1 subbase | 100–150 mm compacted | Increase to 150 mm on clay or soft subsoil |
| Sharp sand bedding | ~50 mm (25 mm compacted) | Screeded level to a consistent depth |
| Pavers/kit units | Varies by product | Set 3–5 mm proud before compaction |
| Polymeric jointing sand | Fill joints completely | Activated with water after compaction |
For edging and edge restraints, calculate your perimeter using the formula π × diameter. A 3 m diameter circle has a perimeter of about 9.4 m, so you'd need just over 9.4 m of flexible plastic edge restraint or compatible brick edging. Round up and buy extra, cutting curved edging to fit is fiddly and you don't want to run short mid-job.
Site prep and excavation for curved patios
Mark your circle on the ground first using your center stake and a string at the full radius, then spray paint or sand along the arc. Once you can see the full circle, assess what you're working with. Clay soil is the most common problem, it holds water, moves with frost, and will push your pavers out of alignment within a season if you don't deal with it properly. On clay, you need a deeper subbase (150 mm compacted is a safer target) and good drainage away from the circle in every direction.
For your excavation depth, add up all your layers: subbase depth + 50 mm sand bedding + paver thickness, then add a few millimetres so the finished surface sits just slightly above the surrounding ground for drainage. A typical calculation looks like: 150 mm subbase + 50 mm sand + 50 mm paver = 250 mm total dig depth. Mark that depth on your center stake so you can check it as you excavate.
Dig beyond your marked circle by about 150–200 mm in every direction. That extra margin gives you room to fit the edge restraint and compact the subbase right to the boundary without the sides collapsing inward. After you have your base and drainage grade right, laying brick edging around the perimeter keeps the patio shape locked in laying brick edging for patio. Remove all topsoil and organic material, roots, old mulch, any soft or spongy ground. If you hit soft spots even after removing topsoil, dig deeper in those areas and pack them with extra Type 1 before you start the main base build-up.
If you're working over an existing hard surface like old concrete, check whether it's structurally sound. A solid existing base can sometimes be used as a foundation, but any cracks, hollow spots, or areas that flex underfoot need to come out. Building a circle on top of a compromised surface just passes the problem on, you'll be re-doing the job in two years.
Building a stable base and getting the drainage grade right
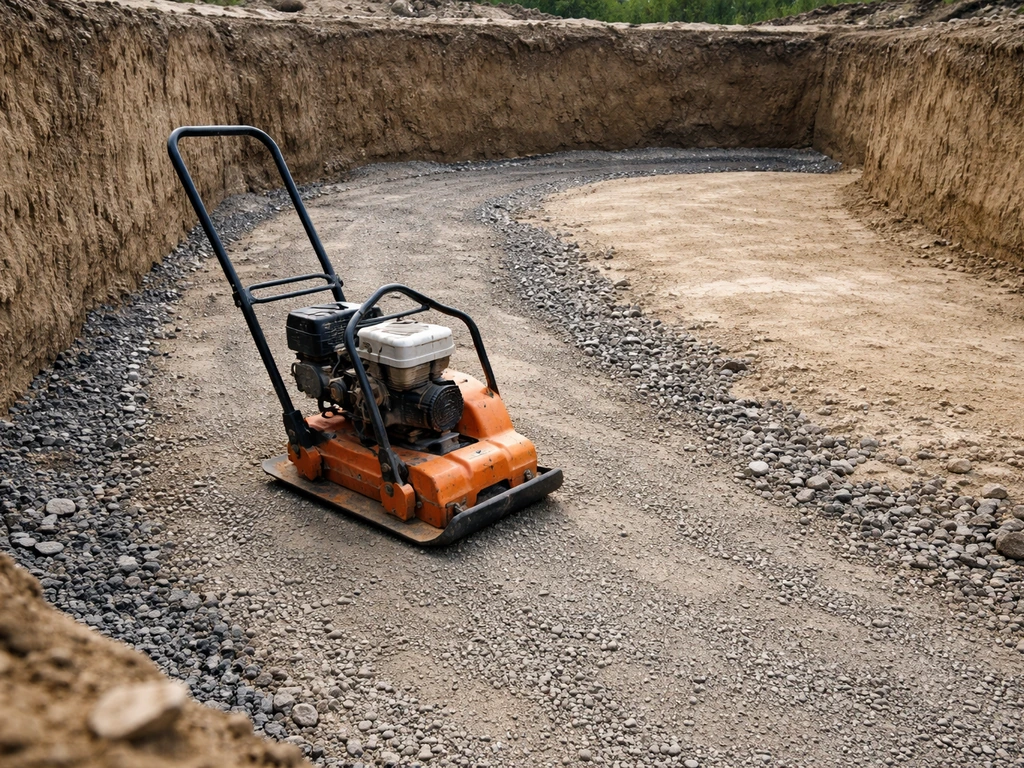
Compact the subgrade (the bare earth at the bottom of your excavation) before you add any material. A plate compactor makes this quick and you can hire one for a day. Run it over the whole circle area in overlapping passes. You'll know the subgrade is properly compacted when the compactor starts to bounce and hold rather than sinking in. If it keeps sinking in one area, dig that spot out and replace with clean hardcore.
Add your Type 1 subbase in two layers if you're going deeper than 100 mm, pour roughly half, compact it thoroughly, then add the rest and compact again. Trying to compact 150 mm in one go means the bottom half never gets properly dense. Rake the subbase to rough grade before compacting, aiming to maintain a consistent depth across the whole circle. Use your center stake and a long straight-edge or spirit level to check for dips.
Drainage is critical, and circular patios are no exception. You need a fall of between 1:60 and 1:80 away from any building or structure, that works out to about 12–17 mm of drop per metre of distance. On a circular patio, the simplest approach is to grade the whole surface slightly toward one edge (usually toward a garden or lawn), rather than trying to crown the center. Set your subbase and sand bedding to this fall, and the finished pavers will follow. If you skip this step and end up with a flat or slightly hollowed circle, you'll have a puddle problem every time it rains.
Once the subbase is compacted and graded, add your sharp sand bedding layer. Screed it to a consistent depth of around 50 mm using screed rails and a long straight board. The sand should be firm enough to hold a footprint but not wet, if it's sticking to your screed board, it's too wet and needs to dry out before you lay pavers on it.
Layout and marking out a true circular perimeter
This is where a lot of DIYers lose accuracy, so take your time here. Re-drive your center stake firmly into the compacted base (not just the sand, push it down to the subbase). Tie a string to the stake equal to your exact radius. Walk the string around 360 degrees and mark the perimeter again directly on the sand or base, using spray paint, chalk line, or a trail of dry sand. Check four or five points by measuring from the center, if any point is more than 10–15 mm out, adjust it before you do anything else.
For a circle patio kit, the kit components often include a center piece and rings of blocks that radiate outward, so the layout is partly defined by the kit itself. Start by placing the center block or center ring dry (without bedding) to confirm the finished size matches your excavation. Re-measure from center to the outer edge of the final ring and compare to your marked perimeter, if they don't match, you need to adjust the base grade or the perimeter before committing to the installation.
If you're laying individual pavers in a circular pattern rather than using a kit, mark out the rings with concentric circles using your stake and string at increasing radius lengths. For a radial (wedge-shaped) layout where joints fan out from the center, mark radiating lines every 10–15 degrees using a protractor or a simple string-and-angle method. This gives you the joint lines to follow as you lay, which keeps the pattern consistent all the way around and prevents the misaligned arcs that are the most common visual mistake on DIY circle patios. If you’re wondering how to lay herringbone brick patio instead, the pattern uses repeated diagonal cuts and a tighter, more consistent laying rhythm than running-bond layouts circular pattern.
Installing kit components or pavers in a circle
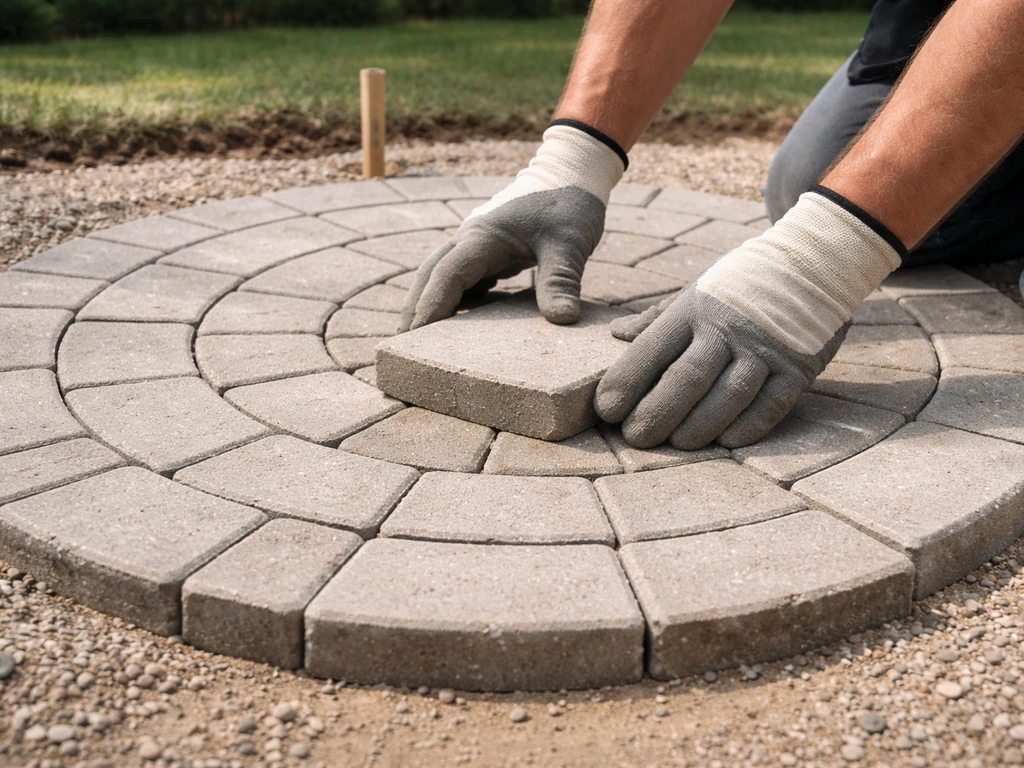
Whether you're using a kit or loose pavers, always work from the center outward. Place the center piece first, bed it level and at the correct height, and use it as your reference point for everything that follows. Kits are specifically designed to eliminate the need for cutting curved edges into individual blocks, the pieces are pre-shaped (often trapezoidal or wedge-shaped) so they fit together into a true circle with consistent joint widths. Once you have the measurements and site prep done, follow the step-by-step paver installation and compaction process for a neat, stable reclaimed-brick finish reclaimed brick patio. The joint specification on a quality kit is tight, often around 1.5 mm, so precision matters from the first ring out.
As you work outward ring by ring, keep checking back to your center stake. After every ring, re-measure from the center to the outer edge of the newly placed units at multiple points around the circle. If one side has crept out further than the other, it's easy to correct at this stage, a small nudge with a rubber mallet and you're back on track. Leave it until you've laid three rings and it becomes a much bigger problem to fix.
For individual pavers (not a kit), use spacers to maintain consistent joint gaps and keep the radial lines straight. Wedge-shaped pavers are the easiest option for genuine circular arcs because the joints naturally radiate from the center point without creating inconsistent gaps. If you're using standard rectangular pavers in a circular pattern, the inner edge of each unit will need to be cut, more on that in the next section.
Do not compact the pavers until the whole circle is laid, the edge restraint is in place, and you've done a final level check across the whole surface. Compacting individual rings prematurely shifts the sand bedding and makes it almost impossible to correct height differences later. Keep foot traffic off laid sections as much as you can, use a kneeling board if you need to reach the center of a large circle.
Cutting, edging, leveling, and jointing
Cutting for the arc
The outer ring of any circle patio almost always needs some cuts to maintain a clean circular edge. The method that works best is to place the uncut paver in position, use your radius string (still attached to the center stake) to mark the cut line directly onto the paver face, and then cut with an angle grinder fitted with a diamond blade or a paving saw. For tight curves, you may need to score and snap, or make a series of relief cuts before the final curved cut. Always wear eye protection and a dust mask, paver cutting produces a lot of fine silica dust.
If you're laying a circular border around an existing rectangular patio, the same stake-and-string method works for marking cuts along the arc. Mark the cut line on each border stone individually using the radius string, cut to the line, and you'll end up with a smooth, consistent curve rather than a jagged approximation.
Edging and edge restraints
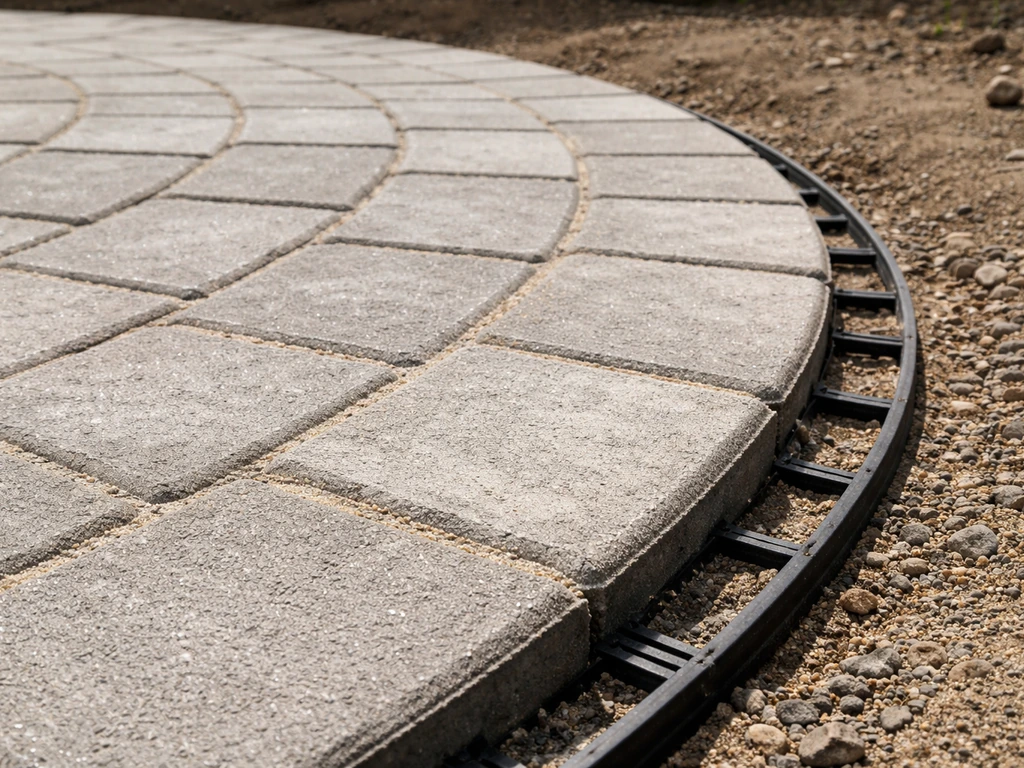
Flexible plastic edge restraint (the kind sold specifically for curved paving installations) is the easiest option for holding a circular perimeter. It bends smoothly around the arc, spikes into the subbase, and keeps the outer ring of pavers from spreading outward under load. Fit the edge restraint before you lay the outer ring of pavers, and check that it follows your marked perimeter accurately, use your radius string to confirm. Alternatively, a soldier course of matching pavers or bricks bedded on concrete mortar makes a more decorative circular border, and this is a common choice for circle patio kits that include a specific border unit. If you're interested in edging options in more detail, circular brick patio installations often use a dedicated brick border as part of the overall design.
Leveling across the curve
Set each paver so its surface sits 3–5 mm above the finished level before compaction. When you run the plate compactor over the whole circle, it will drive the pavers down into the sand bedding and bring them to final grade. Use a long straight-edge (at least 1.8 m) across the circle in multiple directions to check for high or low spots before compacting. Any paver that rocks needs the sand bedding adjusted underneath it, lift it, add or remove sand, re-bed it, and check again. A rocking paver will only get worse after compaction and will be a trip hazard and an eyesore.
Jointing
Once the pavers are compacted to final level, sweep jointing sand across the surface and work it into all the joints with a stiff brush. For circular patios, the radial joints (especially near the center where they're narrowest) can be harder to fill, use a narrow brush or even a gloved hand to push sand into tight gaps. Don't put sand in the joints or on the surface before compaction, it gets displaced and you end up with uneven fill.
Polymeric jointing sand is worth the extra cost for a circle patio. Polymeric jointing sand helps prevent washout in the radial joints, which is especially useful when you’re learning how to lay a brick patio in the UK. Regular sand can wash out of radial joints, especially at the center where joints are narrow. With polymeric sand, sweep it in, compact again lightly to settle the sand down into the joints, then activate it with a gentle shower of water (not a jet, use a shower nozzle setting to avoid washing the sand back out). Let it cure for 24 hours before foot traffic and 48–72 hours before heavy use.
Compaction, finishing touches, and mistakes to avoid
Run the plate compactor over the whole circle in overlapping passes, working from the outside in toward the center. Use a rubber or plastic pad attachment on the compactor if your pavers have a decorative or textured face, direct steel-plate contact can chip or scratch the surface. After the first compaction pass, re-check your drainage grade with a level and a tape measure. If any area has dropped more than 5 mm below the intended grade, you may need to lift those pavers and add a little sand beneath them before a second compaction pass.
The most common finishing mistake is power washing the patio too soon after polymeric sand application. Power washing removes polymeric sand from joints before it has fully cured, sometimes completely washing it out and leaving open gaps that weeds will find immediately. If you want to clean the surface, wait at least a week and use a gentle rinse, not a pressure washer.
Here are the mistakes that come up most often on circular patio installations, and how to avoid them:
- Skipping or under-compacting the subbase: this is the single biggest cause of sinking, rocking, and uneven surfaces within the first year. Two compaction passes per layer minimum.
- Losing the center point: if your center stake gets knocked out mid-job, your whole layout goes with it. Mark a backup reference point (e.g., measure from two fixed objects to the center) before you start digging.
- Wet sand bedding: screeding onto wet sharp sand gives you an unstable, uneven bed. Wait for it to dry out to a workable consistency before laying.
- Forgetting the drainage fall: a level circle holds water. Set the fall into your subbase before you start laying, not as an afterthought.
- Compacting with sand on the surface: sand left on top of pavers before compaction gets ground into the paver faces and can cause surface damage. Compact first, then introduce jointing sand.
- Insufficient jointing sand depth: joints that are only half-filled will allow pavers to rock and shift. Keep sweeping, compacting, and re-filling until joints are packed solid to the surface.
- Not using flexible edge restraint: circular pavers with no edge support will gradually spread outward, opening up gaps and allowing edge units to tip.
Common site conditions and how to handle them
Clay soil is the most problematic subgrade for any patio, and even more so for a circle where any differential movement shows up as an obvious dip or raised ring in the pattern. On clay, increase your compacted subbase to 150 mm minimum, and consider laying a geotextile membrane between the subgrade and the Type 1 before you start, it prevents the clay from working up into the subbase over time. Some DIYers on clay also add a thin layer of clean angular gravel directly on top of the geotextile before the Type 1 to improve drainage.
Sloped ground needs a consistent base depth all the way around the circle. On a slope, the uphill side of your excavation will be deeper than the downhill side if you're trying to create a level finished surface. Measure your base depth from the finished surface level down, not from the existing ground level down, otherwise your subbase will be thinner on the uphill side and you'll get uneven compaction and settling.
If you're laying a circle patio over an existing paved surface like concrete, check that the existing surface drains properly and has no hollow areas. Add a bonding primer if you're bedding into a mortar-based system on top, and make sure your finished height is manageable relative to adjacent doors, thresholds, and paths. The same circle layout principles apply, center stake, radius string, work outward, but you're adjusting your bedding layer rather than building up from bare earth.
Your pre-start checklist
- Calculate your circle area (π × r²) and order pavers or kit with 15–20% extra for waste.
- Calculate perimeter (π × diameter) and order enough edge restraint to cover it.
- Order subbase material (MOT Type 1) and sharp sand based on your layer depths and circle area.
- Mark the center point and full perimeter before breaking ground.
- Excavate to the correct total depth (subbase + sand + paver thickness + a few mm for drainage clearance).
- Compact the subgrade, add subbase in layers, compact each layer.
- Grade the subbase and sand bedding to a drainage fall of 1: 60 to 1:80.
- Screed the sand bedding and re-drive the center stake through it.
- Lay from center outward, checking radius at every ring.
- Fit edge restraint before laying the outer ring.
- Complete all cuts for the arc and border units.
- Do a full level check across the circle before compacting.
- Compact the whole circle, then sweep in polymeric jointing sand.
- Compact again lightly, then activate polymeric sand with a gentle water shower.
- Keep foot traffic off for 24 hours and heavy use off for 48–72 hours.
FAQ
How do I start if my finished circle must land at a specific height near a door or threshold?
If your finished patio level needs to match a door, gate, or step height, set your target finished surface first, then work backwards. Use the build-up thicknesses (subbase, bedding sand, paver) to calculate the excavation depth from that finished level, not from existing ground, and keep the same finished level check across the whole circle with a long straight-edge.
What should I do if my subgrade stays soft or muddy when I compact it?
Wet or muddy subgrade will keep moving under compaction. Let the soil dry until a shovel cuts cleanly and the plate compactor no longer sinks in, then compact again. If it never firms up, dig out the unstable strip or patch and replace with clean Type 1 (and compact in layers) before building the circular base.
Can I still get proper drainage if my patio area slopes naturally?
Yes, but treat it like an engineered drainage problem. Keep the required fall away from the building, then grade the subbase and bedding so the surface follows that fall without creating a hollow center. The easiest approach is to set one reference direction (for example, toward a lawn) and use the level and tape to confirm the same slope exists all around the circle.
How do I check that my circle has the correct slope once everything is bedded?
For a circle, you can still place the fall by grading one direction, but avoid a “crown” or local dips. Check drainage after the first sand layer is roughly set, then again after pavers are seated but before final compaction, using a level across multiple chords of the circle.
What causes the circle to look uneven near the center, and how do I fix it early?
Cutting wedge-shaped pavers is easier than cutting standard rectangles, but even for wedges you must keep joint widths consistent at the center. Use spacers or the kit’s built-in joint system, and re-measure from the center after every ring. If your joints drift wider on one side, stop early and correct the base line, not the paver spacing.
My outer ring is too tight against an edge boundary, how can I correct the layout without wasting more pavers?
If you need a perfect match at a boundary where a full ring won’t fit, reduce the issue by adjusting the radius slightly and recalculating the perimeter before you lay bedding. Don’t try to stretch joint spacing to “make it fit,” instead confirm edge restraint placement and the outer ring start line, then cut the outermost units to suit.
Why does compacting too early ruin a circular patio, and what’s the safest stopping point?
Avoid compaction on partial work because the sand bedding can shift and lock in height errors. If you must stop, stop at a full ring with the edge restraint installed, do a level check, and keep foot traffic off the laid area. Only compact after the entire circle is laid and the final height check is passed.
What if I accidentally wash polymeric jointing sand out while activating it?
Polymeric sand is typically activated with a gentle mist or shower, not a pressure jet. If you over-wet or wash it out, the fix is to re-sweep the surface joints if sand is missing, re-compact lightly, then activate again, letting it cure fully before use.
How should I apply jointing sand so I don’t end up with sand on the surface or empty joints?
For polymeric sand, don’t sweep it into joints before compaction, because it gets displaced under the plate compactor. After the jointing sand cures and you need a final tidy, use a stiff brush to remove excess from the surface only, then avoid walking on the patio until the cure time is complete.
Do I really need geotextile and a deeper subbase on clay, or can I follow the standard depths?
On clay, a geotextile membrane can help stop fines pumping into the Type 1, and using a deeper subbase is critical for a circle. Also consider adding a thin angular gravel drainage layer over the membrane only if you can still achieve your required sand and paver depths, then compact in correct layer thicknesses.
Can I lay a circular patio over old concrete, and what quick checks should I do first?
If you’re laying on an existing slab, you need a stability and drainage assessment. Any hollow, flexing, or cracking areas should be removed or repaired, and you must ensure the overall finished height still works with thresholds. If the slab drains poorly, you can’t rely on a new circle build to fix ponding problems.
How do I make sure curved edge restraint follows the exact circle line?
Choose a curved edge restraint made for paving arcs, then verify the curve by re-checking with the radius string after you spike it. If the edge restraint doesn’t match the marked perimeter, correct it before laying the outer ring, because once pavers are seated you will struggle to pull the line back without disturbing bedding.
One paver rocks after compaction, what is the correct way to fix that without disturbing the rest?
If a paver rocks after compaction, lift it and adjust the bedding sand thickness underneath. Don’t try to solve it by “forcing” the paver down, because you’ll create a high spot next to it. Re-bed, re-check with a straight-edge across the circle, then re-compaction once the area is stable.