
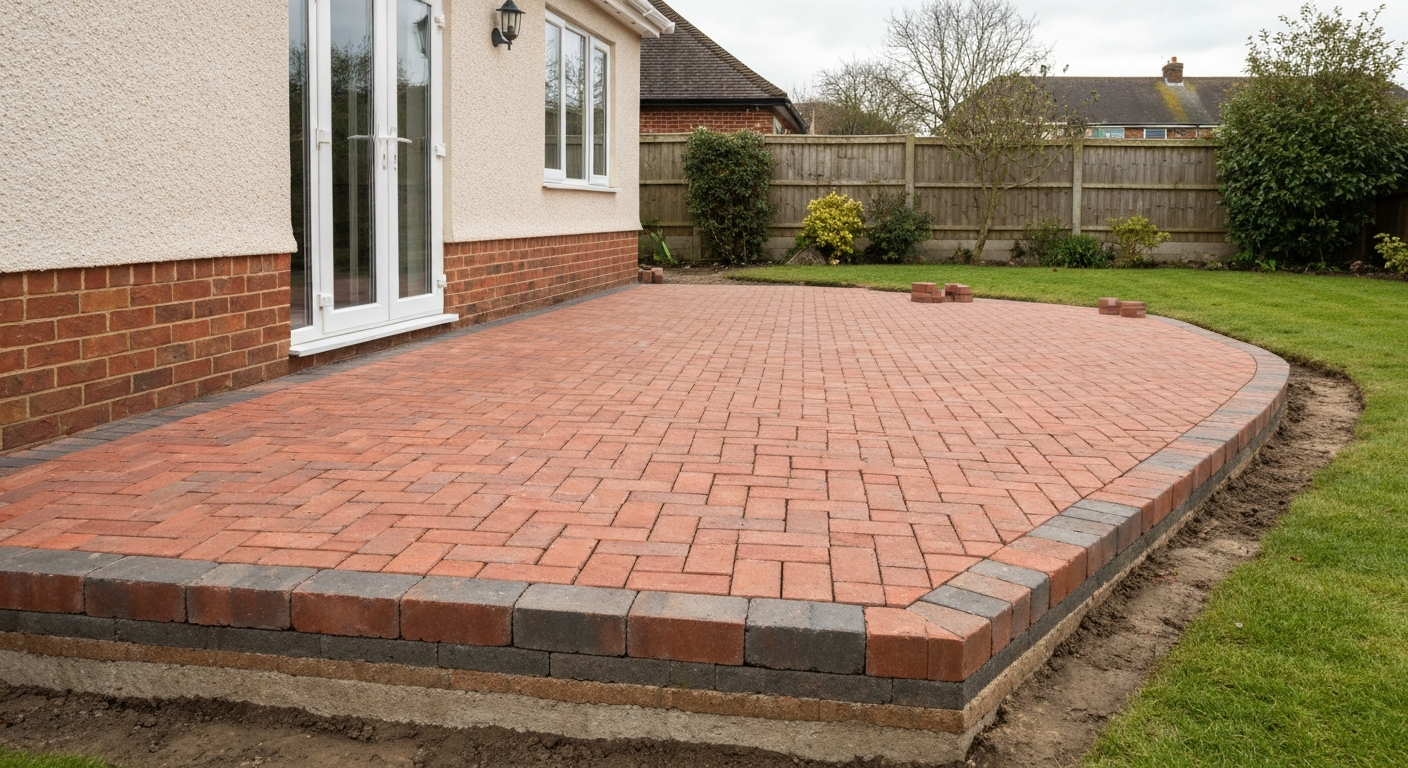
You can lay a red brick patio yourself in a weekend (for a small area) or over two to three weekends (for a medium patio), provided you prepare the ground properly, choose frost-resistant bricks rated for external paving, and set them on a compacted Type 1 sub-base of at least 100 mm. The honest truth is that 90% of patio failures come down to poor base preparation, not poor bricklaying. Get the groundwork right and the rest is methodical, manageable, and genuinely satisfying.
How to Lay Red Brick Patio: Complete DIY Guide & Patterns

Clara Farrell
24 Jul 2026
What this guide covers and who it's for
This guide walks you through every stage of laying a red brick patio: planning, measuring, buying materials, preparing the ground, laying bricks in your chosen pattern, cutting and edging, jointing, drainage, and long-term maintenance. It's written for homeowners and first-time DIYers tackling this for the first time, as well as people who have laid one patio before and want to do it better. There's also specific guidance for UK installations, including frost-heave risks, drainage regulations, and the BS 7533 standards that professional installers follow. By the end you'll have enough detail to plan, price, and complete the project yourself, or to brief a contractor with confidence.
Quick project overview: timelines, skill level, and what to expect
Before you start ordering materials, it helps to have a realistic picture of what you're committing to. Red brick patios are genuinely one of the more achievable DIY projects, but they are physically demanding and time-sensitive once you start mixing mortar.
| Patio size | Approximate area | Skill level | Time estimate (including prep) | Typical team |
|---|---|---|---|---|
| Small | Up to 10 m² | Beginner | 1–2 weekends | 1–2 people |
| Medium | 10–25 m² | Intermediate | 2–3 weekends | 2 people |
| Large | 25 m²+ | Intermediate/advanced | 3–5+ weekends or hire groundworks | 2–3 people or pro groundworks |
The biggest time sink is always excavation and sub-base compaction, not the bricklaying itself. If your ground is hard clay or the area is large, hiring a mini digger for a day is money very well spent. For a medium patio on reasonable ground, expect to spend roughly half your total time on groundwork, a quarter on laying bricks, and the remainder on cutting, edging, jointing, and tidying up.
Planning and site assessment
Good planning prevents expensive mistakes later. Walk your site before touching a spade and work through each of the following points.
Access and existing surfaces
Think about how you'll get materials in and spoil (excavated soil) out. A narrow side passage can make a medium patio significantly harder and more expensive because you'll be moving everything by wheelbarrow. If there's an existing concrete slab, you have a choice: break it up and remove it (labour-intensive but gives you full control of the build-up), or lay over it if it's sound, level, and at the right height. Laying over an existing slab is only realistic if the finished surface won't end up above your damp-proof course (DPC) or block drainage from the house. The finished patio must sit at least 150 mm below the DPC, as required by UK Building Regulations.
Slopes and drainage falls
Every patio needs a fall (a slight slope) to shed rainwater. The standard minimum for brick and block paving is 1:80, which works out to about 12.5 mm of drop for every metre of run. You need to decide which direction the water runs, making sure it moves away from the house and ideally towards a lawn, border, or drain. Don't fall into the trap of creating a patio that channels water toward your back door or your neighbour's garden. Mark your intended fall with string lines before you excavate so you can check it throughout the build. For reference, the maximum crossfall recommended for accessibility is 1:40 (25 mm per metre), so keep your fall gentle and consistent.
Clay soils, soft ground, and drainage lines
Clay soil is the most common problem I see on UK patio projects. It moves seasonally, holds water, and compresses under load in ways that sand or loam doesn't. If you're on heavy clay, you need a thicker sub-base than usual (more on this in the base preparation section), and you should seriously consider adding a layer of geotextile membrane between the subgrade and your Type 1 sub-base to prevent clay migration upward over time. Before you excavate anything, check for buried drainage pipes, inspection chambers, and soakaways. A long prod or drain rod can help, but if you're unsure, your local water authority can sometimes provide drainage maps. Disturbing a drainage line is a much bigger problem than a delayed patio project.
Local regulations and permits
In England, paving a rear garden is generally permitted development and doesn't require planning permission. However, paving a front garden with an impermeable surface over 5 m² does require permission unless you use a permeable surface (such as permeable block paving) or provide adequate drainage to a soakaway or lawn. This is part of the UK's approach to sustainable drainage (SuDS) and is backed by national standards. If in doubt, check with your local planning authority before you start. For UK readers, the relevant design standard for clay paver installations is BS 7533, and it's worth being aware of what it says even if you're a DIYer. BS 7533 requires testing the formation (soaked CBR) and using its design tables to determine appropriate sub-base thickness and layer design BS 7533 requires testing the formation (soaked CBR) and using its design tables to determine appropriate sub-base thickness and layer design..
Planning for UK conditions and frost
The UK climate is mild but damp, and freeze-thaw cycles are a real threat to any paved surface. Water gets into small voids, freezes, expands, and over a few winters can crack, lift, or shatter bricks and mortar joints. This is called frost heave, and it's entirely preventable if you build correctly.
Frost-heave risks and how to manage them
The key risk is frost-susceptible subgrade: fine silts and clays can draw moisture upward and expand when frozen. UK lowland frost penetration is typically taken as around 450–500 mm for design purposes. On frost-susceptible ground, BS 7533 recommends increasing the thickness of non-frost-susceptible layers (such as Type 1 sub-base) or adding a capping layer, so that the total construction depth keeps frost-susceptible soil below the freezing zone. In practical terms, this often means a combined sub-base and capping depth approaching 450 mm on bad ground, compared to the standard 100–150 mm on stable soil. If you're on clay or silt and want a long-lasting patio, invest in the base rather than the bricks.
Relevant UK standards to check
- BS 7533 series: the UK code of practice for pavements constructed with clay, concrete, or natural stone paving units, covering design, installation, and permeable pavements
- BS 7533-101: includes CBR-based sub-base design tables for different ground conditions and traffic categories
- BS EN 1344: the product standard for clay pavers, including frost resistance classification (F2 = suitable for severe frost exposure in the UK)
- National Standards for Sustainable Drainage Systems (SuDS): sets out requirements for permeable surfacing and surface water management
- GOV.UK guidance on permeable surfacing of front gardens: explains when planning permission is and isn't required
- Building Regulations Part H (drainage) and Part C (site preparation): cover DPC clearance, drainage, and ground moisture
You don't need to read every standard cover to cover, but knowing they exist means you can check a specific detail when you need to, and it's useful when talking to suppliers or getting quotes.
Tools and materials checklist
Having the right tools on site before you start saves a huge amount of time and frustration. I've broken this list down by task stage and included rough time allocations so you can plan your weekends properly.
Groundwork and excavation (allow 40–50% of total project time)
- Spade and mattock (for hand digging) or hired mini digger for larger areas
- Wheelbarrow (at least one, ideally two for larger projects)
- String lines and line pins for setting out levels and falls
- Tape measure (at least 10 m)
- Builder's level (1.2 m minimum) and a long straightedge
- Plate compactor / wacker plate (hire for the day — usually £50–80/day in the UK)
- Rake and tamper for spreading sub-base
- Geotextile membrane (if on clay or poor subgrade)
- Marker spray paint for setting out
Laying and cutting (allow 25–30% of total project time)
- Angle grinder with a diamond blade (for occasional cuts) or a hired block splitter/brick guillotine for clean cuts
- Hired diamond-blade disc cutter / table saw for accurate cuts on large quantities
- Rubber mallet
- Bolster chisel and club hammer (for splitting reclaimed bricks)
- Builder's square (for checking right angles)
- Trowels: pointing trowel, gauging trowel, and margin trowel
- Mortar mixing board or hired mixer
- Buckets, sponge, and brush for mortar mixing and cleanup
- Knee pads (essential — you will thank yourself)
Jointing and finishing (allow 15–20% of total project time)
- Pointing gun or bag (for mortar jointing)
- Stiff-bristle brush (for sweeping in polymeric sand)
- Garden hose with fine rose or watering can (for activating polymeric sand)
- Plate compactor with protective pad (for bedding-in after laying)
- Sealer applicator (if sealing the finished patio)
PPE
- Safety goggles (always when cutting)
- Dust mask rated P2 or FFP2 (brick cutting produces silica dust — take this seriously)
- Hearing protection when using disc cutter or wacker plate
- Heavy-duty work gloves
- Steel-toe boots
- High-visibility vest if working near traffic
How to measure and calculate your quantities
One of the most common and costly mistakes is ordering too few materials. Running out of bricks mid-lay is a real problem because batch colours vary between production runs, and you may not be able to match them exactly. Always order more than you think you need.
Step 1: Calculate your patio area
For a rectangular or square patio, multiply length by width in metres. For an L-shape, break it into rectangles and add them. For a circular patio, use the formula: area = π × radius². Add 10% to your calculated area to account for cuts and breakages, or 15% for a herringbone or circular pattern where off-cuts are higher.
Step 2: Calculate brick quantities
The number of bricks per m² depends on the brick size and joint width you choose. Standard UK clay pavers are commonly 200 mm × 100 mm × 50 mm (or 60 mm). With a 10 mm mortar joint, that gives approximately 45 bricks per m². With a 5 mm joint (sand-set or tight mortar), you get closer to 47–48 bricks per m². For a 215 mm × 102.5 mm traditional brick format, the figure is roughly 38–40 per m² with a 10 mm joint.
| Brick size | Joint width | Approx. bricks per m² | Order for 20 m² (inc. 10% wastage) |
|---|---|---|---|
| 200 × 100 × 60 mm paver | 10 mm mortar | 45 | 990 bricks |
| 200 × 100 × 60 mm paver | 5 mm sand joint | 48 | 1,056 bricks |
| 215 × 102.5 × 65 mm traditional | 10 mm mortar | 39 | 858 bricks |
| 215 × 102.5 × 65 mm traditional | 5 mm joint | 41 | 902 bricks |
Step 3: Calculate sub-base material
For a 100 mm compacted Type 1 sub-base, you need approximately 0.15–0.18 tonnes of Type 1 per m² (Type 1 compacts significantly, so you lay it at about 130–140 mm loose to achieve 100 mm compacted). For a 150 mm compacted sub-base, allow 0.22–0.25 tonnes per m². Worked example: a 20 m² patio with a 100 mm sub-base needs roughly 20 × 0.18 = 3.6 tonnes of Type 1, so order 4 tonnes to be safe.
Step 4: Calculate bedding sand or mortar
For a sand-set (flexible) installation, you need a 30–50 mm layer of sharp sand (the laying course compacts down, so spread loosely at around 50 mm). That's approximately 0.09–0.1 m³ per m², or roughly 0.15–0.18 tonnes per m². For a mortar-set (rigid) installation using a 40 mm bedding mortar, allow approximately one 25 kg bag of sharp sand and one 25 kg bag of cement per 3–4 bricks laid on mortar, or plan on a 3:1 to 4:1 sand:cement mix by volume. Many installers use a semi-dry mix for bedding (the consistency of damp sand) and a wetter mix for pointing.
Step 5: Edging and jointing materials
Calculate your perimeter in linear metres for edging bricks or restraint kerbs. Add 10% for corners and cuts. For polymeric sand jointing, one 15–20 kg bag typically covers 5–8 m² depending on joint width and brick thickness, so check the product data sheet for the specific brand you choose.
Choosing the right red bricks
Not all red bricks are suitable for outdoor paving, and this is an area where buying the wrong product creates problems you can't easily fix. Here's what to look for.
New clay pavers versus reclaimed bricks
New clay pavers manufactured for paving (sometimes called 'engineering pavers' or 'clay block pavers') are made to consistent dimensions, have a known compressive strength, and come with a frost resistance rating. Look for the BS EN 1344 product standard and a frost resistance class of F2, which means the brick has been tested and is suitable for severe frost exposure in the UK. This is the minimum you should accept for an outdoor patio in Britain. Reclaimed bricks are visually beautiful and can give a patio real character, but they require more care in selection. Many reclaimed bricks were not made for paving: they were made for walls, are softer, and will spall and crumble under traffic and freeze-thaw cycles. If you want to use reclaimed bricks, look for hard-fired, dense examples with no visible cracks, test them by tapping (a clear ring is good, a dull thud suggests weakness), and accept some wastage in sorting. There's a whole separate discussion about selecting and laying reclaimed bricks that's worth reading if you're going down that route.
Sizes, thickness, and strength
For a pedestrian patio, 50 mm thick pavers are the industry minimum, but 60 mm is much more common in UK specifications and provides a sensible margin for occasional vehicle use (if you think a car might ever park on it, go to 65–70 mm). Standard clay paver sizes in the UK are typically 200 × 100 mm or 215 × 102.5 mm in plan. The latter matches a standard UK house brick, which is worth considering if you want the patio to match your brickwork or if you're planning to extend an existing red brick path.
Colour, texture, and finish
Red bricks vary enormously: from bright engineering-red to deep burgundy, wire-cut textured faces to smooth pressed finishes, uniform machine-made to variable handmade. A textured or wire-cut face gives better slip resistance when wet (important for a patio that will get rained on). Smooth-faced bricks look very smart but can be slippery when damp. For a family garden patio, textured is the safer choice. If colour consistency matters to you, order all your bricks from a single batch, as different production runs can vary noticeably.
New vs reclaimed: a quick comparison
| Factor | New clay pavers | Reclaimed bricks |
|---|---|---|
| Frost resistance | Rated (F2 for UK use) | Variable, often unknown |
| Dimensional consistency | High (easy to lay) | Variable (more adjustment needed) |
| Appearance | Uniform, modern | Characterful, aged look |
| Cost | £25–£60 per m² | £20–£50+ per m² depending on source |
| Wastage on sorting | Low (5–10%) | Higher (10–20%+) |
| Availability | Reliable | Depends on salvage yards |
| Best use | New builds, clean modern gardens | Period properties, cottage gardens |
My recommendation: for a first patio project, use new clay pavers with a frost resistance rating. The consistent dimensions make laying much easier and the result will last. Save reclaimed bricks for when you're more confident in sorting and assessing quality, or for a small accent area rather than the whole surface.
Base options and ground preparation
This is the most important section in the entire guide. A beautiful brick surface laid on a poor base will fail. A basic brick surface laid on a well-constructed base will last decades.
Understanding the layers
A typical red brick patio build-up from bottom to top consists of: the subgrade (the natural ground), an optional geotextile membrane, the compacted granular sub-base (Type 1 MOT), the bedding layer (either sharp sand or mortar), and then the bricks themselves. Each layer has a job. The sub-base distributes load and provides drainage. The bedding layer allows fine adjustment of level. The bricks are the finished surface.
Sub-base thickness guidance
| Ground condition | Intended use | Compacted sub-base depth | Notes |
|---|---|---|---|
| Good (sandy/gravelly soil, CBR >5%) | Pedestrian patio only | 100 mm | Standard minimum for domestic patios |
| Average (firm clay, CBR 2–5%) | Pedestrian patio | 150 mm | Add geotextile membrane |
| Poor (soft clay/silt, CBR <2%) | Pedestrian patio | 200–250 mm or concrete slab | Consider professional assessment; may need capping layer |
| Any | Occasional vehicle (car parking) | 150–300 mm | Use 60–70 mm pavers; check BS 7533 for exact spec |
| Frost-susceptible subgrade (silt/clay) | Any | Up to 450 mm total non-frost-susceptible construction | To keep frost out of frost-susceptible soil |
How to prepare the subgrade
- Mark out the patio area with string lines and spray paint, including a 100–150 mm margin beyond the finished edge.
- Excavate to the required depth, allowing for your full build-up: sub-base + bedding layer + brick thickness + any additional depth for frost-susceptible ground. For a standard 100 mm sub-base + 40 mm bedding + 60 mm paver, total excavation depth is 200 mm.
- Remove all organic material, roots, and topsoil from the formation. Never lay sub-base over topsoil or organic matter.
- If the ground is clay or soft, lay a geotextile membrane directly on the formation, overlapping joins by at least 300 mm.
- Spread Type 1 MOT sub-base in layers no thicker than 75–100 mm loose, and compact each layer thoroughly with a plate compactor before adding the next.
- Make multiple passes with the plate compactor in different directions. The surface should not deflect visibly when you walk on it.
- Check your levels and falls with a long straightedge and level as you go. It's much easier to correct levels in the sub-base than in the bedding layer.
Sand-set (flexible) versus mortar-set (rigid): which is right for you?
Sand-set (flexible) paving uses a compacted sharp sand laying course of around 30–50 mm and relies on tight joints and edge restraints to hold the bricks in place. It's more forgiving to lay, allows individual bricks to be lifted and reset, and is naturally permeable. Mortar-set (rigid) paving uses a 30–50 mm (typically 40 mm) semi-dry mortar bedding and mortar or slurry-grouted joints. It's stronger, more stable on slopes, and less prone to movement but harder to repair and not permeable. For most domestic red brick patios in the UK, mortar-set is the traditional and most durable choice, especially if you're on clay soil or in a frost-prone area. Sand-set works well on stable, well-drained ground and is easier for a first-time DIYer.
Permeable base options
If your patio is in a front garden or in an area where local planning requires permeable surfacing, you need a fully permeable construction: a permeable laying course (clean 2–6 mm grit/chip) instead of sand, permeable jointing aggregate, and a permeable or engineered sub-base that allows water to infiltrate. This is described in BS 7533-13 and the CIRIA SuDS Manual. It's more complex to design correctly than a standard patio, but worth considering if it saves you a planning application.
Laying the bricks: step-by-step
With your base prepared and levels checked, you're ready to start laying. For a full step-by-step guide on how to lay a brick patio, see our detailed how to lay brick patio resource. Work from a fixed reference point (usually the house wall or a straight edge) and lay dry (no mortar in the bedding layer yet for sand-set; for mortar-set, work in sections of about 1 m²). For step-by-step instructions tailored to UK conditions, refer to how to lay a brick patio UK. Keep your bricks damp before laying onto mortar: dry bricks will suck moisture from the mortar and weaken the bond.
Setting out and choosing your pattern
The three most common patterns for red brick patios are: running bond (stretcher bond), where bricks are offset by half a brick in each course, which is the easiest pattern to lay; herringbone (45° or 90°), where bricks are laid at angles to each other in a zigzag, giving excellent interlock and load distribution but requiring more cuts at the edges; and basket weave, where pairs of bricks are laid in alternating directions in a grid. Herringbone is widely considered the most durable pattern for clay block paving because the interlock resists lateral spreading. If you're interested in laying a full herringbone layout, there's detailed guidance worth exploring for that specific pattern. Circular layouts are a separate challenge involving radiating courses and carefully cut wedge-shaped bricks or specialist radius pavers.
- Snap a chalk line or set a string line as your starting reference. For herringbone, set a 45° line from your starting corner.
- Lay a test row dry (no mortar/no bedding) to check your joint spacing and see how cuts will fall at the edges.
- For mortar-set: mix bedding mortar to a firm, semi-dry consistency (it should hold its shape when squeezed but not be wet). Spread and screed it to a consistent 40 mm depth over an area of about 1 m² at a time.
- Bed each brick firmly with a rubber mallet, checking level and fall constantly with your straightedge and level.
- Maintain consistent joint widths using tile spacers or offcuts of the appropriate thickness.
- Work forward so you never stand on freshly laid bricks. Use a board to spread your weight if you need to reach forward.
- Check your string lines and levels every 5–10 bricks. Small errors compound quickly.
- At the end of each session, protect fresh mortar from rain and frost with plastic sheeting.
Cutting bricks and installing edging
Cuts are inevitable unless your patio dimensions happen to be exact multiples of your brick size plus joint width (rare). Plan your layout to minimise cuts, but don't leave tiny slivers less than half a brick wide at the edges because they look awkward and pop out easily.
Cutting methods
- Angle grinder with diamond blade: good for occasional cuts and curves, but harder to keep straight without practice. Always use a guide.
- Hired table-top diamond disc cutter (brick saw): the best option for accurate, consistent straight cuts. Worth hiring for a day if you have more than 20–30 cuts to make.
- Brick splitter/guillotine: fast and clean for straight cuts on softer bricks; not suitable for engineering bricks or very dense clay pavers.
- Bolster and club hammer: a traditional method that works for splitting reclaimed bricks but gives less precise results.
Installing edging
Edging is essential: it locks the field bricks in place and prevents the pattern from spreading and loosening over time. For a mortar-set patio, lay the perimeter bricks (the edging course) on a full mortar haunching (a thick mortar support on the outer face) first, let it cure for 24–48 hours, then lay the internal field bricks against that fixed edge. For a sand-set patio, use rigid plastic edge restraints or concrete haunching behind a brick edging course. A dedicated brick edging detail using bricks set on edge (soldier course) gives a very traditional, attractive border that works well with red clay pavers.
Jointing, drainage details, and finishing
Mortar jointing
For a mortar-set patio, joints are typically filled with a 3:1 or 4:1 sand:cement mortar brushed or pointed into the joints once the bedding has cured for at least 24 hours. Work the mortar firmly into joints with a pointing trowel or a grout bag, avoid smearing it on the brick face, and clean any residue quickly with a damp sponge before it hardens. Recessed (slightly below the brick face) or flush pointing both work. Avoid rounded 'bucket handle' joints on horizontal surfaces as they collect water.
Polymeric sand jointing
Polymeric sand is a very good option for sand-set patios and for tight-jointed mortar patios. It's swept dry into the joints, then activated with water, which causes the binders to set and lock the sand in place. It resists ant infiltration, weed growth, and washout better than plain kiln-dried sand. Follow the manufacturer's instructions precisely: the surface must be dry when you apply it, and you need enough water to activate it without washing it out.
Drainage considerations
Check your falls before you joint. Pour a bucket of water on the finished surface and watch where it goes. It should run away from the house in a controlled direction. If you see pooling, you need to investigate now, before the joints cure. If your patio drains toward the house wall, the water must go somewhere: a linear drain or channel drain at the house end connected to a soakaway or surface water drain solves this. The finished patio surface must be at least 150 mm below the DPC of your house wall.
Common mistakes and how to avoid them
- Skimping on sub-base depth: the most common cause of brick patio failure. If the ground is soft, double the standard sub-base depth before anything else.
- Not compacting in layers: dumping 200 mm of Type 1 and running a plate compactor over it once does not give you a compacted sub-base. Compact in 75–100 mm lifts.
- Forgetting the fall: a flat patio will pond water and deteriorate quickly. Set your fall on string lines before you lay a single brick.
- Laying dry bricks onto mortar: always dampen bricks before setting on mortar to prevent them wicking moisture from the bed.
- Pointing too soon: if you mortar-point joints before the bedding has cured enough, settling can crack your pointing. Wait at least 24 hours in good conditions, longer in cold weather.
- Ordering too few bricks: always add 10–15% for cuts and breakages, and order from a single batch to avoid colour variation.
- Ignoring the DPC clearance: the finished surface must be at least 150 mm below the DPC. Measure this before you plan your build-up.
- Laying in freezing conditions: fresh mortar must not freeze before it sets. Don't lay on mortar if temperatures are below 3°C or if frost is forecast within 24 hours.
Finishing and long-term maintenance
Should you seal red brick pavers?
Sealing is optional but can be beneficial for red clay pavers. A penetrating impregnator sealer helps protect against staining and makes cleaning easier without significantly changing the appearance. Topcoat (film-forming) sealers enhance colour and give a slight sheen but can make the surface slippery when wet and need reapplying every few years. If you seal, do it after the mortar has fully cured (at least 28 days), on a dry surface, and in dry weather. Avoid sealing bricks that show signs of efflorescence (white salt deposits) before the efflorescence has cleared naturally or been treated.
Routine maintenance
- Sweep or blow leaves regularly to prevent organic matter staining and moss growth.
- Pressure wash annually or as needed, using a rotary head to avoid damaging joint material.
- Repoint any joints that have cracked or hollowed out before water gets into the base.
- Treat moss and algae with a patio cleaner or dilute bleach solution, then brush off and rinse.
- Check falls and drainage annually: if water pools in new places, investigate whether the base has moved.
- In hard frost periods, avoid using rock salt (sodium chloride) on clay pavers as it can accelerate spalling. Use sand grit instead.
- Re-apply sealer if used, typically every 3–5 years depending on traffic and weather exposure.
When to call a professional
Be honest with yourself about the scale and complexity of your project. A 10–15 m² patio on firm, level ground is very manageable as a first DIY project. A 40 m² patio on sloping, clay ground with a drainage challenge is a different matter entirely, and getting the groundwork wrong on a large area is expensive to put right. If your soakaway or drainage is complex, if your ground is very soft or steeply sloped, or if you're paving a front garden that requires planning permission and a compliant permeable construction, bring in a professional for at least the groundwork stage. A good groundworker can excavate, compact, and lay a sub-base in a day that would take you a weekend and several aching days, and they have access to equipment that makes the result significantly better.
FAQ
What are the first steps a homeowner should take to plan a red brick patio?
Start with site assessment and objectives: measure the area, note building edges, drains, steps and levels, and sketch a plan. Check soil type (clay, sand, peat) and slope (use a long spirit level or laser). Confirm local rules (SuDS/permeability and planning for front gardens). Decide intended use (pedestrian only or occasional vehicle), chosen brick thickness and pattern, and access for materials/equipment. Order a sample of bricks to check colour/texture. Allow time: survey and planning typically 1–2 hours for a small patio, more for complex or sloped sites.
How do I estimate materials and quantities for a typical red brick patio?
Estimate area in m² (length × width). Sub‑base: for pedestrian patio use 100–150 mm compacted MOT Type 1 (use higher if low CBR or occasional vehicle use). Bedding: sand‑set ~30–50 mm loose (≈30 mm after compaction) or mortar bed ~40 mm for mortar setting. Brick thickness: typically 50–60 mm for residential patios. Calculate volumes: sub‑base volume = area × depth; bedding volume = area × depth. Add 5–10% for cuts/waste and 10–15% for reclaimed bricks. Jointing sand: ~0.5–1.0 kg per m² depending on joint width and brick depth. Tools and consumables (compactor hire, sand, cement, edging, edging restraints) should be ordered with similar 5–10% contingency.
Which base option should I choose: compacted granular sub‑base with sand setting, or mortar setting?
Choose based on performance, appearance and drainage: - Flexible/sand set on compacted granular sub‑base (Type 1) is common for patios, easier to repair, and compatible with permeable options if designed correctly. - Mortar set (rigid) gives a very stable, traditional finish and is preferred where bricks are laid flat with tight mortar joints; requires good drainage and freezes consideration. For normal domestic pedestrian patios, compacted Type 1 (100–150 mm) + sharp sand laying course (~30–50 mm) is standard. Use mortar bed (~40 mm) if specified by product or for historical authenticity. For permeable paving follow manufacturer/BS 7533 and SuDS guidance and design a permeable sub‑base.
How should I prepare the site and deal with slopes or poor soils (clay, frost‑susceptible)?
Excavate to required depth for construction (e.g., total ~200 mm+ depending on brick thickness and bedding). For slopes, design falls for drainage (minimum ~1:80 for block paving; ensure water goes away from buildings and DPC). For clay or frost‑susceptible soils, increase sub‑base depth, use non‑frost‑susceptible fill or a thicker engineered sub‑base, or consider a concrete raft. If CBR (soaked) is low (<2–2.5%) follow BS 7533 guidance: increase sub‑base or stabilise. Always compact in lifts and proof‑roll before laying bedding. Allow 1–2 days for excavation and subgrade checks for a small patio; more if stabilisation or drainage works are needed.
What equipment and tools do I need and how long will it take?
Essential tools: tape, string line, stakes, spirit level/long level, laser level (optional), shovel, excavator hire for large jobs, plate compactor, angle grinder or brick saw for cutting, brick trowels (if mortar), rubber mallet, pointing tools, broom, wheelbarrow. Materials handling: wheelbarrow, strong helpers. Timing (for a typical 3×4 m patio, two people): site prep/excavation 1 day (or longer if difficult ground), sub‑base placement/compaction 0.5–1 day, bedding and setting bricks 1–2 days depending on pattern and detail, jointing and finishing 0.5 day, curing/initial set time 24–48 hours for mortar. Total DIY time ~3–5 days for a modest patio.
How do I lay common patterns (straight run, herringbone, and circular layouts)?
Straight run: set perpendicular or parallel to house using a string line; lay bricks edge‑to‑edge with consistent joint width (use spacers). Herringbone (45° or 90°): set a central guide line and start from a corner or centre, maintaining the diagonal orientation; it locks units and is good for load distribution. Circular/patio circle: mark the centre and radius, use a compass/string to guide concentric rings or a radial bond; cut bricks for tight curves and use a running bond for outer rings. Allow extra time for herringbone and circular patterns due to more cutting—add ~20–50% more time compared with straight run.