
You can lay patio blocks on grass, but only for temporary or very light-use situations where the area won't be walked on heavily and you don't mind some settling. For any permanent patio, you need to strip the turf, excavate to the right depth, build a compacted base, and then set your blocks. The grass will decompose underneath your patio, causing uneven settling, drainage problems, and block movement if you skip those steps. The good news is that the process is straightforward once you know the right depths, the right materials, and the right order to do things in.
How to Lay Patio Blocks on Grass: 16x16 Tips & Step-by-Step

Clara Farrell
6 Aug 2026
When laying on grass works (and when it definitely doesn't)
Laying blocks directly on turf can be acceptable in two narrow scenarios: a fully temporary installation you plan to move within a season, or a stepping-stone path where individual blocks sit on soil with intentional gaps. In these cases, you cut through the turf, set each stone on firm native soil, and accept that you'll need to re-level things periodically. Even then, you're working around one unavoidable fact: grass and organic topsoil compress, rot, and shift. A 200 lb person standing on a block sitting over soft topsoil will push it down. Repeat that enough times and your patio looks like a mountain range.
For a permanent patio where you want level, stable blocks that last years without constant maintenance, you need to remove the turf and organic topsoil, excavate to a firm subgrade, and build up proper base layers. That's the approach this guide covers in full. For step-by-step instructions on how to set patio blocks, see the linked guide. For step-by-step instructions on how to lay patio block, see this detailed guide. The extra work up front saves you a massive headache two years from now.
Pros and cons of laying on grass vs. full excavation
| Approach | Pros | Cons | Best for |
|---|---|---|---|
| Directly on turf | Fast setup, no excavation, reversible | Settles and shifts, poor drainage, not durable | Temporary use, single-season installations |
| Turf removed, blocks on firm soil | Quicker than full base, decent for light use | Topsoil still soft, will settle over time | Stepping stones, very low-traffic areas |
| Full excavation with compacted base | Stable, long-lasting, drains correctly | More labor and materials, takes 1–2 days | Any permanent patio, heavy-use areas |
Turf or topsoil: a quick decision guide
Before you pick up a spade, run through these five factors. Your answers will tell you how deep to excavate and how thick your base needs to be.
- Block size: Smaller pavers (under 12 in) sit more forgivingly than large 16x16 units, which amplify any unevenness in the base underneath.
- Soil type: Sand and loam drain and compact reasonably well. Clay holds water, expands when wet, and shrinks when dry, making it the most demanding soil for patio work.
- Drainage: If water pools in the area after rain, you have a drainage problem that will destroy any patio built without proper base drainage.
- Slope: A slope over 1% toward your house is a red flag. Patios need to drain away from structures at a minimum gradient of about 1:40 (roughly 1/4 inch per foot).
- Expected load: Foot traffic only means a 4-inch compacted base is typically sufficient. If you'll park a riding mower, have large planters, or put a hot tub nearby, plan for a thicker base.
Everything you need: materials and tools checklist
Getting all your materials on-site before you start saves multiple trips to the hardware store mid-project. Here's everything a typical patio block installation on grass or dirt requires.
Materials
- Patio blocks (calculate area plus 10% overage for cuts and breakage)
- Dense-graded crushed stone / crusher-run (3/4-inch DGA or ABC, meeting ASTM D2940) for the compacted base
- Coarse bedding sand (ASTM C33 or equivalent, 1 inch depth after compaction)
- Geotextile separation fabric (e.g., Mirafi 500X or 140N for clay and silt subgrades)
- Plastic or metal edge restraints with spikes
- Polymeric jointing sand (or regular coarse sand for informal installations)
- Landscape stakes and string line for layout
- Spray paint or chalk for marking cuts
Tools
- Spade and flat-ended shovel for excavation
- Wheelbarrow for removing spoil and moving base material
- Plate compactor (rental, typically $60–90/day) for compacting base layers
- Hand tamper for corners and edges the plate compactor can't reach
- Screed pipes (1-inch diameter) and straight 2x4 screed board for leveling bedding sand
- 4-foot spirit level and rubber mallet
- Angle grinder with diamond blade OR a wet-cut block splitter for cutting pavers
- Tape measure, pencil, and speed square
- Paver lifter clamps or suction-cup lifters for heavy 16x16 blocks
- Protective rubber pad for plate compactor (to avoid surface damage when compacting finished paving)
Personal protective equipment (PPE)
- Steel-toe boots (mandatory when handling 40 lb+ blocks)
- Heavy-duty work gloves
- Safety glasses or goggles (especially during cutting)
- Dust mask rated N95 or higher when cutting concrete blocks dry (always prefer wet cutting to control silica dust)
- Ear protection when running the plate compactor or angle grinder
Reading your site before you dig
A 20-minute site assessment before excavation will save you hours of problem-solving later. The three things that matter most are soil type, drainage behavior, and slope. You can look up the mapped soil type for your exact parcel using the USDA NRCS Web Soil Survey, which is free and tells you your soil's texture, drainage class, and hydrologic group. That said, a simple hand test is usually enough for most homeowners: grab a handful of damp soil and squeeze. If it holds a ribbon shape and feels slippery, you have clay. If it crumbles apart, you're likely dealing with loam or sandy loam. If it barely holds together, you're on sand.
For drainage, watch the area during or right after a heavy rain. Standing water that lasts more than an hour tells you the natural drainage is poor and you'll want to slope your base more aggressively, consider a gravel drainage channel at the perimeter, or both. Check slope by holding a long level on the ground and measuring the gap at one end over 10 feet. About 1/4 inch per foot of fall away from any buildings is the minimum you want to aim for, which is a 1:40 gradient. Finally, call 811 (the US national Dig Safe line) before excavating anything deeper than a few inches. Underground utilities are a serious safety hazard and it costs nothing to have them marked.
High water table is a less common but important problem. If your soil is consistently wet, if you see rust-colored mottling when you dig down 12 inches, or if the area sits in a low point of the yard, you may need to install a perforated drain pipe under the base before building up your layers. Skipping this on a site with a high water table will cause frost heaving in cold climates and perpetual settling everywhere else.
How deep to excavate and why it matters
The total excavation depth is simply the sum of your patio block thickness, your bedding layer, and your compacted base depth. Get this wrong by even an inch or two and your finished patio sits too high or too low relative to surrounding grade, and the base may not be thick enough to prevent settling.
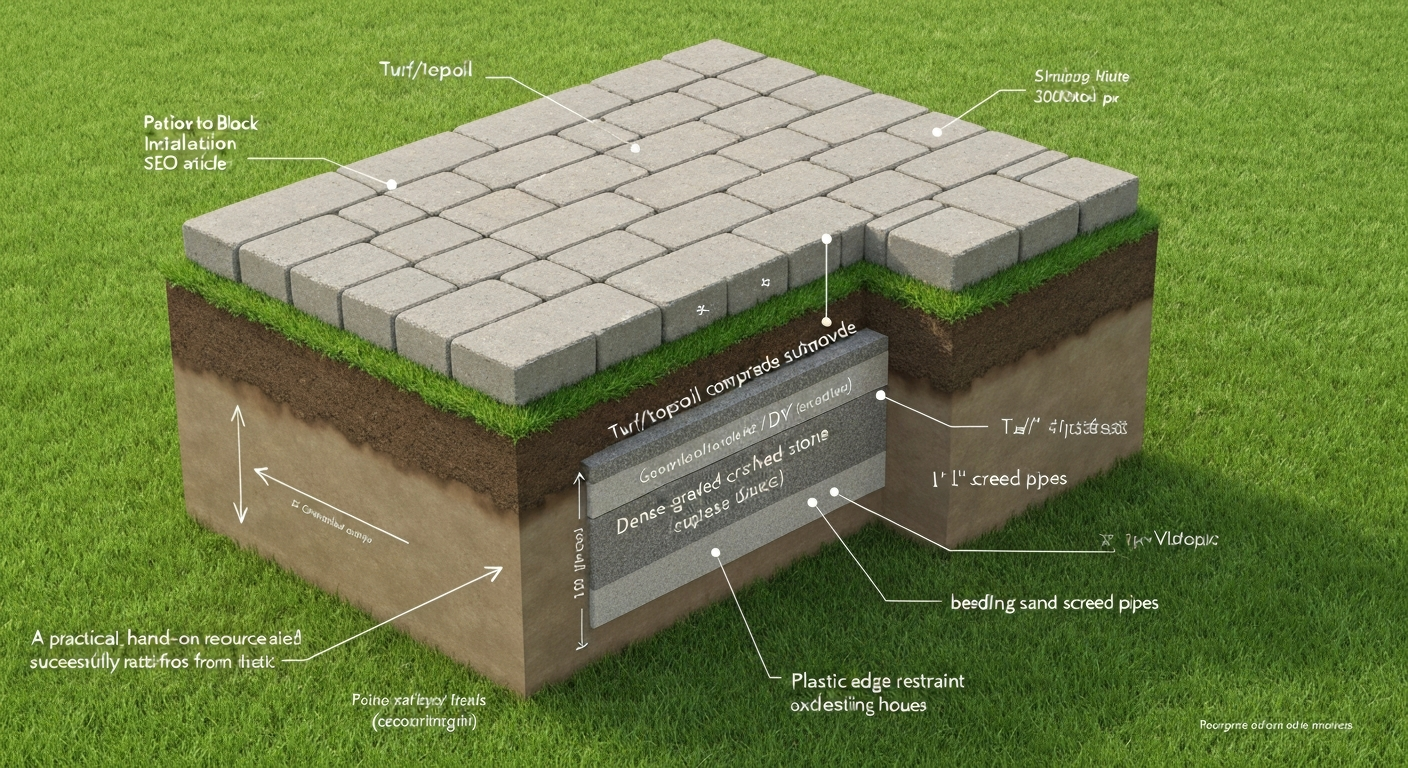
A standard 2-inch-thick patio block on a 1-inch bedding sand layer over a 4-inch compacted base means you excavate 7 inches total. Increase the base to 6 inches for clay soil or heavier blocks and your total depth becomes 9 inches. The bedding layer is always 1 inch (25 mm) after compaction, regardless of block size. The base depth is the variable that changes with soil conditions, block size, and expected load. Industry guidance from ICPI and CMHA is clear on this: pedestrian patios need a minimum 4-inch (100 mm) compacted aggregate base; that goes up to 6 inches (150 mm) for residential installations on softer soils or with heavier paving units. Unilock technical guidance provides typical total excavation depth tables and example base recommendations, standard pedestrian bases commonly use 4–8 in of compacted crushed stone with a 1 in bedding layer; driveways and heavy applications often require 10–18 in total excavation depending on subgrade and paver thickness Unilock technical guidance lists typical total excavation depths and base recommendations..
One mistake I see constantly: people use the bedding layer to correct a poorly graded base. The bedding is not a leveling tool. It should be uniform thickness everywhere. Any grading corrections need to happen in the base layer before you screed the sand. If you try to use thick sand in low spots to compensate for an uneven base, those thick spots will compress over time and create dips in your finished surface.
Building your base layer by layer
Think of the base as a sandwich. Each layer serves a specific purpose and must go down in the right order. Installing them out of order or skipping one because it seems unnecessary is how patios fail within a few seasons.
Layer 1: Compacted subgrade
After excavating to your target depth, the exposed soil (your subgrade) needs to be firm and uniform. Remove any remaining roots, soft spots, or debris. Run a plate compactor over the subgrade to consolidate it before adding anything on top. If you hit a soft pocket, dig it out and backfill with crushed stone, then compact again.
Layer 2: Geotextile separation fabric
On clay and silty soils, lay a non-woven geotextile fabric (Mirafi 500X or similar) directly on the compacted subgrade before adding any stone. This fabric does one important job: it stops the fine particles in clay or silt from migrating upward into your crushed stone base over time. Without it, clay pumps up through the aggregate under repeated loading, your base loses its structure, and the patio settles unevenly. Overlap fabric edges by at least 12 inches at any seams and fold it up the edges of the excavation. On loam or sandy soils with good drainage, geotextile is still good practice but less critical.
Layer 3: Compacted aggregate base (crushed stone)
Use a dense-graded crushed aggregate, commonly called crusher-run, DGA (dense-graded aggregate), or ABC (aggregate base course). This material contains a mix of particle sizes including fines that interlock when compacted, creating a very stable layer. Avoid clean gravel or pea gravel here. They don't compact into a rigid structure. Spread and compact the base in lifts no thicker than 4 inches (loose depth) at a time. If your total base depth is 6 inches, do two lifts, compact each one fully before adding the next. Trying to compact 6 inches of loose stone in one go means the bottom half never gets properly consolidated.
Layer 4: Bedding sand
Spread coarse concrete sand (ASTM C33) over the compacted base to a depth of exactly 1 inch. Use 1-inch diameter screed pipes laid parallel, set to your target grade, and drag a straight 2x4 across them to create a perfectly uniform surface. Pull the pipes out and fill the channels with sand by hand. The bedding layer is what allows you to make fine adjustments for individual block level and provides a small amount of flexibility in the finished surface. Do not walk on the screeded sand before laying blocks. Even a boot print creates an uneven spot that will show through in your finished surface.
Base thickness by block size and soil type
Here are the base specs I recommend based on industry standards and practical experience. These are the compacted aggregate base depths, not counting the 1-inch bedding layer or the block thickness. Add those to get your total excavation depth.
| Block type / size | Loam or sandy soil | Clay soil | Sloped site (>1%) | Notes |
|---|---|---|---|---|
| Small pavers (under 12 in) | 4 in (100 mm) | 5–6 in (125–150 mm) | Add 1 in, ensure drainage channel | Geotextile recommended on clay |
| Standard patio blocks (12x12) | 4 in (100 mm) | 6 in (150 mm) | Add 1 in, slope base away from structure | Most common residential installation |
| Large blocks (16x16, 2 in thick, ~40 lb) | 6 in (150 mm) | 6–8 in (150–200 mm) | 6–8 in minimum, confirm drainage | Consider 2-person lifts; use paver clamps |
| Heavy or thick slabs (>24x24 or >2.5 in) | 6–8 in (150–200 mm) | 8 in+ (200 mm+) | 8 in minimum, engineer if needed | Consult manufacturer tech data sheet |
For the common 16x16 concrete patio stone, a 6-inch compacted base on loam is the practical minimum for a pedestrian-only patio. For step-by-step instructions specific to these units, see how to install 16x16 patio blocks. On clay, go to 8 inches. These larger, heavier blocks (typically around 40 lb each per Oldcastle product data) transfer more concentrated load to the base, so the base needs more depth and rigidity to keep blocks from rocking or settling individually.
Compacting each layer correctly
Compaction is the step most DIYers underestimate, and it's the single biggest reason patios fail. The goal is to eliminate air voids in the base material so it behaves as a rigid, load-distributing platform. The industry target for residential pedestrian patios is 98% of Standard Proctor density (ASTM D698). You won't be running lab tests on your backyard, but you can tell if compaction is adequate by watching the plate compactor: when the machine stops making the surface drop visibly with each pass, you've reached adequate density for that lift.
Equipment choices
A plate compactor is the right tool for compacting crushed stone base layers on a patio project. Rent a forward-plate compactor (around $60–90 per day) for standard residential work. A hand tamper is fine for the subgrade in tight corners and along edges, but it cannot generate the force needed to properly compact a 4- or 6-inch base layer. Using only a hand tamper for the whole base is one of the most common DIY shortcuts, and it consistently leads to settling.
How to compact each layer
- Compact the subgrade first before adding any stone. Two overlapping passes with the plate compactor in perpendicular directions.
- Add your first lift of crusher-run, no more than 4 inches loose depth. Lightly dampen the material if it's very dry, as slight moisture helps the fines lock together.
- Make at least three to four overlapping passes over the entire area. Then make two more passes at 90 degrees to the first set.
- Check for surface movement. If the plate compactor is still visibly sinking the surface, keep making passes until it stops.
- Add your second lift if needed and repeat the process.
- Use the hand tamper along all edges, against walls, and in any corners the plate compactor can't reach. These spots are the most common failure points.
- After setting all blocks, do a final compaction pass over the finished paving surface using the plate compactor fitted with a protective rubber or foam pad. This seats the blocks into the bedding layer and locks them together. Never run a bare plate compactor over finished pavers, it will crack and scar the surface.
Compacting on clay soils
Clay is tricky because its compaction behavior changes dramatically with moisture content. Overly wet clay smears and pumps rather than compacting. Very dry clay is hard to consolidate. If you're working on clay, compact the subgrade when it's just damp enough to hold a shape when squeezed but not wet enough to stick heavily to your gloves. Lay your geotextile fabric directly on the compacted clay before adding any stone. This is non-negotiable on clay soils if you want the base to stay intact over time.
Handling large and heavy blocks safely
A 16x16x2-inch concrete patio block weighs around 40 lb. That's close to the NIOSH ideal maximum lift limit of 51 lb under perfect conditions, and the reality of reaching down, twisting, and placing a block precisely means you're almost always working in a compromised posture. For a full patio with dozens of these units, repetitive lifts add up fast. Use paver clamp lifters, which grip the edges of the block and give you an upright lifting position. Ask someone to help with placement. Order your pallets placed as close to the work area as possible to minimize carry distance. Wear steel-toe boots every time you're handling blocks.
Layout, cutting, and leveling your blocks
Start your layout from the most visible edge of the patio, usually the side facing the house or the primary viewing angle. Dry-lay a full row first before committing anything to the sand. This lets you see where cuts will fall and adjust your starting position to minimize small, awkward cuts at the edges. Use string lines pulled tight between stakes at your target finished height and slope to guide every course. For step-by-step instructions on how to put patio blocks down, see the detailed guide covering layout, leveling, and setting techniques.
For cutting, an angle grinder with a segmented diamond blade handles most cuts in concrete patio blocks. Always cut wet or with dust extraction running. Concrete cutting generates fine silica dust that causes serious lung damage with repeated exposure. A block splitter is faster for straight cuts on softer blocks but won't give you the precision needed for curves or angled cuts. After cutting, smooth any sharp edges with a masonry rubbing stone.
Level each block as you place it using a rubber mallet and a level. Tap down high corners and check in multiple directions. Neighboring blocks should transition with no lip greater than about 1/8 inch. Any variation larger than that is a tripping hazard and will catch water. If a block sits too low, lift it out, add a small amount of sand underneath, and reset it.
Edge restraints and jointing
Edge restraints are the clips that hold the whole system together. Without them, the outer blocks will gradually migrate outward under foot traffic, opening up the joints and causing the interior blocks to shift. Install plastic or metal edge restraints along every exposed edge immediately after laying the blocks and before sweeping in jointing sand. Spike them into the base at 12-inch intervals.
For jointing material, polymeric jointing sand is the right choice for most permanent installations. It's a sand-polymer mix that hardens when wet, resisting weed growth, ant colonization, and washout. Sweep it into the joints, compact the surface with the padded plate compactor to vibrate it deep into the gaps, sweep in another round, then mist the entire surface with water to activate the binder. Let it cure for 24 hours before heavy use. Standard coarse sand works for informal or temporary installs but will need refilling every season.
Common mistakes and how to fix them
- Skipping compaction on the subgrade: You'll see blocks sink in patches within months. Fix requires lifting affected blocks, re-excavating, compacting, and rebuilding. Prevention is far easier.
- Using topsoil or soft fill as part of the base: Organic material compresses and rots. Any organic content in the base leads to settling. Always use crushed stone.
- Bedding sand too thick in low spots: That extra sand compresses later and creates a dip. Fix the base grade instead of using sand to compensate.
- No slope away from structures: Water pools against the house foundation. If you're already laid, you can sometimes re-slope by lifting the patio and re-grading the base.
- No edge restraints: Blocks drift outward, joints open, and the patio gradually falls apart. Retrofit edge restraints by driving metal L-stakes alongside the outer course.
- Cutting blocks dry without dust protection: Serious health hazard. Always wet-cut or use vacuum dust extraction.
Time and cost to expect
A typical DIY patio of 150–200 square feet takes most homeowners a full weekend: one day for excavation, base preparation, and compaction; the second day for laying blocks, cutting, edging, and jointing. If you're working alone on clay soil with 16x16 blocks, budget a third day. Material costs for a basic 150 sq ft patio including patio blocks, crusher-run base, bedding sand, edge restraints, and polymeric sand typically run $600–$1,200 depending on block choice and local material prices. Add $60–$90 for plate compactor rental. Professional installation of the same area generally runs $1,500–$3,500 depending on your region, soil conditions, and whether the contractor handles disposal of excavated soil.
When to call a professional
Most homeowners can handle a straightforward patio installation on level or gently sloping ground with loam or sandy soil. There are situations where hiring a contractor is the smart call: if the area has significant slope toward your foundation, if you've confirmed a high water table or chronic drainage issues, if the soil is pure expansive clay throughout, or if you're laying very large or heavy slab units that require mechanical lifting equipment. Also consider professional help if your patio connects to an existing deck or structure where getting the height and drainage wrong could affect the building. A good contractor will also know your local code requirements, which in some municipalities require permits for paved surfaces above a certain size.
Keeping your patio in good shape
Once the patio is down and cured, maintenance is light. Sweep joints annually and top up polymeric sand if any has washed out. Check for any rocking or raised blocks each spring, especially after a winter with heavy freeze-thaw cycles. A rocking block can usually be fixed by lifting it, adding or removing a small amount of bedding sand, and resetting it. Pull weeds from joints early before their roots disturb the sand. If you used a porous or natural stone block, applying a penetrating sealer every two to three years will protect the surface from staining and freeze-thaw damage.
FAQ
When can I lay patio blocks directly on grass or turf without removing sod?
You should only leave turf in place for temporary, very light-use installations on flat, well-drained sites with coarse, stable soils (sandy loam) and small, thin pavers. For any permanent patio, heavy units (e.g., 16×16), sloped sites, clay/silty soils, or locations receiving furniture/vehicular loads, remove the turf and topsoil. Leaving turf allows root growth and soft pockets that lead to settlement, frost heave, and drainage problems.
How deep do I excavate before laying patio blocks? Exact depths by block size and soil type.
Excavation depth = thickness of paver + bedding (1 in / 25 mm) + compacted aggregate base (varies). Use these compacted base targets: - Small pedestrian pavers (≤3 in / 75 mm thick) on stable sandy loam: 4 in (100 mm) compacted base. - Standard residential patio pavers (≈2–3 in) on typical soils: 4–6 in (100–150 mm). - Heavy 16×16 units (≈2–2.5 in slab weighing ~35–45 lb): 6–8 in (150–200 mm) compacted base on good soils; 8–10 in (200–250 mm) on clay or poor subgrade. - Sloped or frost‑susceptible sites: increase base by 1–2 in (25–50 mm). - Vehicular loading or plan for heavy furniture: treat like driveway—6–8 in (150–200 mm) base (or 8–12 in (200–300 mm) for sustained vehicle traffic). Always add 1 in (25 mm) bedding sand on top of the compacted base and include the paver thickness in total excavation depth.
What type of base material should I use for a non‑permeable patio vs a permeable patio?
Non‑permeable (traditional sand‑set): use dense‑graded aggregate (crusher‑run, DGA, ABC, 3/4" minus) compacted to specified thickness, with 1 in (25 mm) screeded ASTM C33 sand bedding. Permeable PICP: use open‑graded aggregate reservoir layers (No. 2 coarse stone base + No. 57 choker where required) with a 3/4 in or No. 8 bedding layer (or manufacturer’s permeable bedding), and no fines that block infiltration. Do not mix fine, dense‑graded materials into an open‑graded permeable system.
How compact should the subgrade and base be? Any test targets?
ICPI/CMHA guidance: compact the subgrade and aggregate base to at least 98% of Standard Proctor (ASTM D698) for pedestrian/residential pavements; for vehicular/high‑load use aim for ≥98% Modified Proctor (ASTM D1557). In practice, compact the subgrade until firm and uniform (no visible rutting), then compact the base in 2–3 in lifts with a plate compactor to achieve a smooth, tight surface. Use a plate compactor with a protective pad when compacting final pavers.
How do I handle drainage and slope requirements?
Provide a minimum slope away from buildings of 1/8 in/ft (1%) for general patios; 1/4 in/ft (2%) is preferable near structures for positive runoff. Install edge drains or French drains if the site has poor surface drainage, high groundwater, or is in a low spot. For permeable pavements, maintain an overall grade that directs excess water to appropriate infiltration areas or storm system; avoid blocking natural drainage patterns.
What exact tools and materials will I need?
Materials: pavers (ordered with 5–10% overage), dense‑graded aggregate or open‑graded base materials, ASTM C33 bedding sand (for non‑permeable), geotextile fabric if subgrade is fine or unstable, edge restraint (plastic/metal/curb or poured concrete), jointing sand or polymeric jointing material, pea gravel or permeable joint material for PICP, landscape fabric adhesive or tack if required. Tools: shovel, wheelbarrow, 4–8 ft straightedge/screed board, plate compactor, hand tamper, long‑handled rake, masonry saw or wet saw with diamond blade, paver lifter/clamps, mallet, level, string line and stakes, measuring tape, protective gloves, eye protection, ear protection, steel‑toe boots, and mechanical aids or two‑person lifts for heavy units.