Laying a patio is a manageable DIY project for most homeowners, but it sits somewhere between "weekend warrior" and "genuinely hard work" depending on your site conditions and chosen materials. A basic concrete flag patio on flat, well-drained ground? A fit, motivated first-timer can pull that off in a weekend or two. A large natural stone patio on a sloped clay garden with drainage problems? That's a different beast entirely, and rushing it is exactly how you end up with a sunken, cracked surface two winters later.
How Hard Is It to Lay a Patio? DIY Difficulty Guide

Clara Farrell
14 Jun 2026
Quick verdict: DIY difficulty level
On a scale of 1 to 10, a straightforward patio on flat ground with concrete flags rates around a 4 to 5. It's physical, it takes patience, and the prep work is genuinely important, but there's nothing technically beyond a capable first-timer. Step up to large-format natural stone slabs, awkward shapes, or a sloped site and you're looking at a 7 or 8. The core skills aren't impossible to learn, but they demand more time, more care, and often a second pair of hands.
| Scenario | Difficulty | Typical time for 20m² |
|---|---|---|
| Concrete flags, flat ground, good drainage | 4/10 – Beginner friendly | 2 to 3 days |
| Porcelain or natural stone, flat ground | 6/10 – Moderate | 3 to 5 days |
| Any material, sloped or uneven ground | 7/10 – Challenging | 5 to 7 days |
| Large format stone, clay soil, complex shape | 8/10 – Hire or get help | 7+ days |
What actually determines how hard your patio project will be
Three things drive difficulty more than anything else: your site conditions, the size of the area, and the material you choose. Get all three on the easy end and you have a very doable project. Stack the hard versions together and you're in professional territory.
Site conditions
Flat, well-drained ground with stable soil is the best-case scenario. Clay soil is the most common headache in UK gardens because it moves with moisture, which means your base needs to be deeper and better compacted to compensate. Sandy soil drains well but can shift if not properly consolidated. A sloped garden adds the challenge of calculating falls, managing levels across the whole area, and sometimes dealing with significant dig-out depths at one end. Laying a patio next to the house brings its own rules around damp proof courses and drainage direction, which adds another layer of care to the planning.
Patio size
A small 10m² patio is genuinely manageable alone. Once you get above 20 to 25m², the volume of materials involved starts to matter. You're shifting tonnes of sub-base, sand, and slabs, and the physical effort compounds quickly. Larger areas also increase the chance of small leveling errors adding up across the run, so your margin for sloppiness shrinks.
Material choice
Hydraulically pressed concrete flags are the most forgiving material for a first-timer. They're consistent in thickness and size, relatively affordable, and can be laid either rigidly on a mortar bed or flexibly on a compacted sand bed. Natural stone paving and wet cast paving, on the other hand, must be laid rigidly on a full mortar bed with mortared joints. Natural stone slabs also vary in thickness, which means you need to constantly adjust your mortar bed depth to keep the surface level. Porcelain tiles look stunning but are unforgiving: they must be fully bedded, they crack if the base has any movement, and cutting them requires a quality wet saw. For beginners, concrete flags are the sensible starting point.
Tools, skills, and what to expect from the effort
You don't need a professional toolkit, but you do need the right kit. Trying to compact a sub-base with just a tamper plate borrowed from a neighbour, or cutting slabs with an angle grinder instead of a disc cutter, will make the job significantly harder and the results worse. Hiring equipment for a weekend is cheap relative to the cost of materials and your time.
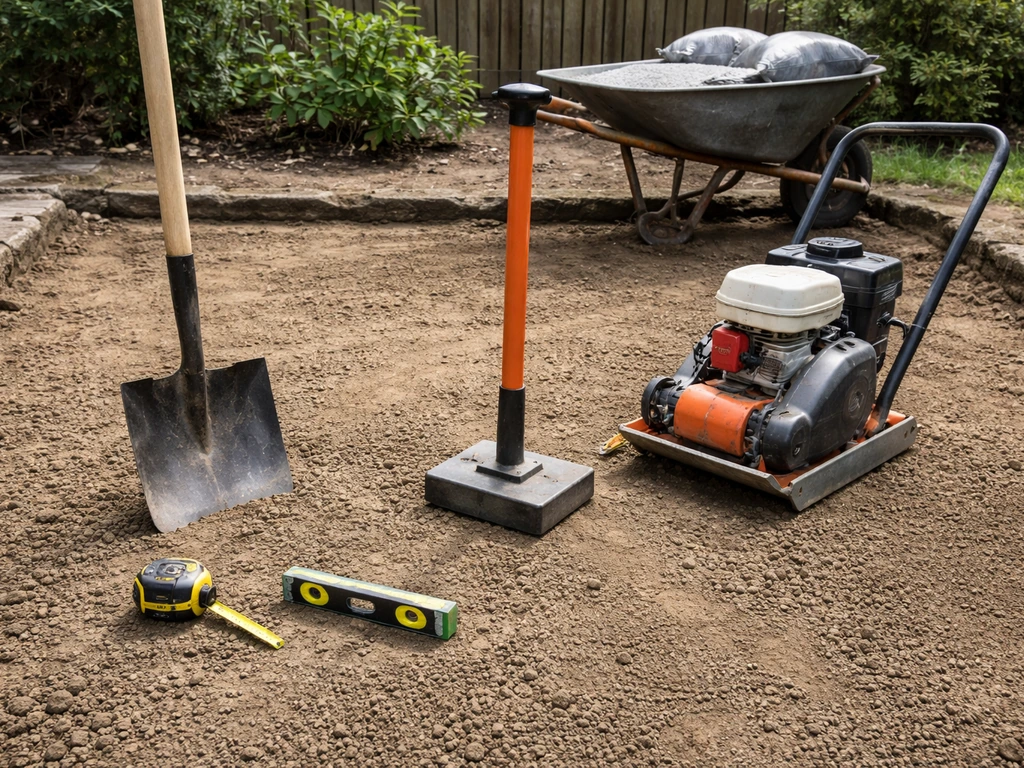
- Spade and wheelbarrow for excavation and material movement
- Plate compactor (hire one) for sub-base compaction
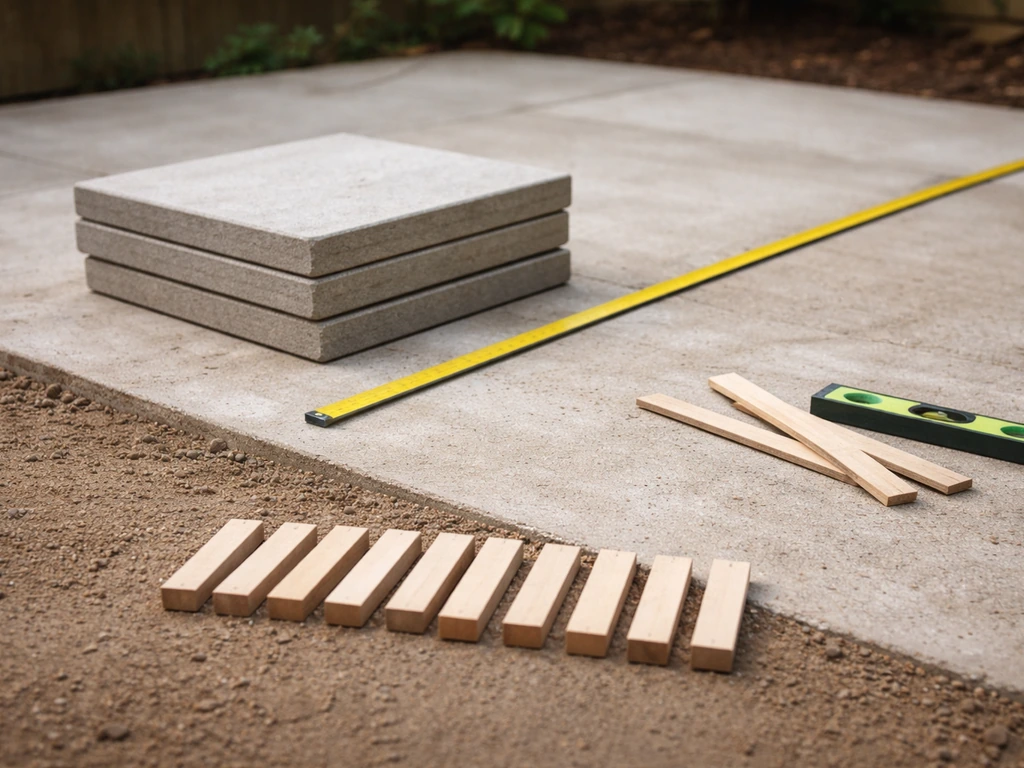
- Long spirit level and straight edge (at least 1.8m) for leveling
- Rubber mallet for bedding slabs
- Bolster chisel and club hammer, or a petrol disc cutter for cutting
- Pointing trowel and mixing paddle or cement mixer
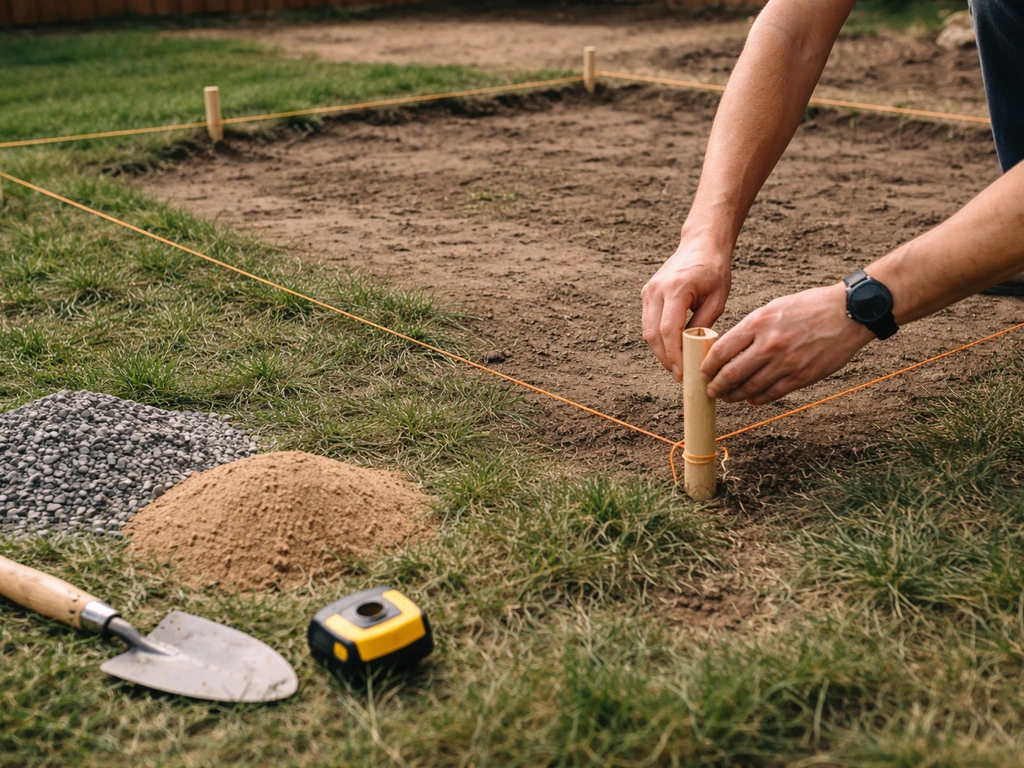
- String lines and pegs for setting out levels and alignment
- Tape measure, marker, and chalk line
In terms of skills, the biggest one is patience. Reading a spirit level, mixing mortar, and cutting a straight line are all learnable in an afternoon. What catches beginners out is rushing: moving on before the sub-base is properly compacted, laying slabs before mortar has gone off, or skipping the string lines because the area "looks straight enough." Physical fitness matters too. A 20m² patio involves shifting roughly 2 to 4 tonnes of sub-base, plus slabs, sand, and mortar. Plan your project around your body's recovery time, not just daylight hours.
Step-by-step overview of a patio install, from prep to finish
Here's the process in plain terms. Each step matters, and skipping or rushing any of them is where projects go wrong. The detailed how-to for each stage is worth reading separately, but this gives you the full picture at a glance. If you’re planning your week, you’ll also want to estimate how long to lay a patio for your specific size and ground conditions. If you want step-by-step guidance on how to lay a patio, this overview gives you the order to follow from base prep through to finishing.
- Plan and measure: Mark out the full area with pegs and string. Calculate your total depth, which is the finished surface level minus the thickness of your slab, minus the bedding layer, minus the sub-base depth. This tells you how much to excavate.
- Excavate and remove spoil: Dig out to the required depth. For a typical domestic patio this is usually around 150 to 200mm below finished level, though clay soils often need more. Excavated soil adds up fast, so arrange disposal before you start.
- Install edging or restraints: Lay your edging kerbs or restraints on a concrete haunch before doing anything else. This keeps your sub-base contained and gives you a reference height to work to.
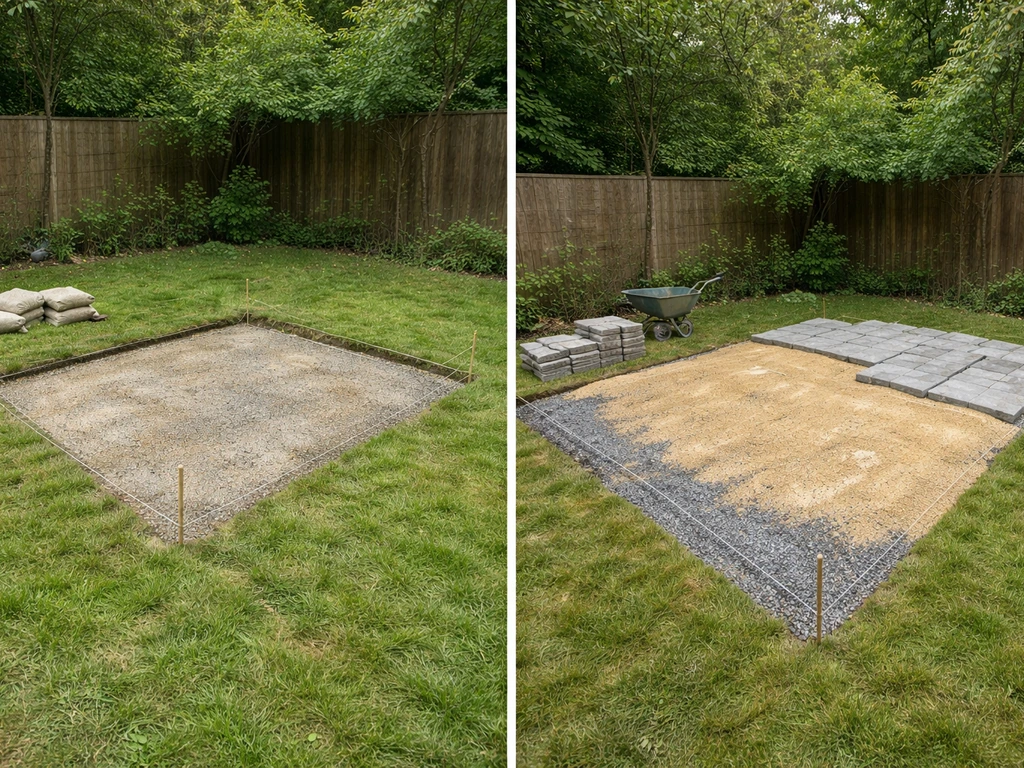
- Lay and compact the sub-base: Spread MOT Type 1 (also called Type 1 granular sub-base, or '40mm to dust') in layers of no more than 100mm and compact each layer thoroughly with a plate compactor. A good rule of thumb is that each compacted layer should be at least twice the thickness of the largest particle in the material. Don't skimp here; this layer is what stops your patio moving.
- Lay the bedding layer: For a rigid mortar bed, mix a semi-dry mortar (typically 4 or 5 parts sharp sand to 1 part cement) and screed it to a consistent depth, usually around 30 to 40mm. For flexible laying with concrete flags, use compacted sharp sand at a consistent depth.
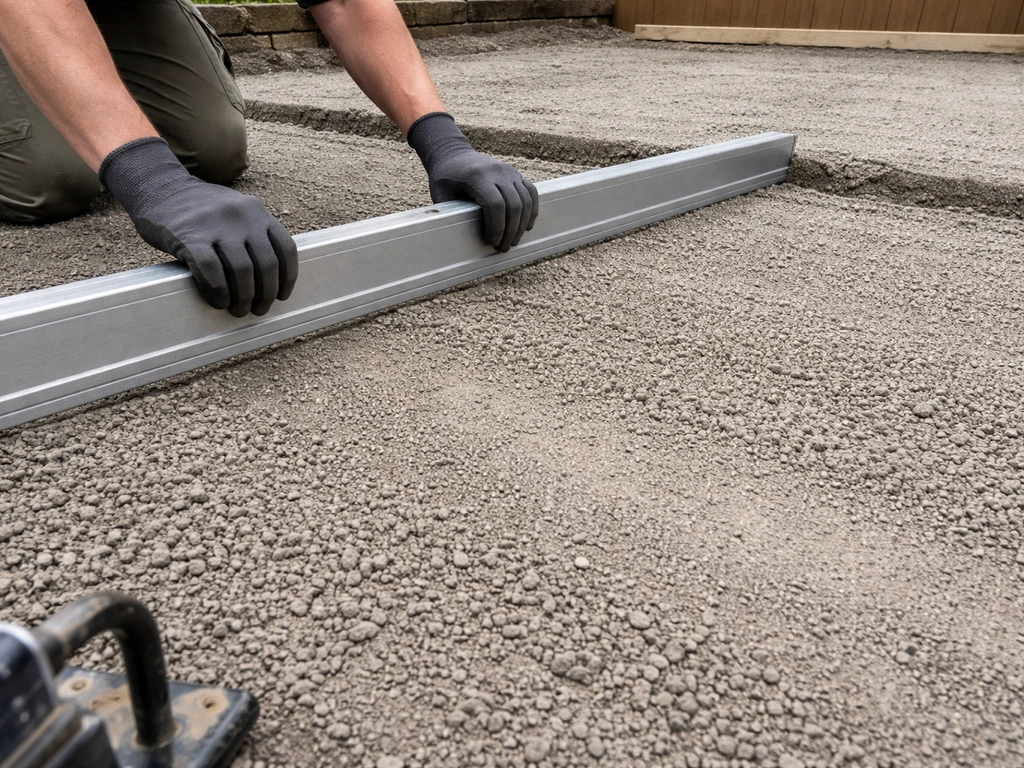
- Lay the slabs: Place each slab carefully, tap down with a rubber mallet, and check level constantly with your spirit level and string lines. Maintain a consistent joint gap (usually 10 to 15mm). Work from a fixed reference point outward and don't stand on freshly laid slabs.
- Cut to fit: Measure, mark, and cut border pieces to fit. For concrete flags a bolster and club hammer work on straight cuts. For natural stone or porcelain, use a disc cutter or wet saw.
- Allow to cure: Leave the mortar bed to cure fully before walking on the surface, usually 24 to 48 hours minimum depending on conditions.
- Fill joints: Point the joints with a suitable mortar mix or brush in kiln-dried jointing compound depending on your material and the look you want. Natural stone and wet cast paving need mortared joints. Concrete flags can use sand jointing for flexible installations.
- Check drainage: Once complete, check that water runs toward your intended drainage point. No patio should drain toward the house foundation.
The real challenge: base, drainage, and leveling
If there's one thing I'd tell every first-timer, it's this: the patio surface is the easy part. The base work is where the project succeeds or fails, and it's almost entirely invisible once you're done. Poor base preparation is the single biggest cause of patio failure, and it's also the part most beginners want to rush through to get to the satisfying bit of laying slabs.
Poor base preparation is the single biggest cause of patio failure, and it's also the part most beginners want to rush through to get to the satisfying bit of laying slabs, so if you're wondering how to handle joints and movement differently, see how to dry lay a patio as a related approach. For larger patios or areas with higher loads, you may also need rebar reinforcement and should lay it correctly within the base and mortar layers.
MOT Type 1 sub-base (the granular material sometimes called '40mm to dust') is the standard choice for domestic patios. It compacts down tightly, drains reasonably well, and provides a stable foundation. The key word is compacts. Loose, uncompacted sub-base is almost as bad as no sub-base at all. You need a plate compactor, and you need to use it in passes, in layers. If you're working on clay soil, consider going deeper with your sub-base than the minimum, because clay moves with water and seasons in a way that sandy or chalky ground doesn't.
Drainage is the other silent killer of patios. Every patio needs a fall of at least 1:60 (roughly 16mm for every metre of run) away from any buildings or structures. Getting this fall consistent across the whole area while also keeping the surface level in the cross direction is the skill that separates a good patio from one that puddles or floods. Set your string lines before you lay a single slab and check your levels constantly. It's slow, but it's the part that matters most.
Common mistakes that make patios fail or feel impossibly hard
Most patio problems trace back to a handful of recurring errors. Knowing them in advance saves you from learning them the hard way.
- Not excavating deep enough: Skimping on dig depth means the finished surface ends up too high, or the sub-base is too thin to support the load. Always calculate your full depth stack before you put a spade in the ground.
- Skipping or under-compacting the sub-base: Loose sub-base settles unevenly under weight and weather, causing slabs to dip, rock, or crack. Hire a plate compactor, even for a small job.
- Inconsistent mortar bed depth: A mortar bed that varies in thickness produces a surface that's impossible to keep level. Screed it carefully and take your time.
- Ignoring drainage falls: A flat patio looks neat but collects water. Even a gentle slope away from the house is essential. Build it into your levels from day one, not as an afterthought.
- Laying without string lines: Eyeballing alignment and level never works across a full patio. String lines are not optional; they're how you keep everything honest over a large area.
- Rushing curing time: Walking on or pointing freshly laid slabs before the mortar bed has set properly causes movement. Wait the full cure time, even if it's frustrating.
- Leaving gaps without joints: All paving units must have a joint between them. Butt-jointed slabs with no gap trap water, allow movement to concentrate, and are much harder to relay if one slab needs replacing.
- Wrong material choice for the site: Porcelain on an unstable base, or natural stone on high-traffic ground without proper mortar bedding, will fail quickly regardless of how carefully you lay it.
Should you DIY or hire a pro? A practical decision checklist
Most patios can be DIYed with the right preparation and realistic expectations. But some situations genuinely call for professional help, and knowing which is which saves you money, time, and a lot of frustration.
Ask yourself these questions honestly. If most of your answers fall in the right column, DIY is realistic. If several fall in the left column, getting at least a partial professional involvement (especially for groundworks and levels) is a smart investment.
| Consider hiring help if... | DIY is realistic if... |
|---|---|
| Your garden slopes significantly across the patio area | The ground is reasonably flat and level |
| You have heavy clay soil with drainage problems | You have sandy, chalky, or well-drained soil |
| You want large-format natural stone or porcelain tiles | You're happy with concrete flags or small block paving |
| The patio is over 30m² or an awkward shape | The area is under 20m² and roughly rectangular |
| The patio joins the house and DPC complications exist | The patio is freestanding away from the building |
| You have no experience with mixing mortar or reading levels | You're comfortable with basic DIY and can follow a process |
| You need it finished quickly with no margin for error | You have 2 to 3 weekends to work at a steady pace |
One middle-ground option that works well: hire a groundworker to do the excavation and sub-base, then lay the slabs yourself. The prep work is the physically demanding, skill-critical part. Having it done right gives you a solid foundation to work from and makes the laying stage far more manageable and enjoyable.
Your next steps today
The best thing you can do right now is go outside and assess your specific site. Look at how the ground drains after rain, check if there's an obvious slope, and probe the soil to understand what you're working with. That assessment tells you more about your project difficulty than any general guide can. From there, measure the area, calculate your depth stack, and get quotes for sub-base material and slab delivery before you commit to a start date.
Once you’ve measured the area and calculated your depth stack, the next step is to work out exactly what materials you need to lay a patio what materials do i need to lay a patio. Once you know exactly what you're dealing with, the right tools to have ready, and which materials suit your site, the actual laying process tends to feel much more controlled than the idea of it. It's hard work, but it's very much achievable.
FAQ
When should I hire someone rather than DIY the whole patio?
If you’re not confident setting consistent falls, the easiest safeguard is to hire help for the groundworks and levels. A common middle option is having a groundworker excavate and build the sub-base to your fall, then you handle slab laying and jointing. That reduces the biggest failure risk (drainage inconsistency) without removing all DIY control.
How do I know the sub-base is compacted enough?
Many patios fail because the base wasn’t compacted properly, even when the slabs look fine at first. Plan on compacting in layers with a plate compactor, and avoid adding sand or bedding over loose material. A quick check is to do a firm foot press and see if it deforms easily, if it does, it needs more compaction before you continue.
What’s different about laying a patio next to the house?
For near-house patios, you should treat drainage direction as non-negotiable, and avoid creating a “catchment” that funnels water toward the building. In practice this means confirming where runoff will go, setting the fall away from the house, and not blocking existing drainage routes. If you have a damp proof course to respect, keep bedding layers and levels aligned with that constraint before you start.
How can I ensure I’m getting the fall right across the whole patio?
The fall matters more than the exact shape. Use string lines and level checks at multiple points, in both the length direction (toward the drainage point) and across the width (so the whole area is even). Skipping cross-checks often creates localized puddles even when one edge seems “right.”
How long should I wait between base prep, bedding, and laying slabs?
If you’re tempted to start laying slabs immediately, the risk is trapping movement under a surface that settles unevenly. Let mortar bedded areas cure to the point recommended for your product before heavy foot traffic, and avoid disturbing slabs once tapped into place. For sand-bedded flag patios, focus on achieving a stable, compacted surface first rather than trying to “fix” an uneven base later.
Can I mix laying methods or bed types for different paving materials?
Before buying, check whether your patio needs rigid mortar beds and fully mortared joints (typical for natural stone and wet cast), or a more forgiving approach (commonly concrete flags on a sand bed). If you mix methods, you can end up with a base that moves slightly while the top is laid rigidly, which increases cracking and joint failure.
What usually takes longer than I expect during a DIY patio?
Budget time for cutting and for “fitting” around edges. Straight cuts are only half the work, you also need to account for the boundary gap, thickness of edging, and any steps or obstructions. On large-format slabs especially, many first-timers underestimate the time for dry fitting and re-leveling after a cut.
How much physical effort should I plan for a 20m² patio?
For heavy, large areas, comfort becomes a project variable. A practical tactic is to stage materials and work in zones, so you’re not repeatedly hauling tonnes across the whole site. If you’ll be shifting 20m² worth of sub-base, plan breaks for recovery, because fatigue is a major driver of level mistakes and rushed jointing.
How do I prevent patio joints from cracking or failing?
If you want to avoid joint issues caused by movement, your joint strategy needs to match the base. For flexible approaches, dry laying can help reduce some rigid-bond problems, but you still need the same drainage, compacted base, and correct edging restraint. Don’t rely on grout or mortar to “hold” a weak base.
How do I tell from my site assessment whether DIY will be realistic?
The easiest way to decide is to test drainage after rain in the exact location where the patio will be. If water lingers, you likely have a sub-base and fall problem to solve, not just a paving problem. For clay, the base often needs to be deeper and better layered, and you may want more professional input on excavation depth and levels.