
For most domestic patios, you're looking at 1 to 3 days for a dry-lay sand-set job, 2 to 4 days for mortar-bedded slabs, and anywhere from 3 days to a week or more for a full concrete slab, once you factor in curing time. A typical 20–30 m² project with one or two people working at a steady pace will fall somewhere in that range, but your actual schedule depends heavily on your method, soil conditions, the size of your crew, and whether the weather cooperates. The phases below will help you map out exactly how long each part of the job will take and where you can pick up time without cutting corners. For a UK-focused breakdown on timings and common delays, see our guide on how long to lay a patio in the UK.
How long to lay a patio: phase-by-phase timings & tips in UK

Clara Farrell
15 Jul 2026
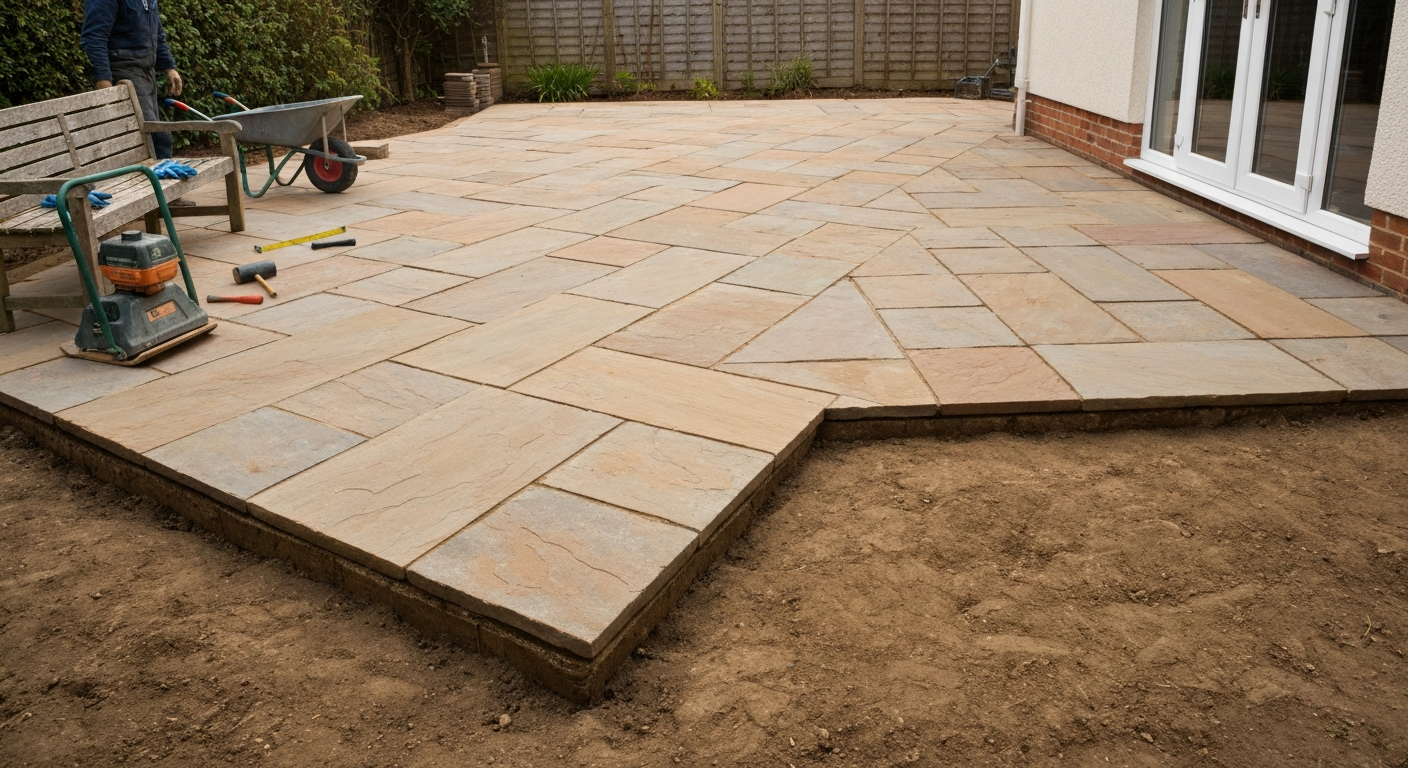
Typical total times at a glance
These figures assume a two-person DIY crew working a standard 25 m² patio on reasonably flat ground with decent soil access. Professional crews with plant will work faster, especially on excavation. Times include all phases from breaking ground to final tidy, but not concrete's 28-day full-strength window.
| Method | Typical total (DIY) | Ready for light foot traffic | Full use / final strength |
|---|---|---|---|
| Dry-lay / sand-set (loose) | 1–2 days | Same day or next morning | Immediately after compaction |
| Mortar-bedded slabs | 2–4 days | 24–48 hours after last slab | 5–7 days (mortar cure) |
| Block / brick paver (sand-set) | 2–3 days | Same day after compaction | Immediately after jointing sand sets |
| Concrete slab | 3–5 days active work + 28 days curing | 24–72 hours (light only) | 28 days for full load-bearing strength |
Which method should you actually pick?
Choosing a method isn't just about time. It's about matching what the job actually demands with your skill level, budget, and how long you want the finished patio to last. Here's an honest breakdown.
| Method | Best for | Skill level | Relative cost | Durability |
|---|---|---|---|---|
| Dry-lay / sand-set | First-timers, budget jobs, adjustable surfaces | Beginner | Low | Good if sub-base is solid |
| Mortar-bedded slabs | Natural stone, large format slabs, permanent finish | Intermediate | Medium | Excellent with good prep |
| Block / brick paver | Driveways edging into patios, flexible surfaces | Beginner–Intermediate | Medium | Very good |
| Concrete slab | Structural base, garage surrounds, heavy-use areas | Advanced / trade recommended | Medium–High | Excellent (28-day cure) |
If this is your first project, dry-lay or block paving on a compacted Type 1 sub-base is the most forgiving starting point. Mortar work is very achievable for a confident DIYer, but it punishes rushed prep harder than sand-set methods do. Concrete slabs poured in-situ are genuinely best left to someone with concrete experience, especially once you factor in formwork, rebar placement, and the narrow window you have to finish and cure the pour correctly. If you want to know how hard is it to lay a patio, see our detailed guide comparing difficulty by method and listing step-by-step tasks for each skill level. If your patio sits next to the house, drainage and DPC considerations add complexity regardless of method.
Tools and materials checklist
General items needed for every method
- Spade and/or mattock for excavation
- Wheelbarrow (ideally two for moving spoil)
- String lines and pegs for setting out levels
- Spirit level (1.8 m or longer) and line level
- Tape measure
- Rubber mallet
- Plate compactor (hire one — do not skip this)
- MOT Type 1 / crusher-run sub-base material (~100 mm compacted depth, order loose volume × 1.3 to allow for compaction)
- Geotextile membrane (weed and fines barrier between soil and Type 1)
- Angle grinder or slab splitter for cuts
- Safety PPE: gloves, goggles, knee pads, steel-capped boots
- Stiff brush for jointing and clean-up
Dry-lay / sand-set specific
- Sharp (coarse) grit sand for screed bed, ~40 mm depth
- Screed rails or timber screeding guides
- Long straight-edge for screeding
- Polymeric jointing sand (follow manufacturer's temperature and rain-free window requirements)
- Edging restraints to lock perimeter in place
Mortar-bedded slab specific
- Cement and sharp sand for M12 bedding mortar (approx. 1: 3 cement:sharp sand, stiff consistency)
- M6 pointing mortar (approx. 1: 4 cement:sand) for joints
- Mortar mixing paddle or cement mixer
- Gauging trowel and pointing iron or Rub brick
- Bucket of water and sponge for surface cleaning
- Plastic sheeting or hessian for weather protection during cure
Concrete slab specific
- Formwork timber (25 mm boards) to contain the pour
- Rebar (A393 or A252 mesh common for domestic slabs) — cut and tie before pour
- Bar chairs or spacers to hold rebar at correct cover (typically 40–50 mm from bottom)
- Ready-mix concrete (specify C25/30 for most domestic slabs, confirm with your supplier) or volumetric mixer
- Tamping beam or vibrating screed for levelling
- Bull float or steel float for surface finishing
- Curing compound or polythene sheeting for controlled curing
Site factors that will change your schedule
Before you commit to a start date, walk the site and run through these variables. Each one can add half a day to two days of work if you're not prepared for it.
Size of the patio
Hand excavation is slow, realistically a few cubic metres per person per day if you're digging by hand. For a 30 m² patio at 170 mm excavation depth, that's roughly 5 m³ of spoil. A hired mini-excavator (1–5 tonne) can shift 15–30 m³ per day, meaning that same job takes under an hour with plant versus most of a day by hand. If access allows, hire the machine.
Soil type and ground conditions
Clay soil is the most common schedule-killer on UK residential projects. It's heavy, sticky, and compacts poorly, if you're digging into clay, your sub-base prep takes longer because the ground needs to be as stable as possible before you even think about placing Type 1. Sandy or gravelly soils are much faster to work. If you hit tree roots, rubble from a previous build, or made ground, budget for extra time.
Slope and drainage
A sloped site needs more careful setting-out to get your fall right (a minimum 1:60 fall away from any building is standard). You may need to cut and fill, which adds excavation and compaction time. On steep slopes, retaining edges or a step detail adds another half day minimum. Get your string lines set before you start digging, changing levels mid-dig is the kind of thing that turns a one-day job into three.
Access for materials and spoil removal
If you can't get a bulk bag or vehicle close to the site, you're barrowing everything from the front of the house. That doubles your material-handling time. Plan your delivery drops carefully and order Type 1 as close to the dig location as possible.
Weather
Cold weather is the biggest time thief for mortar and concrete work. Masonry and mortar work should not normally proceed when air temperature is below 3 °C, and fresh mortar needs protection from frost. Concrete should be above roughly 5 °C at delivery, and curing times extend significantly in cool conditions. Polymeric jointing sands typically require above 0 °C and a dry window after application, always check the product datasheet. For sand-set dry-lay work, weather matters less, but laying in wet conditions makes screeding messy and imprecise. In the UK, a project started in November carries real risk of delay; spring and summer give you the most predictable schedule.
Phase-by-phase timing breakdown
Every patio job goes through the same core phases. The timings below are for a two-person DIY team on a typical 25 m² residential patio. Scale up proportionally for larger areas.
| Phase | What happens | Typical duration (25 m²) | Notes |
|---|---|---|---|
| Setting out and excavation | Mark area, dig to required depth (typically 170 mm for slab + sub-base + bedding) | Half day to full day | Longer with clay, tree roots, or hand-dig only |
| Sub-base placement and compaction | Lay Type 1 in 75–100 mm loose lifts, compact each lift with plate compactor | 2–4 hours | Never compact one thick layer — compact in lifts |
| Edging / perimeter restraints | Set edge restraints, kerbs, or border courses to defined levels | 1–3 hours | Needed for sand-set methods to prevent spread |
| Bedding / screed layer | Sand screed (dry-lay) or mortar bed (mortar method), levelled to falls | 2–4 hours | Mortar beds must be used while workable — do not batch too far ahead |
| Laying slabs / blocks / paving | Place and seat units to correct level and joint spacing | 4–8 hours | Speed varies heavily by slab size and cuts required |
| Jointing / pointing | Fill joints with polymeric sand or pointing mortar | 1–3 hours | Mortar pointing adds cure time before use |
| Curing / sealing (where applicable) | Protect fresh mortar/concrete, apply sealant once cured | 10 min active + waiting time | Sealant application typically 7–28 days after laying |
| Site tidy and spoil removal | Remove surplus material, clean tools, dispose of excavated spoil | 1–2 hours | Spoil skip or builder's bags should be arranged before you start |
Dry-lay (sand-set) patio: schedule and timings
Dry-laying, placing paving on a compacted sand screed rather than mortar, is the most DIY-friendly method and the one I'd recommend to anyone tackling their first patio. For a concise checklist of essential equipment and tools, see what tools do I need to lay a patio. For a quick checklist of tools and materials, from Type 1 sub-base and paving slabs to jointing sand, edging, and basic tools, see what materials do I need to lay a patio. For step-by-step instructions and practical tips, see our guide on how to dry lay a patio. It's forgiving, adjustable, and on a 25 m² job a competent beginner can realistically be walking on their new patio by the end of day two. For step-by-step guidance on preparing the base, setting out, cutting and finishing, see our how lay a patio guide.
Step-by-step schedule
- Mark out and excavate to 170 mm below finished level (100 mm Type 1 + 40 mm sand bed + slab thickness). Half to full day depending on access and soil.
- Lay geotextile membrane over excavated ground, then place and compact Type 1 sub-base in 75–100 mm loose lifts. This is critical — every lift gets compacted before the next goes on. Budget 2–4 hours.
- Set edge restraints at perimeter to your finished level with the correct fall (minimum 1:60 away from structures). Allow 1–2 hours.
- Set screed rails at your required finished height minus slab thickness. Spread and screed sharp grit sand to a smooth, even 40 mm bed. Do not compact the sand after screeding. Allow 1–3 hours.
- Lay slabs or blocks onto the screeded sand without disturbing the surface. Tap down with a rubber mallet and check level frequently. A two-person team can manage roughly 3–6 m² per hour for standard sized paving, slower for large format or irregular shapes.
- Once all units are laid and you're happy with levels, spread polymeric jointing sand across the surface, brush into joints, then activate with water per manufacturer instructions. Apply only above 0 °C with a dry window after activation. Allow 1–2 hours for spreading and activation.
- Keep traffic off until the jointing sand has set — typically a few hours to 24 hours depending on the product.
Time per m² and labour estimates
For a two-person DIY team, expect roughly 30–45 minutes per m² across all phases combined on a straightforward flat site. That puts a 25 m² patio at roughly 12–18 hours of active working time, spread comfortably over two days. Machine laying gangs using mechanised equipment can achieve 300–600 m² per 8-hour day on open sites, but for a garden patio, hand-laying is standard and those figures are not relevant. PavingExpert commentary gives an example where two manual gangs might together manage around 250 m² in a day in favourable conditions, while mechanical/plant gangs can achieve much larger single‑day outputs, use these as illustrative upper‑bound trade figures only blank" rel="noopener noreferrer">PavingExpert notes machine‑laying gangs can achieve several hundred square metres per day.. What does matter is that your productivity slows down near the edges and corners where cuts are needed, budget extra time if your design has lots of cut lines.
DIY suitability and common pitfalls
- Skipping the plate compactor on the sub-base is the single biggest mistake — the paving will sink and shift within a season if the Type 1 isn't properly compacted
- Using building sand instead of sharp grit sand for the screed bed — building sand holds moisture and can slump under load
- Not ordering enough Type 1 — remember that loose material compacts by roughly 30%, so order your volume × 1.3
- Disturbing the screeded sand while laying — once a screed rail is pulled, move along the slab line, not back across it
- Applying polymeric jointing sand in damp conditions or without checking the forecast — partial setting from unexpected rain can lock in a messy surface
Mortar-bedded patio: schedule and timings
Mortar bedding produces a more permanent, solid result and is the standard method for natural stone, large porcelain tiles, and any paving where you want genuine rigidity. It takes longer than dry-lay and is less forgiving if you rush the sub-base stage, but a well-laid mortar-bed patio will outlast a sand-set one by years if the groundwork is right.
Step-by-step schedule
- Mark out and excavate to depth (same 170 mm baseline: 100 mm Type 1 + 40 mm mortar bed + slab thickness). Allow half to full day.
- Lay geotextile membrane, then place and compact Type 1 sub-base in 75–100 mm lifts. Compact each lift. Allow 2–4 hours. The sub-base must be solid before any mortar goes on — this is more critical here than in dry-lay because mortar is rigid and will crack if the base moves.
- Mix bedding mortar to M12 spec: approximately 1 part cement to 3 parts sharp sand, stiff consistency. Batch only what you can lay in 30–45 minutes.
- Lay mortar bed at 40 mm depth, roughly 1 m² at a time, then place slabs and tap to level with a rubber mallet. Work in manageable sections. A two-person team covering 25 m² this way takes most of a full working day for the laying phase alone.
- Leave joints of 6–10 mm between slabs. Point joints with M6 mortar (1: 4 cement:sand) once the bedding mortar has set sufficiently — typically 24 hours, though in cool weather you may wait longer.
- Clean slab surfaces immediately after pointing with a damp sponge. Mortar staining on natural stone can be very hard to remove once fully cured.
- Protect fresh mortar from rain and frost with polythene sheeting for at least 24 hours, longer in cold weather. Allow 24–48 hours minimum before light foot traffic, 5–7 days before normal use.
Time per m² and labour estimates
Expect 45–75 minutes per m² for all phases on a mortar-bedded project with a two-person DIY team. That puts a 25 m² patio at around 18–30 hours of active work, typically spread over two to three days, with pointing happening on day two and final clean-up on day three. Factor in curing time before you schedule any outdoor use, pointing mortar needs at least five days before anything heavy rests on it.
DIY suitability and common pitfalls
Mortar-bed laying is absolutely within reach for a careful, patient DIYer. Where people go wrong is usually one of the following:
- Batching too much mortar at once — mortar starts to go off within 30–45 minutes. If it stiffens in the bucket, do not add water to re-temper it. Bin it and mix fresh.
- Laying in cold or frosty conditions without protection — mortar work should stop when air temperature drops below 3 °C. In the UK this matters from October through March in most regions.
- Rushing to point joints before the bedding mortar has set — this disturbs the slabs and leads to movement before the mortar has any strength
- Not cleaning slab faces immediately — mortar smears are easy to sponge off when wet and very difficult to remove once they cure, especially on textured or porous stone
- Poor sub-base prep — cracked or sunken mortar-bedded slabs almost always trace back to inadequate compaction beneath, not the mortar itself
Concrete slab patio: schedule, pour, and curing
A poured-in-place concrete slab is the most structurally capable option, and the most demanding to execute correctly. I'd be honest with you: if you've never worked with concrete before, this is the method where I'd most seriously recommend getting at least one experienced person involved. The pour window is tight, the finishing has to happen fast, and the curing phase needs active management. That said, it's not impossible as a DIY project, you just need to go in knowing what you're dealing with.
Step-by-step schedule including formwork and reinforcement
- Mark out, excavate, and compact sub-base as above. For a concrete slab, your sub-base matters even more — a solid, well-compacted Type 1 base is what the slab relies on for its full service life.
- Set formwork (typically 25 mm timber boards) around the perimeter to contain the pour. Set to finished level with correct fall. Stake firmly and check for level. Allow half a day for a typical 25 m² pour.
- Place rebar or mesh reinforcement. A393 or A252 steel mesh is common for domestic slabs. Support mesh on bar chairs so it sits roughly mid-depth in the slab (typically 40–50 mm cover from the bottom face). Tie laps and edges. Note: NHBC guidance suggests unreinforced slabs should generally not exceed 16 m² in a single pour, while reinforced slabs can be cast up to around 60 m² in one operation — so for anything over 16 m², reinforcement is strongly advisable.
- Order ready-mix concrete (C25/30 for most domestic applications) or arrange a volumetric mixer. Do not try to hand-mix a full slab from bags — the volume and timing make it impractical.
- Pour and tamp/screed to formwork level. Use a tamping beam across the formwork edges to level the surface. Have all hands on deck for this phase — once the truck starts pouring, you are committed.
- Float the surface to a smooth or brushed finish while the concrete is still workable. Timing here is critical — too soon and you push bleed water back in, too late and the surface is unworkable.
- Protect from rain and direct sun immediately after placing. In warm conditions, cover with polythene sheeting or apply a curing compound to retain moisture.
- Light foot traffic is generally safe after 24–72 hours in warm conditions (above 10 °C ambient). In cooler UK weather, 48–72 hours minimum is more realistic. Normal use takes 3–7 days. Full design strength comes at 28 days — do not apply vehicle loads or heavy point loads before then.
Curing times you need to know
| Stage | Warm conditions (>10 °C) | Cool conditions (5–10 °C) | Notes |
|---|---|---|---|
| Light foot traffic | 24–48 hours | 48–72 hours | Step carefully — surface can still scuff |
| Remove formwork | 24–48 hours | 48–72 hours | Only when concrete feels fully set |
| Normal pedestrian use | 3–7 days | 7–14 days | No heavy point loads |
| Full design strength | 28 days | 28+ days (extended in cold) | Vehicle loading, heavy furniture: wait for 28 days |
Rebar guidance in brief
For a standard domestic patio slab (not a garage floor or retaining structure), A252 or A393 steel mesh is the practical choice. Cut to size with an angle grinder, overlap laps by at least 300 mm, and always use bar chairs or purpose-made spacers to keep the mesh off the ground, mesh lying on the sub-base provides almost no structural benefit because the reinforcement needs to be within the concrete section, not under it. For step-by-step guidance on positioning, tying, and supporting reinforcement within your slab, see how to lay rebar for patio. For anything structural or loadbearing beyond foot traffic and garden furniture, get the specification from a structural engineer.
Labour estimates and DIY suitability
Active working time for a 25 m² concrete slab is typically 2–3 days: one day for formwork, sub-base and rebar, one day for the pour and finishing, and then the waiting begins. But the 28-day curing period means you can't really use the space for a month. UK practice guidance summarises that light foot traffic is often possible after 24–72 hours, normal light use after 3–7 days, and full design strength (commonly 28 days) for vehicle loading, Concrete Early‑Age Strength Gain, Concretemetric (guide) Concrete Early‑Age Strength Gain — Concretemetric (guide). Plan your project around that. If you're laying a slab as a base for a structure, the concrete pour is day one of a much longer build. For a standalone patio surface, consider whether mortar-bedded paving over a solid Type 1 base gives you what you need at lower complexity.
Special situations that change your timeline
Laying next to a house
When your patio sits against the house wall, you must finish at least 150 mm below the damp-proof course (DPC). This adds a constraint to your level-setting that can affect how much excavation you need and where your finished surface falls. Getting this wrong isn't just a timing problem, it's a potential damp issue in the building. Allow extra time at the setting-out stage to locate your DPC and work backwards to your finished patio level before you break any ground. For step-by-step guidance on setting levels, managing DPC clearances, and detailing drainage when laying a patio next to a house, see how to lay a patio next to a house.
Sloped ground
A significant slope means more complex cut-and-fill, which adds time to excavation and sub-base work. On a steep slope, you may also need step details or a retaining edge, each of which is a separate sub-task. Budget at least half an extra day for a meaningfully sloped site (more than a 1:20 natural gradient) compared to a flat one.
Clay soil
Clay doesn't compact cleanly under a plate compactor the way granular soil does, and it can heave with frost if not properly drained. On a clay site, it's worth increasing your sub-base depth slightly, some practitioners go to 150 mm compacted depth on clay, and being particularly diligent about compacting in lifts. The extra material and compaction passes add time, typically half a day on a standard domestic patio.
Laying over an existing surface
Laying over existing concrete or paving is tempting for speed, but it only works if the existing surface is level, stable, and not prone to movement. If the old surface is cracked, uneven, or sitting on a poor base, whatever you lay on top will inherit those problems. The honest time comparison: breaking out and removing an old slab (add a skip, a day of breaking, and the cost of disposal) versus the risk of relaying over a failing surface. In most cases, starting clean is the right call.
Tips to speed the job without losing quality
- Hire a plate compactor — it saves hours compared to hand-tamping and produces far better results
- Hire a mini-excavator if your access allows — it can cut your excavation time from a full day to under two hours
- Set all string lines and levels before touching a spade — level errors mid-dig cost far more time than careful setting-out upfront
- Order materials to be delivered as close to the work area as possible to minimise barrowing distance
- Work in manageable bays (roughly 3 m² at a time for mortar work) to stay ahead of open-time limits on your bedding material
- For dry-lay projects, have one person screeding ahead while the other is laying — this rhythm keeps the work moving without the screeded sand drying or being disturbed
- Check the weather forecast for your full project window before you start — a surprise frost or heavy rain mid-job can add days to your schedule
FAQ
How long does it take to lay a patio from start to finish?
Typical total time depends on method and size. Rough examples for an average 20 m² patio (good access, typical soils): dry-lay paving: 1–2 days working (excavation + sub-base + lay) plus immediate use once swept and jointed; mortar-bedded (wet-bed) paving: 2–3 days working plus 24–48 hrs before light use and 7+ days for stronger cure; concrete slab (cast in-situ): 1 day to excavate/sub-base, 1 day to form/reinforce/pour, 1–3 days before light foot traffic, and 7–28 days for full curing; block/paver with bedding: 1–2 days to prepare and lay per 20 m², plus joints stabilising (polymeric sand) rain-free window. Larger jobs scale roughly by area but need extra time for logistics, curing and finishing.
Phase-by-phase timings for each common method (per 10–20 m² example)
Dry-lay (sand/compacted): excavation 0.5–1 day; sub-base delivery/spread/compact 0.5–1 day; screed bed and lay 0.5–1 day; jointing & compaction 0.25 day. Mortar-bedded: excavation 0.5–1 day; sub-base 0.5–1 day; bedding mortar & laying 0.5–1 day; pointing & clean-up 0.25 day; protect 24–48 hrs. Concrete slab: excavation/sub-base 0.5–1 day; formwork & reinforcement 0.25–0.5 day; pour & screed 0.25–0.5 day; initial curing/protection 1–3 days before light use, 7–28 days for full strength. Block/paver on sand: excavation 0.5–1 day; sub-base 0.5–1 day; laying & edge restraints 0.5–1 day per 20 m² (hand-laid slower); jointing (polymeric sand) 0.25 day plus rain-free cure window. Times assume 1–2 competent DIYers or small trade gang; scale up with crew size.
How do timings change per m² and by crew size?
Hand-laid DIY rates: expect 2–6 m² per person-day for detailed work (mortared or natural stone), 6–12 m² per person-day for straightforward concrete slabs or simple paving. Small trade gangs (2–4 people) can usually do 20–60 m²/day depending on method. Mechanised/large gangs can reach hundreds of m²/day (specialist plant). Use these as practical ranges: DIY single person: ~5 m²/day; two DIYers: ~8–12 m²/day; small pro gang: ~30–60 m²/day.
How long for key tasks: excavation, sub-base, screeding, laying, jointing and curing?
Excavation: hand dig 0.5–2 m³ per person-day; small machine 15–30 m³/day. Sub-base spreading/compacting: 0.5–1 day for 10–30 m² (allow lifts, plate compactor passes). Screeding/bedding (sand or mortar): 0.5–1 day for 10–30 m². Laying paving: 0.5–2 days depending on complexity and method. Jointing: polymeric sand 0.25 day plus short rain-free cure (minutes–hours per product); mortar pointing 0.25–0.5 day and protect 24–48 hrs. Curing: concrete—light foot traffic 24–72 hrs, safe light use 3–7 days, full design strength ~28 days; mortar—24–48 hrs minimum protection, longer in cold/wet weather.
What materials and tools will I need (checklist)?
Materials: paving slabs/blocks, Type 1 (MOT Type 1) sub-base, sharp sand for bedding or screed, cement for mortar (M12 bedding, M6 pointing where used), concrete (if slab), polymeric jointing sand (if used), edge restraints, geotextile (optional for weed control), rebar mesh or bars for reinforced concrete if required. Tools/plant: shovel, wheelbarrow, spirit level, straightedge/screed board, masons’ trowel, pointing tool, rubber mallet, plate compactor, hand tamper, measuring tape, brick saw or angle grinder for cutting, wheelbarrow, hose, broom, protective gloves/eye protection. Optional plant: mini-excavator, cement mixer, vibrating poker (for concrete), temporary sheeting for weather protection.
What labour estimates should I budget for as a DIYer vs hiring trades?
DIYer (single competent person): plan for 2–4× the time of a pro; small 20 m² job may take 3–6 full days. Two DIYers can halve that roughly. Hiring trades: a two-person groundworks/paving gang will usually complete 20–30 m² in 1–2 days of active laying plus site prep/curing time; larger professional gangs work faster. Factor in additional days for deliveries, cuts, drainage, and curing/protection — trades often charge day rates that imply multiple workers will finish faster but at higher labour cost per day.