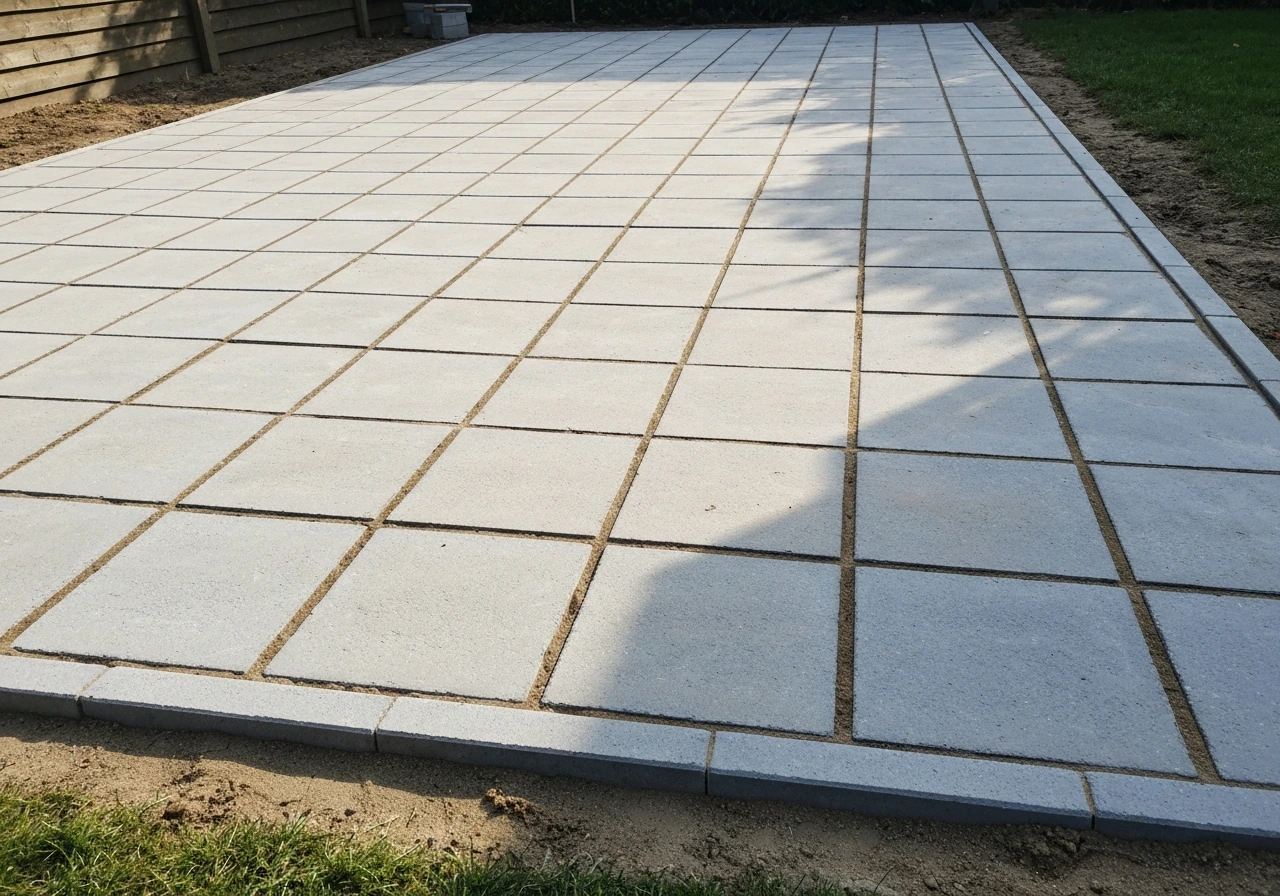
You can lay a stable, long-lasting patio on a sand bed by excavating to the right depth, compacting a solid sub-base, screeding a 1 inch (25 mm) layer of washed concrete sand, and then laying your pavers or flags directly onto it. Done correctly, the sand bed gives you a forgiving, adjustable surface that keeps pavers level, drains reasonably well, and holds firm for years. The key is getting the preparation right, the sand layer itself is actually the easy part.
How to Lay a Patio with Sand: Step-by-Step DIY Guide

Clara Farrell
4 Jul 2026
When a sand base is the right choice
A sand-set patio is ideal for residential foot-traffic areas: garden patios, pathways, seating areas, and small courtyards. It suits concrete pavers, brick pavers, natural stone flags, and porcelain flags (though porcelain flags often work better on a mortar bed). If you are building somewhere that will see regular vehicle traffic, like a driveway, a basic sand-set build-up may not be adequate on its own, and you should look into a thicker engineered base or a bonded system instead.
Sand-set also works well on ground that drains reasonably. If your garden sits on heavy clay that holds water, you will need to put extra effort into the sub-base depth and drainage before the sand layer goes down. A soggy, poorly-drained sub-base is the number one reason sand-set patios rock and sink within a couple of seasons. If your site slopes significantly, the preparation steps are still the same, but keeping the sand layer even across a slope takes a bit more care.
One thing sand-set is not great for is thin or very large natural stone slabs (anything over about 900 x 600 mm) that can flex under foot. Those formats really benefit from a full mortar bed. For standard concrete pavers, brick-sized units, and most segmental paving, sand-set is the go-to method used by professionals worldwide.
Materials and tools checklist for a sand-set patio
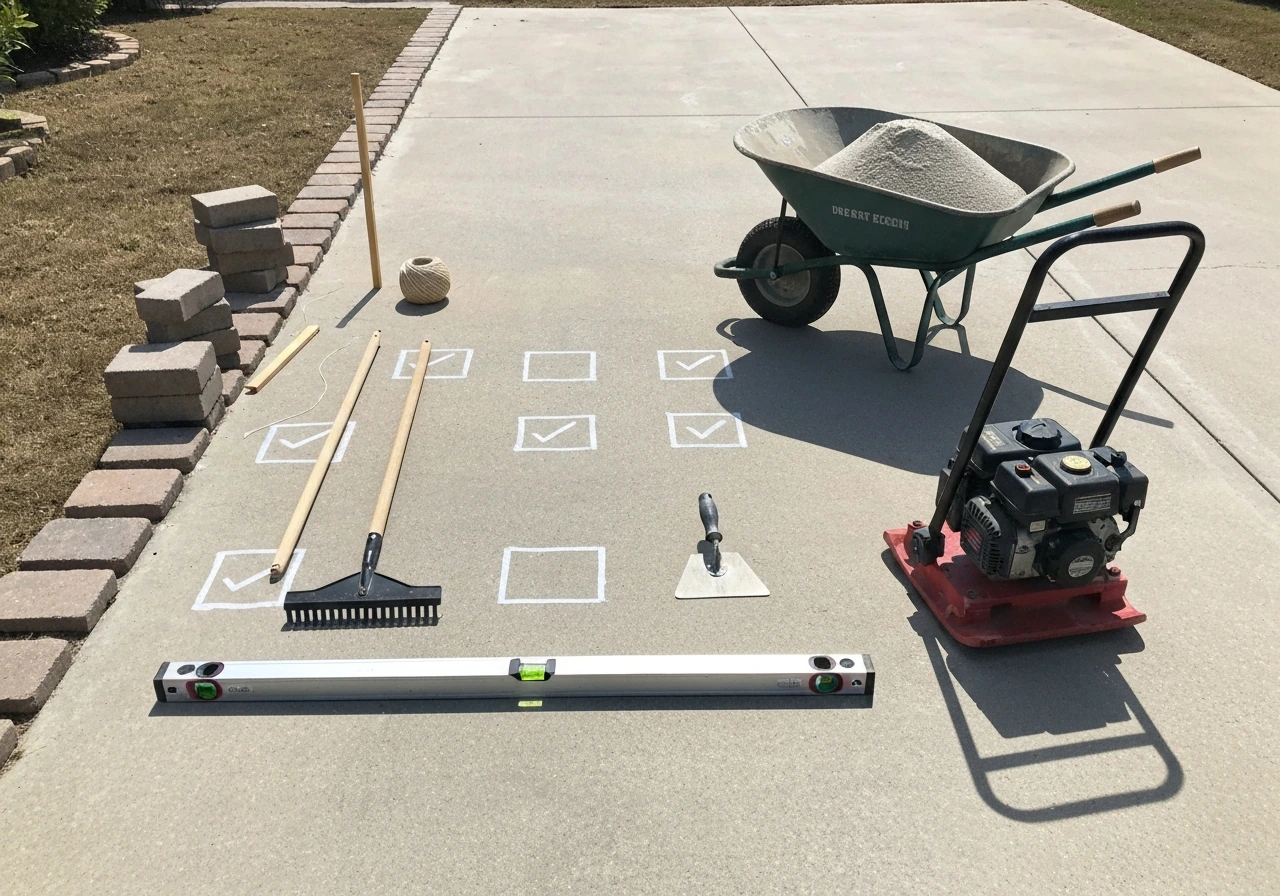
Get everything on site before you start. Running back to the builder's merchant mid-project is how mistakes happen. Here is what you need:
Materials
- Pavers or flags (concrete, brick, or natural stone in your chosen format)
- Washed concrete sand (also called sharp sand or ASTM C33 bedding sand) — this is NOT builder's sand or stone dust
- Compactable aggregate sub-base (MOT Type 1 / crusher run / road base depending on your region) — typically 4 to 6 inches (100 to 150 mm) for a residential patio
- Geotextile landscape fabric (optional but useful between subgrade and sub-base on soft or clay ground)
- Edge restraints: plastic paver edging, metal landscape edging, or concrete haunching — whichever suits your patio style
- Polymeric jointing sand for finishing (or regular kiln-dried sand for a more rustic look)
- Timber screeding guides or steel screed rails (for levelling the sand layer)
Tools
- Spade and mattock for excavation
- Wheelbarrow
- Plate compactor (hire one — do not try to tamp a sub-base by hand)
- Long spirit level and a straight-edge or screed board (at least 6 ft / 1.8 m)
- String line and line pins
- Rubber mallet
- Tape measure and pencil
- Angle grinder with a diamond blade for cutting pavers
- Broom and plate compactor rubber mat (for final compaction over pavers)
- Garden hose with a gentle shower-spray head (for activating polymeric sand)
Site prep: strip, sub-base depth, and getting level
Good preparation is where a patio succeeds or fails. I have seen plenty of patios laid by people who skimped on this part, and they all ended up relaying sections within a few years. Do not cut corners here.
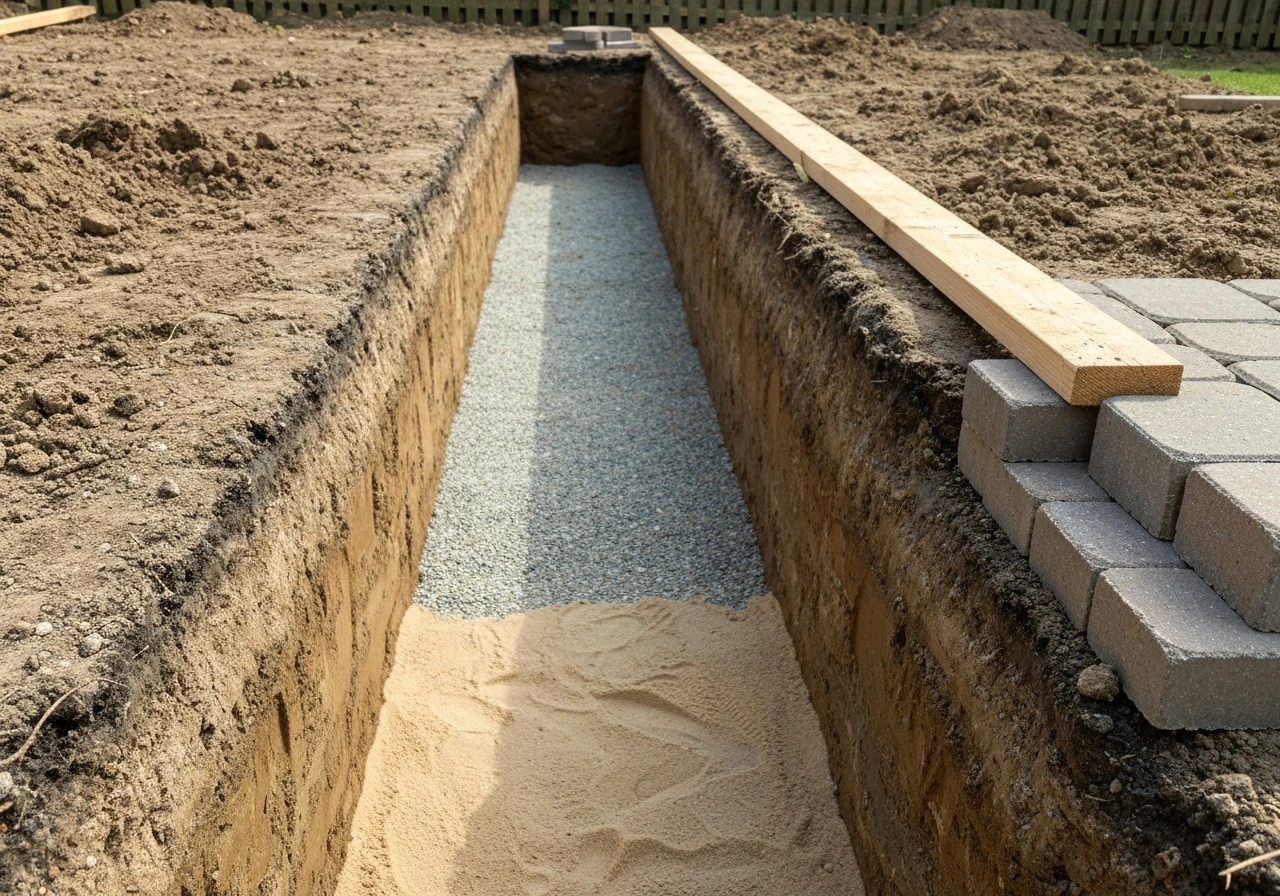
How deep to dig
For a residential sand-set patio, your total excavation depth needs to accommodate: the paver thickness (typically 60 to 80 mm for concrete pavers), plus 25 mm of bedding sand, plus at least 100 to 150 mm of compacted sub-base. That puts you at roughly 200 to 250 mm (8 to 10 inches) below your finished patio level in most cases. Mark that depth on a stake and keep checking as you dig.
Strip all topsoil, grass, and organic material completely. Organic matter compresses and rots, which causes settlement. If you hit soft, spongy subgrade even after removing topsoil, either dig deeper and add more sub-base, or lay a geotextile fabric first to stabilize the ground before adding your aggregate.
Getting the drainage slope right
Your finished patio surface needs to fall away from the house or any structure at a rate of at least 1/4 inch per foot (roughly 1:50 or 2%). This sounds trivial but it makes the difference between a dry patio and a paddling pool after rain. Set your string lines at this fall before you even start adding sub-base. Build the slope in from the ground up, do not try to create it only in the sand layer at the end.
Compacting the sub-base
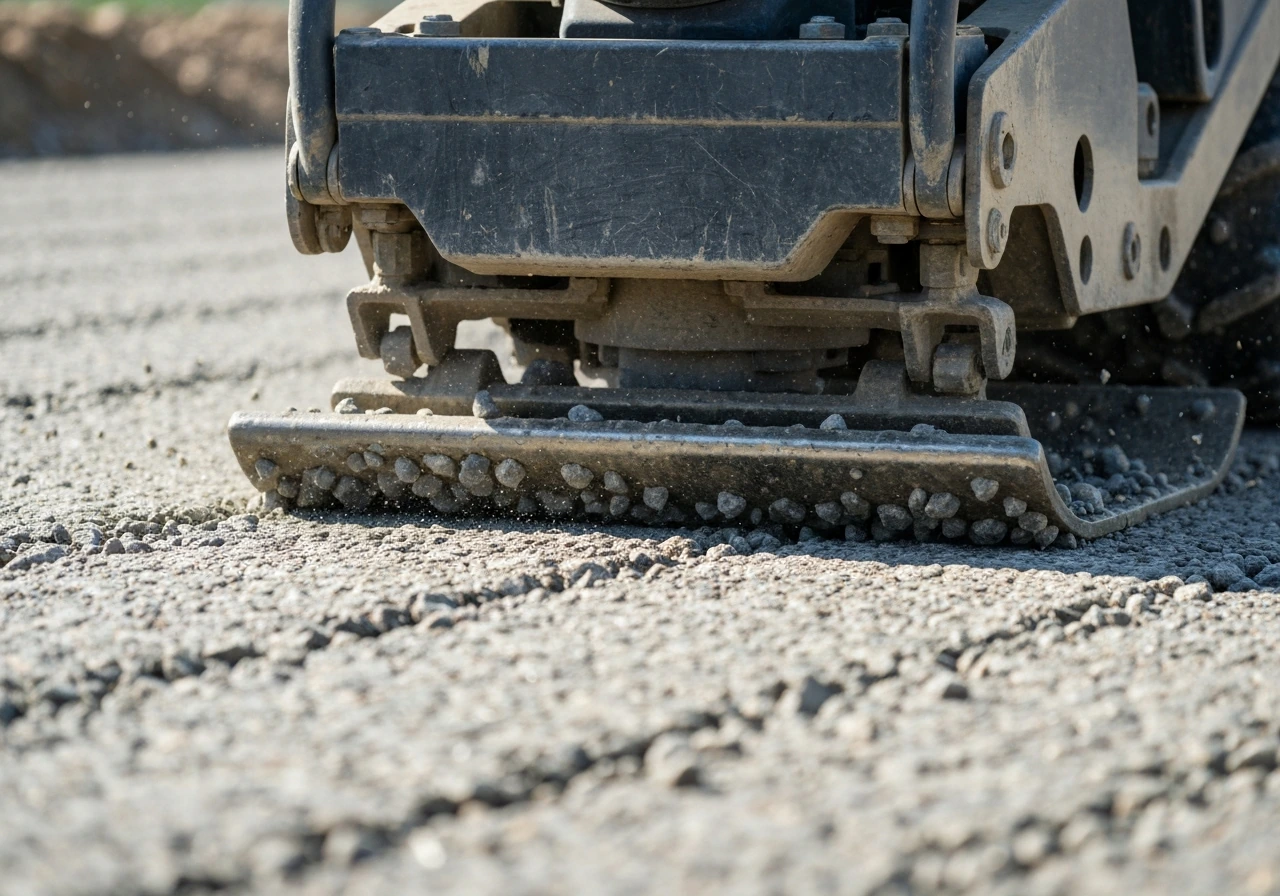
Lay your sub-base aggregate in layers no deeper than 75 mm (3 inches) at a time and compact each layer with the plate compactor before adding the next. Do not dump 150 mm in and compact it once, you will get poor compaction in the lower half and it will settle later. Once your sub-base is fully compacted and at the right depth, check the surface with a long straight-edge.
The tolerance you are aiming for is within 3/8 inch (10 mm) over a 10 foot (3 metre) straight-edge. CMHA specifies a [compacted base surface tolerance of ±3/8 in. (10 mm) over a 10 ft (3 m) straightedge](https://www. cmha.
org/resource/pav-tec-002/) prior to screeding bedding sand to help prevent rocking and lippage. Any bumps or hollows bigger than that in the sub-base will telegraph through the sand and cause pavers to rock. Fix them now before you ever touch the sand.
Building the sand layer: thickness, type of sand, and compaction
Which sand to use
Use washed concrete sand, the kind that meets ASTM C33 or an equivalent gradation standard. The critical property is low fines: no more than 1% of the material should pass a 0.075 mm (No. 200) sieve. This sounds technical, but in plain language it means: avoid anything dusty, silty, or dirty. Builder's sand, stone dust, and limestone screenings are all wrong choices for bedding. They hold water, compact poorly, and shift under load. Washed concrete sand feels gritty and slightly coarse and looks clean. If you are not sure at the merchant, ask for 'bedding sand' or 'concrete sand' and confirm it is washed.
Screeding the sand to the right thickness
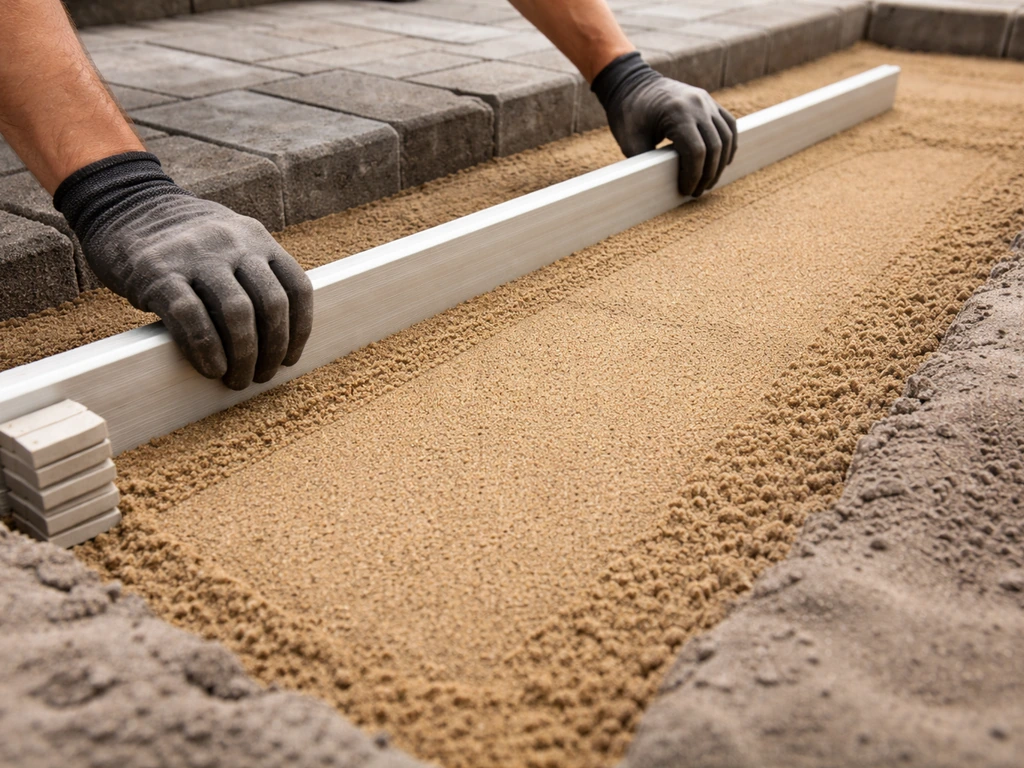
The bedding sand should be 1 inch (25 mm) thick after compaction, not before. In practice that means you lay it slightly thicker (around 30 to 35 mm loose) and it settles to 25 mm once the pavers are bedded in. Lay your screed rails or timber guides on the compacted sub-base at your desired finished level minus the paver thickness, then pull a straight-edge across them to create a flat, consistent sand surface.
That screeding step is the heart of how to screed sand for patio, so take your time to keep it level before you bed the pavers. Work in manageable sections of about 2 to 3 square metres at a time so you are not walking on screeded areas you have not yet paved.
A common mistake is making the sand layer too thick, thinking it will give you more room to adjust levels. Thick sand compresses unevenly and causes pavers to rock. Stick to 25 mm. If you need to adjust levels, do it in the sub-base, not the sand.
Do not compact the sand before laying pavers
Leave the screeded sand loose. The pavers compact it when they are pressed and vibrated into position. If you pre-compact the sand, it becomes difficult to set pavers at the right level and you risk disturbing the surface anyway. The plate compactor comes after the pavers are laid, not before.
Laying patio pavers on sand: setting, cutting, and edging
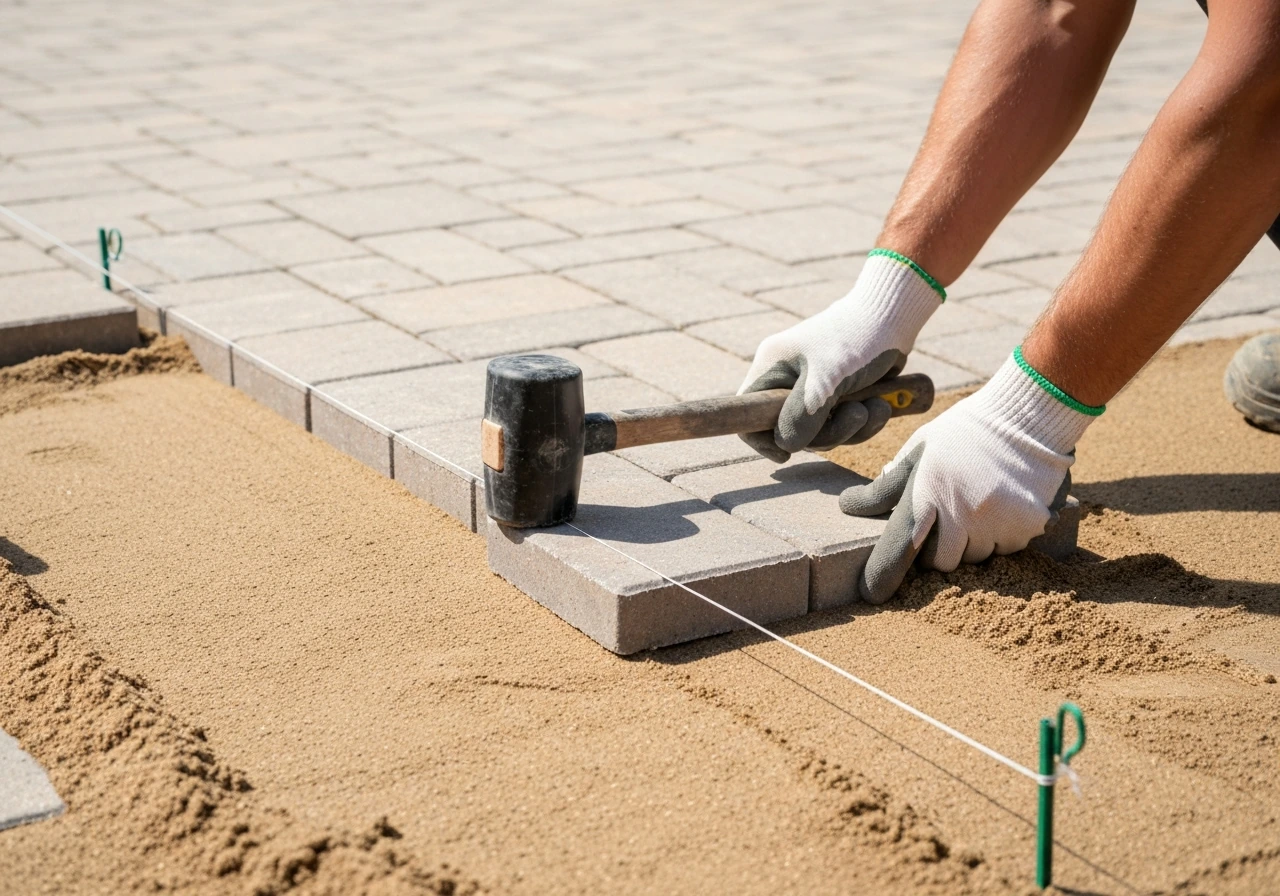
Setting out and keeping things straight
Before you lay a single paver, set up string lines as reference guides for your joint lines. Run them tight and re-check them as you go. Joint lines that deviate more than about 3/8 inch over 10 feet look noticeably wonky and are hard to correct once you are halfway across the patio. Start from a straight, visible edge (usually the house wall or a line parallel to it) and work outwards.
Placing the pavers
Lower each paver gently onto the sand, do not slide it across the surface or you will disturb the screed. Set it down and give it a firm tap with a rubber mallet to bed it in. Check level constantly with your spirit level, both along each paver and across adjacent units. A lippage (height difference) of more than about 3 mm between neighbouring pavers becomes a trip hazard and looks poor. Work from your set pavers outwards, kneeling on laid units rather than on the screeded sand. Use a knee board (a scrap of plywood) to spread your weight if needed.
Cutting pavers for the edges
Leave cuts until last. Lay all full units first, then measure and cut the border pieces. Use an angle grinder with a diamond blade for concrete or brick pavers. For natural stone, a wet-cutting disc makes a cleaner edge and keeps dust down. Always wear eye protection and a dust mask when cutting. Mark your cut line with a pencil or chalk, score it first with a light pass, then cut through fully. For awkward angles around curves or obstacles, a template made from card saves wasted pavers.
Edge restraints: do not skip these
Edge restraints hold the whole system together. Without them, pavers at the perimeter creep outwards over time, joints open up, and the patio gradually falls apart from the edges inward. Install your edge restraint so that at least 1 inch (25 mm) of vertical contact is made with the side of the paver. Plastic paver edging with steel spike pins works well for straight runs. For a neater finish, concrete haunching (a small fillet of concrete behind the edge pavers) is more robust and permanent. Whatever you use, install it before you do the final compaction pass.
Compacting the laid surface
Once all pavers are laid and edges are restrained, run the plate compactor over the entire surface. Fit a rubber mat or rubber pad to the base of the compactor to avoid scratching or chipping the paver faces. Make at least two full passes in different directions. This seats the pavers firmly into the sand bed and brings the surface to final level. Check for any rocking pavers after each pass and lift and re-bed any that move.
Jointing and finishing: brushing in sand, sealing, and cleanup
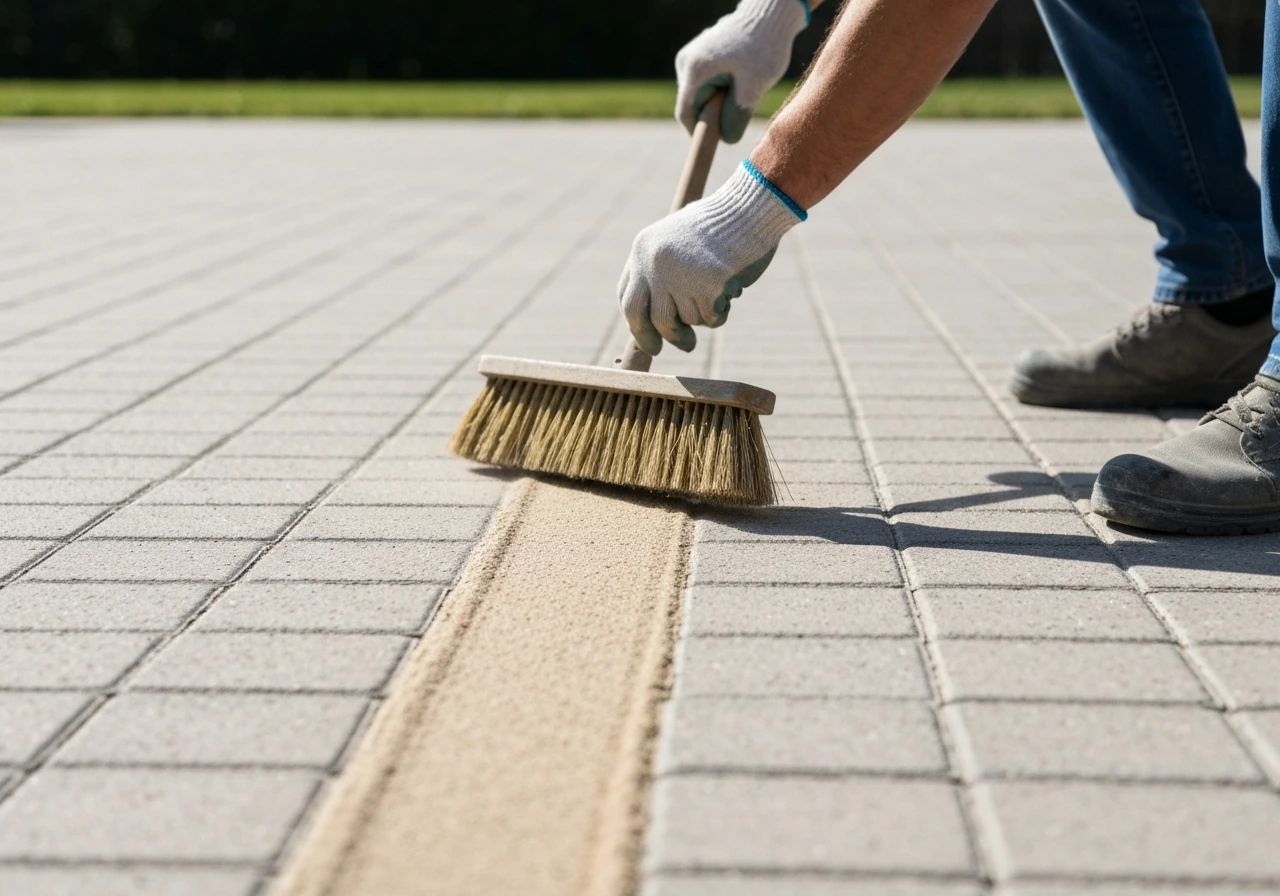
Filling the joints
Once the pavers are compacted into position, it is time to fill the joints. You have two main options: regular kiln-dried sand, or polymeric jointing sand. Kiln-dried sand is cheaper and simpler, but it can wash out in heavy rain, allow weeds to germinate, and needs re-topping every year or two. Polymeric sand costs more but binds together when activated with water, resisting washout and weeds much better. For most residential patios, polymeric sand is worth the extra cost.
| Feature | Kiln-dried sand | Polymeric sand |
|---|---|---|
| Cost | Low | Higher |
| Weed resistance | Poor | Good |
| Washout resistance | Poor | Good |
| Ease of installation | Very simple | Requires care with water activation |
| Longevity | Needs regular topping up | Lasts several years before refreshing |
| Best for | Low-budget, sheltered patios | Most residential patios |
How to install polymeric sand
Make sure the paver surface is completely dry before you start, moisture on the surface causes the polymeric sand to stain and haze. Pour the sand over the dry surface and sweep it into the joints with a stiff broom. Work it in thoroughly, filling joints completely. Polymeric sand typically needs at least 1.5 inches (about 40 mm) of joint depth to perform properly, so check the manufacturer's data sheet for your specific product. Once joints are filled, blow or sweep the excess off the surface carefully, this step is important. Any residue left on the pavers when you add water will leave a haze that is very hard to remove.
Activate the sand by misting the surface with a gentle shower spray, working in small sections of about 5 to 10 square metres at a time. You want the joints damp, not soaked. Puddling water on the surface or in the joints is too much. Follow the specific product instructions, most manufacturers like Techniseal and Bell recommend wetting in sections and allowing the water to absorb before moving to the next area. Leave it to cure for at least 24 hours before walking on the surface, and longer before placing furniture.
Should you seal the patio?
Sealing is optional for most residential sand-set patios. It enhances colour, makes cleaning easier, and adds some extra protection against staining and frost damage on certain paver types. If you do seal, wait at least 28 days after installation to allow any efflorescence (white mineral bloom) to appear and be cleaned off first. Use a paver-specific sealer appropriate for your material type, a sealer for concrete pavers is not necessarily right for natural stone. Apply it on a dry day when no rain is forecast for at least 24 hours. Two thin coats is better than one heavy coat.
Final cleanup
Once the jointing sand is cured, give the surface a thorough sweep. Remove any off-cuts, leftover aggregate, and construction waste from the site. Check around the perimeter that your edge restraints are flush and all spike pins are fully driven. Hose the surface down gently and let it dry, then take a look at the overall level and drainage, pour a small amount of water and watch where it runs. If it sits in any low spots, you have identified something to keep an eye on or address before it becomes a problem.
Common mistakes that cause patios to fail
- Using the wrong sand: Stone dust, limestone screenings, or builder's sand in the bedding layer will compress unevenly and hold water. Always use washed concrete sand.
- Too-thick sand bed: A bedding layer deeper than 25 mm creates an unstable cushion that shifts under foot traffic. Fix levels in the sub-base, not the sand.
- Skipping or under-compacting the sub-base: Loose aggregate settles over time. Compact in 75 mm lifts and test the surface tolerance before screeding.
- Forgetting the drainage fall: A flat patio holds water. Build in at least a 1:50 slope (1/4 inch per foot) away from structures from the very start.
- No edge restraints or inadequate ones: Pavers without restrained edges spread and the whole patio loosens within a few years.
- Pre-compacting the sand: Screeded sand should stay loose until the pavers are placed and vibrated in.
- Leaving polymeric sand residue on the surface before wetting: This causes permanent haze or staining on the paver face.
Your next steps
If you are working with a sloped garden, the preparation steps are the same but you will need to think carefully about how to manage the fall across the site, there is more to consider there than a flat build. If you are not sure how much sand to order, working out the volume before you go to the merchant will save you a trip (and the over-ordering that most people default to). And if screeding the sand to a consistent 25 mm depth feels daunting, taking a few minutes to understand the screeding technique before you start will make the whole laying process much smoother.
The project is genuinely achievable for a first-timer over a weekend for a small to medium patio. The preparation and compaction are the hardest parts physically, but none of it requires specialist skills, just patience, checking your levels constantly, and not rushing the sub-base work. Once you get the first few pavers down and see the surface taking shape, the rest goes quickly.
FAQ
Can I lay a patio with sand if I do not compact the sub-base in layers?
It usually fails faster. You can compact in up to about 75 mm layers, this avoids leaving loose material in the bottom that later settles, creating rocking pavers. If you skipped layer-wise compaction, you should rework the sub-base rather than trying to “fix it” with thicker sand.
What happens if I use stone dust or builder’s sand instead of washed concrete sand?
Often you get water retention and shifting. Dusty or silty bedding (stone dust, screenings, builders sand) tends to hold moisture, compact inconsistently, and wash out more easily, leading to uneven paving or joint loss. Stick to washed concrete sand with low fines, it should feel clean and slightly gritty, not dusty.
How do I know if my site needs geotextile under the sub-base?
If you encounter spongy ground after topsoil removal, or your subgrade is weak or unstable, geotextile can prevent pumping and mix of subgrade with aggregate. If the ground feels firm and well-draining after digging, you may not need it, but in clay or soft spots it is a smart insurance layer.
Is it better to pre-level the sand by compacting it before laying pavers?
No, for sand-set patios you want the sand bedding to be workable. Pre-compacting the sand makes it harder to fine-tune levels and increases the chance of disturbing the surface during bedding. The correct approach is leaving the screeded sand loose, then vibrating the pavers down with the compactor after installation.
How much sand should I order for a sand-set patio?
Calculate for loose bedding thickness, not just the final depth. Since the bedding sand should end up at about 25 mm after bedding, you typically order for around 30 to 35 mm loose, plus sub-base and wastage. A quick step is to multiply patio area by (loose bedding depth) in meters, then add an allowance for cutting losses and uneven areas.
Can I lay sand-set pavers on a steep slope without changing the method?
The sequence stays the same, but the fall management becomes critical. Maintain the required drainage slope using string lines, and avoid relying on the sand layer to “create” the grade. On steeper or complex slopes, consider extra restraints and careful base thickness, because sand-set can move if the sub-base is uneven.
What edge restraints should I use to prevent perimeter movement?
Use an edging system that provides real contact with the side of the pavers, about 25 mm vertical engagement is a good target. For straight runs plastic edging with steel pins is common, concrete haunching is more permanent. Skipping restraint is a frequent cause of creeping and joint opening from the edges inward.
How tight should joint lines be, and how do I keep them straight?
Keep joints consistent and follow string guides from a straight reference edge, then re-check often. If joint alignment drifts beyond roughly 10 mm over 3 m (about 3/8 inch over 10 feet), it becomes visibly uneven and difficult to correct mid-way. Dry-lay a border section first if you are unsure about alignment.
What should I use to fill joints, and when should I avoid polymeric sand?
Polymeric jointing sand resists washout and weeds better than simple kiln-dried sand. Avoid using polymeric sand if you cannot keep the surface fully dry during activation, because moisture can cause staining or hazing. Also confirm your product’s required joint depth, many need around 40 mm of joint depth to perform properly.
How much water should I use when activating polymeric joint sand?
Mist it so joints are damp, not soaked. Over-wetting creates puddles in joints and can wash the product or stain the paver face. Work in small areas, dampen, allow absorption, then move on, and let it cure for at least a day before foot traffic.
When can I walk on the patio after installing pavers and finishing joints?
After pavers are compacted and joints are filled, allow joint sand to cure before use. A common rule is at least 24 hours for foot traffic, and longer before heavy loads like furniture moved across the surface. If rain threatens before curing, cover carefully to avoid disturbing joint sand.
Should I seal a sand-set patio, and when does sealing become a problem?
Sealing is optional, it can improve stain resistance and make cleaning easier, but only use a sealer suited to your paver type. Wait about 28 days after installation before sealing, this lets efflorescence appear and be cleaned off first. Sealing too early can lock in haze and make it harder to remove later.
How do I check that my drainage is correct once the patio is finished?
Do a simple water test after cleanup, pour water into the area and observe where it runs. If water sits in low spots, it indicates a leveling or base issue that will show up as staining and settlement later. Mark problematic areas now so you can investigate the underlying sub-base before it becomes permanent.