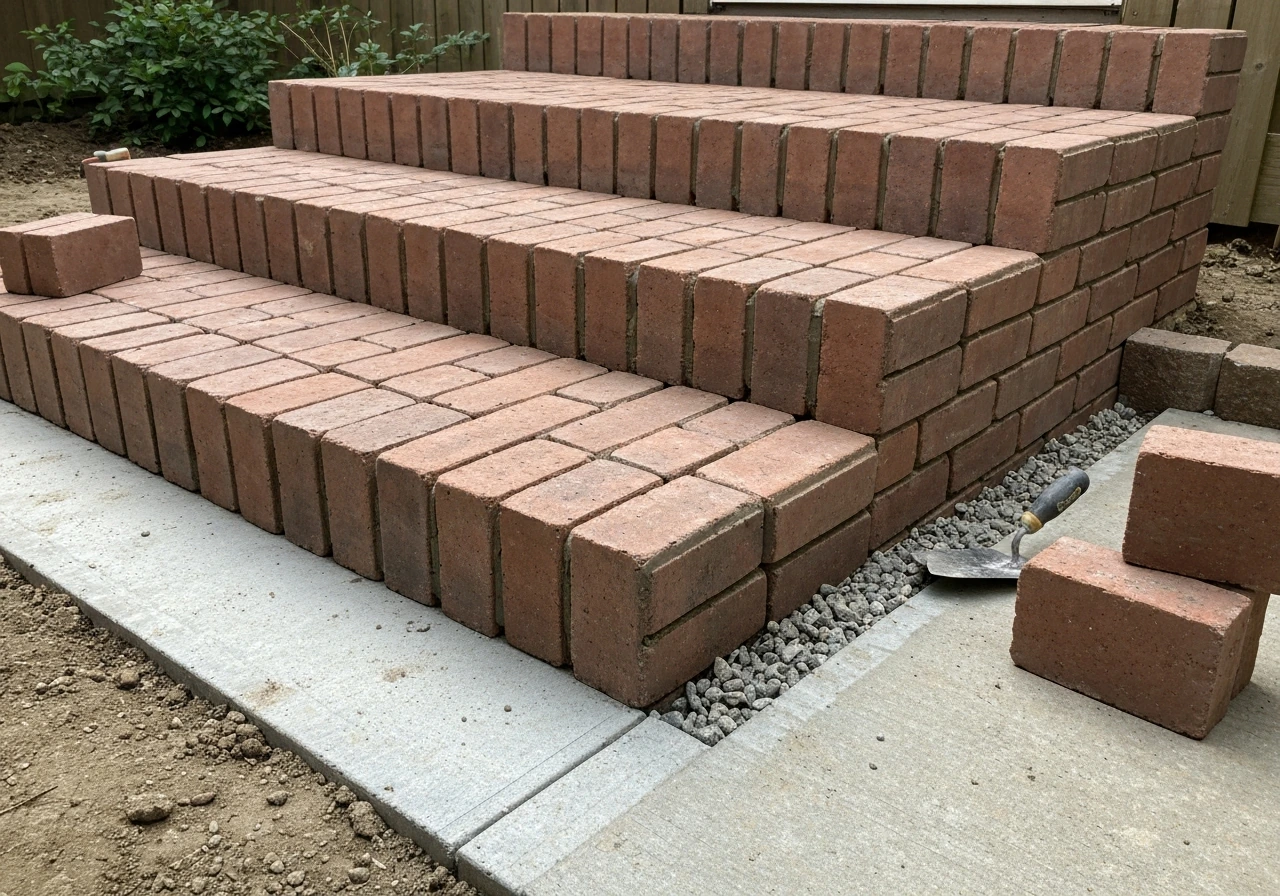
To build DIY brick patio steps that last, you need a compacted gravel base at least 6 inches deep, risers no taller than 7.75 inches, treads at least 10 inches deep (measured nosing to nosing), and each step leveled and squared before you move to the next one. Get those fundamentals right and you end up with steps that feel solid underfoot, drain properly, and don't shift after the first hard frost.
DIY Brick Patio Steps: Step-by-Step Build Guide

Clara Farrell
18 Jun 2026
Plan the layout and match your existing patio height first
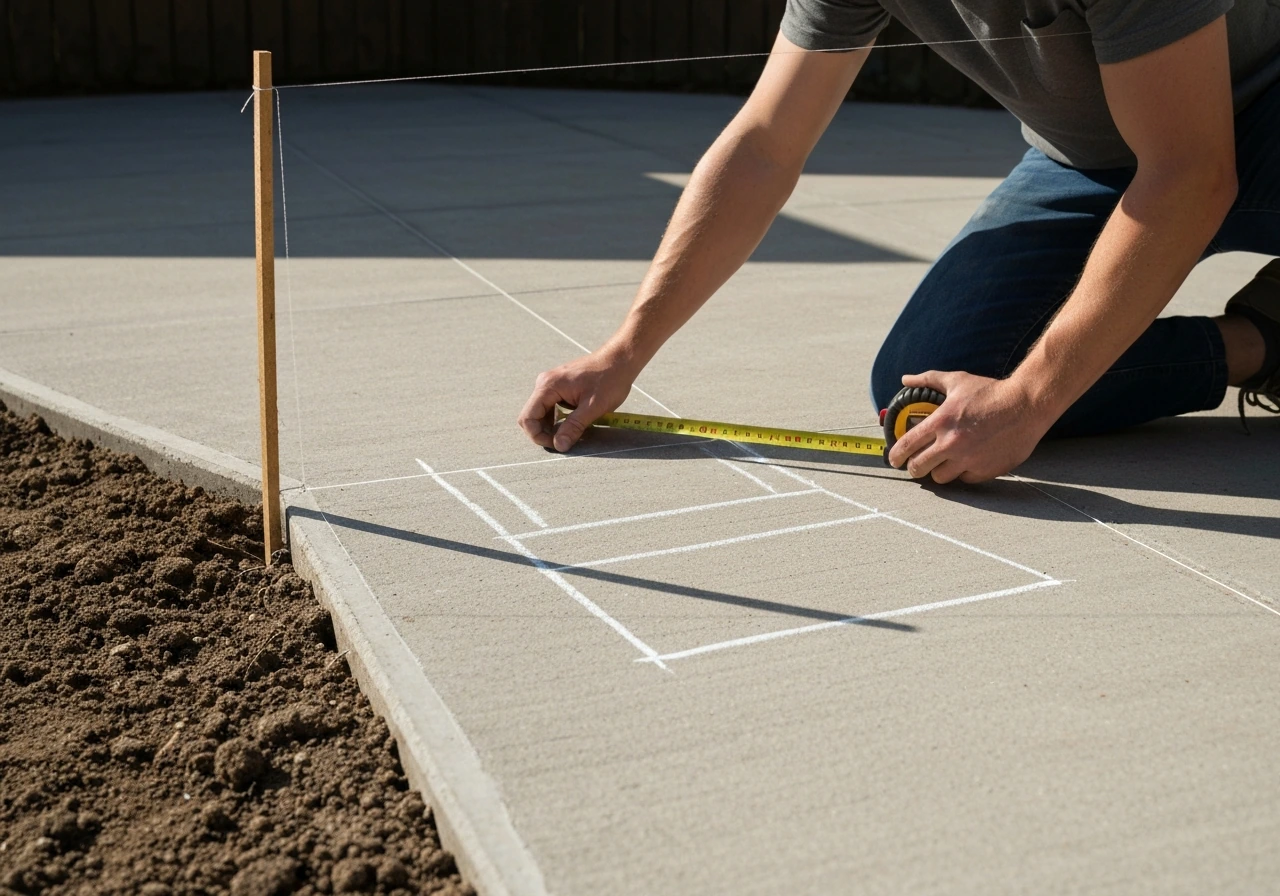
Before you buy a single brick, figure out how many steps you actually need. Building a brick patio wall involves similar planning steps, including layout measurements and matching it to your patio’s height and drainage needs. Measure the total rise, which is the vertical distance from the ground at the base of the steps up to the finished surface of your patio. Let's say that distance is 18 inches. Divide it by your intended riser height. If you aim for 6-inch risers, you get exactly 3 steps. If the math doesn't divide evenly, adjust your riser height slightly rather than forcing a weird fractional step at the top or bottom. The IRC (Section R311.7) sets a maximum riser height of 7-3/4 inches and a minimum tread depth of 10 inches, and those are the guardrails you design within.
The most common mistake at this stage is not accounting for the tread material thickness. If you're setting 2.25-inch-thick standard bricks as your tread, that height is part of each step's finished rise. So if your structural riser block brings the step up 6 inches and you then lay a 2.25-inch brick tread on top, your actual rise becomes 8.25 inches, which exceeds the IRC maximum. Build your riser support height so that when the tread is added, the combined rise lands at or under 7.75 inches. Sketch this out on paper before you dig anything.
Also measure your patio's finished surface height carefully. If your patio has a slight slope for drainage (the standard recommendation is 1/8 inch per foot away from the house), your top step tread needs to match that finished patio height at the transition point, not sit proud or sunken. A 1/4-inch height difference between the top tread and the patio surface is enough to catch a toe and trip someone.
Quick rise/run planning reference
| Total Rise (inches) | Riser Height Target | Number of Steps | Min. Tread Depth |
|---|---|---|---|
| 6 | 6 in | 1 | 10 in |
| 12 | 6 in | 2 | 10 in |
| 18 | 6 in | 3 | 10 in |
| 24 | 6 in | 4 | 10 in |
| 21 | 7 in | 3 | 10 in |
| 28 | 7 in | 4 | 10 in |
Materials and tools: brick vs pavers, mortar vs dry-set, and everything else you need
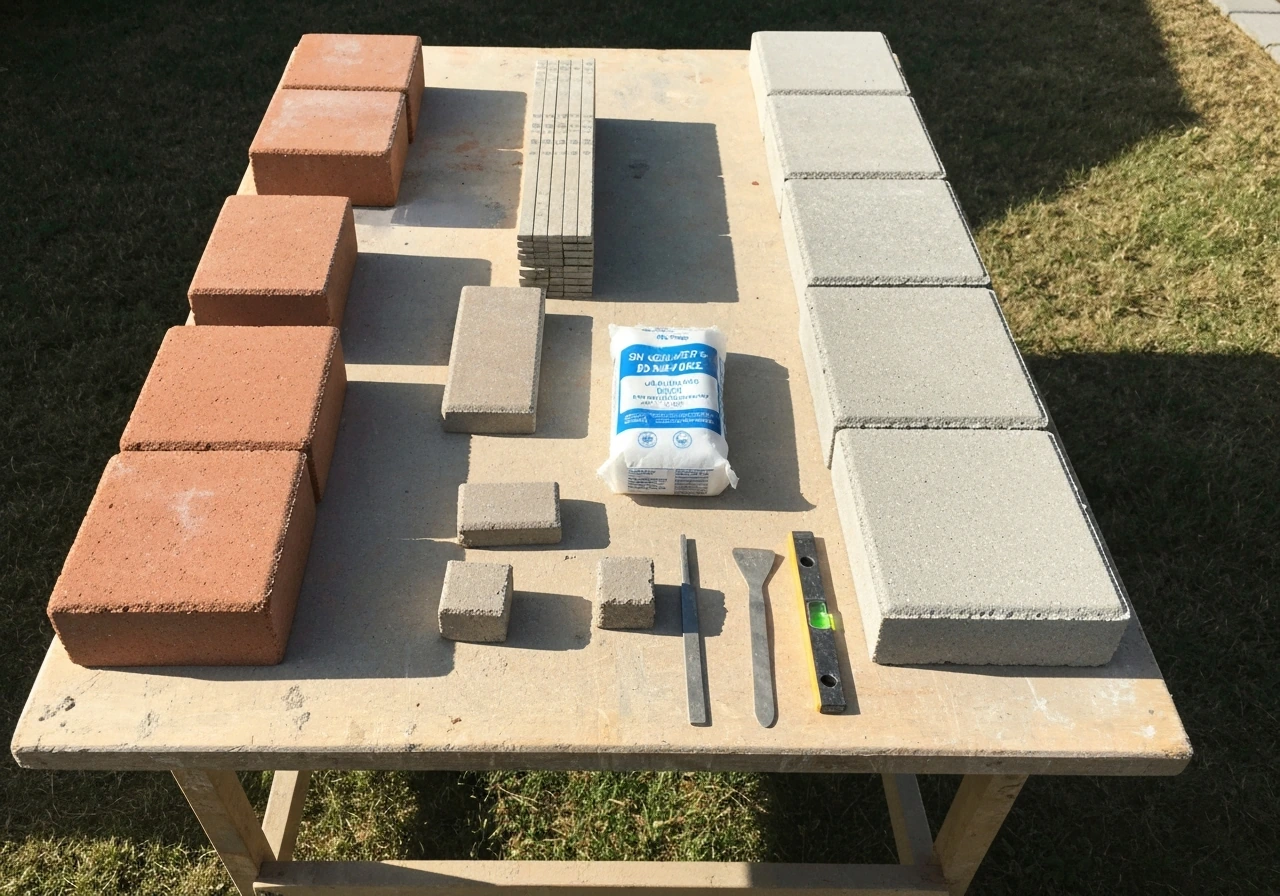
You have two main material directions: traditional clay bricks or concrete pavers (often called brick pavers). Both work well for steps, but they behave differently and suit different situations. Clay bricks give a classic look and hold up beautifully in moderate climates, but in freeze-thaw zones you need to choose a Grade SW (Severe Weathering) brick rated for ground contact. Concrete pavers are denser, more uniform in size (which makes leveling easier), and generally more tolerant of freeze-thaw cycles. For treads especially, a thicker paver of 2.375 to 3 inches gives you a more solid, chip-resistant edge than a standard 2.25-inch brick.
For the step risers (the vertical face of each step), you have a choice: lay bricks or pavers in a dry-set or mortared configuration, or use concrete block as the structural core and face it with brick. If you follow the same brick and cement-style principles for the step structure, you can adapt the method to build a full patio as well brick or pavers in a dry-set or mortared configuration. The concrete block core approach is faster and more stable for taller step runs. The fully dry-set approach works well for low, one- or two-step transitions and requires no mortar skill. Full mortar construction gives the cleanest look and is the most rigid, but it demands decent technique and the right mortar mix (Type S mortar is the standard for masonry in contact with the ground).
Material and tool checklist
- Bricks or concrete pavers (Grade SW for brick in freeze-thaw climates; 60mm or 80mm thick pavers for treads)
- Crushed gravel or compactible gravel base material (3/4-inch clean crushed stone or processed gravel)
- Coarse bedding sand or concrete sand (not fine play sand) for final leveling layer
- Geotextile landscape fabric (non-woven, 4 oz or heavier)
- Concrete block or solid cap block for step supports if using the block-core method
- Type S mortar mix for mortared joints and setting risers
- Plastic or steel edge restraints with galvanized spikes
- Tape measure and a story pole or folding ruler
- 4-foot level and a small torpedo level
- String line and line level
- Stakes and batter boards
- Rubber mallet
- Plate compactor (rent one, don't skip this)
- Angle grinder or brick splitter for cuts
- Stiff-bristle broom for joint sand
- Polymeric jointing sand or regular coarse sand for joints
- Safety glasses and work gloves
One thing I'd push back on: don't try to substitute fine leveling sand or play sand for your base layers. It compacts poorly, migrates easily, and is the number-one cause of settling steps I've seen. Use coarse concrete sand or granite chip screenings for the bedding layer, and crushed gravel (not rounded river gravel) for the base.
Site prep and base construction
This is where the real work happens, and where most DIY step failures start. I cannot stress enough: the base is everything. If you're also figuring out how to build a brick patio nearby, the same base, drainage, and leveling principles will make the whole project work together. The bricks on top are just decoration if the foundation underneath isn't right.
Excavation depth and ground conditions
Mark out the footprint of your entire step structure with stakes and string. For a standard 3-step run that's roughly 10 to 12 inches wide per tread and maybe 4 feet wide, you're looking at a fairly small excavation, but it still needs to go deep. Excavate down at least 8 to 10 inches below your planned finished tread surface. That gives you 6 inches for compacted gravel base, 1 inch of bedding sand, and the thickness of your brick or paver tread. In cold climates with heavy frost, go deeper, 12 inches of compacted base is not overkill.
If you hit clay soil (which is dense, poorly draining, and prone to heaving), don't just add more sand on top of it. Dig an extra 2 to 4 inches and fill with gravel. Clay retains water and expands when it freezes, and that's what heaves steps apart over winters. On sloped ground, you'll need to cut a stepped bench into the hillside so your base sits on undisturbed, level soil at each step location rather than floating on fill.
Drainage and geotextile
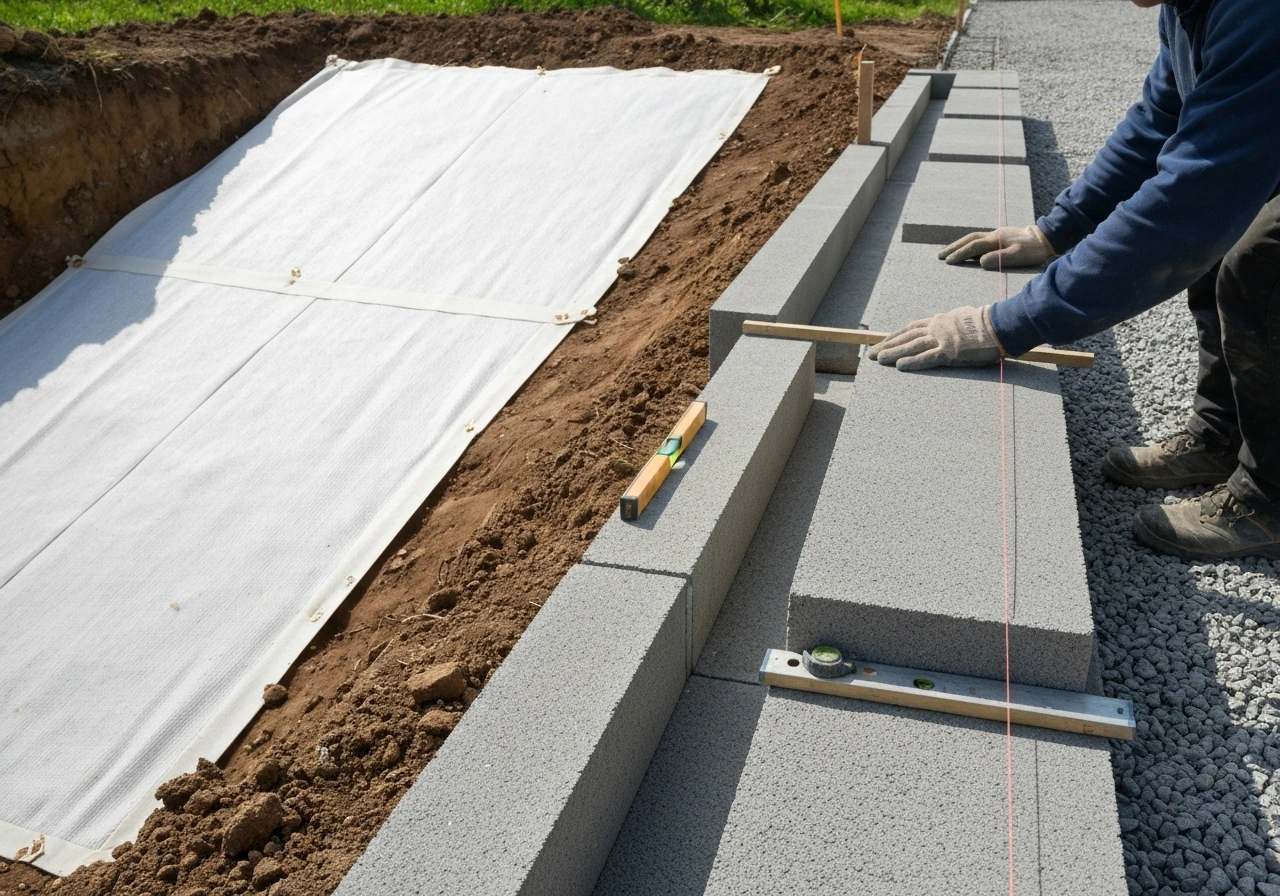
Once you've excavated, lay a sheet of non-woven geotextile fabric across the entire excavated area before adding your gravel. This does two things: it keeps the gravel from migrating down into the soil over time, and it prevents weeds from pushing up through your base. Overlap seams by at least 12 inches. Then add your crushed gravel in two or three lifts, compacting each 3-inch layer with a plate compactor before adding the next. Don't dump all 6 inches in at once and run the compactor over it once. Layered compaction is what creates a truly stable base. If you plan to add a fire pit on the patio, treat it like a heavy outdoor feature and make sure the base and drainage are suitable for heat and settling fire pit on brick patio.
Make sure the surrounding grade drains water away from the step structure. You don't want pooling water underneath, which will undermine your base and refreeze in winter. If you're on flat ground, consider digging a small perimeter trench filled with gravel on the low side of the steps to give water somewhere to go.
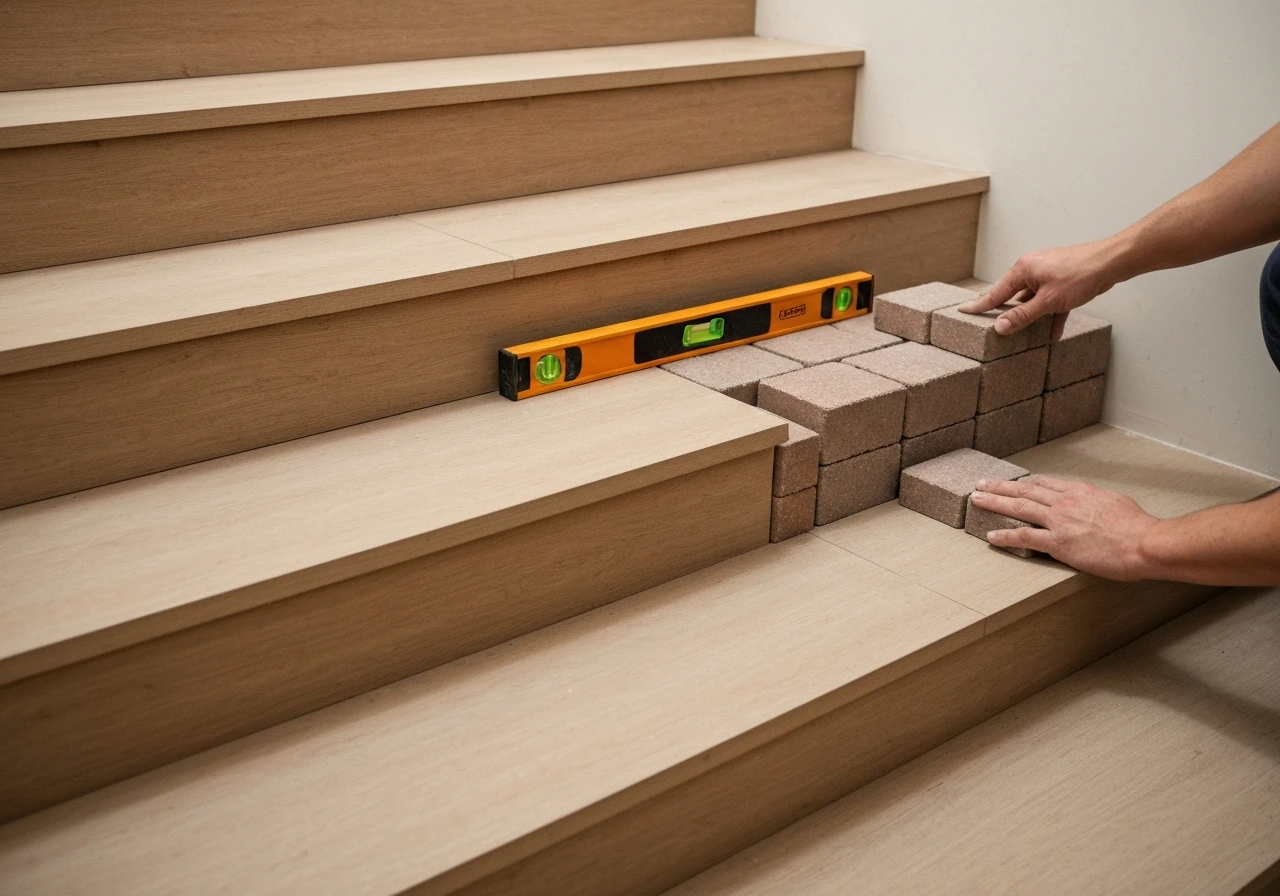
Building the step supports and setting square, level lines
Once your base is compacted and roughly level, you need to build up the structural core of your steps. For most DIY builds, the cleanest approach is a stair-stepped concrete block support structure, sometimes called a soldier course or stringer base. You stack concrete blocks in a staircase pattern on your compacted gravel base, essentially building the skeleton of each step before you add any facing bricks or tread pavers on top.
- Set a string line from your patio surface down to the ground at the correct slope, representing your finished step profile. This is your reference throughout.
- Mix a small batch of mortar and lay the first course of concrete blocks at the base of the step structure, checking level in both directions before the mortar grabs.
- Build up each subsequent block 'tier' in a staircase pattern, keeping each tier set back by the tread depth you planned (at least 10 inches).
- Check each tier for level side-to-side and front-to-back. Any twist in the block base will telegraph directly to your finished tread surface.
- Use a story pole or marked rod to confirm the height of each tier matches your planned riser height minus the tread thickness.
- Let the block structure cure for at least 24 hours before laying tread bricks or pavers on top.
Square is just as important as level. Use the 3-4-5 triangle method to confirm your steps are square to the patio edge: measure 3 feet along one edge, 4 feet along the adjacent edge, and the diagonal between those two points should be exactly 5 feet. If it isn't, adjust your layout before any mortar cures. Fixing a crooked step run after the fact is miserable.
Setting bricks or pavers for treads and risers
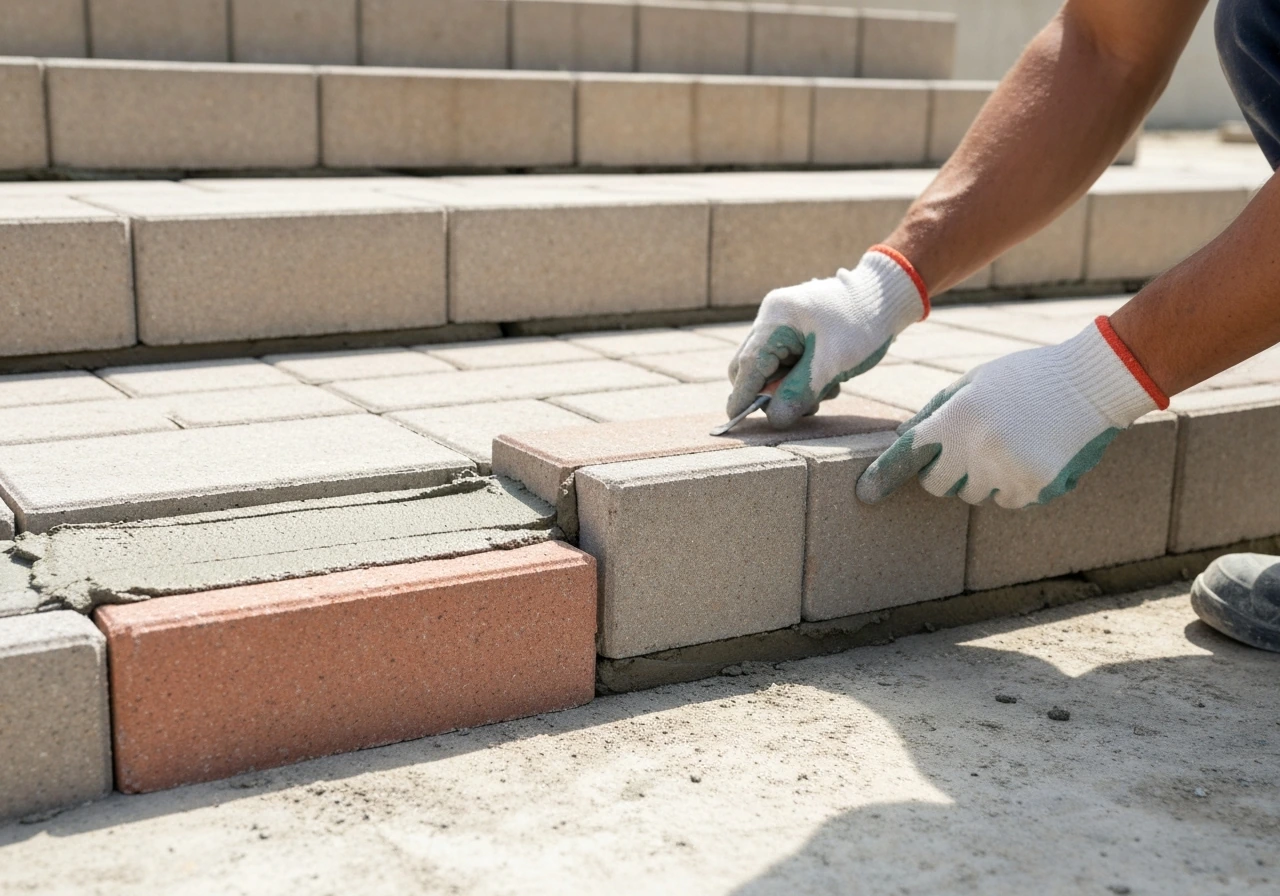
Now for the satisfying part. You're setting the visible bricks or pavers that will become the finished step surfaces. Work from the bottom step to the top, completing each step fully before moving up. If you are also planning brick columns for your patio, make sure their footings are designed to stay stable and support the load over time brick columns for patio.
Risers first, then treads
For mortared steps, butter the back of your riser bricks and press them against the front face of each block tier, using a stretcher bond (running bond) pattern where possible. Joints should be around 3/8 inch and consistent. Tap each brick with a rubber mallet and check with your level. For dry-set risers, use a concrete adhesive or construction adhesive formulated for masonry instead of mortar. It won't look as traditional, but it works for lower-traffic residential steps.
Laying the treads
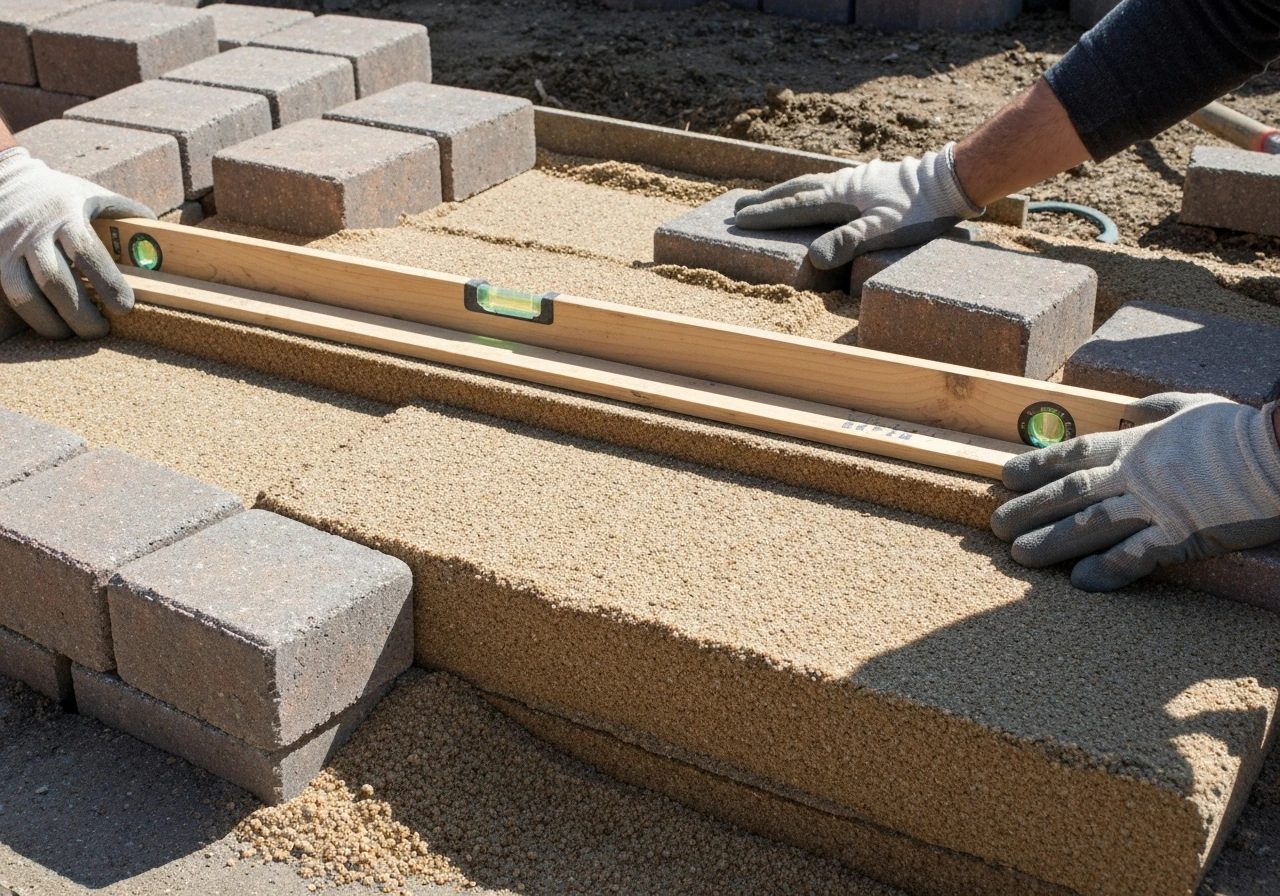
Spread a 1-inch layer of coarse bedding sand over the top of each block tier, screed it level, and set your tread bricks or pavers firmly into it. For dry-set treads, this is the standard method. For mortared treads, apply a thin mortar bed instead of sand and set the bricks into it. Either way, use a long level across the full tread width to confirm it's flat, and check front-to-back to make sure there's a very slight forward pitch (about 1/8 inch over 12 inches) to shed water forward off the tread. Do not let tread bricks pitch backward toward the riser, that pools water and creates a slip hazard.
Cutting bricks and pavers
You'll almost certainly need cuts at the edges or where steps meet the patio. A rented brick splitter works well for straight cuts on standard bricks. For pavers and for curved or angled cuts, use an angle grinder with a diamond blade. Always score a line first and cut in multiple passes rather than forcing one deep cut. Wear eye protection and a dust mask, masonry dust is genuinely harmful. Test fit cut pieces dry before setting them in mortar or sand.
Tightening, edging, and finishing the details
Once all treads and risers are set, the step structure needs to be locked in place at its perimeter. Even a mortared step run benefits from edge restraints along the sides to prevent lateral spreading over time. For dry-set steps, this is non-negotiable. Drive steel or heavy-duty plastic edge restraints into the gravel base on both sides of the step structure, hammering the galvanized spikes through the restraint flange every 12 inches or so.
For dry-set joints, sweep polymeric jointing sand over the entire surface, work it into all joints with a stiff broom, then gently mist the surface with water to activate the binder in the polymeric sand. Let it dry for at least 24 hours before walking on it. Standard coarse sand works too, but it needs to be re-swept periodically as it slowly migrates out of joints. For mortared joints, tool the joints with a jointing tool while the mortar is still slightly soft (press a thumb in, if it leaves a print without sticking, it's ready to tool). Clean excess mortar off face surfaces before it hardens.
If your top tread meets the patio surface, consider finishing that transition with a cap brick or bullnose paver to create a clean, defined edge. This also protects the exposed edge of both the tread and the patio from chipping. Matching the cap style and color to your existing patio bricks makes the steps look intentional rather than like an afterthought, which matters for resale value and overall appearance.
Common mistakes and how to fix them
I've seen (and made) most of these mistakes, so let me save you some grief.
- Uneven riser heights: If you measure at the end and find one step is 6 inches and another is 7.5 inches, that inconsistency is a serious trip hazard. IRC R311.7 limits the allowable variation between the tallest and shortest riser in a flight to 3/8 inch. If dry-set steps haven't been mortared yet, lift the offending tread and adjust the sand bed. For mortared steps, you may need to chisel off and re-lay that tier.
- Steps that settled and cracked: This almost always comes back to an inadequate or improperly compacted base, or fine sand used instead of crushed gravel. If the damage is minor, you can sometimes inject a self-leveling polyurethane foam product under the slab to lift it. For serious settlement, the only real fix is to pull the steps and rebuild the base correctly.
- Water pooling on treads: Check the forward pitch on each tread. A dead-flat or slightly backward-sloping tread holds water and ices over in winter. Correct it by lifting dry-set treads and adjusting the sand bed, or grinding down a high rear edge on a mortared tread.
- Gaps opening between steps and the patio: This happens when the steps move independently from the patio. The fix is to tie the top step into the patio edge with mortar or construction adhesive once everything has settled, and to make sure the base extends under both the steps and the adjacent patio edge rather than stopping abruptly.
- Cracked or spalling bricks: In cold climates, using the wrong brick grade (SW vs MW) leads to freeze-thaw spalling within a few winters. You'll need to replace affected bricks. Going forward, seal exposed brick surfaces and use Grade SW brick.
- Out-of-square layout: Catch this early with the 3-4-5 check. Once bricks are mortared, fixing a crooked run means demolishing and rebuilding.
Safety checks, sealing, and keeping your steps looking good long-term
Before you call the steps done, walk through this final checklist. Stand on each tread and check for any rocking or wobble. Check every riser with a level. Make sure the total rise variation across all steps is under 3/8 inch. Confirm the forward pitch on every tread. Look at the transition between the top tread and the patio surface, it should be flush or within 1/4 inch. Check that edge restraints are fully driven and no spikes are protruding. Sweep away any loose debris, sand, or mortar crumbs.
Curing and settling time
If you used mortar anywhere in the build, give it a full 28 days to reach full cure strength before heavy foot traffic or furniture weight. It's structurally usable much sooner (about 24 to 48 hours for light use), but the full cure is when it hits maximum hardness. Polymeric jointing sand needs at least 24 hours dry time after activation. Expect a small amount of settlement in dry-set steps during the first season as everything beds in. After the first winter, check all joints and sweep in fresh polymeric sand anywhere gaps have opened.
Sealing options
Sealing is optional but genuinely worth it for brick steps in freeze-thaw climates or anywhere the steps are exposed to heavy rain and road salt. A penetrating silane-siloxane sealer is the best choice for clay brick: it repels water without changing the surface appearance. Acrylic sealers give a slight sheen and work well on concrete pavers. Apply sealer to clean, dry bricks no sooner than 30 days after installation. Reapply every 3 to 5 years depending on traffic and climate. Never seal a wet or dirty surface, it traps moisture and causes the exact spalling you're trying to prevent.
Ongoing maintenance
Every spring, check the joints and refill any that have washed out. In freeze-thaw climates, avoid rock salt on brick or paver steps since it accelerates surface spalling. Use sand or a calcium chloride product labeled safe for masonry instead. Rinse steps with a garden hose periodically to clear debris from joints. Every few years, a pressure wash on a low setting (under 1,500 PSI) followed by a fresh seal coat will keep the surface looking clean and extend the life of the brick significantly. Well-built brick steps can easily last 20 to 30 years with minimal upkeep, which is the real payoff for doing the base work right from day one.
FAQ
What height should I measure for the riser, before or after I add the tread brick or paver?
For DIY brick patio steps, aim for risers that meet code limits after the tread is installed, not based on the brick alone. Practically, decide your finished tread thickness first (brick or paver thickness), then build your riser block height so the combined rise lands at or below 7.75 inches. If you do the math early, you avoid the common problem of having an over-height top step that cannot be fixed cleanly without rebuilding the support core.
Can I build diy brick patio steps on sloped or uneven ground?
Yes, but only when the whole base and drainage plan still works. If the steps need to follow an existing slope, create a terraced, stepped bench so each step portion sits on firm, undisturbed material, then keep the tread surfaces with that slight forward pitch. Avoid the temptation to slope the entire base or rely on leveling sand under the blocks, both of which can shift during freeze-thaw.
What’s the best sand and gravel to use, and can I substitute fine leveling sand?
Use coarse concrete sand or granite screenings for the bedding layer, not fine leveling sand or play sand. Fine sand compacts into a weaker layer, traps water, and can migrate out of joints over time. For the compacted base, use crushed gravel (angular) rather than rounded river rock, because angular material locks together under vibration.
If I’m in a cold climate, can I still use standard clay bricks for the treads and risers?
You can, but only if the product is rated for ground contact and the specific exposure conditions. In freeze-thaw zones, look for a brick grade that is intended for severe weathering and use it for parts exposed to moisture cycles, especially treads and exterior risers. If you use non-rated clay bricks, you may get surface scaling and edge chipping sooner than expected.
Do I really need edge restraints if my diy brick patio steps feel stable right now?
Not for anything structural. Even if you choose mortar or dry-set for the facing, the base must be compacted in layers and restrained at the perimeter. If you only “fill in” with sand or skip edge restraints, lateral movement can happen even when the steps feel solid on day one, then worsen after the first winter.
How should I handle polymeric jointing sand after installing dry-set joints?
Polymeric jointing sand is best for dry-set joints because it locks gaps and reduces weed growth, but it has specific care requirements. Keep the surface dry enough to activate it properly, mist lightly after sweeping it in, then do not disturb the joints for at least a full day. If you have a heavy rain forecast right after installation, wait or plan protective coverage so the binder does not activate prematurely.
How much pitch should my treads have, and what happens if they pitch backward?
A small amount of forward pitch is correct, but too much can make walking uncomfortable and increase toe catch risk. Use the level across the entire tread width and measure the pitch consistently from front to back. If you accidentally pitch backward, water sits against the riser and creates a slip hazard while accelerating brick or mortar deterioration at the joint line.
How long should I wait before walking on mortared diy brick patio steps?
For mortared construction, mortar joints need enough working time to tool cleanly and still cure fully. Plan to keep traffic off the steps until cure progress is complete, then avoid putting heavy loads on the structure early. Also, any mortar smearing on brick faces should be cleaned promptly because hardened mortar is harder to remove and can mar the look.
What’s the best way to verify my step layout is square before setting bricks?
A practical way to confirm square and correct alignment is to measure diagonal distances before you set any facing bricks and to re-check after you build each tier. If your diagonals are off, correct the underlying concrete block layout immediately. Fixing a crooked finished run later is difficult because the facing bricks or pavers will not “pull themselves” into alignment without breaking joints or shifting restraints.
If the top tread does not match the patio height, can I fix it with a cap brick?
For the top transition, if the top tread ends up higher or lower than the patio surface, use a cap or bullnose style edge piece to create a defined, durable boundary. Ideally the top is flush or within about a quarter inch so toes do not catch. If you are already locked into a height mismatch, a cap style can improve safety and appearance more than trying to patch with extra sand.
If I’m building a fire pit on the same patio area, how does that affect diy brick patio steps?
Yes, but do it with a “load and vibration” mindset. For a nearby feature like a fire pit, you need appropriate base thickness and drainage so heat cycles do not combine with settling to crack the surrounding step structure. Keep the base of the feature and the step base compatible, and ensure water can still shed away from joints between the two areas.
Should I seal brick steps, and when is the right time to apply sealer?
Sealing depends on climate, exposure, and the brick type. In freeze-thaw areas and where there is road salt or frequent rain, penetrating silane-siloxane sealing on clay brick helps reduce water uptake and spalling risk without changing appearance much. Do not seal a wet or dirty surface, and apply only after a full cure window so trapped moisture is not sealed in.