
You can build brick columns for a patio using one of three methods: solid brick masonry, brick veneer over a CMU or concrete pier, or brick veneer over a wood or steel post. For most DIYers building decorative columns that don't carry a roof or pergola beam, brick veneer over a concrete-filled CMU core is the sweet spot between durability and achievable skill level. Structural columns that support a roof or heavy beam are a different story and almost always need a permit, engineered footing design, and rebar. This guide walks you through both situations so you know exactly what you're getting into before you mix a single batch of mortar.
How to Build Brick Columns for Patio: Complete DIY Guide

Clara Farrell
27 Jul 2026
Who this guide is for
This guide is written for homeowners and first-time DIYers who want to add brick columns to an existing or new patio, whether for a simple decorative accent, to anchor a pergola, to frame a gate opening, or to support a porch roof. If you're already tackling a broader brick patio build, columns are a natural extension of that project. I'll cover everything from planning and permits through footing excavation, laying courses, installing caps, and tying the columns into your patio surface. I've also included guidance on how columns connect to adjacent features like short retaining walls, steps, and fire pit installations, since those often come up in the same project. For step-by-step instructions on building steps that tie into brick columns, see our guide to DIY brick patio steps.
Decorative vs load-bearing columns: know which one you're building
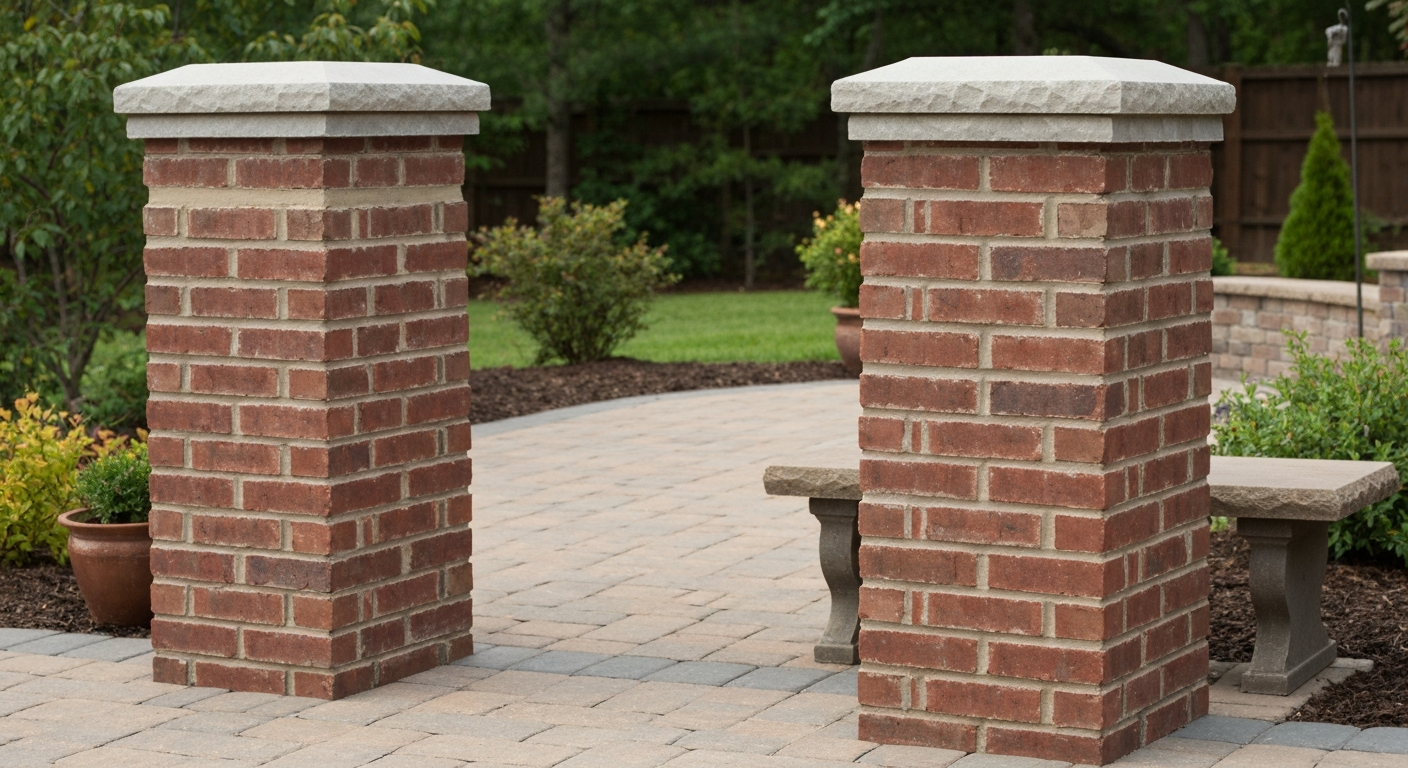
This is the single most important question to answer before you buy a single brick. Decorative columns are freestanding masonry piers that hold nothing structural. They frame an entrance, anchor a mailbox, support a planter or a light fixture, or act as visual anchors at the corners of a patio. They carry only their own self-weight and, maybe, a small ornamental load. Load-bearing columns do actual structural work: they carry a roof, a pergola or arbor beam, a porch header, or a guard/railing post that transfers horizontal forces. The engineering requirements, the footing size, the rebar, and the permit situation are completely different for each.
| Feature | Decorative Column | Load-Bearing Column |
|---|---|---|
| Primary purpose | Visual framing, accent, lighting | Carries roof, beam, pergola, or guard |
| Typical permit requirement | Often exempt, but confirm locally | Almost always required |
| Structural engineer needed? | Usually no | Recommended or required |
| Minimum footing depth | Below frost line still strongly advised | Below frost line, engineered size required |
| Rebar/reinforcement | Optional but recommended | Required, designed to code |
| Governing code | Local ordinances vary | IRC + ACI 530 / TMS 402 |
| DIY-friendly? | Yes, with basic masonry skills | Possible but needs professional review |
Even decorative columns benefit from at minimum a proper footing and some vertical reinforcement. A freestanding brick column with no rebar and a shallow footing will eventually lean, crack, or topple. I've seen it happen to columns that looked great for two or three years and then had a frost heave quietly knock them off-plumb.
Permits, frost lines, and when to call an engineer
In most U.S. municipalities, a building permit and inspections are required any time a column carries a structural load, which includes supporting a roof, porch beam, or guard system. Check your local municipality (for example, see Roofing, Siding, Windows & Doors | Manheim Township, PA - Official Website) to confirm whether a permit and inspections are required for columns that carry structural loads. Non-structural decorative pedestals are often (not always) exempt, but rules vary by jurisdiction and some localities require permits for any masonry work above a certain height. The safest approach is to call your local building department before you start. It takes five minutes and saves you from having to tear out work later.
The International Residential Code (IRC) and local amendments govern when approved plans and inspections are required for structural elements like porch columns. When you file for a permit, most municipalities will want to verify footing dimensions, reinforcement placement, and anchor bolt layout before you pour concrete. That pre-pour inspection is standard, and skipping it is the most common permit violation I hear about from readers.
Frost line depth is non-negotiable. Your footing must bear below the local frost line or seasonal freeze-thaw cycles will heave it out of the ground. Frost depths across the U.S. range from zero in the deep South to over 60 inches in parts of Minnesota and Maine. Check NOAA frost-penetration maps or a compiled state-by-state reference for a starting point, then confirm the required depth with your local building department, since local amendments often add a safety buffer on top of the mapped depth.
For structural columns, I strongly recommend at least a consultation with a structural engineer before you start. The engineer will size the footing based on the column load and your soil's allowable bearing capacity, specify the rebar layout, and tell you if you need a grade beam connecting multiple column footings. This isn't expensive for a simple patio project and it protects both your structure and your safety. Design of reinforced masonry columns in the U.S. is governed by ACI 530 / TMS 402 (the masonry code), and NCMA technical notes like TEK 17-03A give prescriptive reinforcement tables for common column sizes.
Sizing columns, spacing, and footing depth
For decorative patio columns, a 12x12-inch nominal column (three bricks wide by three bricks deep, using standard modular bricks) is the most common residential size and looks proportional next to a standard 8-foot patio door or gate opening. A 16x16-inch column reads as more substantial and suits wider pergola spans or heavier cap stones. Columns carrying a pergola beam or light porch roof typically start at 16x16 inches nominal, with a reinforced CMU or concrete core inside.
Column spacing depends on what you're framing. For a simple entrance pair, 4 to 6 feet between column faces is typical. For a pergola with a wood beam, the structural beam span determines the column spacing, and a structural engineer or a span table for the specific lumber size should be used rather than guessing. Overloaded beams are a real safety risk.
Footing depth: go below the frost line in your area, full stop. For footing width and thickness, a simple rule of thumb for decorative columns is to make the footing at least twice as wide as the column and 12 inches thick at a minimum. For a 12x12-inch column, that means a 24x24-inch footing at 12 inches thick. For structural columns, use engineered footing dimensions based on the column load divided by the allowable soil bearing capacity for your site. Never assume soil bearing capacity without a soil report if the load is significant.
Three construction methods compared
There are three practical ways to build a brick patio column. Each has a real use case. Choosing the wrong one for your situation wastes money and may create a safety problem.
Method 1: Solid brick masonry
Solid clay brick masonry means laying bricks in an interlocking pattern all the way through the column cross-section with no separate structural core. This is the traditional approach and produces the most authentic-looking result. It's also the most labor-intensive and requires consistent coursing, proper bond patterns, and full mortar coverage in every joint. For structural columns, ACI 530 / TMS 402 requires vertical rebar through a grouted core even in solid masonry, plus horizontal ties at specified intervals. For smaller decorative columns, a central cavity filled with mortar or grout and a single vertical rebar provides adequate stability.
Method 2: Brick veneer over CMU or reinforced concrete pier
This is my recommended method for most DIY patio projects. You build the structural core first: either a hollow concrete masonry unit (CMU, also called a concrete block) column with rebar in the cells and masonry grout poured in, or a round concrete-filled tube form (Sonotube) acting as the pier. Once the core is set and cured, you lay a single wythe of face brick around the outside as a veneer, tied back to the core with metal ties. The brick is doing the cosmetic work; the CMU or concrete is doing the structural work. This is faster, more forgiving for beginners, and structurally very solid.
Method 3: Brick veneer over a wood or steel post
Laying brick around a 4x4 or 6x6 pressure-treated post is fast and works well for very lightweight decorative applications. The post carries the load; the brick is purely cosmetic. The limitation is that wood moves with moisture and temperature, which can crack mortar joints over time. This method is not suitable where the masonry itself needs to carry lateral load or where you want a long-term weather-resistant column. It can work for a temporary or budget-conscious installation, but expect to repoint mortar joints within 5 to 10 years.
| Method | Best For | Structural Rating | DIY Difficulty | Relative Cost |
|---|---|---|---|---|
| Solid brick masonry | Traditional look, authentic detailing | High (with rebar + grout) | Moderate to hard | $$–$$$ |
| Brick veneer over CMU/concrete pier | Most patio columns, pergola support | High (engineered core) | Moderate | $$ |
| Brick veneer over wood/steel post | Purely decorative, lightweight accents | Low (brick is non-structural) | Easy | $ |
For columns that will anchor a pergola or carry any real load, go with Method 2 or a properly reinforced Method 1. Method 3 is fine for framing a pathway entrance with no overhead structure.
Tools, materials, and mix specifications
Tool checklist
- Post-hole digger or rented power auger (for footing holes)
- Spade shovel and hand tamper or plate compactor
- Mason's line and line level
- 4-foot level and torpedo level
- Brick trowel (10-inch pointing trowel for joints)
- Brick jointer or round dowel for tooling joints
- Rubber mallet
- Angle grinder with diamond blade or brick splitter for cutting
- Mixing trough or electric paddle mixer
- Buckets (5-gallon), measuring container, garden hose
- Mason's corner poles or story pole (helps keep courses level)
- Tape measure, pencil, chalk line
- Safety glasses, leather gloves, knee pads
Materials shopping list
- Face bricks: ASTM C216 Grade SW (severe weathering) for any freeze-thaw climate, Grade MW acceptable in mild climates
- CMU blocks (8x8x16 nominal) for core construction if using Method 2
- Rebar: #4 (1/2-inch) vertical bars for decorative columns; #5 or engineered size for structural
- Horizontal ties: 9-gauge ladder-type or Z-ties at 16-inch vertical intervals
- Masonry grout (per ASTM C476): premixed sacked grout or fine grout mixed on site, target 8–11-inch slump
- Concrete for footings: 3,000 psi mix minimum; specify air entrainment (4–7% air) for freeze-thaw climates
- Mortar: Type S for below-grade and structural applications; Type N for above-grade general masonry (ASTM C270)
- Anchor bolts or cast-in post bases (Simpson Strong-Tie or equivalent with ICC-ES ESR report) sized to column load
- Capstones or coping: natural stone, precast, or soldier course brick cap
- Masonry sealer (penetrating siloxane or silicone-based) for weatherproofing
- Flashing (self-adhesive rubberized or sheet metal) for under the cap and at the base of brick veneer
- Plastic or metal weep inserts for veneer cavities (space approximately every 24 inches)
- Foam backer rod and polyurethane caulk for control joints and cap sealing
Mix specifications
Mortar type matters more than most beginners realize. Below grade and for structural applications, use Type S mortar (higher strength and better bond for lateral/shear loads). For above-grade general brickwork on a decorative column, Type N mortar is the industry standard, per ASTM C270 and Brick Industry Association guidance. Do not use Type M (high-strength, rigid) above grade; it's too stiff and will actually cause brick faces to spall in freeze-thaw conditions.
For masonry grout filling a reinforced CMU core or hollow brick column, follow ASTM C476: mix to a pourable consistency with a slump of 8 to 11 inches. If you're specifying by compressive strength, the minimum 28-day strength target is around 2,000 psi (13.8 MPa). For footings exposed to freeze-thaw cycles, use air-entrained concrete. ACI 201.2R recommends 4 to 7 percent air content depending on aggregate size and exposure severity. Most ready-mix suppliers can spec this automatically; just ask for air-entrained mix when you order.
Realistic costs and project time
| Method | DIY Material Cost (per column) | Pro Installed Cost (per column) | DIY Time (per column) | Skill Level |
|---|---|---|---|---|
| Solid brick masonry (decorative, ~4 ft tall) | $150–$250 | $600–$1,200 | 1–2 days | Moderate |
| Brick veneer over CMU core (decorative, ~4 ft tall) | $120–$200 | $500–$1,000 | 1 day + curing | Moderate |
| Brick veneer over CMU core (structural, pergola-height ~8 ft) | $300–$500 | $1,200–$2,500+ | 2–3 days + curing | Moderate–Hard |
| Brick veneer over wood post (decorative, ~4 ft tall) | $80–$150 | $400–$800 | Half day | Easy–Moderate |
These ranges assume standard modular face brick at roughly $0.50 to $1.50 per brick, basic CMU at $1.50 to $3.00 per block, and sacked mortar at $8 to $15 per 80-pound bag. A typical 4-foot decorative column in the 12x12-inch size uses approximately 80 to 100 standard bricks. Labor is the biggest variable in professional quotes; markets vary significantly. If you're doing a multi-column project (four or more columns for a pergola, for example), the per-column material cost drops somewhat due to bulk purchasing, but the project time scales accordingly. Budget at least a full weekend for a two-column entrance project when you factor in footing cure time.
Site prep and layout: the part most people skip
Bad prep is the root cause of almost every failed column I've seen. The column looked fine for a year, then it shifted, cracked, or leaned, all because the footing was undersized, poured on loose soil, or set above the frost line. Good layout and excavation work is unglamorous but it's the foundation of everything else.
Call 811 before you dig
Before you touch the ground, call 811 (the national dig-safe number in the U.S.) to have underground utilities marked. This is free, required by law in most states, and takes two to three business days. Column footings go 24 inches or deeper, easily deep enough to hit a gas line, electrical conduit, or irrigation pipe. This is non-negotiable.
Marking and layout
Use batter boards and mason's line to establish the exact position of each column before you dig. Place the batter boards about 2 feet outside the planned column corners so you can remove and replace the lines without disturbing the boards. Drop a plumb bob from the line intersections to mark the footing center on the ground. Spray paint or stakes work for marking the footing perimeter. Double-check your diagonal measurements (equal diagonals confirm square layout) if you're positioning multiple columns in a grid.
Excavation and footing preparation
- Excavate to the required depth, which is below your local frost line plus the footing thickness. For a 12-inch-thick footing in a 30-inch frost-depth area, you're digging to 42 inches.
- Clear any loose fill, organic material, or disturbed soil from the bottom of the hole. You want to pour onto undisturbed native soil or properly compacted fill.
- Tamp the bottom of the excavation firmly with a hand tamper. If the soil is soft or sandy, consider 4 inches of compacted gravel at the bottom for drainage.
- Set your rebar cage or vertical bars in the hole, positioning them per your plan. For a 12x12-inch column, one #4 bar centered vertically is a minimum; for a 16x16 or larger structural column, four bars in a square arrangement are the standard starting point per NCMA TEK 17-03A guidance.
- If required by your permit, call for the pre-pour inspection before placing concrete. The inspector will verify footing depth, dimensions, rebar placement, and anchor bolt positions.
- Pour the footing concrete (3,000 psi minimum, air-entrained in freeze-thaw climates), consolidate with a rod or vibrator, and screed level. If you're installing anchor bolts for a post base, position them while the concrete is wet using a template to ensure bolt spacing matches your hardware.
- Allow the footing to cure for a minimum of 3 days (ideally 7 days) before loading it with masonry.
Grading and drainage around the column base
Grade the ground around the column base so water drains away from the footing at a minimum slope of 1 inch per foot for the first 6 feet. Columns that sit in ponding water at the base will suffer accelerated mortar deterioration and potential footing movement over time. If your patio surface ties into the column base, plan the finished patio grade before you pour so the patio drains away from the column rather than directing water toward it. Integrating columns with a wider brick patio layout requires coordinating your column footing depths and finished surface grades early in the planning stage.
Step-by-step: laying the brick courses
Once your footing is cured and your core structure (CMU or rebar cage) is in place, you're ready to lay brick. For a full, illustrated walkthrough on the basics of laying brick for a patio, see how to install patio bricks. Wet your bricks lightly before laying them if they're very dry and porous. Dry bricks suck moisture out of mortar too fast, weakening the bond. You don't want them dripping wet, just damp.
- Dry-lay the first course on the footing without mortar to confirm your layout and check spacing. This is the moment to catch sizing errors before you commit.
- Mix your mortar to a stiff peanut-butter consistency. Spread a full bed joint (3/8-inch thickness is standard) on the footing surface for the first course.
- Set the corner bricks first, checking level and plumb in both directions. These are your reference points for the entire column.
- Lay the remaining bricks of the first course, checking level across the course with a 4-foot level. Tap with a rubber mallet to adjust.
- Apply mortar to the head joints (vertical joints) as you go, pressing mortar into the joint from the side and filling completely. Voids in head joints cause water infiltration and spalling.
- For a veneer column over CMU: place your metal veneer ties (Z-ties or ladder ties) every other course vertically, embedded in the mortar joint and attached or tied to the CMU core.
- Build up corners and leads first, then fill in between using a mason's line stretched between the corners as a height guide for each course.
- Use a story pole or mark your lead bricks at 3/8-inch joint intervals to maintain consistent course height. A 2-3/4-inch brick plus a 3/8-inch mortar joint equals 3-1/8 inches per course; use this to calculate total column height.
- Every 4 to 6 courses, fill the CMU core cells or internal cavity with masonry grout. Consolidate the grout by rodding or tapping. Don't fill the entire height at once; pour in lifts of 4 to 6 courses and reconsolidate.
- Tool your mortar joints when the mortar is thumbprint-firm (neither wet nor fully hard). A concave or rodded joint performs best for exterior water shedding. Tool all four sides of the column as you go up.
Bond patterns for columns
For a square column, a common pattern is to alternate the corner brick orientation by 90 degrees each course so the column corners interlock. On a 12x12-inch column using standard modular bricks, this typically means two bricks running one direction on one face, and one brick running perpendicular at the corner, then reversing the orientation on the next course. This interlocking keeps the column from splitting vertically along a continuous vertical joint. Never build a column with continuous vertical joints at the corners; that's the fastest path to structural failure.
Building the cap
The cap (also called coping) is one of the most important details on the whole column. Water that sits on top of a column without a properly designed cap will work down into the mortar joints, freeze, expand, and eventually crack or spall the brick face. A well-built cap protects everything below it.
Install a layer of rubberized self-adhesive flashing over the top course of brick before setting the cap. The cap itself should overhang the column face by a minimum of 1 inch on all sides (4 inches is the industry recommendation for effective water shedding). Slope the top of the cap slightly from center to edges, or use a precast cap with a built-in drip edge. Set the capstone in Type S mortar, fully bedded, and caulk the perimeter joint between the cap and the top brick course with a polyurethane sealant to prevent water infiltration at that vulnerable transition.
Weatherproofing and sealing
For columns in freeze-thaw climates, two things protect the brick: specifying Grade SW (severe weathering) face brick per ASTM C216 in the first place, and applying a penetrating masonry sealer after the mortar has cured (wait at least 28 days). A penetrating siloxane sealer repels water without trapping moisture inside the masonry, which is critical. Film-forming sealers can trap water and cause spalling. Reapply sealer every 5 to 7 years depending on the product and exposure.
For veneer columns, install weep holes or weep inserts at the base of the veneer cavity, spaced approximately every 24 inches horizontally. These allow any moisture that gets behind the veneer to drain out rather than accumulate. Pair the weeps with through-wall flashing at the base of the veneer so water is directed out and not absorbed into the footing or core.
Integrating columns with your patio and other features
Brick columns rarely exist in isolation. They tie into patio surfaces, low walls, steps, pergolas, and fire pit areas. Each of those connections needs a bit of planning. When the column footing and the patio sub-base are being built at the same time, coordinate the footing top elevation so the finished column base sits at or just above the finished patio surface. If the column footing projects above the patio, it creates a water trap and a trip hazard.
If you're building short brick walls between columns (to create a knee wall or privacy screen), the wall needs its own continuous footing below frost depth, or it needs to be tied into the column footings with a grade beam. See our companion guide on how to build a brick patio wall for step-by-step footing, reinforcement, and bonding details when you're tying short walls into columns. Columns and walls that share a footing system move together; columns and walls on separate independent footings can move relative to each other and crack at the junction. A small amount of planning here saves a frustrating crack repair later.
For pergola columns, install a cast-in post base anchor at the top of the column during the last few courses of construction, set in fresh mortar with a top-plate anchor bolt cast into the final grout pour. Simpson Strong-Tie and similar manufacturers publish allowable load tables and ICC-ES ESR reports for their anchors; size the anchor to the beam load and follow the required embedment depth from the manufacturer's table.
If you're placing a fire pit near your patio columns, maintain a minimum clearance of 10 feet from any combustible structure (more if local codes require it) and be aware that repeated heat cycling can accelerate mortar joint degradation in nearby masonry. Non-combustible refractory mortar in the fire pit structure itself is the right call there, but standard Type N mortar in the columns several feet away is not a fire risk.
Common mistakes and how to avoid them
- Footing too shallow: the single most common failure. Footings above the frost line will heave. Check your local frost depth and add margin.
- Skipping the pre-pour inspection: if you have a permit, the inspector must see the reinforcement before you pour. Pouring before the inspection can require you to excavate and start over.
- Using Type M mortar above grade: it's too stiff, bonds poorly with brick, and causes spalling. Use Type N above grade and Type S below.
- Continuous vertical joints at column corners: these are structural weak points and look wrong. Alternate corner brick orientation every course.
- No cap flashing or insufficient cap overhang: water sitting on top of the column destroys it over time. Flash under the cap and ensure at least a 1-inch overhang on all sides.
- Grout poured in one shot: pour grout in lifts of 4 to 6 courses and consolidate each lift. Pouring the full height at once can cause grout segregation and voids around the rebar.
- Mortar joints not fully filled: thin or voided head joints (vertical joints) allow water in. Press mortar firmly into every joint, front and back.
- Not checking plumb every few courses: columns drift off-plumb gradually. Check with a 4-foot level on two adjacent faces every 3 to 4 courses and correct while the mortar is still workable.
- Using regular concrete sealer instead of penetrating masonry sealer: film-forming products trap moisture and cause spalling. Use a breathable penetrating siloxane product.
Safety notes
Mortar and grout are caustic. Wear gloves and safety glasses at all times when mixing or laying. Portland cement in mortar can cause serious chemical burns after prolonged skin contact, especially when wet. Change gloves if they get saturated with mortar. For columns taller than 4 feet, you'll need proper scaffolding or a sturdy work platform; leaning off a ladder while holding a brick and a trowel is a recipe for a fall. Rent a small pump-jack scaffold or build a simple plank-and-sawhorse platform at mid-column height.
For structural columns, never skip the engineering review or the permit process. A column that fails under load, whether from an undersized footing, inadequate rebar, or a missing anchor bolt, can bring down a pergola, porch roof, or overhead structure with serious consequences. The permit and inspection process exists specifically to catch these issues before they become disasters.
A quick word on related patio projects
Brick columns rarely get built in a vacuum. If you're building columns as part of a larger patio installation, the groundwork you're doing here, the footing excavation, the grading, the layout lines, all of it feeds directly into the wider patio build. The sub-base work for the patio surface and the footing work for the columns should be coordinated in the same planning session so you're not excavating twice or fighting incompatible grades. For step-by-step instructions on constructing the adjoining patio surface using brick and cement, see our guide on how to build a patio with bricks and cement. If you also need guidance on constructing the finished surface, see our step-by-step on how to build a patio deck with bricks for material choices and laying patterns. For a step-by-step visual walkthrough, see our YouTube tutorial on how to build a brick patio how to build a brick patio (YouTube tutorial). Similarly, if you're adding steps, low walls, or a patio deck structure that ties into the columns, those connections are much easier to design in from the start than to retrofit later.
FAQ
Do I need a permit to build brick columns for my patio?
Often yes if the columns are structural (support a roof, beam, porch, guard, or replace existing structural columns). Decorative, non‑loadbearing pedestals may be exempt in some jurisdictions. Always check your local building department and the edition of the IRC your jurisdiction enforces; obtain plans and inspections when columns carry loads.
When should I use brick columns versus brick veneer over a backup?
Use solid or reinforced brick/CMU columns when the column must carry structural loads or when high durability/appearance are top priorities. Use brick veneer over reinforced CMU or a concrete pier when you want masonry look with a structural backup that’s faster to build. Brick veneer over a wood or steel post is acceptable for purely decorative columns but not recommended where masonry must be load‑bearing without an engineered backup.
How do I size footings and determine depth for patio columns?
Determine footing area from the vertical load divided by allowable soil bearing capacity (footing area = load / soil bearing capacity). Footings must bear below the local frost line in freeze‑prone areas; frost depths vary by location, so confirm local values. For structural columns, have an engineer calculate footing size and reinforcement; for small decorative columns, follow local prescriptive tables if permitted.
What reinforcement is needed for load‑bearing masonry columns?
Reinforced masonry columns typically require vertical reinforcement (rebar) and transverse ties per masonry code. NCMA/TEK guidance recommends a minimum of four vertical bars for many common column sizes with specified tie spacing and limits on bar size/number. Use code/engineer guidance (ACI 530/ASCE 5/TMS 402) for sizing and placement. Grout-filled cores with proper slump and strength are used to bond reinforcement and transfer loads.
What mortar and grout types should I use?
Select mortar per ASTM C270 and application: Type N for general above‑grade work, Type S for higher lateral or below‑grade structural applications, and Type M for heavy foundation work. Use grout that meets ASTM C476 for reinforced masonry — pourable slump (~8–11 in) and specified compressive strength (commonly ~2,000 psi or per engineer). Air‑entraining admixtures should be used for footings and exterior grout in freeze‑thaw climates.
What materials, tools, and estimated costs should I expect?
Materials: face bricks (specify Grade SW for freeze climates), CMU or concrete pier (if used), rebar, grout, mortar, anchor bolts/post bases, flashing/weeps, capstones/coping, sealant. Tools: level, trowel, jointer, brick hammer, masonry saw/chop saw, mortar mixer, wheelbarrow, measuring tools, safety gear. Costs vary widely by method and region: decorative veneer columns (materials & labor) can be a few hundred dollars each DIY; reinforced masonry or structural columns often cost $1,000+ each installed. Time: a DIY decorative column may take a day or two; structural, reinforced masonry columns (including footing cure time) typically take several days to weeks depending on curing and inspections.