You can build a brick patio on grass, but you cannot just lay bricks on top of it and call it done. The grass and organic material underneath will rot, compress, and shift, and within a season or two your patio will be sunken, uneven, and a tripping hazard.
How to Build a Brick Patio on Grass Step by Step

Clara Farrell
16 May 2026

The right approach is to remove the grass entirely, excavate down 7 to 9 inches, build a proper compacted gravel base, add a bedding sand layer, then set your bricks with edge restraints and jointing sand. If you want a full walkthrough of the process, this guide covers each step in detail how to put in a brick patio. Do that, and you end up with a solid, lasting patio.
Skip any of those steps, and you are basically just decorating your lawn temporarily.
Reality check: can you actually lay bricks on grass?
The short reality is that grass is living organic material sitting on soil, and organic material is the enemy of a stable patio. As the grass and root system underneath decompose, the surface above drops and shifts unevenly. Add to that the fact that soil without compaction will compress differently in different spots under load, and you get a lumpy, unsafe surface fast.
Some people ask whether you can kill the grass first and lay bricks directly on dead organic matter instead of removing it. The answer is no. Dead or alive, the organic material still compresses and rots over time. The grass itself is not the problem you are solving by killing it. You need to physically remove it and excavate to stable, compactable subgrade.
That said, building a brick patio over a grassy area is absolutely a reasonable DIY project. You are not starting from a perfect blank canvas, but with the right prep, the final result is just as durable as if you had started on bare dirt. The grass just means you have a removal step at the front end. If your yard has noticeable soft spots, standing water after rain, or heavy clay soil, pay extra attention to the drainage and base sections below, because those conditions do require a bit more care.
Site prep: removing sod, grading, and handling problem soil
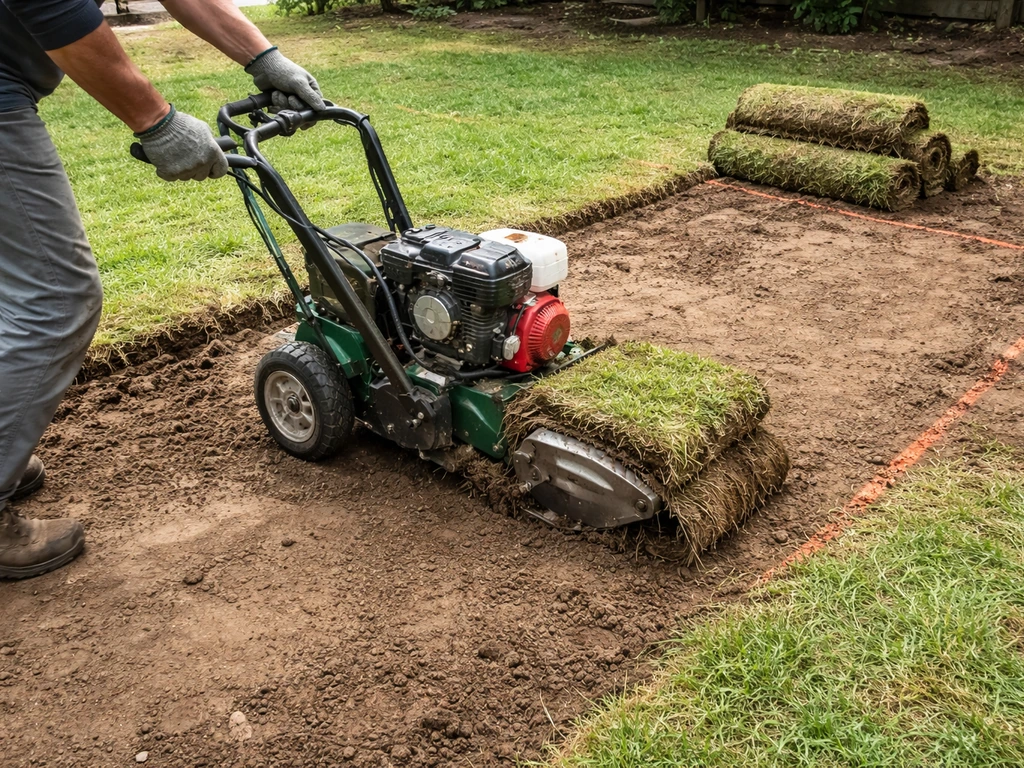
Removing the sod
Mark out your patio area first, adding a few inches on each side beyond your finished dimensions to give yourself working room. A sod cutter (rentable from most home centers for around $75 to $100 per day) is the fastest option for larger areas. For smaller patios, a flat spade works fine. Cut the sod into manageable strips, roll them up, and either compost them or use them to patch other areas of your lawn. Do not leave sod piles on your work site where they will compact back down.
Once the sod is off, you need to excavate. Dig down so that when you add your base layers and bricks, the finished patio surface sits at or just above grade level. A total excavation depth of 7 to 9 inches is a reliable target for most residential projects: that accommodates a 4 to 6 inch compacted gravel base, a 1 to 1.5 inch bedding sand layer, and a standard brick or paver thickness of around 2.25 to 2.5 inches.
Grading the subgrade and handling soft or clay soil
After excavation, look at what you are working with. Firm, dark soil that holds its shape when you step on it is a good sign. Soft, spongy ground that compresses noticeably underfoot is a red flag. Standing water or a wet, muddy base after a recent rain is an even bigger warning sign. If you have soft areas, those spots will need extra compaction or a thicker gravel layer. Some situations call for adding a few extra inches of crushed stone specifically to bridge over weak spots.
Clay soil deserves special mention. Clay holds water, expands when wet, and can push pavers upward through frost heaving in colder climates. If your excavated base is heavy clay, a geotextile separation fabric is not optional, it is essential. ICPI specifically recommends geotextile fabric under paver systems installed over clay soil because clay particles migrate upward into your gravel base over time and undermine the whole system. ICPI Tech Spec 22 emphasizes that geotextile separation under a flexible base helps prevent clay particles from migrating into the aggregate base over time, which can lead to paver system failure geotextile fabric under paver systems installed over clay soil. More on that in the base section below.
Before you do anything else, set your drainage slope. The finished patio surface needs to shed water away from your house or toward a defined drainage direction. The correct slope is between 1/8 inch and 1/4 inch per foot. On a 10-foot-wide patio, that means one edge sits 1.25 to 2.5 inches lower than the other. Set this slope at the subgrade level using stakes and string lines, and carry it consistently through every layer above. If you try to correct the slope with your sand layer later, you will end up with uneven sand depths that compromise stability.
Building the base: layers, thickness, and compacting
The base is what your patio lives or dies on. Get this right and the rest of the project is almost foolproof. Rush it or thin it out to save time and your patio will let you know within a year.
Layer 1: geotextile fabric
After excavation and grading, lay a geotextile landscape fabric (also called a separation geotextile, not standard weed barrier) across the entire excavated area. This fabric sits between your native soil and the gravel base. Its job is to prevent soil particles from migrating upward into the gravel over time, which is the main cause of patio sinking and failure in the long run. Overlap adjacent pieces by at least 12 inches. Do not skip this step if you have clay-heavy soil, but honestly it is good practice in any soil type.
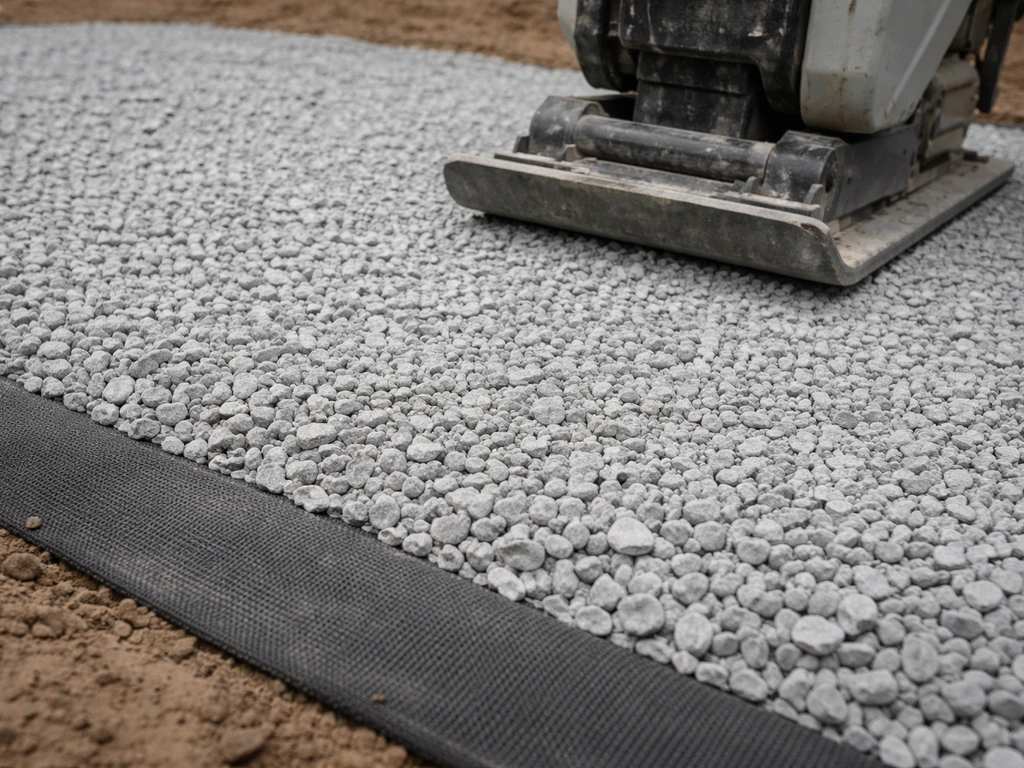
Layer 2: compacted crushed stone base
Crushed stone is the workhorse of your base. Use 3/4 inch crushed angular stone (sometimes called road base, crusher run, or Class II base depending on your region). Avoid smooth round gravel because the angular edges are what lock together and create a stable, compactable surface. For a standard residential patio on firm soil, a 4-inch compacted depth is the minimum. On softer soil or clay, go to 6 inches.
Add the stone in 2-inch lifts (layers) and compact each lift separately with a plate compactor before adding the next one. Renting a plate compactor costs around $60 to $90 per day and it is absolutely worth it. A hand tamper is not a substitute for larger areas; you simply cannot generate enough force to get adequate compaction. Make at least two to three passes over each lift, overlapping your passes. After compacting, the surface should feel solid underfoot with zero give.
Layer 3: bedding sand
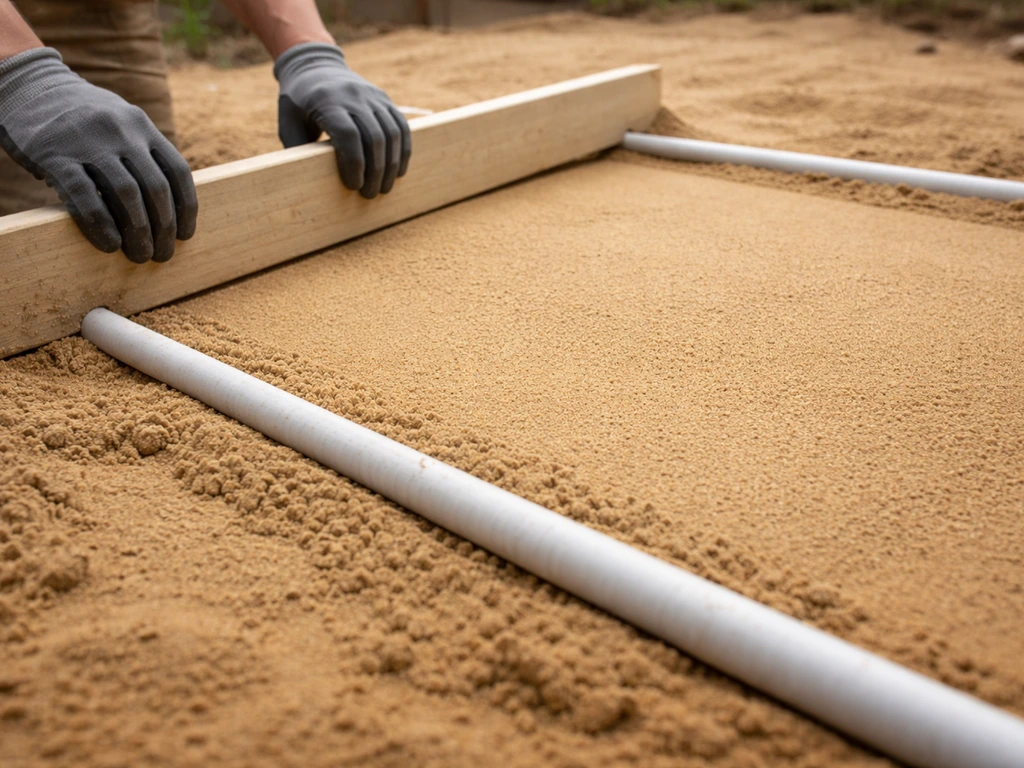
Bedding sand sits directly under the bricks and allows you to make fine adjustments to level and slope. Use coarse concrete sand (also sold as sharp sand or bedding sand), not fine play sand or mason sand. Fine sand compresses too easily and can wash out over time. The correct depth is 1 to 1.5 inches (25 to 40 mm) of uncompacted sand, consistently across the entire area. Do not vary the depth to compensate for an uneven base; if your gravel base is uneven, fix the gravel base first.
Use a screed board to level the sand. A common method is to lay two pipes or conduit pieces of equal diameter (1-inch diameter works well for a 1-inch sand depth) parallel across the surface, pour sand between them, and drag a straight board across the pipes to create a perfectly flat, consistent sand bed. Remove the pipes after screeding and fill the channels with loose sand before laying bricks.
| Layer | Material | Depth (compacted) | Notes |
|---|---|---|---|
| Subgrade | Existing soil, excavated | N/A | Grade and compact; slope 1/8–1/4 inch per foot |
| Separation | Geotextile fabric | N/A | Required over clay; recommended everywhere |
| Base | Angular crushed stone (3/4 inch) | 4–6 inches | Compact in 2-inch lifts; thicker for soft/clay soil |
| Bedding | Coarse concrete sand | 1–1.5 inches | Screed flat; do not vary depth to fix base errors |
| Surface | Brick or clay pavers | ~2.25–2.5 inches | Standard modular brick thickness |
Layout, leveling, and setting the bricks
Planning your layout and pattern
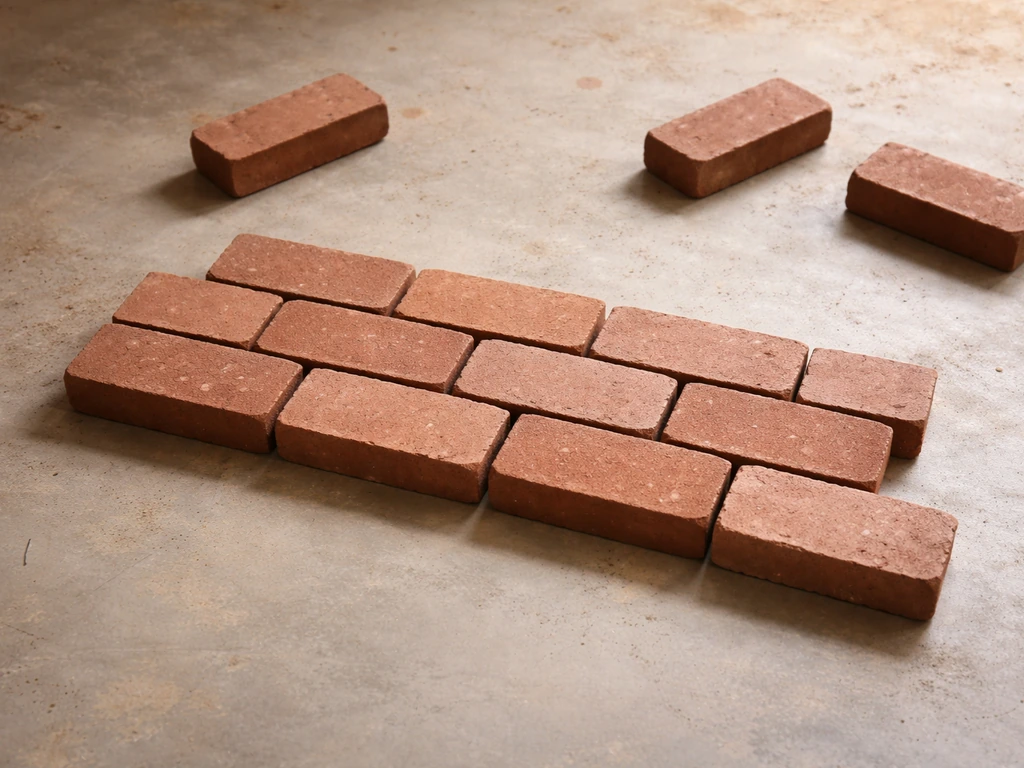
Before you set a single brick, dry-lay a row or two to confirm your spacing and pattern. The most common and beginner-friendly patterns are running bond (like a standard brick wall, offset by half a brick each row), herringbone (45 or 90 degree interlocking), and basket weave. Running bond is the easiest to cut for edges. Herringbone is actually the most dimensionally stable pattern because the interlocking angles resist shifting in all directions, making it a great choice if your patio will see heavy foot traffic or furniture.
Leave a consistent joint gap between bricks. A 3/8-inch spacing is a widely recommended standard that allows enough room for jointing sand while keeping the look tight. Use spacers or a consistent piece of scrap material to maintain even spacing as you work. Inconsistent joints look sloppy and can actually affect how well the polymeric sand locks everything together later.
Setting the bricks
Work from one corner outward, kneeling on a piece of plywood to avoid disturbing your screeded sand bed. Set each brick with a firm, straight-down push. Do not slide bricks into position after they touch the sand; sliding displaces the sand and creates voids underneath. Use a rubber mallet to tap each brick level with its neighbors, and check your progress frequently with a long straightedge or level. Periodically step back and sight down your rows to catch any creeping misalignment early.
As you work, maintain your drainage slope. A 4-foot level with a small shim on one end (sized to match your intended slope) is a handy way to check that the slope is consistent across the patio as you set bricks. Do not rely on eyeballing it.
Cutting bricks for edges
You will almost certainly need to cut some bricks to fill in the edges and any irregular corners. A circular saw with a diamond blade or an angle grinder with a masonry disc works for occasional cuts. For a project with lots of cuts, a rented masonry saw (wet saw) is faster and cleaner. Always score and cut on the waste side of your line, and wear eye and ear protection.
Edging and jointing: locking everything in place
Edge restraints
Edge restraints are non-negotiable. Without them, your bricks will slowly migrate outward over time, creating gaps in the center and a patio that looks like it is slowly exploding. The edge restraint goes around the perimeter of the patio, pressed tightly against the outer face of the bricks, and is spiked down through the restraint into the compacted gravel base below. Use a proper plastic paver edging or metal landscape edging rated for pavers, not standard garden bed edging or soil backfill. ICPI is explicit that garden bed edging is not an acceptable paver restraint.
Install the restraint so it sits against the bricks at or just below the finished patio surface. Drive the spikes at intervals of about 12 inches on straight runs, and more frequently on curves. Once the restraint is in, give the outer bricks a final check for alignment before moving on.
Filling the joints with polymeric sand
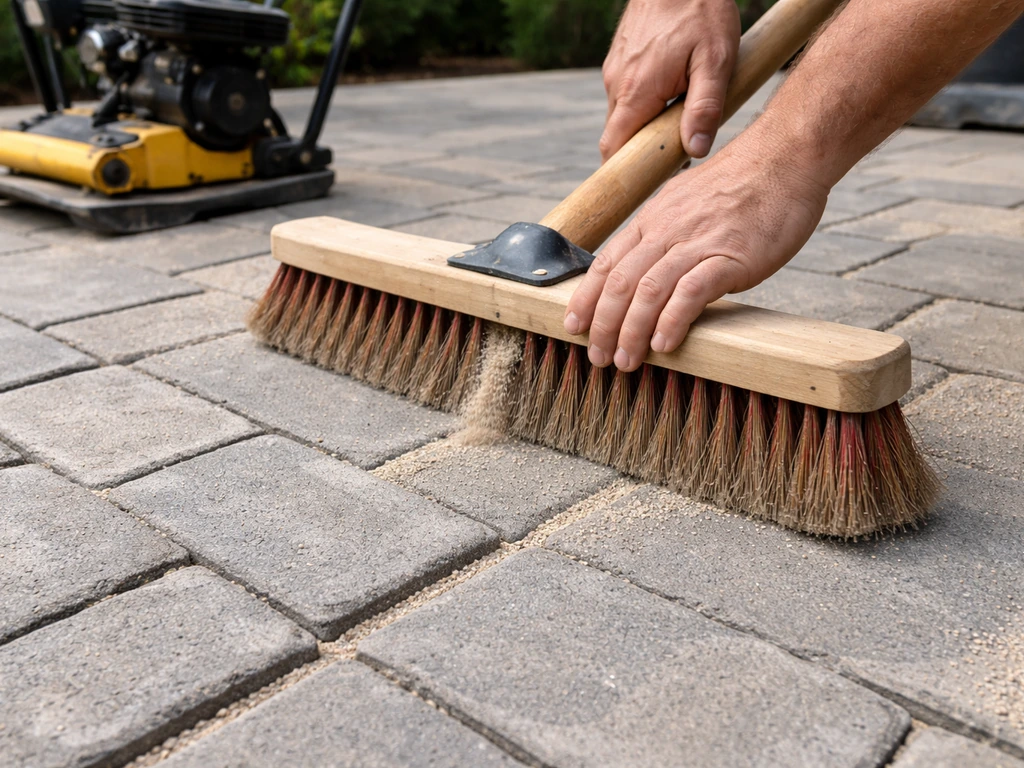
Polymeric sand is the best jointing material for a DIY patio. It contains a polymer binder that activates with water, hardens the sand, and resists washing out and ant intrusion far better than plain sand. Pour dry polymeric sand over the surface and sweep it diagonally across the joints with a push broom, filling the gaps. Use a leaf blower held nearly parallel to the surface (not pointed down into the joints) to blow excess sand off the brick faces.
Repeat the sweeping and blowing process until the joints are filled to within about 1/8 inch of the top of the bricks. Repeat the sweeping and blowing process until the polymeric sand joints reach saturation, using multiple passes as described in Techniseal’s installation instructions Repeat the sweeping and blowing process until the joints are filled to within about 1/8 inch of the top of the bricks. .
Then run a plate compactor over the entire patio one more time. This vibration settles the sand fully into the joints and helps seat the bricks firmly. After compacting, sweep and blow again to top off the joints if needed. Finally, activate the polymeric sand with a fine mist of water. Do not drench it; a gentle mist is all that is required. Let it cure for 24 hours before walking on it, and 48 hours before heavy furniture or loads.
Finishing, settling, and keeping it in great shape
In the first few weeks after installation, some minor settling is normal and expected. A few bricks may drop slightly as the bedding sand fully seats itself. Keep an eye out for any that drop noticeably more than their neighbors, which can signal a void in the base. If you find one, pop the brick out with a flat pry tool, add a bit of extra sand, re-screed, and reset it.
If you want to seal your brick patio, wait at least 30 days after the polymeric sand has cured before applying a brick or paver sealer. Sealing is optional but it does protect against staining, efflorescence (the white mineral deposits that sometimes appear on brick surfaces), and freeze-thaw damage in cold climates. Use a breathable penetrating sealer rather than a film-forming sealer, which can trap moisture and peel.
Maintenance is minimal once the patio is properly installed. Sweep it regularly to keep debris out of the joints. Re-apply polymeric sand to any joints that erode over the years (typically every 5 to 8 years, depending on weather and use). Pull weeds that sprout in joints promptly before their roots can disturb the bedding layer. If you live somewhere with hard winters, avoid using metal snow shovels directly on the brick surface; a plastic blade prevents scratching and chipping.
Common mistakes and how to fix them
Most patio problems trace back to one of a handful of root causes. Here is what goes wrong and what to do about it.
- Sinking bricks in one area: Almost always caused by inadequate base compaction or insufficient base depth over soft soil. To fix it, pull up the affected bricks, excavate the area, add more crushed stone, compact it thoroughly, re-screed the sand, and reset the bricks. Going back and fixing the base properly is the only real solution.
- Shifting or spreading bricks: Missing or failed edge restraints. Check the perimeter and install or replace restraints, then sweep fresh polymeric sand into any gaps that opened up.
- Pooling water on the surface: The drainage slope is either insufficient or running in the wrong direction. Ideally this is caught during construction, but if you are dealing with an existing patio, you may be able to pull up the affected section and re-grade the base layer beneath it.
- Bricks heaving upward in winter: Frost heaving caused by water trapped in the base or subgrade. This is common when geotextile was skipped over clay soil. The long-term fix involves proper drainage and, if the problem is severe, potentially pulling the patio and rebuilding with fabric and improved drainage.
- Joint sand washing away quickly: Plain sand in the joints instead of polymeric sand, or polymeric sand that was activated with too much water and did not harden properly. Re-sweep polymeric sand into the joints, compact, and mist carefully.
- Uneven brick heights across the surface: Inconsistent bedding sand depth, usually caused by trying to compensate for an uneven gravel base with varying sand thickness. The base needs to be flat and at consistent grade before you screed the sand.
- Bricks cracking or crumbling: Wrong brick type. Standard clay face bricks used in walls are not designed for ground contact and foot traffic. Use pavers specifically rated for exterior paving: concrete pavers, clay paving bricks rated SW (severe weathering), or natural stone pavers.
Tools and materials to gather before you start
Getting everything together before you start saves you from mid-project supply runs that kill momentum. Here is a practical checklist.
| Category | What You Need | Notes |
|---|---|---|
| Excavation | Sod cutter or flat spade, wheelbarrow | Rent a sod cutter for areas over 100 sq ft |
| Layout | Stakes, string line, line level or laser level, measuring tape | Set drainage slope with string lines before digging |
| Base | 3/4 inch angular crushed stone | 4 inches min compacted; 6 inches for soft/clay soil |
| Separation | Geotextile separation fabric | Non-woven; overlap seams 12 inches; essential for clay |
| Bedding | Coarse concrete (sharp) sand | Not play sand or mason sand |
| Screeding | Two 1-inch diameter pipes, straight 2x4 board | For consistent 1-inch sand layer |
| Compaction | Plate compactor (rental) | Do not substitute a hand tamper for this |
| Bricks | Clay paving bricks (SW-rated) or concrete pavers | Calculate area plus 10% for cuts and breakage |
| Edging | Plastic or metal paver edge restraint, 10-inch spikes | One length per linear foot of perimeter |
| Jointing | Polymeric sand | One bag per ~30–40 sq ft depending on joint width |
| Finishing | Rubber mallet, push broom, leaf blower, garden hose with mist setting | |
| Cutting | Angle grinder with masonry disc or rented wet saw | Wet saw for high-cut-count projects |
A quick note on related variations of this project
The method described here is a dry-laid, flexible base installation, which is the most DIY-friendly approach and the one used on the vast majority of residential patios. If you are considering setting bricks with mortar instead of polymeric sand, that is a different process with different requirements around a concrete slab or mortar base.
If you are specifically trying to lay a brick patio without cement, the key is still the same: build a compacted gravel and sand base with proper edging and joint filling bricks with mortar instead of polymeric sand. Setting bricks with mortar instead of polymeric sand is a different process that changes the base and jointing steps. Similarly, if your yard has a significant slope, the excavation and drainage planning steps become more involved.
If your yard has a significant slope, planning the excavation, base thickness, and drainage becomes even more important, so review how to build a brick patio on a slope before you start. And if you are working directly on an area that is more bare dirt than grass, the process is essentially the same minus the sod removal step. If you are working on bare dirt instead of mostly grass, the prep steps are essentially the same.
Each of those scenarios has its own specific considerations worth exploring before you commit to a method.
Your pre-start checklist
- Mark out the patio area with stakes and string, including your planned drainage slope direction
- Call 811 (US) or your local utility locating service before you dig to identify any buried lines
- Confirm your total excavation depth target: brick thickness + 1 inch sand + 4 to 6 inches compacted gravel
- Rent a sod cutter and plate compactor for your project day(s)
- Order or pick up crushed stone, coarse sand, geotextile fabric, bricks, edge restraints, and polymeric sand
- Remove all sod and organic material, excavate to depth, and establish drainage slope at the subgrade
- Lay geotextile fabric, add and compact crushed stone in 2-inch lifts
- Screed bedding sand to a consistent 1 to 1.5 inch depth
- Set bricks in your chosen pattern with consistent 3/8-inch joints, working from one corner outward
- Install edge restraints around the full perimeter before filling joints
- Sweep and compact polymeric sand into joints, blow off excess, mist to activate, and let cure 24 to 48 hours
FAQ
Can I build a brick patio on grass if I remove the top layer of sod but not enough to reach 7 to 9 inches?
It usually fails sooner. If you do not excavate to the full depth needed for a compacted gravel base plus bedding sand and brick thickness, the remaining soft soil will keep compressing and the patio can sink unevenly. Use the 7 to 9 inch target as a minimum and only adjust after checking subgrade firmness.
What should the soil look like after excavation to know it is ready for the base?
You want firm soil that holds its shape when stepped on, no pumping or visible rutting, and no standing water after a recent rain. If you see sponginess, you typically need either extra gravel thickness (for bridging) and heavier compaction, or removal and replacement in the weak spots.
Do I need geotextile fabric if my yard is not clay?
It is strongly recommended even outside of clay, because separation helps prevent soil migration into the gravel base over time. Standard weed barrier is not the same product. Make sure you use separation geotextile rated for subgrade separation and overlap seams adequately.
Can I compact the gravel base by using the plate compactor fewer times to save time?
No, compaction quality is what locks the base. Do multiple passes over each 2 inch lift with overlapping coverage. If you still feel give after compacting, stop and add lifts or rework rather than moving on to the sand layer.
Is 1 inch of bedding sand enough instead of 1 to 1.5 inches?
It can be too thin to correct for minor leveling and can make brick alignment harder without creating low spots. Stick to about 1 to 1.5 inches of uncompacted bedding sand and level it with screeding, but only after the gravel base is correct.
What is the biggest mistake when setting the drainage slope?
Trying to fix slope using bedding sand depth differences. Sand should be a consistent thickness so bricks sit evenly. Set the proper slope at the subgrade level and carry it through the gravel and sand layers, checking with string lines and a level.
Should I use polymeric sand or regular joint sand on a patio over grass?
Polymeric sand is usually the better DIY option because it resists washout and helps limit weed intrusion in the joints. Regular sand can erode and leave voids that allow shifting. If you use polymeric sand, you must avoid drenching during activation and allow full cure before loading.
How much water should I use to activate polymeric sand?
Use a fine mist so the joints are lightly moistened but not flooded. Drenching can cause premature breakdown or uneven curing. Follow up after activation, sweep off excess sand from faces, and wait at least a day before light foot traffic and two days before heavy loads.
Can I seal the patio right after installation?
Wait at least 30 days after polymeric sand has cured. Sealing too early can trap moisture and interfere with joint stabilization. Choose a breathable penetrating sealer so moisture can move through brick and does not peel like film-forming products sometimes do.
What do I do if, after a few weeks, one brick drops more than the others?
That often signals a void or under-compacted area under that spot. Pop out the brick, add a controlled amount of bedding sand, re-screed the area, reset the brick, then sweep and top up polymeric sand in the joints and compact again if needed.
Is it safe to cut brick with a regular masonry saw blade and let dust fly?
Use the right blade for masonry and protect yourself. A diamond blade for an angle grinder, or a wet saw for many cuts, reduces chipping and dust issues. Wear eye and hearing protection, and cut with the waste side on the line to keep your face clean.
How do I prevent weeds if I occasionally see sprouting in the joints?
Pull weeds early, before roots establish and disturb the bedding layer. After joints erode, re-fill with polymeric sand per the patio’s weather and usage conditions, which is typically every 5 to 8 years.
Do I need expansion gaps around the patio edge and structures?
Yes, most setups need room for movement, especially along house walls and where temperature changes are significant. Use edge restraint at the perimeter for lateral stability, and include appropriate separation at transitions so the patio is not forced against rigid surfaces.
What if my yard has a slope, but it is not extreme?
Even moderate slope changes how you set excavation depth and drainage. You still need the correct 1/8 inch to 1/4 inch per foot fall, but you may also need revised base thickness in lower areas and more careful subgrade prep so compaction remains uniform.