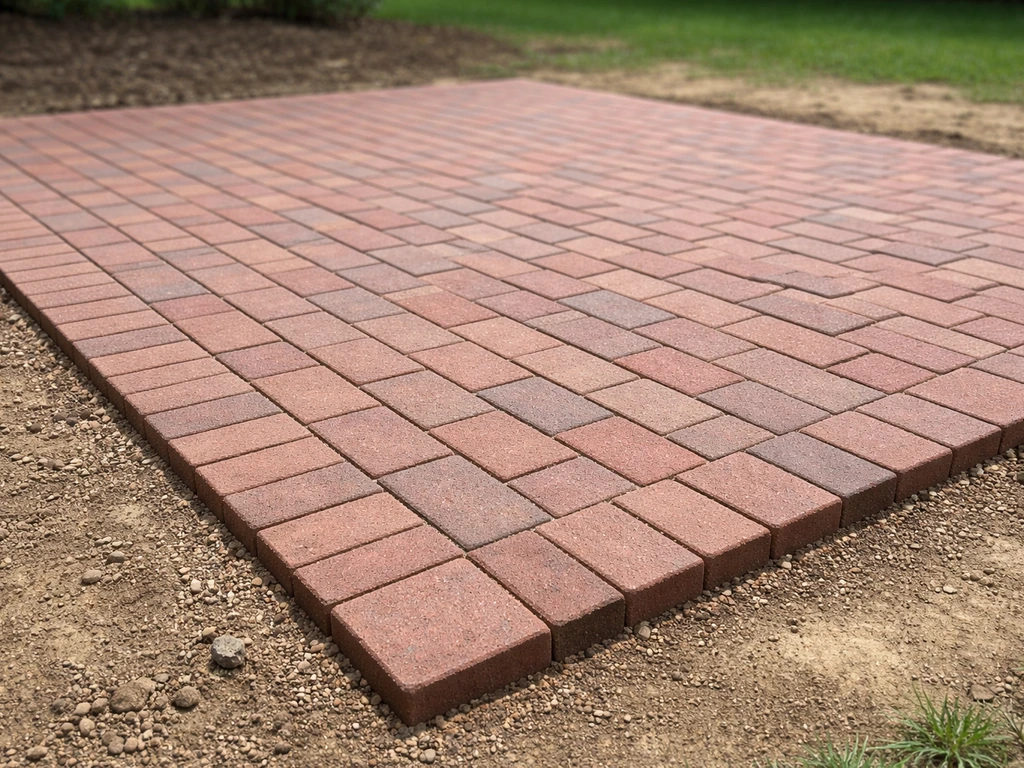
You can lay a brick patio directly on dirt, but the dirt itself is never actually your foundation. You dig down past the topsoil, compact the subsoil, add a geotextile fabric layer, build up a compacted gravel base, screed a 1-inch sand bedding layer, then set your bricks on top. Do it in that order, get the slope right (1/8 to 1/4 inch per foot away from the house), and you'll end up with a patio that stays flat, drains properly, and doesn't shift or sprout weeds every spring.
How to Lay a Brick Patio on Dirt Step by Step

Clara Farrell
24 Jun 2026
Plan your layout and check what you're working with
Before you grab a shovel, spend time on the ground understanding your site. Walk the area after a heavy rain and watch where water pools or flows. Note any slopes toward the house, low spots, or areas where the ground stays soggy. These observations directly affect how you design your drainage slope and whether you'll need extra gravel depth in certain zones.
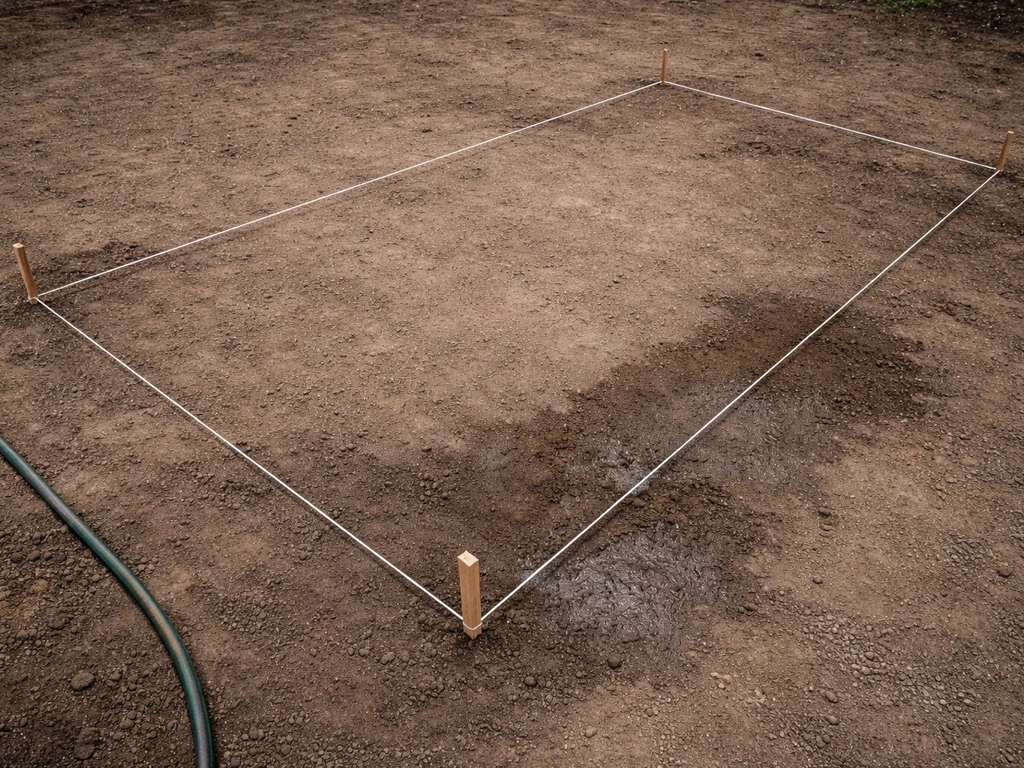
Mark out your patio footprint using stakes and string lines. A garden hose works too for curved edges, but straight lines are easier for your first patio. Measure diagonals to confirm your rectangle is square: if both diagonals match, you're good. Now think about your finished brick surface height relative to the house threshold, nearby lawn, and any steps you'll need. Write it down. You'll be referencing these numbers constantly.
Also check what kind of soil you have. Sandy loam is forgiving. Heavy clay holds water and is notorious for frost heave in cold climates because it traps moisture that freezes and pushes everything upward. Silt and silty clay are the worst offenders for frost movement. If you're in a freeze-thaw climate and your soil is clay-heavy, don't shortchange the gravel base depth. That base is your insurance policy.
- Mark the perimeter with stakes and string lines, confirming square by measuring both diagonals
- Note the finished surface height needed at the house edge and at the outer edge
- Check existing slope direction and identify any drainage problem spots
- Identify soil type: sandy, loam, clay, or silt (clay and silt need more base depth in cold climates)
- Call 811 (or your local utility line service) before digging to mark buried lines
Pick the right bricks, tools, and bedding materials
For a patio laid on dirt with a sand bed, you want pavers rated for exterior use, meaning they're dense enough to resist moisture absorption and freeze-thaw cycles. Standard clay paving bricks (often called paving brick or patio brick) are a solid choice. Concrete pavers work just as well and come in more sizes and colors. Avoid using standard building bricks or salvaged wall bricks on a patio floor because they're softer and will flake and crumble after a few winters.
For bedding sand, use concrete sand that meets ASTM C33 gradations. This is a coarser, sharp sand that compacts well and holds its position under bricks. Don't use play sand or fine mason's sand as a bedding layer because they shift too easily. For the gravel base, use crushed angular stone (commonly called road base, crusher run, or Class II base) rather than smooth pea gravel. Angular stone locks together when compacted; round stone doesn't.
| Material | What to Buy | What to Avoid |
|---|---|---|
| Bricks/Pavers | Clay paving brick or concrete pavers rated for exterior use | Wall bricks, salvaged soft bricks, decorative tile |
| Bedding sand | Concrete sand (ASTM C33 compliant, coarse/sharp) | Play sand, fine mason's sand, beach sand |
| Base aggregate | Crushed stone / road base / crusher run | Pea gravel, river rock, smooth stones |
| Fabric | Non-woven geotextile landscape fabric (3-4 oz minimum) | Thin woven plastic sheeting, regular garden fabric |
| Joint sand | Polymeric jointing sand or dry concrete sand | Regular topsoil, fine dirt, play sand |
For tools, you'll need a plate compactor (rent one, don't skip it), a long screed board or 2x4, a rubber mallet, a brick chisel and hand sledge for cuts, and a circular saw with a diamond blade for cleaner cuts. You'll also need a long level, a string line and line level, a tape measure, and wheelbarrows for moving material. A laser level makes the job faster and more accurate if you can borrow one.
Dig it out and prep the dirt base
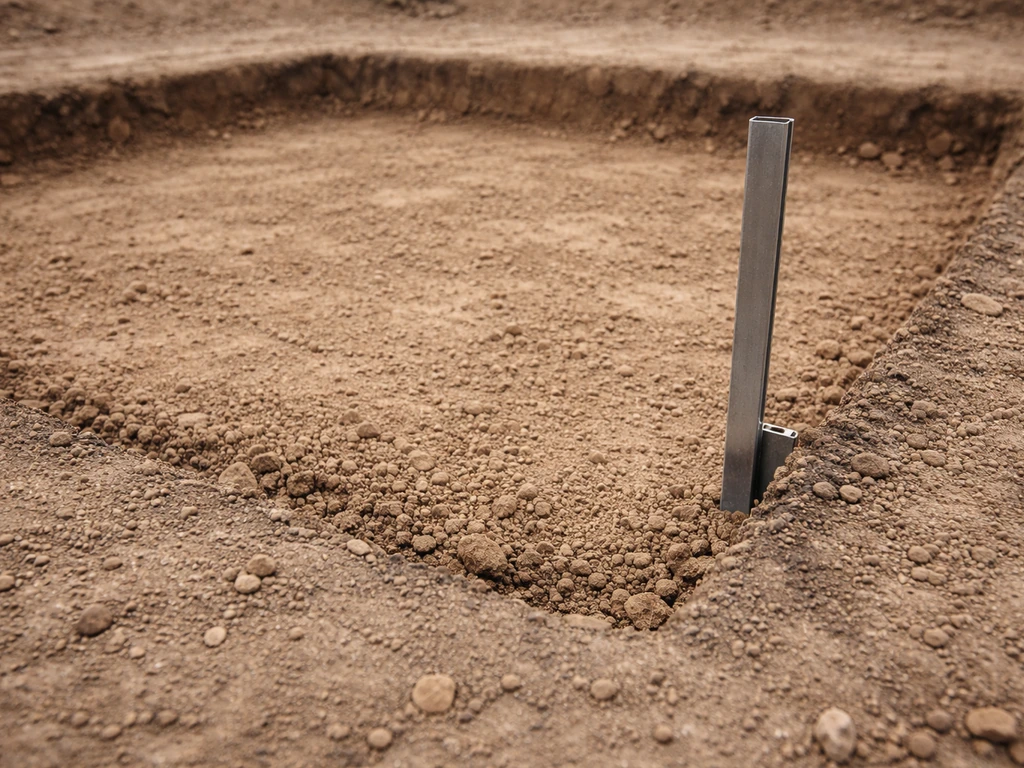
This is the part most people underestimate, and it's where most patio failures start. You need to dig down past the topsoil entirely. Topsoil is full of organic material that compresses, absorbs water, freezes, and moves. It is not a stable foundation. Your goal is to reach firm subsoil and build everything up from there.
The total excavation depth depends on your climate and the thickness of your bricks. A typical calculation looks like this: brick thickness (usually around 2.25 to 2.5 inches for standard paving brick) plus 1 inch of sand bedding plus 4 to 6 inches of compacted gravel base. That puts your dig at roughly 7.5 to 9.5 inches below your planned finished surface. In colder climates with clay or silt soil, go deeper on the gravel, up to 8 inches, to push the frost line further from your bedding layer.
Excavate to a consistent depth across the whole area, building in your drainage slope as you go. The slope should drop 1/8 to 1/4 inch per foot away from the house. A slope of 1/4 inch per foot across a 10-foot patio means the far edge sits 2.5 inches lower than the house edge. Set your string lines to reflect this slope, and use them as a reference while digging and again while building up layers. Once you've dug to depth, compact the exposed subsoil thoroughly with a plate compactor, making overlapping passes until the surface feels firm and doesn't give underfoot.
- Remove all topsoil and organic material until you hit firm subsoil
- Total dig depth: brick thickness + 1 inch sand + 4-8 inches gravel (deeper in cold/clay-heavy soil)
- Set string lines at finished-surface height with 1/8 to 1/4 inch per foot slope away from the house
- Keep the excavated bottom consistent and slope it to match your planned surface slope
- Compact the subsoil with a plate compactor before placing any base material
Build your foundation layers: fabric, gravel, and sand
Once the subgrade is compacted and firm, lay down non-woven geotextile fabric across the entire excavated area. This layer does two important things: it prevents the soil from migrating up into your gravel base over time (which weakens it and eventually causes uneven settling), and it suppresses weed growth from below. Overlap seams by at least 12 inches, and run the fabric up the sides of the excavation a few inches so it wraps around the base. Don't skip this layer. It's cheap insurance and makes a noticeable long-term difference, especially on clay-heavy or weedy sites.
Now add your crushed stone base in lifts, not all at once. Pour 2 to 3 inches of crushed stone, spread it evenly, compact it with the plate compactor, then add the next lift and repeat. Compacting in layers gets you much better density than dumping it all in and running the compactor once. Your total compacted gravel depth should be 4 inches minimum for a pedestrian patio, 6 inches if you have clay soil, and up to 8 inches in hard freeze climates. Check your slope reference strings constantly as you build up each layer.
Once the gravel base is compacted and at the right height, add approximately 1 inch of concrete sand (ASTM C33) as your bedding layer. Screed it flat using two lengths of conduit or metal pipe as rails, dragging a straight 2x4 across them to create a perfectly even surface at the right height. The sand layer should be exactly 1 inch thick across the whole area. Don't vary it to fix high or low spots in the gravel base underneath. If the gravel base has depressions, fix those in the gravel before adding sand. Using extra sand to compensate for an uneven base is one of the most common mistakes and it leads to settling and rocking bricks later.
Lay out your brick pattern and keep everything level
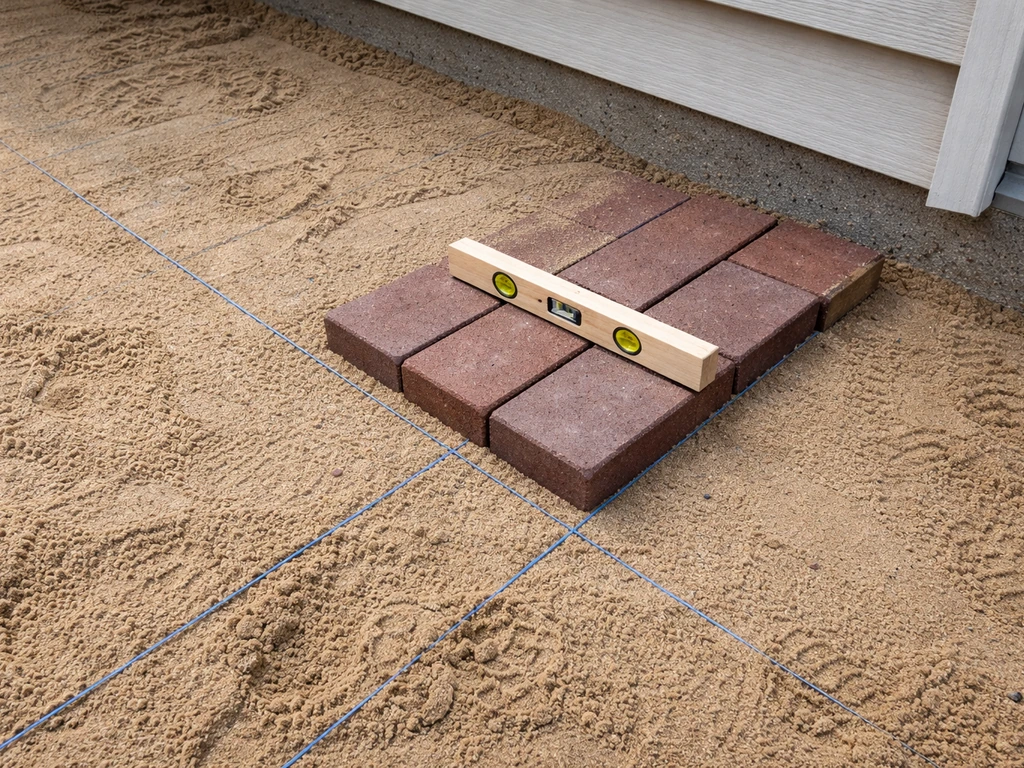
Start at the corner of the patio closest to the house, or at the most visible edge if one side will be seen more than the other. Snap chalk lines across the sand to mark your grid, based on the brick dimensions plus your intended joint width (usually 1/8 to 3/8 inch). These chalk lines are your steering guides to keep rows running straight. It's easy to drift a millimeter here and there and end up with a noticeably crooked pattern 10 rows in. If the ground is uneven, keep re-checking level as you set bricks so the pattern stays consistent from start to finish rows running straight.
Common brick patterns include running bond (like a standard brick wall, with staggered joints), herringbone (45 or 90 degrees, very stable and popular for patios), and basket weave (pairs of bricks alternating direction). Herringbone at 45 degrees is actually one of the most structurally stable patterns for a sand-set patio because the interlocking directions resist lateral movement. It does require more cuts at the edges, which is worth knowing upfront.
Set each brick by pressing it firmly into the sand, not by hammering it down hard. Use a rubber mallet to tap it level with its neighbors. Check level frequently with your long level across multiple bricks and across the slope direction. Don't walk on freshly placed bricks yet. Kneel on a piece of plywood spread across completed sections to distribute your weight and avoid disturbing the sand bed.
Cut bricks and handle edge details
Save all your edge cuts and border work until after you've laid the main field of bricks. This way you can adjust the bond pattern slightly at the edges to minimize tiny slivers that are hard to cut and weak after cutting. Aim for cut pieces no smaller than half a brick wherever possible.
For straight cuts, a circular saw with a diamond blade gives the cleanest result. Score the cut line on both faces, then cut through. Always wear eye protection and a dust mask. For curved cuts or irregular shapes, a chisel and hand sledge works for rough cuts on clay brick. Mark your line, score it with several chisel taps all the way around, then strike firmly to split along the line. It won't be as clean as a saw cut, but for hidden border cuts it's fine.
Edge restraints are critical for a sand-set brick patio. Without them, the perimeter bricks slowly migrate outward over time as the sand compresses and shifts, and the whole pattern starts to spread and fall apart. Install plastic or aluminum edge restraints along all exposed edges of the patio, spiked into the subgrade below with 10- to 12-inch spikes every 12 inches. The restraints should sit tight against the last row of bricks and hold them in place permanently.
Fill the joints, level up, and compact the surface
Once all bricks are set and edge restraints are installed, do a final check across the whole surface with your level. Look for high or rocking bricks and fix them now by lifting the brick, adding or removing a small amount of sand beneath it, and resetting. This is your last chance to correct issues before the joints go in.
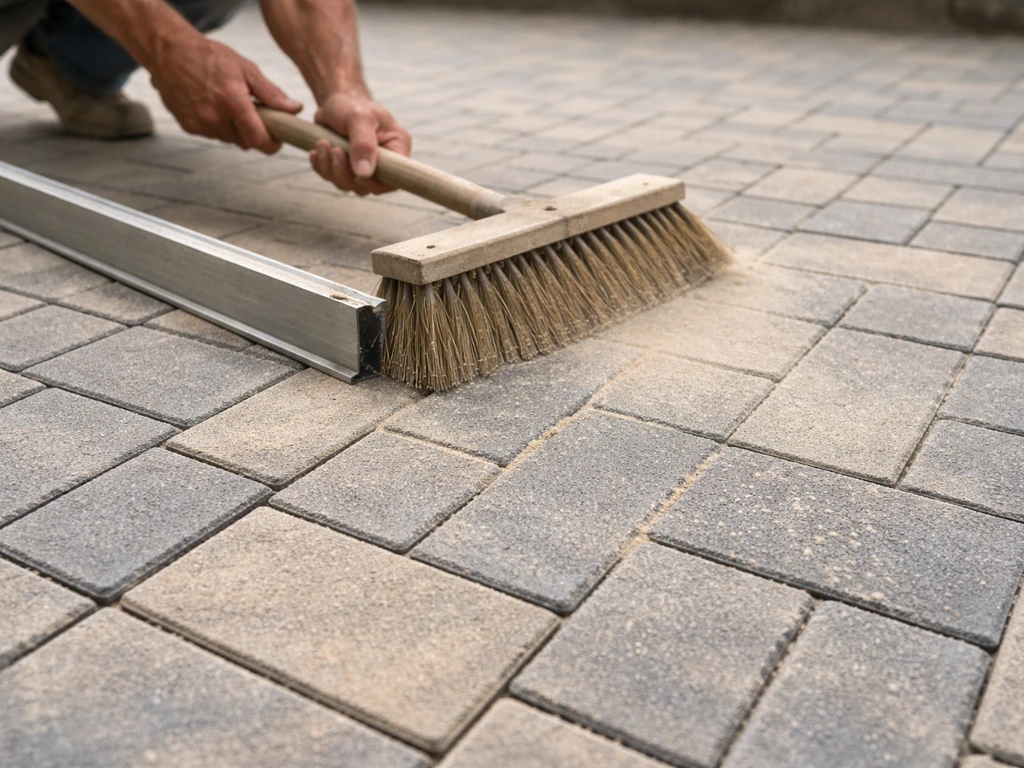
Pour polymeric jointing sand over the patio and sweep it into the joints using a stiff broom. Polymeric sand is well worth the extra cost over regular sand because the polymer binders lock the particles together when activated with water, creating joints that resist washout, ants, and weed intrusion far better than plain sand. Work the broom in multiple directions to pack sand into every joint. Joints should be filled to within 1/8 inch of the top surface, not flush to the very top.
Once joints are filled, run a plate compactor over the entire surface. Use a rubber pad attachment or a piece of carpet between the compactor plate and the bricks to protect them from scratching. This pass compacts the bricks into the bedding sand and drives the joint sand deeper. After compacting, sweep in another light pass of polymeric sand to top off any joints that settled, then compact again. Blow or brush all excess sand off the brick surface before activating.
To activate polymeric sand, wet the surface using a gentle shower-style spray, not a jet or fine mist. A fine mist doesn't penetrate, and a jet washes the sand out of the joints. Wet the surface thoroughly, wait for it to absorb, then wet again if needed. Follow the specific manufacturer's instructions for your brand of poly sand because activation steps vary slightly. Generally you'll water the surface two or three times and allow it to cure for 24 hours before allowing foot traffic and 48 to 72 hours before heavy use.
Curing, maintenance, and the problems to watch for
Polymeric sand typically reaches working strength within 24 hours and full cure in a few days, depending on temperature and humidity. Keep people off the patio for at least a day after wetting. If rain is forecasted within 24 hours of installation, wait. Wet polymeric sand that gets rained on before it sets can wash out of the joints entirely.
Every spring, walk the patio and check for settled or rocking bricks, joint sand erosion, or cracks in the joints. A few bricks settling slightly in the first year is normal as everything finds its equilibrium. Lift the affected bricks, adjust the sand, reset, and tamp. Top up any joints where sand has worn down. Most DIYers find they need to do a minor refresh of joint sand every two to three years.
The most common problems on dirt-base patios (and how to fix them)
| Problem | Most Likely Cause | Fix |
|---|---|---|
| Bricks settling or sinking | Topsoil wasn't fully removed, or gravel base not deep/compacted enough | Remove affected bricks, dig deeper, add and compact more gravel, reset |
| Weeds growing through joints | No geotextile fabric, or regular sand used instead of polymeric sand | Remove weeds, re-apply polymeric sand, consider a surface sealant |
| Uneven surface / rocking bricks | Extra sand used to fix base depressions instead of fixing the base itself | Lift bricks, correct the gravel base level, re-screed sand, reset |
| Water pooling on the surface | Drainage slope insufficient or sloping toward the house | Difficult to fix without rebuilding; focus on getting slope right during install |
| Bricks spreading or migrating outward | No edge restraints installed, or spikes not driven deep enough | Install or re-secure edge restraints along all exposed edges |
| Joint sand washing out after rain | Polymeric sand activated incorrectly, or rain hit before curing | Remove loose sand, dry joints fully, reapply and activate correctly |
| Frost heave lifting sections in winter | Insufficient base depth in freeze-thaw climate, clay soil trapping water | Rebuild affected section with deeper gravel base and proper drainage slope |
One thing worth saying directly: most patio failures trace back to the base, not the bricks. If you put in the time to dig to the right depth, compact properly, and use the right materials in the right order, the actual brick-laying part is straightforward. If you want the full walkthrough, see the step-by-step guide on how to put in a brick patio, from digging the base to finishing the joints. Rushing the prep to get to the fun part is the single biggest mistake people make on this project.
If you're dealing with a site that slopes toward the house, has persistently waterlogged soil, or requires more than about 12 inches of total excavation to reach stable ground, it's worth getting a quote from a hardscape contractor before proceeding. If your patio is on a slope, plan for proper drainage and extra base support so the bricks stay stable over time. Some site conditions, like severe drainage problems or very expansive clay soils, genuinely benefit from professional input on drainage solutions before any patio goes in. Everything else on a reasonably flat, well-drained site is well within DIY reach if you follow the steps carefully.
Laying bricks directly on sand over a compacted base is a slightly different process than mortared installations (which lock everything in place with cement) or grass-removal projects where sod is the starting point rather than bare soil. For a mortared patio, you would typically spread mortar on a prepared base and bed each brick so the joints are filled and locked in place mortared installations. The sand-set method described here gives you a flexible, repairable surface that can handle minor ground movement better than a fully mortared system. If you're curious about those other approaches, the methods diverge mainly at the bedding layer and jointing stage.
FAQ
Can I lay a brick patio on dirt without digging down to stable subsoil?
You should not. If you leave topsoil or organic-rich material in place, it will compress and hold water, which leads to rocking bricks. A practical stopgap is to excavate fully to firm subgrade, then build the gravel plus sand bed exactly as described, even if it feels like extra work.
How do I know if my patio site has enough drainage before I start?
Do a rain test. After a heavy rain, check whether water pools in low spots for more than a few hours (or stays muddy the next day). If it does, you likely need to adjust the overall slope, add extra gravel depth in those zones, or consider perimeter drainage, rather than relying on the sand bed alone.
What if I’m laying the patio on clay-heavy dirt in a freezing climate, but I already excavated and compacted?
Increase gravel base depth rather than adding more sand. More sand will not prevent frost heave as effectively because the bedding layer is not the freeze buffer. For clay in freeze-thaw conditions, plan toward the higher end of the gravel depth guidance, and keep the subgrade compaction tight.
Is it okay to fix low spots by adding extra bedding sand?
No. Using extra sand to “level up” depressions is a common mistake because the sand can compress and the bricks settle unevenly later. Instead, correct unevenness in the gravel base first, then screed bedding sand to a uniform thickness.
Do I need geotextile fabric if weeds aren’t currently a problem?
Yes, it still helps even if you do not see weeds now. Geotextile reduces soil migration into the base over time, which otherwise weakens the base and can cause settlement. It also suppresses future weed growth from below.
Can I use pea gravel instead of crushed angular stone for the base?
You generally should not. Pea gravel compacts poorly because rounded stones do not lock together. Use crushed angular stone so it interlocks under the plate compactor, which is what keeps the base stable under load.
What edge restraint works best if my patio edges are against soil instead of a hard surface?
Use plastic or aluminum restraints along all exposed edges, and make sure they are tight against the last row of bricks. Anchor them into the subgrade with spikes, spaced consistently. If a restraint is loose or not seated firmly, perimeter bricks are much more likely to migrate outward.
How many times should I compact the gravel base before adding sand?
Compact after each lift, not just once at the end. Typical practice is to add crushed stone in 2 to 3 inch lifts, compact each lift thoroughly with overlapping passes, then add the next lift. This improves density and reduces later settling.
How do I avoid sand washing out of joints after jointing?
Use polymeric jointing sand, fill joints nearly to the surface but not flush, and compact it after the first sweep-in. Also, do not activate it with a jet spray. Use a gentle shower-style wetting so polymer activates without dislodging the sand.
When is it safe to walk on the patio after installing polymeric joint sand?
Keep people off at least until the first day has passed after wetting. If you need to walk across it during that time, wait longer because polymer gains strength gradually and foot traffic can disturb joint sand before it cures.
Do I need to recompact after activating polymeric sand?
Often yes, because joints can settle as the polymer activates and fines move. After the initial compaction, sweep in additional polymeric sand if needed, then compact again lightly. Before activating, remove excess sand from the brick faces.
If a few bricks settle in the first year, should I tear up the patio?
Usually no. Minor initial settlement can be normal, and the fix is localized. Lift the affected bricks, adjust sand beneath, reset them firmly, and re-sand the joints. Repeating this maintenance is typically faster and cheaper than replacing the whole patio.
Can I lay bricks on dirt if my patio will be driven over by a vehicle?
This process is intended for pedestrian patios. Vehicle loads require thicker, engineered base and often different reinforcement or jointing considerations. If you plan for vehicles, treat it as a design change, not a “just add more sand” situation.