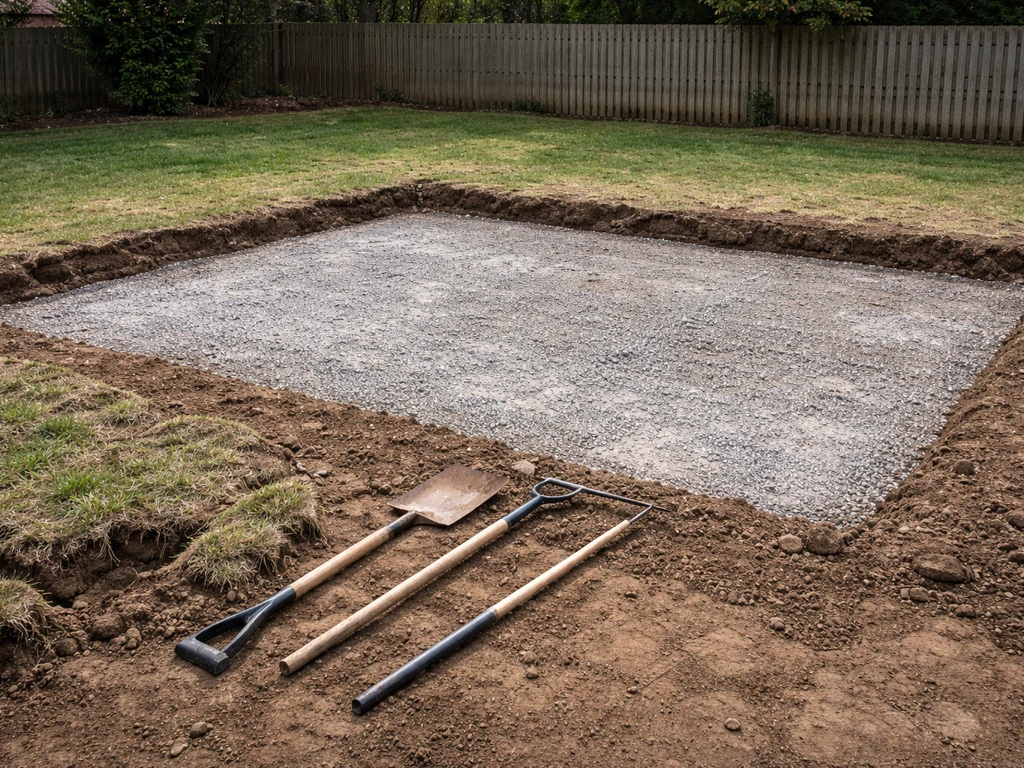
To dig up your lawn for a patio, you need to excavate deep enough to fit your entire build-up: typically 4 inches of compacted gravel base, 1 inch of bedding sand, plus the thickness of your paving material. For standard 2-inch thick pavers, that means digging down roughly 7 inches from finished grade. Mark your area, strip the turf in manageable sections, excavate to depth, grade it flat with a slight drainage slope, compact the subgrade, and you're ready to start building your base.
How to Dig Up Lawn for a Patio: Step-by-Step Guide

Clara Farrell
5 Jul 2026
Planning the patio area and working out your excavation depth
Before you pick up a single tool, spend 20 minutes with a tape measure and a notepad. This planning step saves you from the two most common DIY disasters: digging too shallow and ending up with a patio that sits proud of the lawn, or digging too deep and creating a sunken mess.
Start by deciding your finished patio dimensions and noting them down. Then work out your excavation depth. The formula is straightforward: base depth + bedding sand + paver/slab thickness = how deep you dig. For most residential patios on stable soil, that breaks down like this:
| Layer | Typical Depth |
|---|---|
| Compacted gravel/aggregate base | 4 inches |
| Bedding sand (screeded level) | 1 inch |
| Standard concrete pavers (2 inch) | 2 inches |
| Total excavation depth | 7 inches |
| Thicker slabs (e.g., 2.5 inch natural stone) | 7.5 inches total |
If you're on clay soil or ground that's prone to movement, some builders increase the gravel base to 6 inches, bringing total dig depth to 9 inches. It's worth the extra effort. Clay holds water and shifts with frost, and a thin base on top of it will crack and sink within a few seasons. On well-draining sandy soil, 4 inches of compacted base is usually fine.
Also think about finished height in relation to your house. The patio surface should sit at least 150mm (about 6 inches) below any damp-proof course on your property walls, and it should slope away from the house at a gradient of around 1:60 (roughly 1 inch drop for every 5 feet of run) for drainage. Mark that slope on your plan now so you account for it during excavation.
Marking out the area, protecting your edges, and removing turf efficiently
Good marking is what separates a tidy, professional-looking result from a ragged edge that looks like it was done by someone in a hurry. Take your time here.
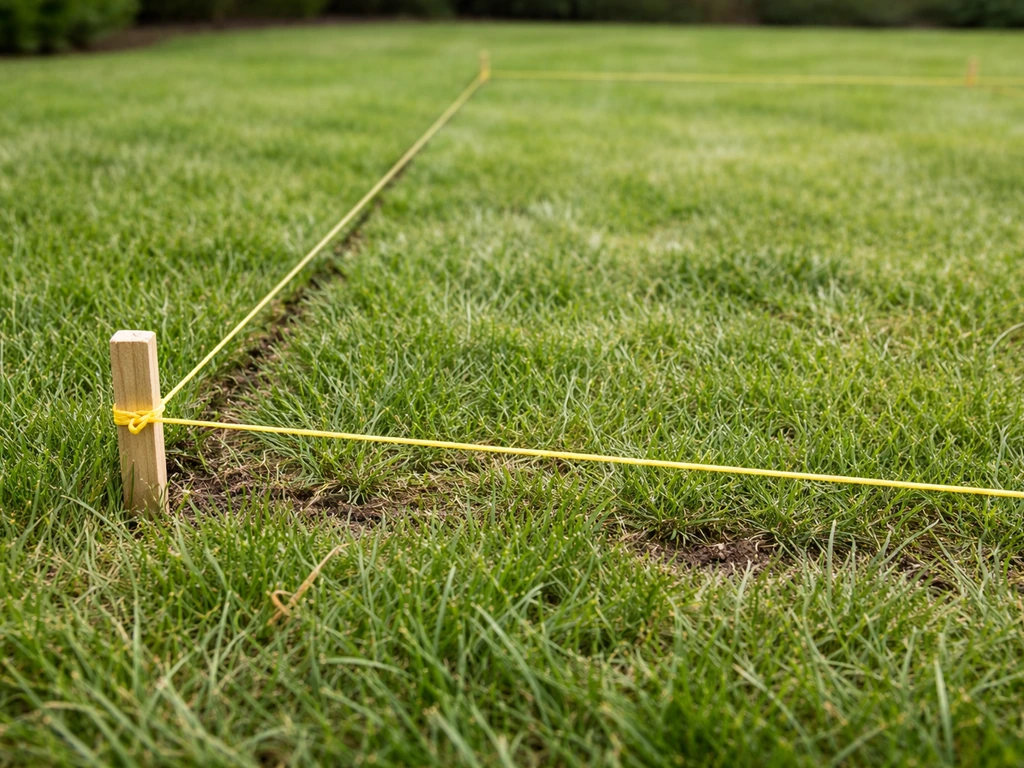
Marking straight and curved edges
For straight-edged patios, use timber pegs and a builder's line (string line) to define every side. Check for square by measuring diagonally corner to corner: if both diagonal measurements are equal, you've got a true rectangle. For curved or freeform shapes, use a garden hose or rope to lay out the shape, then mark it permanently with line-marking spray paint or sand poured from a bottle. Walk around it, look at it from upstairs if you can, and adjust before you commit.
Protecting the surrounding lawn edge
Cutting a clean edge first makes everything easier. Run a half-moon edger or a flat spade along your marked line before you start stripping turf. This severs the grass roots right along your boundary, stops the surrounding lawn from tearing and ragging when you pull the turf away, and gives you a crisp line to work to. I always do this step before anything else and it makes a real difference to the finished look.
Stripping turf the smart way
For small patios (up to about 15 square metres), a sharp flat spade is all you need. Slice the turf into strips about 30cm (12 inches) wide by pushing the spade horizontally just under the root zone, roughly 2 to 3 inches deep. Undercut each strip, roll it up like a carpet, and carry it off. Keep the rolls manageable, maybe 60 to 90cm long, so they're not too heavy to handle.
For larger areas, hiring a sod cutter or turf cutter is genuinely worth the day rate. These machines slice turf to a consistent depth in neat strips and can clear a large patio footprint in a couple of hours instead of a full day of back-breaking work. Most tool hire shops stock them and they're easy to operate. If your lawn has been down for years and the root mat is thick and fibrous, the machine will save your back.
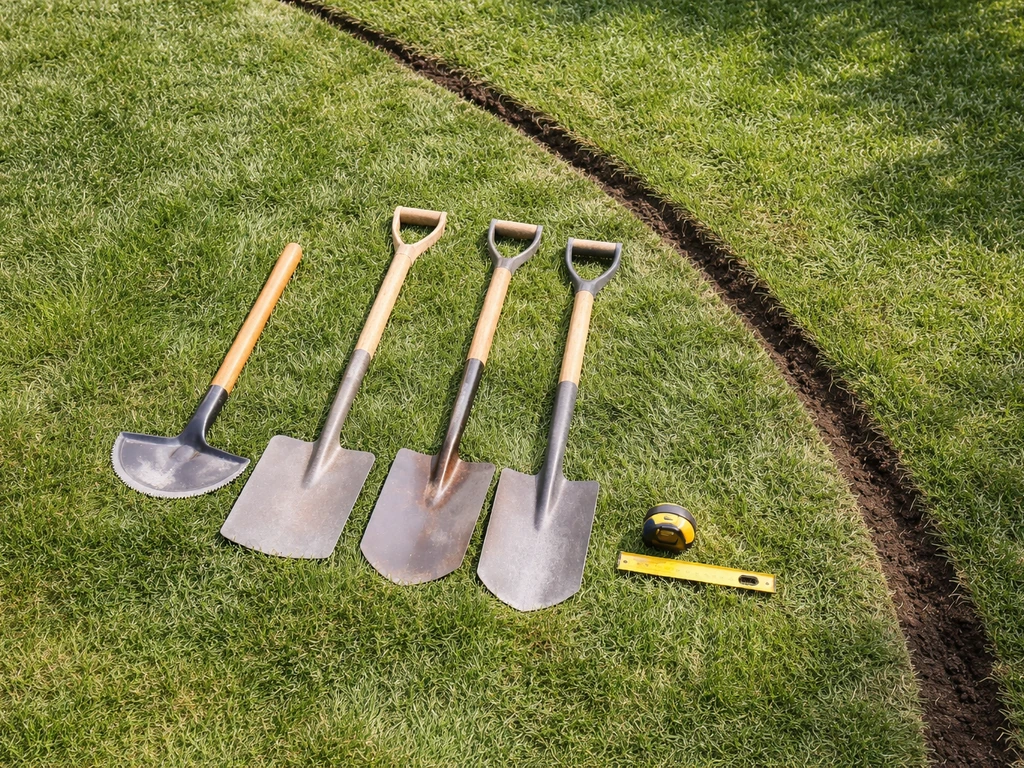
Tools and materials you'll need before you start
Having the right kit on hand before you start means you don't lose momentum halfway through. Here's what to gather:
- Flat spade and sharp digging spade (two different tools: flat for cutting turf, pointed for deeper digging)
- Half-moon edger or edging iron for cutting clean boundaries
- Wheelbarrow (ideally two if you have a helper)
- Builder's line and pegs for marking out
- Line-marking spray paint or sand for freeform shapes
- Tape measure and spirit level
- Long straightedge or screed rails for checking levels
- Plate compactor or wacker plate (hire one: don't skip this)
- Rake and garden fork for clearing loose soil
- Pegs and string set at finished sub-base height for depth reference
- Sod cutter (hire for areas over 15 square metres)
- Safety: gloves, steel-toe boots, and knee pads if you're hand-digging
You don't need to buy most of this. A plate compactor hire for a day typically costs between £40 and £80 in the UK or around $60 to $100 in the US, and it's the single most important piece of equipment for getting a solid, long-lasting result. Compact the subgrade properly and your patio won't sink. Skip it and you're taking a real gamble.
Step-by-step excavation: depth, grading, and hauling sod away
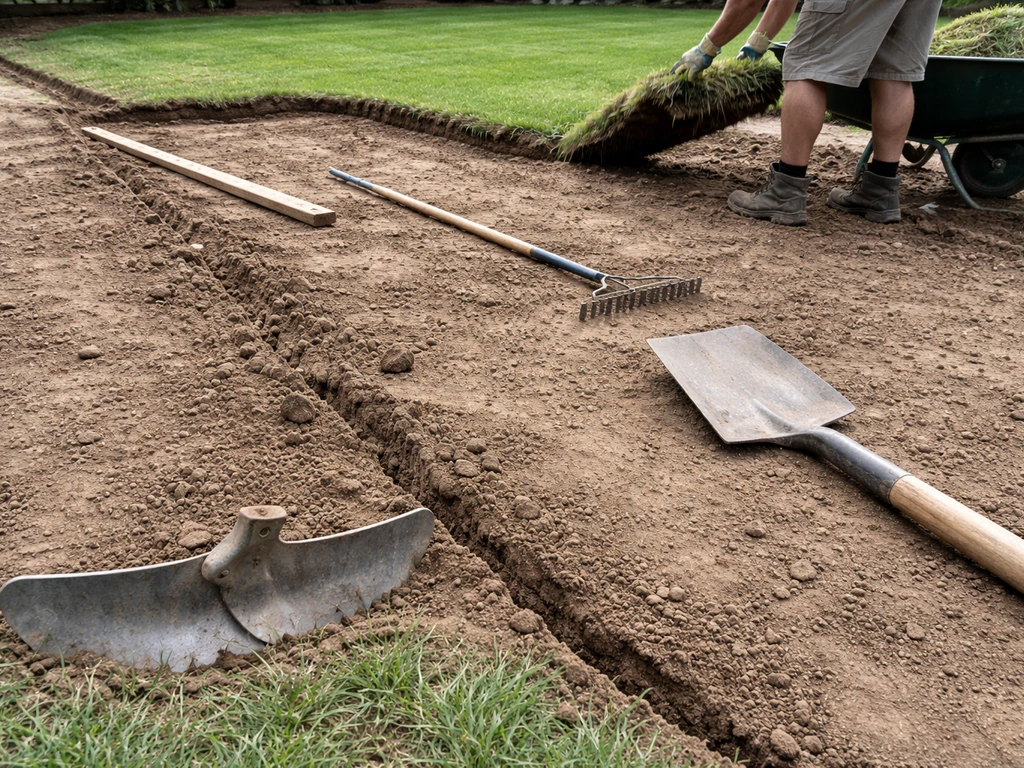
With your area marked and tools ready, here's how to work through the excavation methodically.
- Cut your boundary edges first with the half-moon edger along your marked string line.
- Strip all the turf using the flat spade or hired sod cutter, working in rows across the area. Roll or fold each strip and remove it immediately so it doesn't pile up in your way.
- Set depth reference pegs around the perimeter, hammered in so the top of each peg sits at your target excavation depth. For a 7-inch dig, measure 7 inches down from the surrounding lawn surface and mark each peg. These become your depth guides as you excavate.
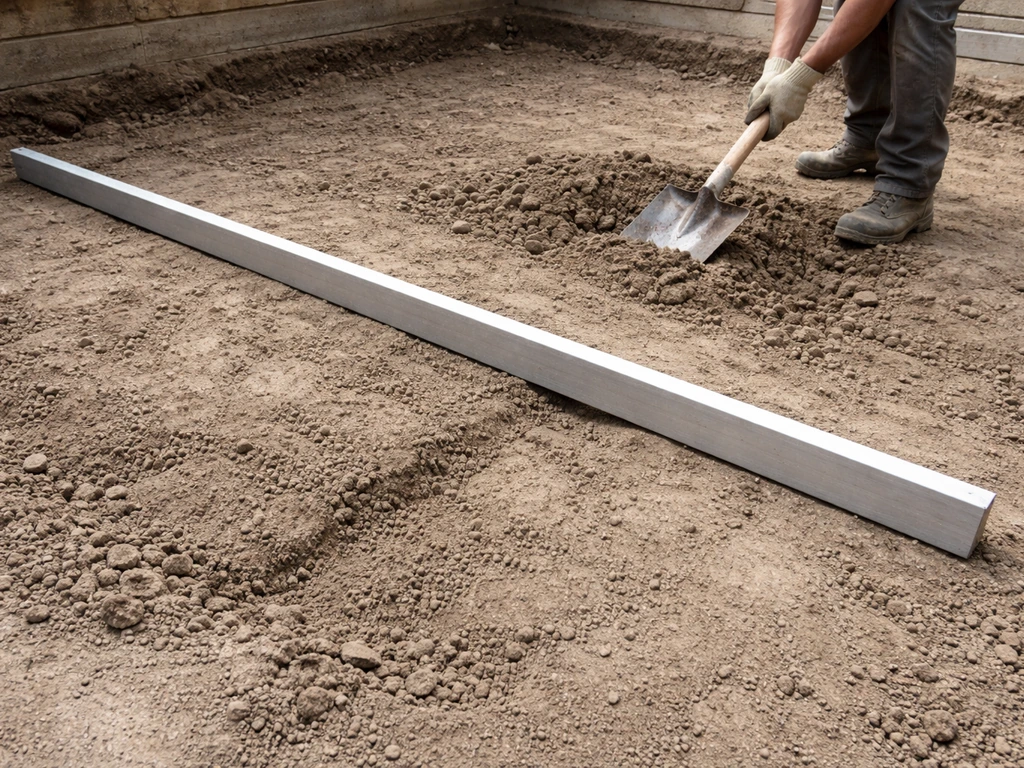
- Dig out the topsoil with your digging spade and fork, loading it straight into the wheelbarrow. Don't guess at depth: keep checking against your pegs as you go.
- Work in a grid pattern across the area, roughly 1 metre squares at a time, rather than digging randomly. This keeps the floor level relatively even and prevents you from accidentally over-digging in one corner.
- Grade for drainage as you go. Your finished subgrade should slope away from the house at about 1 inch per 5 feet. Set string lines at the correct sloped height around the perimeter so you can check your gradient continuously.
- Once excavated, rake the floor smooth, removing any loose lumps, rocks, or chunks of root.
- Load all excavated soil and turf into wheelbarrows and move it to your disposal area immediately. Piling it nearby just means a second job moving it later.
A word on depth consistency: the most common excavation mistake is an uneven floor with high and low spots. High spots will force your base layer to be thinner there, creating a weak point. Low spots waste base material. Take your time raking the floor level before you move on to compaction.
Prepping the subgrade after turf removal
Removing the turf and topsoil gets you to the subgrade: the natural, undisturbed soil underneath. What you do to this layer is arguably the most important part of the whole job. A poorly prepared subgrade is the number one reason patios crack, sink, and shift. Getting the ground ready properly, including correct excavation depth and compaction, is what helps prevent those problems when you install patio slabs patios crack, sink, and shift.
Compact the subgrade
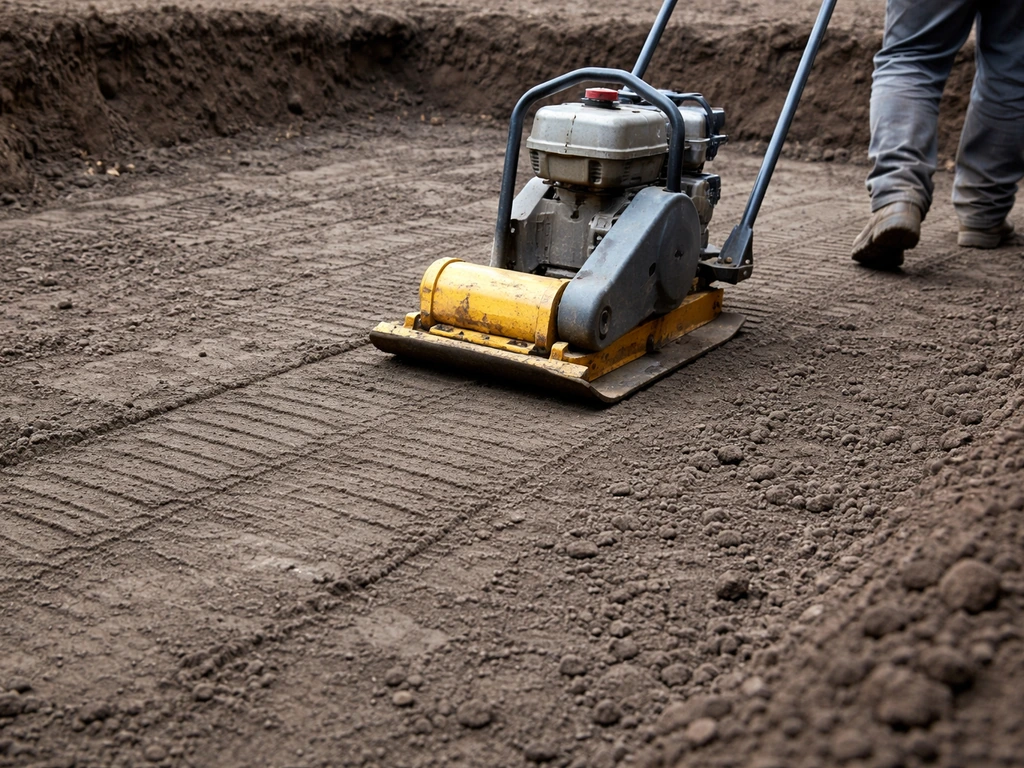
Once excavated to depth and raked level, compact the exposed subgrade with your plate compactor. Make two or three passes in perpendicular directions across the whole area. This closes up any voids left by removed roots and firms the soil so it won't settle further once your patio base is loaded on top of it.
Dealing with soft spots
After compacting, walk the whole area pressing your heel down firmly. If you find a spot that gives or feels springy, that's a soft spot and it needs attention before you continue. Dig out the soft material (it's often wet or organic soil) and replace it with compacted hardcore or crushed stone. Tamp it down in 2-inch layers until it's firm. Building over a soft spot guarantees that section of patio will sink.
Base material options
Once the subgrade is compacted and firm, you're ready to bring in your base material. For most DIY patio builds, compacted crushed stone or Type 1 MOT sub-base (in the UK) or clean crushed gravel (in the US) is the standard choice. Spread it in layers no deeper than 2 inches at a time, compact each layer with the plate compactor before adding the next, blank" rel="noopener noreferrer">until you reach your target base depth of 4 inches. Bovees also notes the common residential patio base guideline of about 4 inches of compacted gravel, followed by a bedding sand layer and the paver thickness on stable soil blank" rel="noopener noreferrer">until you reach your target base depth of 4 inches. After that, screed a 1-inch bedding sand layer and you're ready to start laying. For more detail on sub-base options and how to lay them correctly, that's a whole topic in itself worth looking into before you move forward. If you want to lay a patio without a sub base, you still need a properly prepared subgrade and a method that can handle drainage and movement for your soil type.
Common mistakes and how to fix them
Even experienced DIYers run into problems during this stage. Here are the ones I see most often and what to do about them.
Uneven excavation floor
If your dug-out floor has peaks and troughs, don't panic. Use a long straightedge or screed rail to identify high spots and cut them down with a spade. For low spots under about an inch deep, you can bring in a little compacted fill. For low spots deeper than an inch, dig a bit wider around them and fill with compacted crushed stone rather than loose soil, which will just compress further.
Stubborn roots and old turf
Thick, established lawn with a dense root mat can be brutal to strip by hand. A sod cutter will handle most of it, but for persistent thick roots from old shrubs or hedges, you'll need to dig around them with a fork and cut them with loppers or a mattock. Don't just bury them under your base: roots rot and leave voids. Anything bigger than your thumb diameter should come out.
Clay soil
Clay is the trickiest soil type for patios. It expands when wet and contracts when dry, which means constant movement under your patio if you don't manage it properly. On heavy clay, increase your gravel base to at least 6 inches and consider laying a geotextile membrane directly on the compacted clay subgrade before adding base material. The membrane separates the clay from the aggregate and stops the two mixing over time, which can lead to the base gradually being swallowed into the clay.
Sloped ground
If your garden slopes significantly, you'll need to step-cut the subgrade in terraces or excavate to a consistent depth that follows a flat plane across the patio. Trying to build on an unexcavated slope without properly levelling the base layer means your patio will be uneven or you'll end up with vastly different base depths from one side to the other. For steep slopes, honestly consider whether you need a retaining wall at the low edge: it's more work but the right solution.
Misjudging finished height
This one catches people out constantly. If you dig too shallow, the finished patio ends up sitting higher than the surrounding lawn, creates a trip hazard, and looks wrong. Always set your depth reference pegs before you start digging and check against them frequently. It's much easier to remove a little more soil than to deal with a patio that ends up 2 inches too high.
Clearing up, disposing of turf and soil, and your next-step checklist
What to do with the excavated material
A standard 10 square metre patio excavated to 7 inches will produce somewhere around 1.8 to 2 cubic metres of soil and turf: roughly the equivalent of a large skip. Don't underestimate how much material comes out. Your options for disposal:
- Reuse the turf elsewhere in the garden to patch bare areas or create raised beds (strip the roots off and stack the turf, grass-side down, to rot into compost over 6 to 12 months)
- Topsoil can be used to raise garden beds, level dips in the lawn, or improve planting areas
- Book a skip before you start if you have no use for the material: 2 to 3 cubic metres fills a midi skip
- Some local councils offer soil and turf collection through garden waste services: check before hiring a skip
- Don't pile turf and soil against your house wall, a fence, or anywhere it'll become a long-term problem
Site clean-up before building
Before you bring in any base material, do a final tidy of the excavated area. Remove any stray lumps of root or soil from the edges, brush loose material off the compacted subgrade surface, and check your depth pegs one more time. If you've had to leave the excavation open overnight or for a few days, check for any pooling water: if water has collected in the bottom, pump or bail it out and allow the subgrade to dry slightly before proceeding.
Your patio installation checklist from here
- Subgrade compacted and all soft spots addressed: check
- Drainage slope established (approximately 1 inch per 5 feet away from the house): check
- Finished excavation depth confirmed against your pegs at every corner: check
- All turf, roots, and spoil removed from the area: check
- Geotextile membrane laid if on clay or unstable soil (optional but recommended): check
- Crushed stone/Type 1 sub-base material delivered and ready: next step
- Spread and compact sub-base in 2-inch layers to a total of 4 inches (6 inches on clay): next step
- Screed 1-inch bedding sand layer to correct slope and level: next step
- Lay pavers or slabs from a fixed corner outward: next step
- Fill joints with polymeric sand or pointing mortar depending on paver type: final step
Getting the ground prep right is genuinely the hardest and most important part of a patio project. The laying itself is more satisfying and faster once you've done the groundwork properly. If you're now at the stage of building up your sub-base layers, it's well worth digging into the detail on how to lay a sub-base correctly and how to prepare the ground specifically for the type of slabs or pavers you're using: the specifics matter and doing it right at each layer means the finished patio will still look good in 20 years. To make sure everything holds up, follow a dedicated guide on how to prepare ground for a patio at each layer of your build-up.
FAQ
Can I keep some of the lawn and topsoil and just build the patio on top of it?
Yes, but only if you can still hit the required finished-height targets. A common compromise is to excavate to full depth under the patio footprint, but treat the lawn edge as a transition (for example, match paving height to soil grade after you compact the subgrade and bedding sand). If you keep the patio surface too close to the grass, the edge will wick moisture and can heave, especially on clay or shaded lawns.
How do I estimate how much soil, gravel, and sand I need for the excavation?
Before ordering base or bedding sand, calculate volume using excavated area times average depth, then add 10 to 15% for uneven subgrade, settlement of material as it compacts, and spillage. Also plan on extra material if you discover soft spots after compaction, because those require removal and replacement at least to the local firm depth.
What happens if I miss some grass roots or leave bits of topsoil when digging up the lawn?
No, not if the lawn area will hold water or if you have expansive clay. A common failure mode is mixing organic matter into the subgrade, which later decomposes and leaves voids. Even if you install a thick base, any remaining turf roots or topsoil in the compacted zone can cause localized sinking, so remove all turf and topsoil to expose true undisturbed subgrade.
Is it enough to check level once, or should I verify the grade after each stage?
You should use a straightedge or screed rail not only after excavation, but again after each compaction and after placing each base layer. If you leave a layer uneven, the next layer cannot reliably correct it, and you can end up with pavers rocking even if the total thickness is correct.
How can I tell if the subgrade is compacted enough, and when should I stop?
For plate compactor work, you typically want multiple passes across the whole area, then re-check firmness with your heel test. For machine compaction, avoid overworking wet material (it becomes paste and loses strength). If the soil is sticky or you leave deep footprints, pause and let it dry or add proper aggregate for replacement before compacting again.
What should I do if the dug-out area fills with water overnight?
If you find water in the excavation, do not proceed until it is controlled. Pump or bail it out, then let the bottom dry back enough to regain strength before compacting. If water keeps returning from groundwater, you may need drainage measures, because building base on a repeatedly wet subgrade leads to pumping, base migration, and uneven settlement.
If I use a geotextile on clay, do I still need to compact the subgrade and add the full gravel depth?
Yes, but only if you manage separation correctly. A geotextile membrane is most helpful to prevent aggregate migration into clay or to reduce mixing over time, but it should be placed on prepared, stable subgrade and not undercut by voids. You still need proper compaction and layer thickness, since membrane placement does not replace the need for a dense base.
How do I handle the patio edge where it meets the lawn so it stays neat and doesn’t create a trip step?
Start by checking what the neighboring lawn needs for edging and moisture, then plan a small transition so your paving edge is not a sharp step. In practice, set your depth references and drainage slope, excavate accordingly, and consider an edge restraint system so pavers do not migrate toward the lawn as the base settles or freezes.
Is it possible to lay a patio without a sub-base if I dig up the lawn properly?
You can, but the risk is the patio may drop and create uneven joints if the base layer is not well-drained and compacted. If you must avoid excavation depth or sub-base, you need an approach that still includes a stable, well-prepared subgrade, appropriate drainage, and a proven method for your specific soil and climate.
My patio looks uneven after installation, what are the most likely causes that started with digging up the lawn?
If you see rocking pavers later, common causes are uneven excavation, soft spots missed during the heel test, insufficient compaction between base layers, or bedding sand that is too thick. The fix usually involves lifting affected pavers, removing to the problem point, re-compacting, and re-laying bedding sand to the target thickness.