To prepare ground for a patio, you need to mark out the area, call 811 to locate buried utilities, strip the topsoil and vegetation, excavate to the right depth (typically 6 to 12 inches depending on your base plan), compact the subgrade, lay and compact a crushed stone base of at least 4 inches, and then add your bedding layer or concrete forms on top. For a concrete patio specifically, you also need to set timber forms, add reinforcement mesh or rebar, and plan for control joints before the pour. The preparation work is genuinely what separates a patio that lasts decades from one that cracks, sinks, or drains toward your house within a few years.
How to Prepare Ground for a Patio: Step-by-Step Guide

Clara Farrell
19 Jun 2026
Start Here: Pick Your Patio Type and Base Approach
Before you dig a single shovelful, decide what you're building. The patio surface you choose changes almost everything about the ground prep, how deep you excavate, what layers you need, and how precise you have to be. Get this wrong at the planning stage and you'll be re-digging later.
Broadly, patios fall into two camps. Flexible systems, like natural stone slabs, brick pavers, or porcelain tiles set on a sand or mortar bed, sit on a compacted crushed-stone base with a bedding layer on top. Rigid systems, concrete slabs, need forms, reinforcement, and a base that supports the slab as a single unit. Some lightweight flexible pavers on very stable, well-drained soil can technically work with a minimal base, but blank" rel="noopener noreferrer">adding a proper crushed stone sub-base almost always improves long-term performance, so it's not a step worth skipping.
If you're planning a concrete patio, the ground prep is more involved: you're essentially building a road. The base needs to be deep enough, level enough, and stable enough to keep a solid slab from cracking under its own weight as the ground moves through seasons. If you're in a region with freezing winters, frost heave is a real concern, and your base depth needs to account for it, more on that below.
| Patio Type | Typical Base Depth | Bedding Layer | Concrete-Specific Steps |
|---|---|---|---|
| Pavers / brick | 4–6 inches crushed stone | 1 inch bedding sand | No |
| Natural stone slabs | 4–6 inches crushed stone | 1 inch sand or mortar bed | No |
| Concrete slab | 4 inches compacted crushed stone | No bedding (forms directly on base) | Yes: forms, rebar/mesh, control joints |
| Porcelain / tile on screed | 4–6 inches crushed stone + screed | Mortar bed | Partial: screed acts like a mini slab |
Assess the Site Before You Touch a Spade
Walking the site carefully before you dig saves hours of rework. The things you're looking for are slope and drainage direction, soil type, and what's buried underfoot.
Call 811 First, No Exceptions
This is non-negotiable in the US. Call 811 (the national 'Call Before You Dig' service) at least two full business days before any digging starts. Your local utility companies will send someone to mark underground gas, water, electric, and cable lines with colored flags or paint. Many states legally require this, in Washington state, for example, it's the law. Hitting a buried utility line is dangerous and expensive. Make the call, wait for the marks, and plan your dig around them.
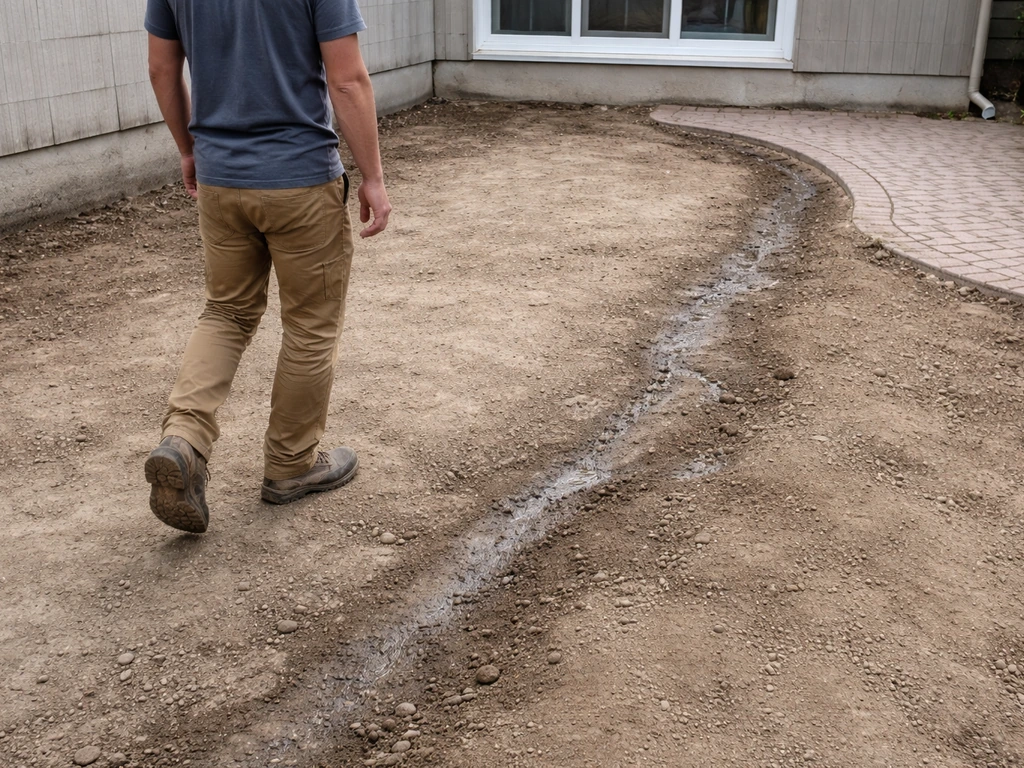
Check Slope and Drainage
Water is the biggest enemy of any patio. Your finished surface needs to slope away from the house, a minimum fall of about 1 inch per 8 feet is the standard recommendation for drainage. Before you dig, check which way your ground naturally drains and whether water pools anywhere in the area after rain. If it does, you've got a drainage problem to solve at the base layer stage, not after the slabs are down.
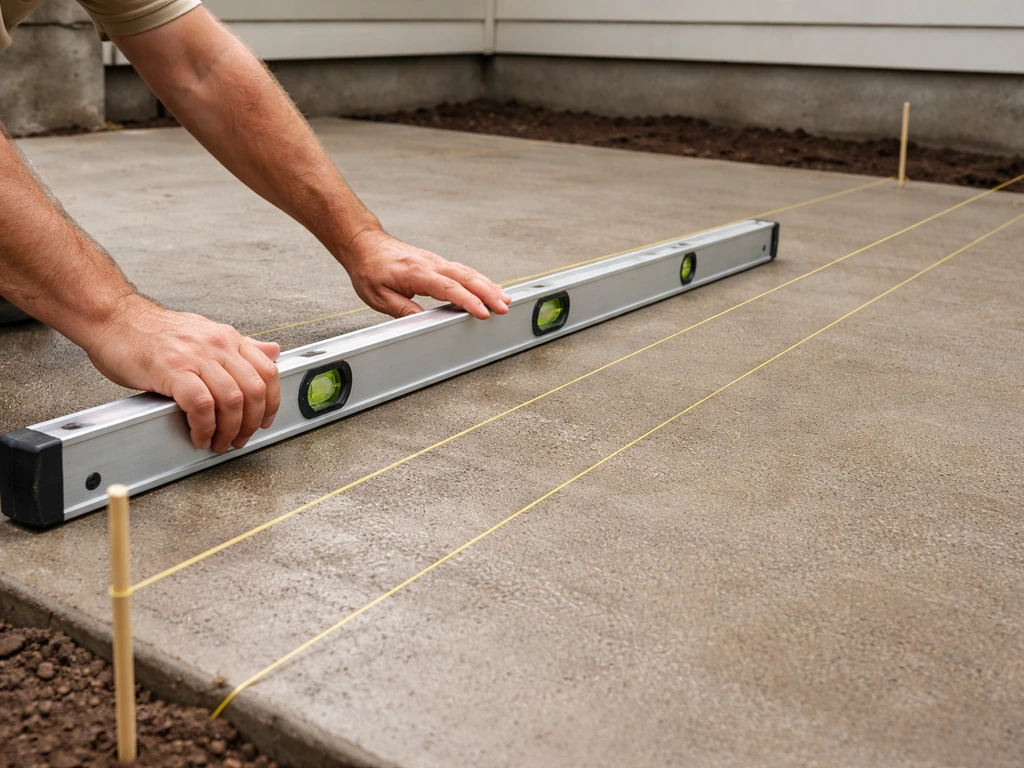
Use a long spirit level or a line level and string lines to map out the existing gradient. Note which edges are high and which are low. This survey will guide your excavation depths at different points across the patio area, especially if the ground isn't flat.
Understand Your Soil
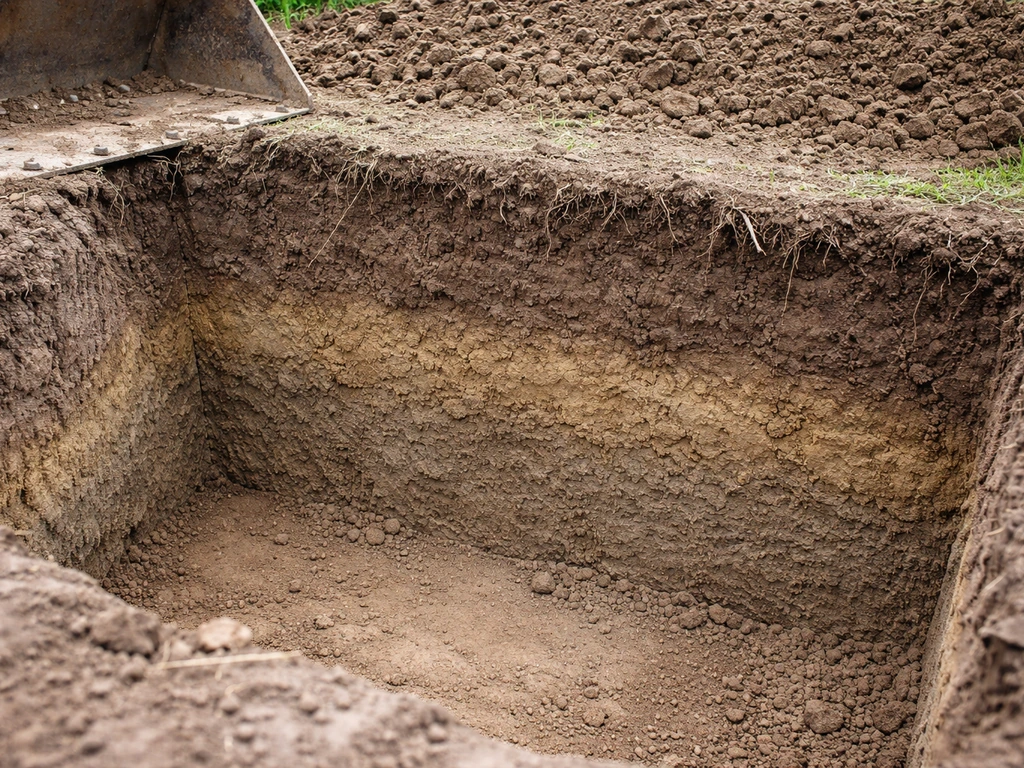
Dig a test hole about 12 inches deep in the center of the area. What you find matters a lot. Sandy or gravelly soil drains well and is relatively stable, ideal conditions. Clay soil is a different story: it holds water, swells when wet, shrinks when dry, and shifts during freeze-thaw cycles. If you have clay, you may need a deeper base, and you'll want to be especially thorough about compaction. Soft, spongy, or organic soil (anything that feels bouncy underfoot or smells earthy and rich) needs to be excavated out completely and replaced with compacted fill, don't try to build on it.
Mark Out the Area
Use timber stakes and string lines to mark the perimeter of your patio. Check your corners are square using the 3-4-5 triangle method: measure 3 feet along one edge, 4 feet along the adjacent edge, and if the diagonal between those two points is exactly 5 feet, the corner is a perfect right angle. Mark the string lines at the finished surface height you're aiming for, accounting for the slope you want. Spray paint or sand on the ground makes it easy to see your dig line clearly.
How Deep to Excavate
Excavation depth is one area where a lot of first-timers go too shallow. You need to remove all topsoil and vegetation, roots included, and get down to firm, undisturbed subsoil before you start building up your base layers. If you want a durable result, follow a clear how to lay sub base for patio process for excavation, compaction, and crushed stone layers before adding bedding or slab forms. Topsoil is full of organic matter that compresses and decomposes over time; any base you build on it will eventually sink.
For most residential paver patios, a total excavation of 6 to 8 inches below your finished surface level is typical: roughly 4 to 6 inches for the crushed stone base, plus 1 inch for bedding sand, plus the thickness of your paving material (usually 1.5 to 2.5 inches for brick or stone). Work backward from your planned finished height to figure out how deep to go.
For a concrete slab, plan for the slab itself (4 inches is standard for a residential patio), plus 4 inches of compacted crushed stone base underneath. That puts your dig depth at around 8 inches minimum below finished surface. In areas with significant frost depth, where the ground freezes hard in winter, your base may need to go deeper still to protect against heave. If you're unsure about local frost depth, your local building department can give you the number for your area.
Handling Problem Soil Conditions
If you hit soft or waterlogged soil below your target depth, keep digging until you reach firm ground. Fill back up with crushed stone in layers (more on compaction below) rather than leaving soft material in place. On clay-heavy sites, consider placing a layer of geotextile fabric between the subgrade and your crushed stone base, it stops the clay from migrating up into the stone over time and keeps the base performing properly for years longer.
Uneven ground is a separate challenge covered in detail in guides specifically about how to flatten ground for a patio, but the short version is: always cut down to the lowest planned subgrade level across the whole area, then build back up uniformly with compacted fill. Never add fill on one side and cut on the other without compacting the filled section thoroughly, that's a recipe for differential settlement.
Building and Compacting the Base Layers
Once the subgrade (the actual soil surface at the bottom of your excavation) is exposed, flat, and firm, it's time to build upward. This is where the long-term stability of your patio is really decided.
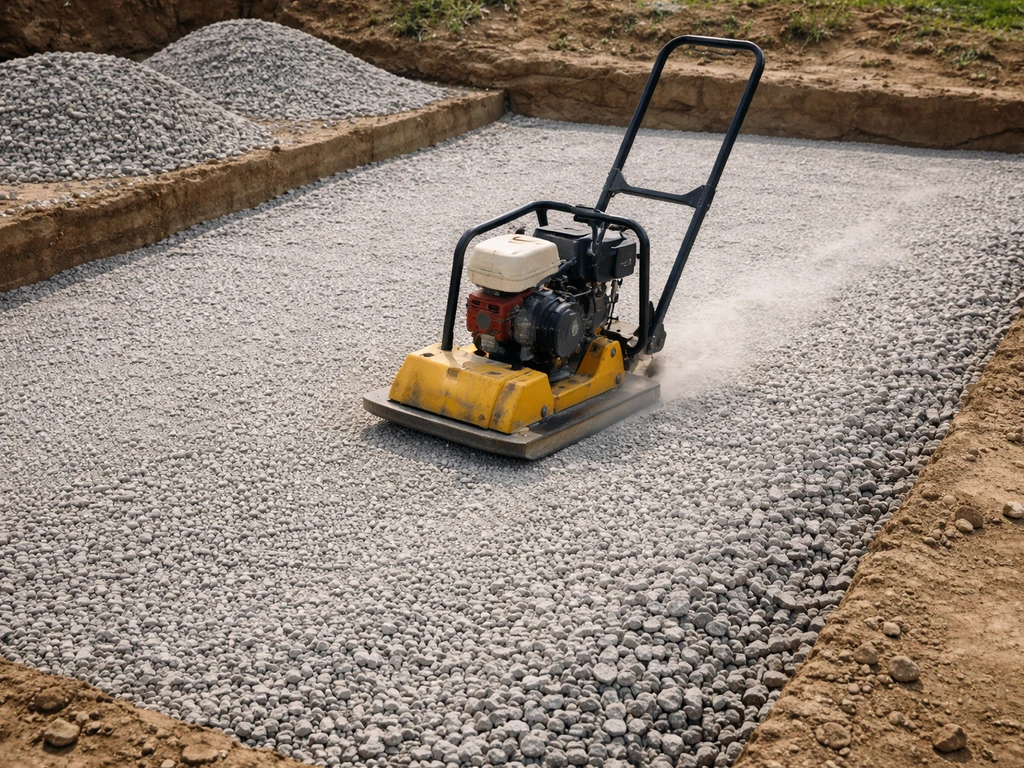
Compact the Subgrade First
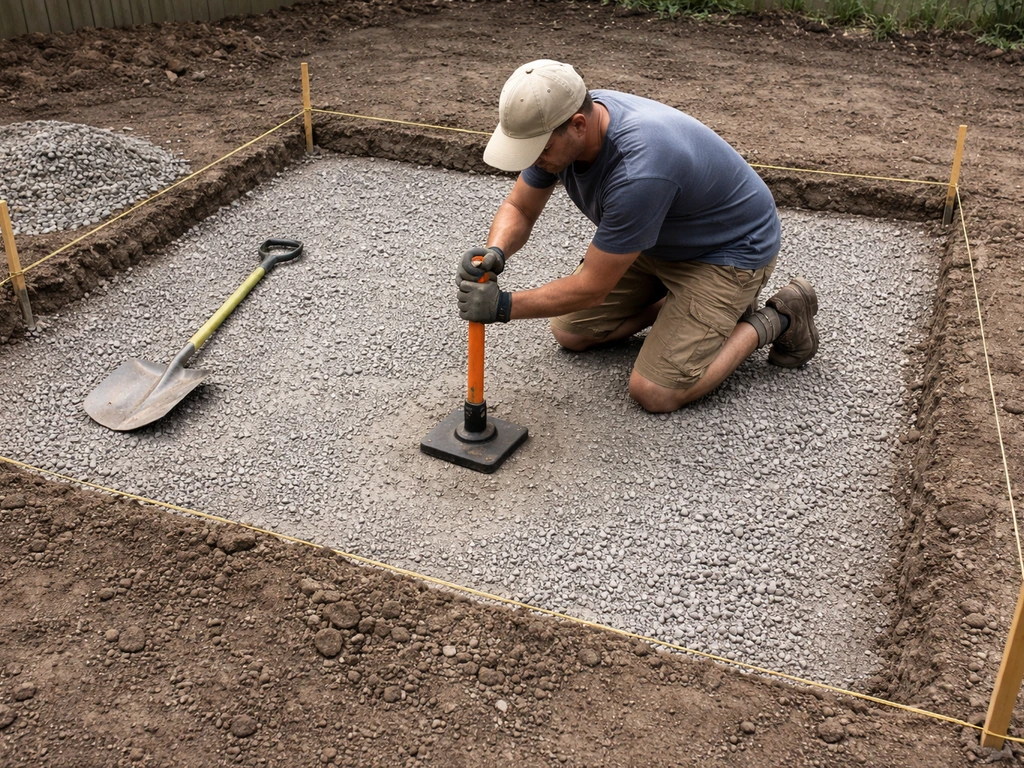
Before placing any stone, run a plate compactor or hand tamper over the exposed subgrade. You want a firm, unyielding surface. If your heel sinks into it when you step, it needs more compaction or the soft material needs to come out. For larger areas, renting a plate compactor is absolutely worth it, hand tamping a 200-square-foot patio is exhausting and rarely achieves the same density.
Laying the Crushed Stone Base
Use crusher run (also called road base or MOT Type 1 depending on your location) as your main base material. It's a mix of crushed stone and fine particles that locks together and compacts well. Spread it in layers no deeper than about 3 to 4 inches at a time, thicker lifts don't compact uniformly all the way through. A useful rule of thumb: the base layer thickness should be at least twice the largest aggregate particle size in that material, which usually works out to around 100mm (4 inches) for standard 50mm crusher run.
Rake each layer level before compacting. Run the plate compactor over the area with 4 to 6 passes per lift, overlapping each pass by about 6 inches to make sure nothing gets missed. After compacting, the surface should look tight and feel solid underfoot, no give, no loose pieces rolling around. Add your next lift and repeat the process until you reach the correct depth. For a standard residential patio base, you'll typically be placing one or two lifts of crushed stone.
Adding the Bedding Layer (Pavers Only)
If you're laying pavers or stone slabs rather than pouring concrete, the final layer before your surface material is bedding sand. Spread clean coarse sand to a depth of at least 1 inch, evenly across the compacted base. Use screed pipes or rails, lengths of conduit or timber set at the right height, to drag a straight board across the sand and get a consistent, flat surface. Do not compact the bedding sand before laying your pavers: the pavers themselves are set into it, and compacting it first can create a crust that affects how they seat. The compaction happens after the pavers are laid, when a plate compactor is run over the whole surface to bed everything in.
Getting the bedding layer truly level is where your patio's finished flatness is decided. Small inconsistencies here translate directly into rocking slabs and lippage between pavers. Take the time to get this layer right. There's a lot more detail on preparing specifically for slab-on-sand systems in guides about how to prepare ground for patio slabs, which is worth reading if that's your chosen surface.
Concrete-Specific Ground Prep: Forms, Reinforcement, and Vapor Barriers
If you're pouring a concrete patio, the base work above is the same, but from there the prep diverges significantly from a paver install. This is where a lot of DIYers either skip steps or get confused, and it's also where skipping those steps shows up as cracking a year or two later.
Setting Timber Forms
Once the compacted stone base is done, build timber forms around the perimeter using 2x4 or 2x6 lumber (your choice depends on your planned slab thickness, 4-inch slabs use 2x4s). Drive wooden or metal stakes into the ground outside the form boards every 2 to 3 feet, and screw the form boards to the stakes. Set the top edge of the forms at your planned finished slab height, including the 1-inch-per-8-feet drainage slope away from the house. Check constantly with a spirit level and string lines as you go. Once concrete is poured, you can't move the forms, so get them right before you mix a drop.
For curves or rounded edges, use thinner plywood (3/8 inch or 1/2 inch) that can bend to shape and is held in place by stakes at close intervals. Coat the inside face of all your forms with a release agent, old motor oil, cooking spray, or a purpose-made form release, so the timber comes off cleanly once the slab has cured.
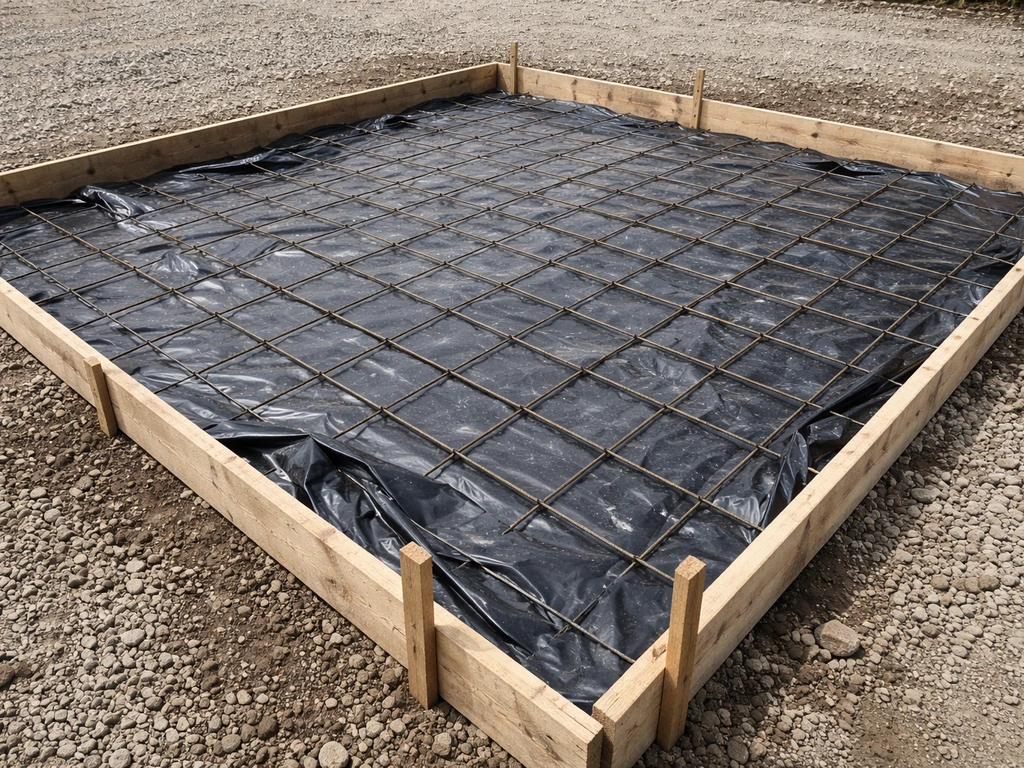
Vapor Barrier Under the Slab
Before reinforcement goes in, lay a vapor barrier directly on top of the compacted stone base. Use polyethylene sheeting, at least 10-mil thickness is the recommendation from ACI guidance, with thicker sheeting offering better puncture resistance during the pour. Overlap seams by at least 12 inches and tape them. The vapor barrier keeps ground moisture from wicking up through the slab, which matters for any finishes you apply on top and for the concrete's long-term durability.
Reinforcement: Mesh or Rebar
For a standard 4-inch residential patio slab, welded wire mesh (WWM, typically 6x6-W1.4xW1.4) is the most common DIY choice. Roll it out across the area inside the forms, cutting it to fit with bolt cutters. The mesh needs to sit in the middle of the slab thickness, not on the ground, and not floating to the top. Use small plastic or concrete rebar chairs (sometimes called 'dobies') spaced every 3 to 4 feet to hold the mesh at the right height. Alternatively, for heavier-use areas or softer soils, use #3 or #4 rebar on a 12-inch grid, it provides more tensile strength and is worth the extra effort on clay sites.
Reinforcement doesn't prevent concrete from cracking, nothing does entirely, but it keeps cracks tight and prevents the slab from shifting and separating at a crack. Think of it as the safety net that keeps small cracks from becoming big structural problems.
Plan Your Control Joints Before the Pour
Control joints (also called contraction joints) are intentional weak points you cut into the slab that guide where cracks form. Without them, concrete cracks wherever it wants to, which is usually somewhere inconvenient and ugly. The standard spacing rule is to place control joints at intervals no greater than 2 to 3 times the slab thickness in feet. For a 4-inch slab, that's a maximum of 8 to 12 feet between joints. So plan your joint layout on paper before the pour, marking where you'll either use plastic joint strips placed before pouring or where you'll saw-cut after the pour (within 12 to 24 hours of finishing, while the concrete is still green).
Where the slab meets the house foundation, a wall, or any fixed structure, use expansion joint material (typically a compressible foam or fiber strip) rather than a control joint. This accommodates independent movement between the slab and the structure and is one of the most commonly skipped steps in residential concrete work, don't skip it.
Finishing Details That Hinge on Your Ground Prep
Final Grade Check and Tolerances
Before anything goes on top of your prepared base, whether that's concrete or bedding sand, do a final check with a long straightedge and spirit level across the whole area. For concrete work, top-of-slab elevation tolerance is generally accepted at around plus or minus 3/4 inch from the target level. In practice, the closer you are to perfect at the base stage, the easier the finishing work becomes. Lumps and low spots in the base show up in the final surface, no matter how carefully you finish the top.
Drainage Slope Confirmation
Check your slope one more time at the base stage. It's much easier to adjust the base than to try to compensate during the pour or after slabs are laid. Run a string line from the house-side edge to the far edge of the patio at your planned heights and confirm the fall is consistent across the full width. If it's not, re-screed or re-compact now.
Curing a Concrete Slab
Once the concrete is poured, finished, and the surface bleed water has evaporated, curing begins. Keeping the slab moist for a minimum of 7 days is standard practice for most Portland cement concrete mixes at normal temperatures. Moist-cured concrete gains significantly more strength than concrete left to dry in open air. Cover the slab with wet burlap and plastic sheeting, or use a curing compound sprayed on immediately after finishing. Don't let it dry out in the first week, and don't let anyone walk on it for at least 24 hours, preferably 48.
Tools and Materials Checklist for Ground Prep
- String lines and timber stakes
- Spray paint or sand (for marking dig lines)
- Spirit level and long straightedge
- Tape measure
- Spade and mattock (or mini excavator hire for larger areas)
- Wheelbarrow
- Plate compactor (hire if not buying)
- Crusher run / road base crushed stone
- Coarse bedding sand (for paver systems only)
- Screed pipes or rails (for bedding sand leveling)
- Timber form boards, 2x4 or 2x6 (concrete patios)
- Form stakes and screws
- 10-mil polyethylene vapor barrier (concrete patios)
- Welded wire mesh or rebar and chairs (concrete patios)
- Bolt cutters and wire ties (for mesh/rebar)
- Expansion joint strips (where slab meets house or walls)
- Form release agent
- Geotextile fabric (optional but recommended on clay sites)
Common Mistakes That Cause Long-Term Problems
- Not calling 811 before digging — a dangerous and potentially illegal shortcut
- Leaving topsoil or organic material under the base — it will compress and cause sinking
- Not compacting in layers — deep uncompacted lifts compact unevenly and create soft spots
- Skipping the vapor barrier under a concrete slab — leads to moisture problems and surface deterioration
- Setting reinforcement mesh directly on the ground — it needs to be in the middle of the slab, not at the bottom
- Forgetting control joints or spacing them too far apart — results in random, uncontrolled cracking
- Omitting expansion joint material where the slab meets the house — causes cracking at that junction
- Not checking drainage slope before pouring — water pooling against the house is a serious problem
- Rushing the curing period on a concrete slab — weak concrete that wears and cracks faster
- Building on clay soil without a geotextile separator — the clay migrates up into the base over time and destroys it
When to Call a Pro Instead
Most of the ground prep work described here is genuinely within reach for a capable DIYer with a weekend and a hired plate compactor. But there are a few situations where getting a professional involved is the smarter call. If your site has significant slope, more than a foot of drop across the patio area, cutting and filling correctly to avoid differential settlement gets complicated fast. If you find soft, waterlogged, or consistently unstable soil at depth, a geotechnical assessment can save you from building on a base that will fail. And if your planned patio is large (over 400 square feet) and concrete, managing a pour of that scale, including getting the timing right on finishing and jointing, is much harder solo than most first-timers expect.
The preparation work, the digging, the base, the compaction, is something most homeowners can absolutely handle. It's physical, but it's not complicated if you follow the sequence carefully. The concrete pour itself, especially on a large slab, is where inexperience shows up most. There's no shame in doing all the prep yourself and bringing in a concrete crew just for the pour day.
Your Next Steps
If you've read this far, you've got the full picture of what ground preparation for a patio involves. The sequence is: call 811, assess your site, mark out and excavate to the right depth, compact the subgrade, build and compact your crushed stone base in layers, then either add bedding sand for pavers or set forms and reinforcement for a concrete slab. If you want a patio that lasts, you also need to know exactly how to dig up the lawn and prep the subgrade before you build the base layers how to dig up lawn for patio. Every step matters, and the steps build on each other, which means doing the early ones properly makes everything that follows easier.
If you're still deciding on your surface material and whether a sub-base is truly necessary for your specific setup, there's a dedicated look at how to lay a patio without sub base that addresses the edge cases. For the excavation side of things, specifically getting an existing lawn cleared cleanly, a guide on how to dig up lawn for a patio covers that process in more detail. And if your site has a slope to deal with, reading about how to lay a sub base for a patio alongside the leveling information will help you plan the thickness variations you'll need across different parts of the area.
FAQ
How do I figure out how deep to excavate if my patio size or shape is irregular (not a perfect rectangle)?
Work from the slope you measured, then set your finished height at the house edge and the far edge (and any low corners). Mark a dig plane that keeps the base level where the drainage slope is produced above it (by adjusting bedding or slab thickness only after the base is uniform). For irregular shapes, calculate the required total depth at multiple points, not just the center, and adjust the subgrade excavation so the crushed stone base ends up level across the whole footprint.
Can I use pavers with less crushed stone base if my soil seems stable?
Even if the area looks stable, skipping the crushed stone layer can lead to movement over freeze thaw or after repeated wetting and drying, especially with clay or mixed fill. If you’re tempted to reduce depth, confirm compaction density after each lift and do a simple water test, after a rain see whether water pools and how long it takes to drain away. If drainage is slow, increase base quality or add a drainage fix before laying pavers.
What’s the biggest compaction mistake people make during patio prep?
One common error is compacting unevenly, thick lifts, or not raking and leveling between lifts. Another is compacting crushed stone only once, instead of compacting subgrade and then each base lift (typically 4 to 6 overlapping passes per lift with a plate compactor). If you can push a probe or heel and it sinks noticeably, assume your density is insufficient and address it before bedding sand goes down.
Should I compact the bedding sand before installing pavers?
No, the bedding layer is meant to be set and then stabilized by tamping after the pavers are installed. Compacting bedding sand beforehand can create a crust that prevents pavers from seating evenly, increasing the chance of rocking and lippage. Instead, keep it level using screed rails, then compact the pavers after placement.
Do I need geotextile under the crushed stone base on every patio?
Not necessarily. Geotextile is most valuable when you have clay-heavy soil or fine soils that pump upward into the base over time. If your subgrade is sandy or gravelly and drains well, you may not need it. If you have organic or waterlogged areas, remove and replace those soils first, geotextile is not a substitute for eliminating unsuitable subgrade.
How can I tell if I’ve removed all topsoil and organic material?
Beyond appearance, use a tactile and smell check, topsoil and organic material often feels spongy or crumbly and can smell earthy. Remove until you reach firm, uniform subsoil that does not change texture with a firm footstep or probing. If you hit any roots or pockets that look different, keep digging those areas out and replace with compacted fill.
What drainage slope is acceptable if the patio is small or constrained by existing landscaping?
A common target is about 1 inch of fall for every 8 feet away from the house, but the key is achieving consistent fall without low spots where water can collect. If space constraints force a smaller total run, reduce low points through base grading and confirm with a controlled water test after rain. For very tight areas, ensure downspout discharge does not dump onto the patio edge.
How soon can people walk on a freshly poured concrete patio?
Typically, you should limit foot traffic for at least 24 hours, and longer is better (often closer to 48 hours) depending on temperature and mix. The concrete should also be protected from rapid drying during the first week by keeping it moist (wet burlap and plastic, or an approved curing compound). If you need to move equipment near it, plan support boards so you do not disturb the surface.
Do I need expansion joint material where the slab touches the house and walls?
Yes. Where the slab meets any fixed structure, use compressible joint material so the slab can expand and contract independently. A control joint alone is not a substitute for an expansion joint at these interfaces, without the right separation you can get binding, cracking, and uneven contact along the edges.
Can I place reinforcement mesh directly on the crushed stone base?
No. The reinforcement needs to be supported at the correct height inside the slab so it can do its job when cracking occurs. Use chairs or dobies so the mesh sits near the middle of the slab thickness, if it rests on the base it will not provide the intended crack control and can corrode prematurely if the cover is insufficient.
How do I prevent control joints from looking messy or misaligned after finishing?
Plan the joint layout before pouring and keep joint lines straight relative to edges or key sight lines. If you’re using preformed joint strips, install them carefully before finishing so they stay flush. If you’re saw cutting, wait until the concrete is firm enough to cut cleanly (often within 12 to 24 hours after finishing), and follow the line you marked so the joints guide cracking where you want.
What final base checks should I do right before I start laying pavers or pouring concrete?
Use a long straightedge across the entire area to find high and low spots, then verify slope using string lines from the house-side edge to the far edge. Confirm the surface feels firm (no heel sink) and that there is no loose debris or standing water. If you find issues at this stage, correct them by re-screeding or re-compacting now, once you pour or set pavers the base shape is locked in.
When should I consider hiring a pro for ground prep, not just the concrete pour?
Hire help early if you discover more than minor soft or waterlogged zones at depth, or if you see large elevation changes across the site that require complex cut and fill to prevent differential settlement. Also consider a professional if you’re unsure about frost depth, drainage requirements, or you’re dealing with buried utility marks that leave very tight excavation margins. In those cases, correcting design and subgrade strategy up front is usually cheaper than rebuilding later.