To level patio blocks correctly, you need to fix the cause underneath rather than just fuss with the blocks themselves. That means establishing a proper slope (1/4 inch per foot away from the house for drainage), compacting a solid gravel base to about 4 to 6 inches deep, screeding a consistent 1-inch bedding sand layer, and then setting each block to your string lines. Every adjustment happens in the base and bedding, not by forcing blocks up or down after the fact.
How to Level Patio Blocks: Step-by-Step DIY Guide

Clara Farrell
17 Jun 2026
I've watched plenty of first-timers try to eyeball their way through this and end up with a patio that looks fine on day one but rocks, sinks, or puddles within a season. The good news is that if you understand the system from the ground up, leveling patio blocks is completely within reach for a homeowner with a free weekend and the right tools. If you want the best results, level your patio blocks by starting from a solid sand bed and following the same step-by-step process for bedding sand, screed lines, and checking flatness.
Quick diagnosis: what 'uneven' means and where it's actually coming from
Before you touch a single block, it helps to understand what kind of uneven you're dealing with. There are really three different problems that all get called the same thing.
- Individual blocks rocking or sitting higher/lower than their neighbors: This is almost always a bedding sand issue. The sand wasn't screeded to a consistent depth, or it shifted after compaction. The fix is lifting those blocks and correcting the sand layer beneath them.
- A whole section of the patio has sunk: This points to a failed sub-base. The gravel base wasn't compacted properly, or water has been washing fines out from underneath. You'll need to lift the affected area, rebuild the base, and reset.
- The patio slopes toward the house or has low spots that pool water: This is a grade problem established before the first block went down. The overall slope was never set correctly, or the bedding sand wasn't screeded to account for drainage. This requires re-establishing your string lines and correcting the whole base.
- Lips between adjacent blocks greater than about 2mm: Even if the overall grade is fine, lips between neighboring units are a trip hazard and a sign the bedding sand wasn't uniform. Individual blocks need lifting and re-bedding.
The repair logic is the same whether you're fixing an existing patio or starting fresh: lift the affected blocks, correct whatever is underneath, and reset using string lines as your guide. Trying to tap blocks into place without addressing the cause just kicks the problem down the road.
Tools and materials you'll need
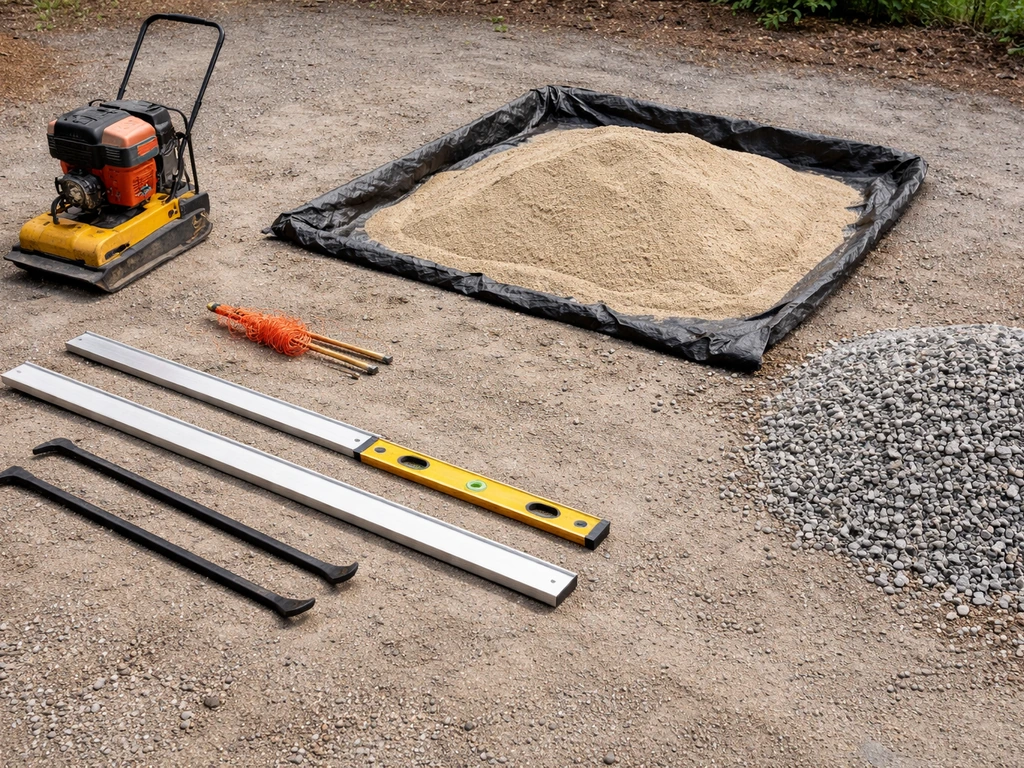
Having the right gear on site before you start saves a lot of frustration. Here's what you'll realistically need for a standard sand-set patio block project.
| Item | What It's For | Notes |
|---|---|---|
| Plate compactor | Compacting gravel base and final surface | Minimum 5,000 lbf for patio work; rent one if you don't own it. Get a rubber pad attachment for final compaction over blocks. |
| Mason's string line and stakes | Setting grade and height reference | You need at least two lines to establish slope in both directions |
| Line level or water level | Checking string lines are truly level | A line level clips onto the string; a water level works over longer distances |
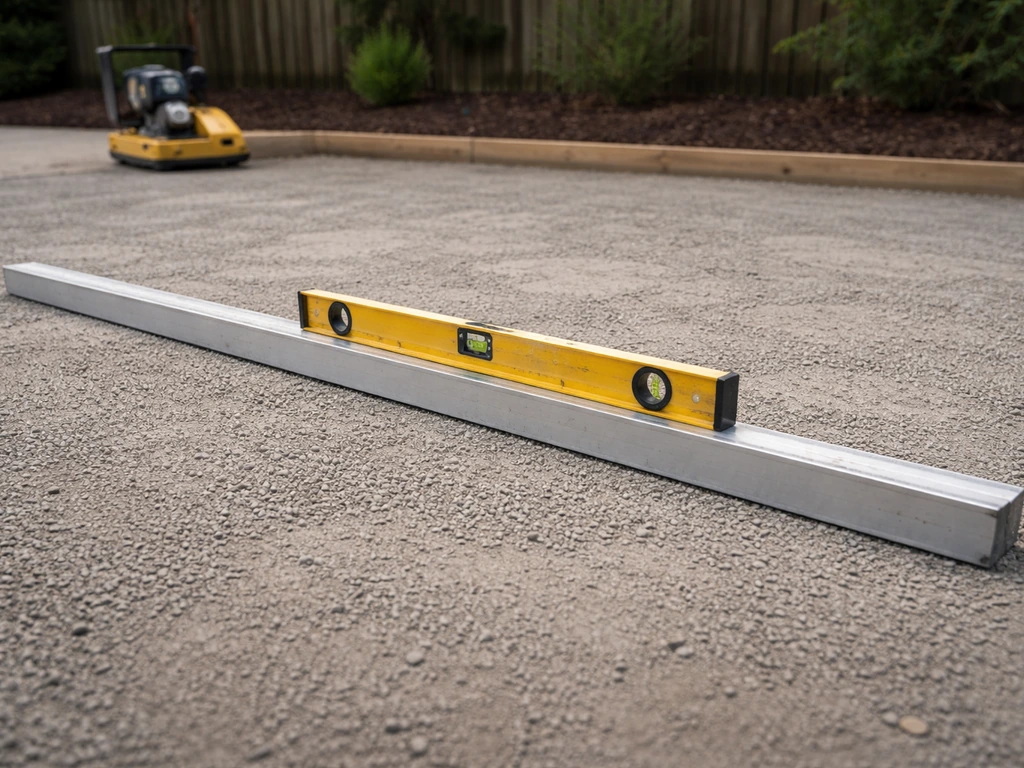
| 4-foot spirit level | Checking blocks during setting | Also useful for checking base flatness after screeding |
| 8-foot straightedge or long level | Checking surface profile across multiple blocks | A piece of straight lumber works in a pinch |
| Screed pipes or rails | Controlling bedding sand depth | Two 1-inch diameter pipes about 10 feet long are the classic setup |
| Screed board (2x4) | Pulling sand to a consistent depth | Should span across both screed pipes |
| Rubber mallet | Setting blocks without chipping | Never use a regular hammer directly on blocks |
| Pry bars or paver lifting tools | Lifting existing blocks without damage | Two flat bars used simultaneously keep blocks from cracking |
| Tape measure | Layout, slope calculations, diagonal checks | A 25-foot tape is the minimum useful length |
| Compacted gravel base material | Sub-base layer beneath bedding sand | Crushed stone or road base; aim for 4–6 inches compacted depth for a residential patio |
| Coarse bedding sand | 1-inch layer between base and blocks | Concrete sand or coarse washed sand; not fine play sand |
| Polymeric sand or regular jointing sand | Locking joints after installation | Polymeric sand is more durable and weed-resistant |
| Safety glasses and gloves | Personal protection | Especially important when cutting blocks |
If you're fixing an existing patio rather than starting from scratch, you may also need a circular saw with a diamond blade or an angle grinder to cut edge blocks. A hand tamper can substitute for a plate compactor on very small repair areas, but for anything larger than a few square feet, renting a plate compactor is worth every dollar. Barkman Concrete's installation guide also specifies plate compactor sizing in its tools and materials guidance for paver and slab projects A hand tamper can substitute for a plate compactor on very small repair areas, but for anything larger than a few square feet, renting a plate compactor is worth every dollar..
Prep work: clearing, checking level and grade, and fixing the sub-base
This is the stage most DIYers rush, and it's where most problems are born. Good prep is genuinely 80% of the job.
Remove or lift blocks in the affected area
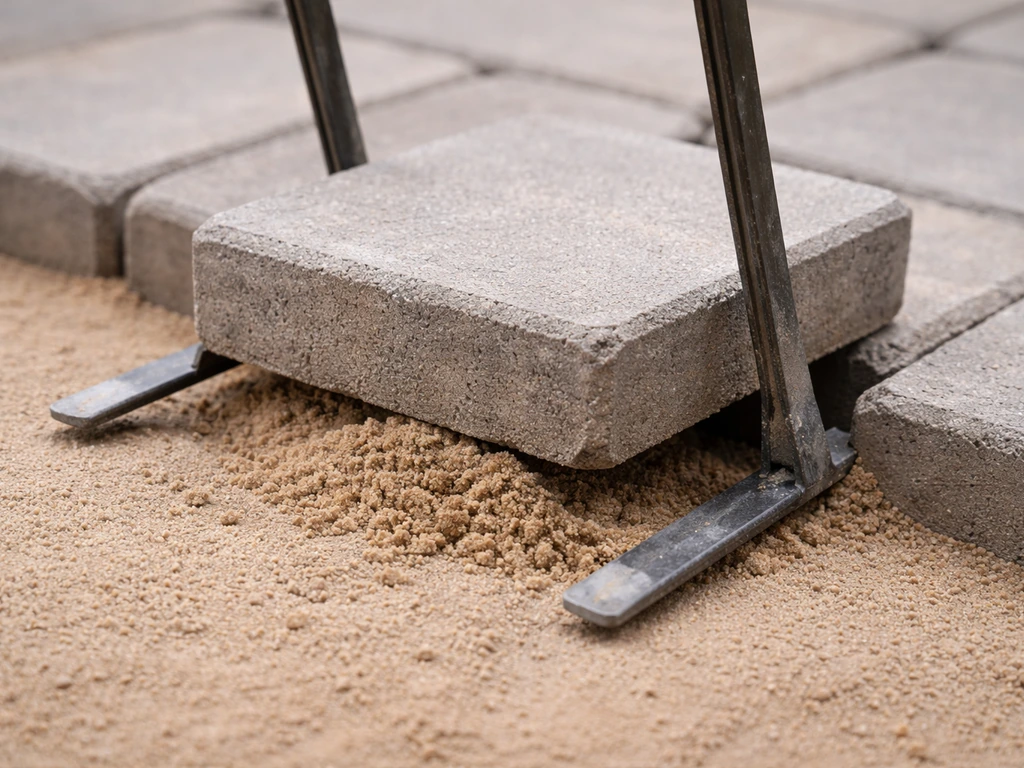
For a repair job, start by lifting the blocks in the uneven area. Work from the outside of the affected section inward. Slide two flat pry bars down on either side of a border block and lever upward simultaneously with equal pressure so the block comes straight up rather than rocking into its neighbors. Stack lifted blocks nearby, keeping them in order if you want to reinstall them in the same pattern. If you're starting a brand-new installation, obviously this step doesn't apply, but you'll still need to excavate to the correct depth.
Establish your grade and string lines
Set wooden stakes at the perimeter of your patio and run string lines between them. These lines serve two purposes: they define the finished height of your blocks, and they establish the slope for drainage. The standard for patio drainage is 1/4 inch per foot of horizontal run, sloping away from the house. On a 12-foot-wide patio, that's a 3-inch drop from the house edge to the outer edge. The absolute minimum is 1/8 inch per foot (1% grade), but 1/4 inch per foot (2% grade) is what ICPI recommends for pedestrian surfaces and it's what I'd use every time.
Use the 3-4-5 method to confirm your layout is square: measure 3 feet along one string, 4 feet along the perpendicular string, and the diagonal between those two points should measure exactly 5 feet. If it doesn't, adjust your stakes until it does. Getting this right at the start saves you from cutting awkward angles on edge blocks later.
Assess and fix the sub-base
Once the area is cleared, look at what's underneath. If the subgrade soil is soft, mushy, or has eroded channels where water has been running through, you have a sub-base problem. For a standard residential patio, you need a compacted gravel base of 4 to 6 inches after compaction. If you're in a wet climate, have clay soil, or see signs of water movement, consider laying a geotextile fabric over the subgrade before adding gravel. The fabric separates the gravel from the soil and stops fine particles from migrating up and destabilizing your base over time.
Add gravel in layers of no more than 3 to 4 inches at a time and compact each layer with your plate compactor before adding the next. You're aiming for about 95% compaction density. A properly compacted gravel base won't leave footprints when you walk on it and will feel almost like concrete underfoot. If it still feels springy or your footprints sink in, it needs more compaction passes. This step directly connects to the broader topic of how to level a patio base, which goes into more detail on gravel depth for different soil types.
Set the base correctly: bedding sand, screed lines, and compaction
Once the gravel base is solid and your string lines are set, you're ready for the bedding sand layer. This is the fine-tuning layer that lets you make small adjustments to block height, but only within a narrow range. Don't think of it as your leveling fix. It's a precise 1-inch layer, full stop. Pavestone’s concrete-asphalt-base installation specifications call for bedding sand spread and screeded to a nominal 1 inch (25 mm) thickness and verify base and geotextile readiness plus thickness control blank" rel="noopener noreferrer">Paver Installation Layers.
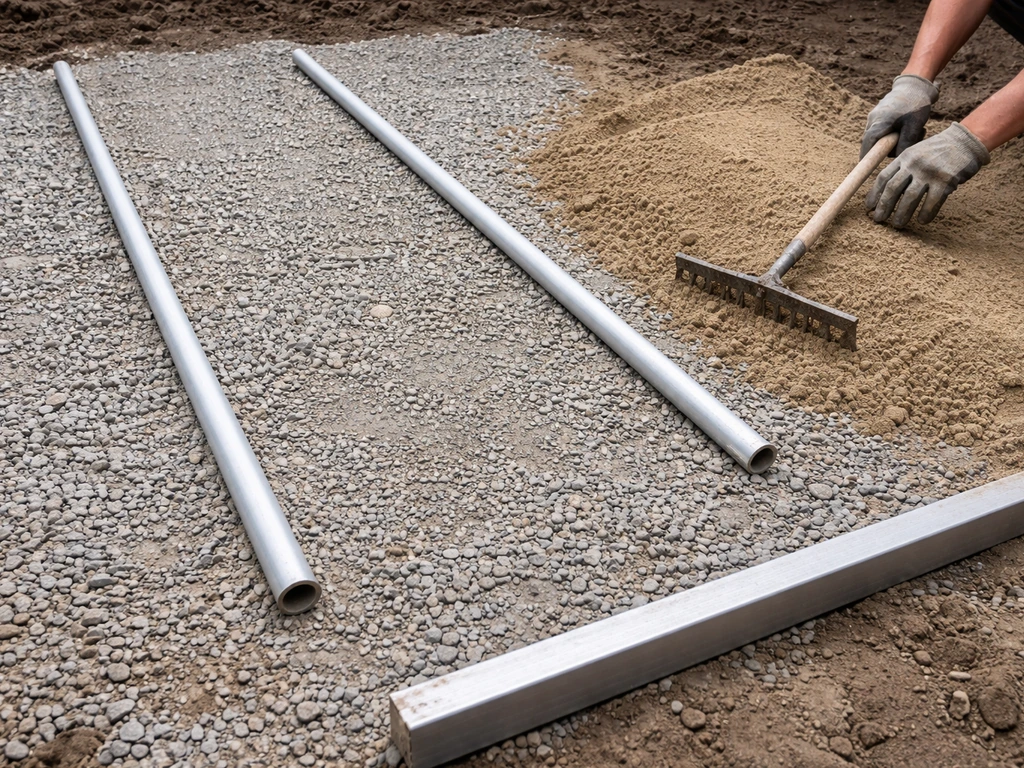
Set up your screed rails
Lay two 1-inch diameter pipes or rails parallel to each other across the compacted gravel base, spaced so your screed board can span between them comfortably. The tops of these pipes become your depth reference: when you drag your screed board across them, you pull the sand down to exactly 1 inch. Position the pipes so they're running in the same direction you'll be laying blocks, and check their height against your string lines to confirm you're accounting for the correct finished height (string line height minus block thickness equals your screed pipe height).
Spread and screed the sand
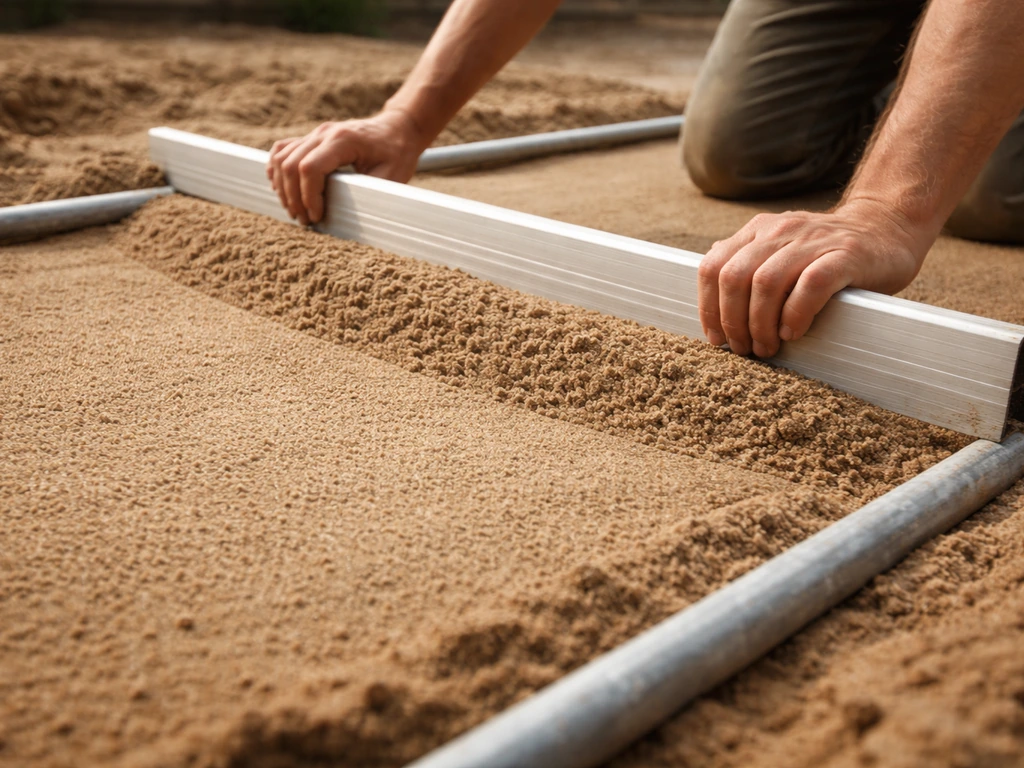
Dump enough bedding sand between the pipes to slightly overfill the space, then drag your screed board across the pipes in a smooth sawing motion to pull the excess off and leave a perfectly flat, 1-inch-deep bed. Fill any low spots you notice, re-screed, and repeat until the surface is consistently flat with no humps or hollows. Once you've screeded a section, don't walk on it. Step on the pipes or the compacted base beyond the screeded area. Footprints in screeded sand will cause blocks to sit low in those spots.
Work in manageable sections, moving the pipes forward as you go. A common mistake is screeding the entire area at once and then walking all over it to lay blocks. Screed a section you can fill with blocks before the sand gets disturbed, then move the rails forward. This is closely related to how to level sand for patio blocks, which covers screeding technique in more depth.
How to level the blocks: start points, working in sections, and checking flatness
With a solid, screeded base under you, setting the blocks level is mostly about discipline: working from a known reference point, checking frequently, and not trusting your eye alone. Following these checks and working from a known reference point will help you lay a level patio that stays flat and drains properly over time how to lay a level patio.
Choose your starting point
Always start from a straight, fixed edge, typically the edge closest to the house or a permanent edging you've already set. This gives you a hard reference line to work outward from. Don't start in the middle of the patio and work out. Set your first row of blocks tight against that fixed edge and confirm they're sitting at the correct height relative to your string lines before laying anything else.
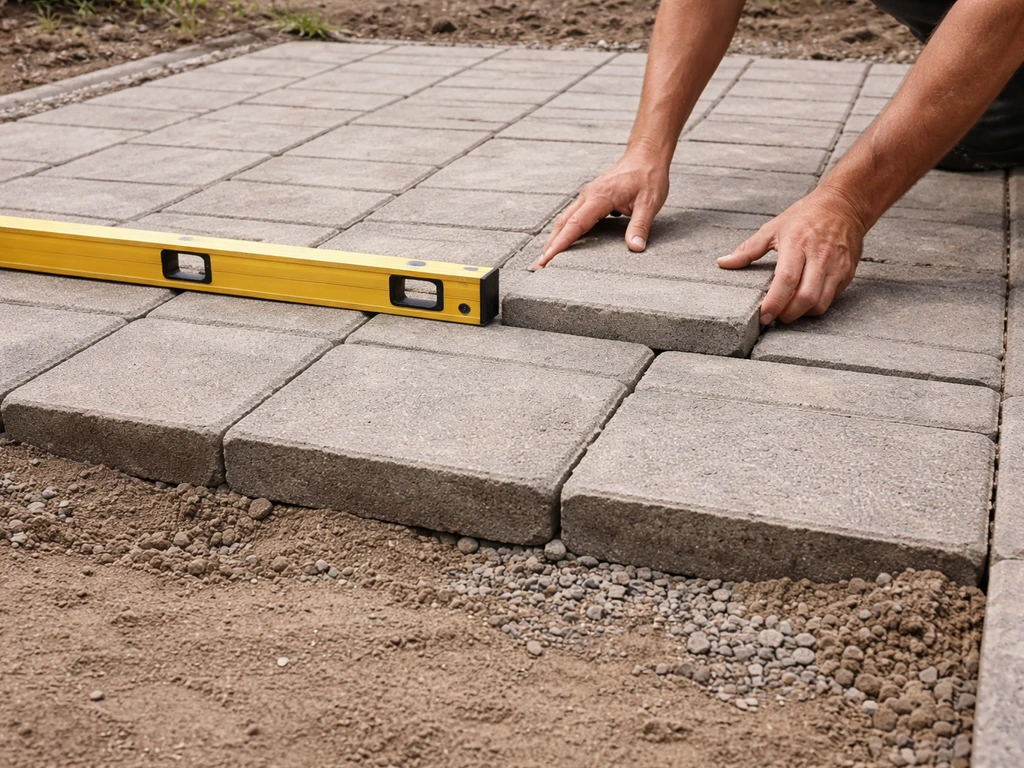
Work in sections and check constantly
Lay blocks in a working line across the patio, setting each one by hand into the sand without sliding it (sliding displaces sand and creates uneven spots). After placing each block, tap it lightly with a rubber mallet to seat it fully. Check your string line frequently as you go: the top of each block should just graze the underside of the string. Don't set 20 blocks and then check. Check every 3 to 4 blocks when you're getting started, then every row once you've found your rhythm.
Every 4 to 6 rows, lay your 8-foot straightedge across the surface diagonally to check for hollows or high spots that your local eye-level checks might have missed. A block can feel flat to its immediate neighbors but still be part of a subtle bow or dip that only shows up over a longer distance. Diagonal checks catch this early, when it's still easy to correct.
Check your diagonals for squareness
As you complete sections, measure the diagonals of the laid area. Both diagonals should be equal. If they're not, your pattern is racking out of square and will cause problems at the edges when you get to cutting. Catching this every few rows lets you make tiny corrections rather than one big painful one later.
Adjusting individual blocks to eliminate high and low spots
Even with perfect prep, you'll encounter the occasional block that sits slightly high or low. Here's how to correct each without creating a new problem.
Block sitting too high
A high block means there's too much sand beneath it. Lift the block straight up using two pry bars (same technique as for existing repairs), remove a small amount of sand from beneath it, and reset. Tap it with the rubber mallet and recheck. Don't just hammer a high block down. Forcing it compresses the sand unevenly and often creates a high ring around the block where the displaced sand has nowhere to go.
Block sitting too low
A low block needs more sand under it. Lift it, add a small amount of sand to the hollow, re-screed that spot flat, and reset the block. Tap to seat and check again. Resist the urge to add just a pinch of sand and push the block back down without lifting it fully. Partially adding sand under a seated block almost always creates an uneven support point and the block rocks.
Rocking block
A block that rocks diagonally has a high point under one corner. Lift it, look for a lump or high spot in the sand, level it out, and reset. The workmanship standard to aim for is no lips greater than about 2mm between adjacent blocks. If you can catch a coin edge on the joint, that's too much.
Common mistakes to avoid during adjustment
- Adjusting one block in isolation without rechecking its neighbors: raising or lowering one block changes your reference for the surrounding blocks, so always recheck a 12-inch radius around any adjusted block.
- Using shims or gravel under individual blocks instead of correcting the sand: shims create a point load instead of full-surface support and the block will eventually crack or rock.
- Continuing to lay blocks when you notice a systematic high or low trend: if blocks are consistently running high or low in one area, your screed pipes weren't sitting at the right height in that section. Stop, lift the blocks in that area, re-screed, and reset.
- Walking on freshly laid blocks before final compaction: foot traffic can shift individual blocks off level before they're locked in by compaction and jointing sand.
Finishing: edge cuts, re-checking level, and locking it all in
With all the full blocks set and checked, you're in the home stretch. The finishing steps are what take a patio from a loose collection of blocks to a stable, locked surface.
Cut and set edge blocks
Measure each edge gap individually and mark blocks for cutting. Don't assume every gap is the same width. Use a circular saw with a diamond blade or an angle grinder to cut. Always cut outside the patio area, away from your screeded sand. Set cut blocks into their gaps the same way as full blocks: place gently, tap to seat, and check against the string line and your straightedge. Cut pieces smaller than about a third of a full block can be unstable, so if you end up with a lot of very small cuts, consider adjusting your starting position on the next project.
Do a final surface check before compaction
Before you compact, do one last pass over the whole surface with your 8-foot straightedge and your 4-foot level. Check both the flatness (no humps or hollows across the surface) and the slope (correct pitch away from the house). This is your last chance to lift and correct individual blocks without fighting against compacted jointing sand. Take your time here.
Compact the surface
Run the plate compactor over the entire patio surface with a rubber pad attached. The rubber pad protects the face of the blocks from scratching and chipping. Make overlapping passes in two perpendicular directions. This compaction does two things: it seats all the blocks firmly into the bedding sand and it embeds any last minor height variations. After this pass, recheck your level and slope one more time. Compaction can occasionally shift a block slightly, and it's worth catching before you fill the joints.
Fill the joints with sand
Sweep jointing sand (or polymeric sand) across the entire surface and work it into the joints with a push broom. For polymeric sand, make sure the surface and joints are completely dry before you start. Sweep, compact again with the rubber-padded plate compactor to force sand deeper into the joints, then sweep again to fill any voids left by the compaction. Repeat this sweep-compact-sweep sequence until the joints are full to within about 1/8 inch of the block surface. For polymeric sand, follow the manufacturer's instructions for the final wetting step to activate the binding agent.
Set permanent edge restraints
If you haven't already, install your permanent edge restraints (plastic paver edging, concrete edging, or a soldier course of blocks set in concrete) before or immediately after the final compaction. Edge restraints stop the outer blocks from creeping outward over time, which is one of the most common causes of a patio that slowly returns to an uneven, spreading mess. Spike the edging into the compacted base at the intervals specified by the manufacturer, typically every 12 inches on curves and 24 inches on straight runs.
Once the jointing sand is set and your edges are locked in, the patio is essentially done. Give it a day before heavy foot traffic (longer if you used polymeric sand) and do a final visual check from a low angle, which reveals any remaining surface variation much better than looking straight down. If you built the base right and screeded carefully, what you'll see is a flat, even surface with a gentle, consistent slope that sends water exactly where you want it to go.
FAQ
What should I do if my patio blocks are level in one spot but the whole surface still dips toward the house or away from it?
Check the slope using your string lines at multiple points, not just at one stake. If the pitch is inconsistent, it usually means the gravel base or the screed rails were set to the wrong height in one section. Lift only the affected blocks, redo the gravel compaction and rescreed that section to restore the full 1/4 inch per foot run (or your chosen grade), then reset the blocks to the corrected reference.
How do I tell whether my problem is loose jointing sand versus a bad gravel base?
If joints wash out or keep settling even after you refill and compact jointing sand, that points to movement under the blocks, usually an uncompacted or eroded base. A quick indicator is footprints sinking or a “springy” feel before final compaction. True base issues require lifting blocks, correcting under the bedding sand, and then rescreeding, because tapping blocks down will not stabilize a shifting base.
Can I level patio blocks by adding extra bedding sand under only the low areas?
It usually makes the patio worse because support becomes uneven at the block corners. The article’s approach is to keep bedding sand as a uniform 1-inch layer and correct height at the base and screeding stage. If you must do a repair, lift the block(s) fully, remove or add sand beneath them, then rescreed that localized area flat before resetting.
What’s the minimum amount of slope I can use if I’m trying to keep the patio as flat as possible?
The minimum commonly used for pedestrian patios is 1/8 inch per foot (about a 1% grade). However, 1/4 inch per foot (about a 2% grade) is the safer target because small construction errors and settlement still leave workable drainage over time. If your patio is very small, the total drop can be only a couple inches, so recheck your math and string heights carefully before you set the first row.
Do I need geotextile fabric under the gravel every time, or only in certain conditions?
Use it when you have conditions that encourage fines to migrate, such as clay-heavy soil, a wet climate, or signs of water movement and erosion channels. If your subgrade is well-draining, stable, and you do not see pumping or washouts, fabric may be optional. When in doubt, installing fabric is low effort compared to redoing a failed base later.
How do I choose between a plate compactor and a hand tamper for repairs?
A hand tamper can work for very small patch areas, but compaction consistency is harder on bigger zones. If the repair extends beyond a few square feet, renting a plate compactor is usually the right call. Aim for repeatable compaction (about 95% density), which you confirm by walking the area, checking for springiness, and making multiple compaction passes.
My rails for screeding keep moving as I drag the board. How can I prevent that?
Set the rails so they sit firmly on compacted gravel (not on loose material), and ensure the spaced width matches your screed board so it does not pry upward while you pull. If the rails shift, your screed depth will vary and you will chase high and low blocks. Recheck rail height against your string lines after moving to the next section.
Should I walk on the screeded sand while I’m laying blocks?
No. Footprints in the screeded bedding sand create low dips where blocks will seat lower later. The practical workaround is to stand on the compacted base beyond the screeded zone or step only where you have already placed blocks.
How often should I check flatness and slope while setting the blocks?
Check the string line frequently during placement, about every 3 to 4 blocks when you are starting, then every row once you develop a rhythm. For overall flatness, do diagonal checks with an 8-foot straightedge every 4 to 6 rows, because subtle bowing can be missed with neighbor-to-neighbor looks.
What’s the best way to correct a block that’s high without creating a surrounding “ring” problem?
Lift the block fully using two pry bars and remove sand from beneath it, then reset and recheck. Avoid hammering down a high block, that forces sand sideways and can push up adjacent areas, creating a visible high ring at the joints.
How small is too small for edge cuts, and when should I change my layout?
Pieces smaller than about one third of a full block can be unstable, especially near edges. If your first pass results in many tiny slivers, adjust your starting position or shift the layout before you cut, so edge blocks are reasonable size and joints look consistent.
Do I compact the surface before jointing sand, or after?
Compact the entire patio after setting and leveling the blocks, then recheck level and slope. Only after that should you sweep jointing sand or polymeric sand into the joints, compact to seat it, and then sweep again to fill voids.
How long should I wait before foot traffic, and does it differ for polymeric sand?
Plan to wait at least a day before heavy foot traffic. If you used polymeric sand, wait longer because it requires the correct drying and activation period. A good rule is to wait until the surface is stable and the polymeric sand has fully activated according to the product instructions before allowing traffic.
What causes a patio to creep outward over time even if the blocks were level at installation?
Most often it is missing or delayed edge restraints. Without restraints, outer blocks can slowly spread outward under repeated loading and seasonal movement, which breaks both the slope and the joint pattern. Install edge restraints before or immediately after final compaction, and spike them into the compacted base at the manufacturer’s spacing.
How do I know if my polymeric sand joints are filled correctly?
After the final sweep-compaction-sweep sequence, the joints should be filled close to the top, about within 1/8 inch of the block surface. For polymeric sand, make sure the patio and joints are completely dry before activation and then follow the specified wetting step, otherwise binding may be incomplete and joints can wash out.