Spread a 1 to 1½ inch layer of sharp concrete sand (ASTM C33 grade) over your compacted base, set two parallel guide rails or screed pipes at the correct height, then drag a straight 2x4 across them to pull the sand flat. If you want the surface to stay truly level, focus on how to level a patio base by setting the correct compacted base height and thickness before you screed. That's the core of it. The details around that process are what separate a patio that stays flat for years from one that rocks, sinks, or throws water back toward your house within a season.
How to Level Sand for Patio Blocks Step by Step

Clara Farrell
21 Jun 2026
What you're actually leveling (and why it matters)
When people talk about leveling sand for patio blocks, they're talking about a specific layer in the build-up: the bedding sand. If you want a step-by-step walkthrough of the process, see our guide on how to level patio blocks leveling sand. A standard patio stack looks like this from bottom to top: compacted subgrade (your native soil), a [compacted crushed stone base, then a bedding sand layer](https://www. bobvila.
com/articles/how-to-build-a-paver-patio/), then the patio blocks, then jointing sand swept into the gaps. The bedding sand is not the structural layer. The compacted base does the structural work. The bedding sand is purely a leveling medium that you screed flat so your blocks sit at a consistent, uniform height.
That distinction matters because a lot of first-timers treat the sand like it's the foundation. It isn't. If your base isn't solid, no amount of careful sand leveling will save you from rocking blocks later.
The bedding sand also needs to stay loose and uncompacted until the blocks go down, because the blocks themselves bed into it slightly when you compact them during installation. Think of it as a precise, controllable cushion rather than a second base layer.
Plan your levels and drainage before you touch any sand
This is the step that most DIYers skip or rush, and it's the one that causes the most problems. If you want the big-picture sequence behind this process, see our guide on how to lay a level patio for the full step-by-step workflow. Before you spread a single grain of sand, you need to know exactly where the finished surface of your patio blocks needs to be, and you need that reference built into your string lines.
Setting your slope for drainage
Your patio must slope away from your house or any structure. The standard target is 1/8 inch of fall per foot of patio length, which works out to roughly 1% slope. You can go up to 1/4 inch per foot (about 2%) on a longer run or if your soil drains poorly, but stay in that range. Less than 1/8 inch per foot and water will pool. More than 1/4 inch per foot and the patio starts to feel noticeably tilted when you're standing on it. For a 10-foot-deep patio, that means your far edge should sit between 1¼ inches and 2½ inches lower than the edge closest to the house.
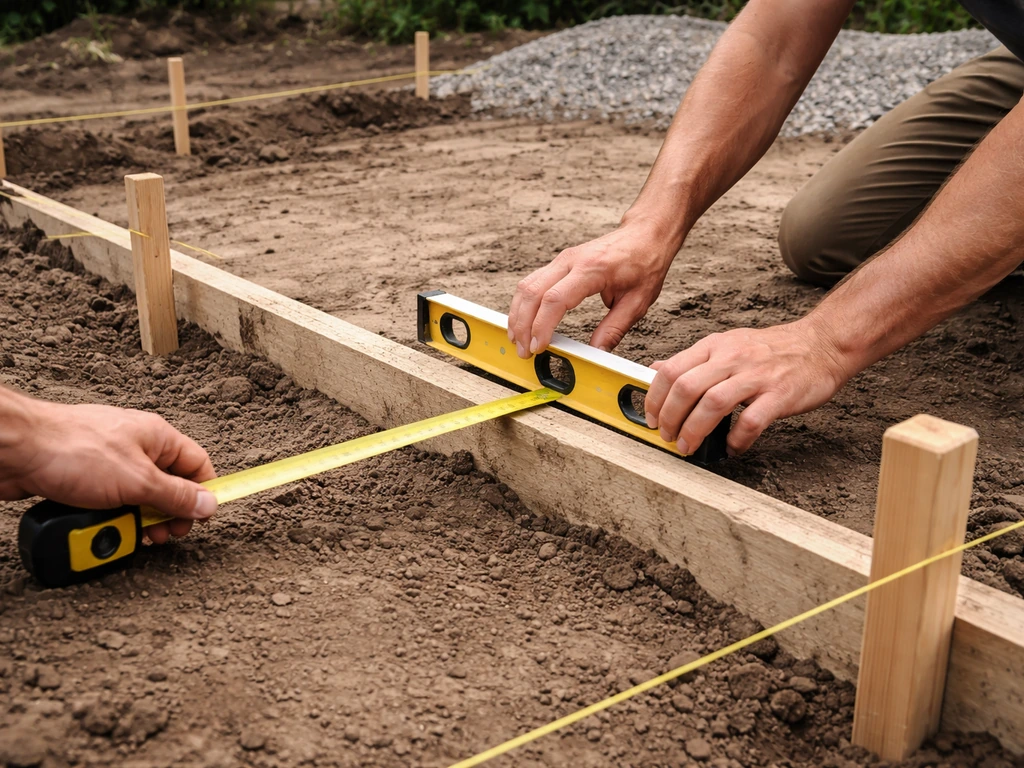
Setting up string lines at the right height
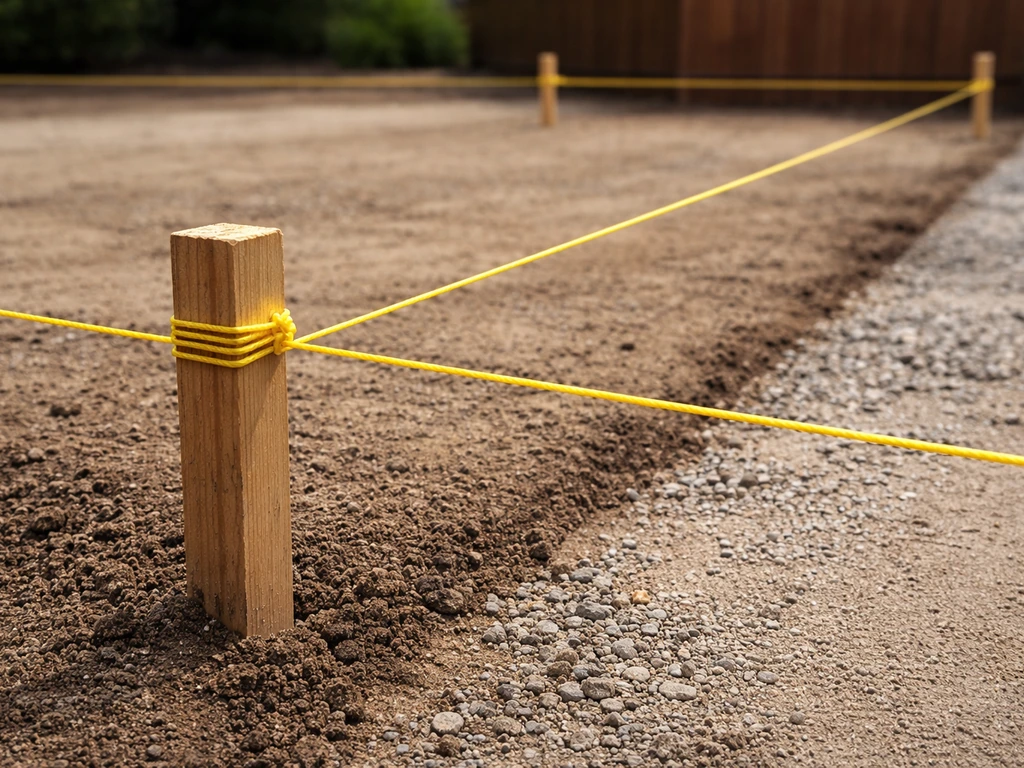
Knock in batterboards or stakes at each corner of your patio area and run string lines tightly between them. The string lines represent your finished patio surface height. To get there, you need to account for your block thickness working downward. If your blocks are 2¼ inches thick and your bedding sand will be 1 inch deep, your compacted base surface needs to sit 3¼ inches below your string line. Measure this carefully at multiple points across the area before you move on. A builder's level or a line level clipped to the string will help you set the slope accurately. Spend time here. Getting this right means every subsequent step goes smoothly.
Prep the base and pick the right sand
Base compaction is non-negotiable
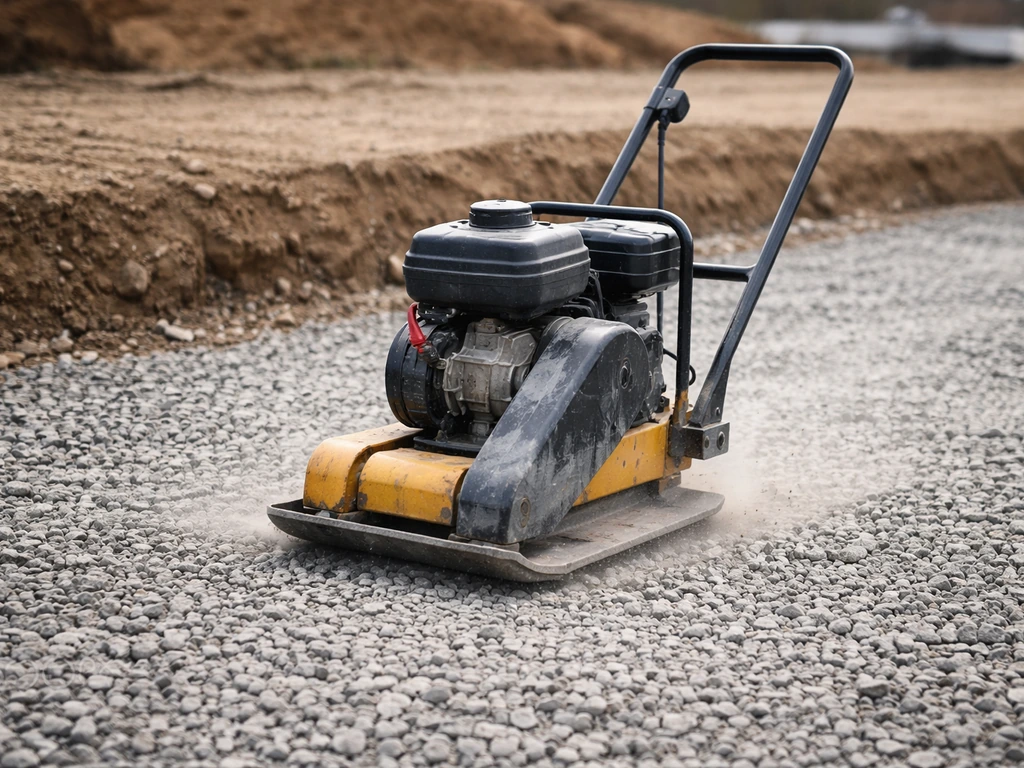
Your crushed stone base needs to be fully compacted before sand goes anywhere near it. A vibratory plate compactor only penetrates a few inches of material per pass, so if you've laid more than 4 inches of base aggregate, you should have compacted it in lifts, not all at once. For typical residential work, run 4 to 6 passes over each lift. If you can push a screwdriver into the base easily by hand, it's not compacted enough.
Fix it now, because soft spots under the bedding sand are exactly what causes blocks to sink and rock later. If you want the ground itself to stay level, focus on preparing the base and setting the correct slope before you start spreading bedding sand how to level ground for a patio.
Choosing the right bedding sand
Use sharp, angular concrete sand that meets ASTM C33 (or CSA A23. 1 if you're in Canada). This is sometimes sold as coarse sand, concrete sand, or paver bedding sand at landscaping suppliers. Do not use stone dust, mason's sand, play sand, or waste screenings.
Stone dust in particular is a common mistake because it looks fine and packs down nicely, but that's exactly the problem. Getting the soil base right before you add bedding sand is key to a patio that stays level over time. It compacts too readily, doesn't allow lateral drainage, and can cause pavers to heave.
ASTM C33 concrete sand has the right particle size and angularity to stay compressible enough for the blocks to seat into it while still staying uniform when screeded.
Spread the sand and set up your screed rails

Now you're ready to work. Dump your sand onto the compacted base and rake it out roughly to slightly more than your target depth. Your target finished depth after screeding is between 1 inch and 1½ inches. Most sources land at 1 inch as the sweet spot, and I'd agree. Go thicker and you introduce more material that can shift and settle under the blocks over time.
How to set up screed rails
Screed rails (also called guide rails or screed pipes) are the key to getting a consistent depth. Use two lengths of metal electrical conduit or steel pipe, typically 3/4 inch or 1 inch diameter. Lay them parallel across the compacted base, spaced so that your screed board bridges both of them without sagging in the middle. For most DIYers, 4 to 6 feet apart works well.
Set each rail at the exact height your finished sand surface needs to be, using your string lines as the reference. Pack a little sand under each rail to set the height, check it with your level, and adjust as needed. Once both rails are set and confirmed level (at your planned slope), you're ready to screed.
If your patio is wider than your screed board can comfortably span (say, wider than 8 to 10 feet), work in sections. Paragon Supply’s DIY patio/path screeding guide also recommends working in manageable sections when the patio width exceeds what a screed board can span comfortably working in sections when the patio is wider than your screed board can comfortably span. Screed one lane, remove the rails, fill the rail channels carefully with sand and pat them flat, then move on to the next section. Never walk on screeded sand you plan to lay blocks on. That means work backward, screeding away from the house and laying blocks as you go so you don't need to step on finished sand.
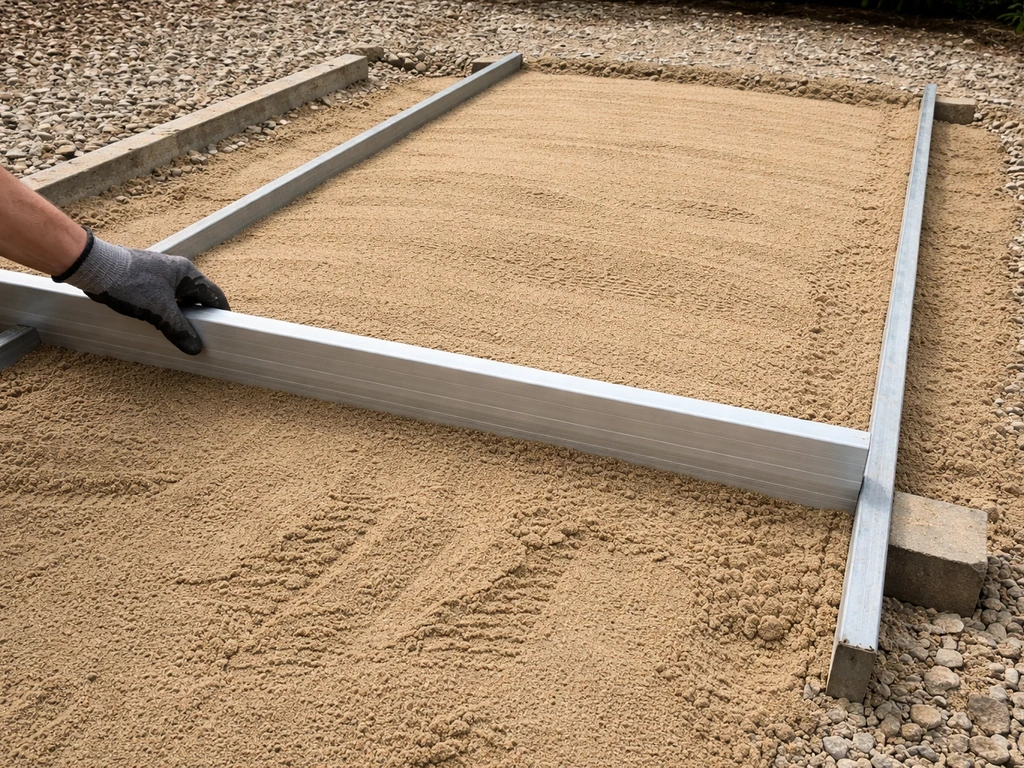
Screed the sand and check for flatness
Place a straight, rigid 2x4 or a purpose-made aluminum screed board across both rails. Pull it toward you in a slow, steady sawing motion, keeping both ends in firm contact with the rails. The board skims off excess sand and fills in low spots as it goes. One or two passes usually does it. Go back and lightly re-pass any area that pulled rough or left drag marks.
Checking and fixing high spots and low spots

After screeding, lay a long straightedge (a 6-foot or 10-foot level works well) across the sand in multiple directions. The industry tolerance for surface flatness is no more than 1/4 inch variation under a 10-foot straightedge. In practice, aim tighter than that if you can. High spots are easy: scrape them down carefully with a hand float or the edge of a trowel. Low spots need a little sand added by hand, then smoothed with the float. Work gently so you don't create new irregularities. Do not walk across the screeded sand to check it. Use your straightedge from the edges or lean across from an area that hasn't been screeded yet.
Slightly damp sand screeds cleaner and holds its shape better than bone-dry sand. If your sand is very dry and keeps crumbling into footprints or the screed board is pulling it unevenly, mist it lightly with a garden hose before screeding. Don't soak it. Just take the dust off the surface and let it sit for a few minutes.
Common leveling mistakes and how to avoid them
Most problems with patio block leveling come down to a handful of recurring errors. Here's what to watch for:
- Walking on screeded sand before laying blocks: this creates ruts and depressions that show up as rocking blocks after installation. Always work backward and lay blocks immediately behind your screeded section.
- Sand too thick: bedding sand thicker than 1½ inches compresses and shifts more easily under load, leading to blocks that sink unevenly over time. Stick to 1 to 1½ inches.
- Uneven screed rail height: if one rail is even slightly higher or lower than the other, your entire screeded surface will have a consistent tilt or crown. Check each rail with a level before screeding, not just by eye.
- Soft spots in the base: if the base wasn't compacted uniformly, some areas will give slightly under pressure, creating low spots after blocks are placed. Address these in the base, not by adding extra sand.
- Edge sinking: the edges of a patio are vulnerable to movement because the blocks there have less lateral support. Install edging restraints (plastic or aluminum paver edging spiked into the base) before you lay blocks, not after.
- Skipping the drainage slope: a perfectly flat surface feels like a win until it rains. Build your slope into the string lines from the start, not as an afterthought.
- Using the wrong sand: fine or dusty sands compact under the screed board and can actually hold the screed above the rail, giving you a false read on your thickness. Always use coarse ASTM C33 concrete sand.
Fixing problems after blocks are down
If blocks are rocking or sunken after installation, adding sand on top won't fix it permanently. You need to pull up the affected blocks, assess what's underneath, correct the base or bedding layer, and reset the blocks on fresh, screeded sand. Rocking blocks almost always mean the bedding sand has been displaced or the base underneath has softened, often from water sitting under the surface. If you find the base is wet and soft, improving drainage around the perimeter of the patio is part of the fix, not just resetting the blocks.
Bedding sand vs jointing sand: different materials, different jobs
Once your blocks are laid, you'll fill the joints between them with a separate material called jointing sand. Bedding sand and jointing sand are not interchangeable, and using the wrong one for either job causes problems.
| Property | Bedding Sand | Jointing Sand (Regular) | Polymeric Jointing Sand |
|---|---|---|---|
| Purpose | Levels and supports blocks from below | Fills gaps between blocks | Fills gaps and locks blocks together |
| Material type | Coarse, sharp ASTM C33 concrete sand | Fine sand, sometimes called torpedo or joint sand | Fine sand with polymer binders |
| When it goes in | Before blocks are laid | After blocks are fully laid | After blocks are fully laid |
| Compaction needed? | No (stays loose for block bedding) | Yes (plate compactor vibrates it in) | Yes (plate compactor, then water activation) |
| Best for | All sand-set paver patios | Budget installs, easy to re-sweep | Long-term weed suppression, ant resistance |
| Key caution | Never use stone dust or fine sand | Can wash out over time | Needs draining base; avoid damp conditions at install |
Polymeric jointing sand is a great upgrade for most DIYers because it hardens slightly when wet, resisting weed growth and washout better than plain jointing sand. To install it correctly, sweep it into the joints with a push broom, run a plate compactor across the patio (with a rubber mat or pad under the plate to protect the blocks), then mist the surface with water to activate the polymers.
Follow the manufacturer's instructions carefully here because getting the moisture amount wrong is the most common reason polymeric sand fails or stains. One important thing: your bedding layer and base must drain properly for polymeric sand to set and cure as designed. If water pools under your patio, polymeric sand won't perform as advertised.
Your next steps: a quick pre-pour checklist
Before you open your first bag of sand, run through this list to make sure you're set up for success:
- String lines are up and set to the correct finished height, with your drainage slope built in (1/8 to 1/4 inch per foot, sloping away from the house).
- Base is fully compacted crushed stone, with no soft spots you can poke a screwdriver into. If soft spots exist, fix the base now.
- You have ASTM C33 coarse concrete sand on site, not stone dust, play sand, or mason's sand.
- Screed rails or pipes are set to your target sand depth (1 to 1½ inches), confirmed with a level.
- Your screed board is straight, long enough to span both rails, and rigid enough not to sag in the middle.
- Paver edging restraints are ready to install before block laying begins.
- You have a plan to work backward across the patio so you never step on screeded sand.
- Jointing sand (either regular or polymeric) is chosen and on site, kept separate from bedding sand.
Getting the sand level right is genuinely the most satisfying part of a patio build because it's the moment the project starts to look real. Take your time with the string lines and the screed rails, use the right sand, and work in sections. If you've done the base preparation correctly, everything from here is achievable for any first-time DIYer.
FAQ
How much bedding sand should I target for patio blocks, and what’s too thick?
Aim for a finished bedding sand depth of about 1 inch, with a practical range of 1 to 1½ inches after screeding. Going thicker than that can allow extra material to shift or settle under block edges, which shows up later as uneven joints and small rocking when you stand near the seams.
Can I compact or tamp the bedding sand before laying the pavers?
No, the bedding sand should stay loose and uncompacted while you screed it. When you set the blocks, they naturally seat into it during installation. If you tamp the bedding sand first, you reduce its ability to accommodate small block height differences and you can lock in humps or dips.
What should I use to set the screed rail height, my string line or a level on the ground?
Use the string lines as your reference for the finished patio surface height, then subtract the block thickness plus the bedding sand depth to set the compacted base height. A laser or line level helps confirm accuracy, but the string line is what keeps the slope consistent across the entire run.
How do I handle a wide patio that my screed board cannot cover in one pass?
Work in sections. Screed one lane, remove the rails, carefully fill the rail channels, and smooth them before you move to the next lane. Also plan your work so you lay blocks as you go, so you are never walking on sand you already screeded.
Should I mist the sand lightly or add water to make it easier to screed?
Mist it lightly if it is very dry, just enough to control dust and reduce crumbling. Avoid soaking, because saturated bedding sand can hold shape poorly and may encourage movement under the blocks, especially if drainage is not adequate under the patio.
How precise does the sand surface need to be before I lay the blocks?
Use a long straightedge and check flatness in multiple directions. The common tolerance guideline is no more than about 1/4 inch variation over a 10-foot length. If you find high spots, scrape them down and recheck, and if you find low spots, add sand by hand and smooth without disturbing nearby areas.
What’s the quickest way to confirm my slope is correct before screeding?
Measure drop from your house-side reference at multiple points, then verify with a long level or builder’s level across the string. For example, for a 10-foot run, your far edge typically ends up about 1¼ to 2½ inches lower depending on whether you choose about 1/8 inch per foot or closer to 1/4 inch per foot.
Why do pavers sometimes rock even if the bedding sand was leveled?
Rocking usually points to an issue under the bedding sand, most often a soft or wet spot in the compacted base. If blocks rock after installation, you often need to lift them and fix drainage or recompact the base, then reset the blocks on fresh, properly screeded bedding sand.
Is jointing sand the same as bedding sand?
No. Bedding sand is for leveling and seating under the blocks, while jointing sand is for filling gaps after installation. Using jointing sand as the bedding layer, or bedding sand as joint fill, can lead to poor locking, washout, or inconsistent joint performance.
Can I use polymeric jointing sand if my patio doesn’t drain well?
Polymeric jointing sand depends on moisture cycling to activate and cure as designed, so a patio that traps water under or around the blocks will reduce performance. If you expect pooling, fix the base and drainage path first, then use polymeric sand so it can actually set and resist washout and weeds.
What’s the common mistake with sand selection for leveling patio blocks?
Avoid stone dust, mason’s sand, play sand, and waste screenings. They can pack too tightly, lose the right compressibility, and limit lateral drainage, which contributes to heaving or paver movement. Stick to a concrete/paver bedding sand type that matches the intended particle size and angularity (ASTM C33 or equivalent).
Do I need to remove screed rails after screeding, or can I leave them in place?
Typically, you remove them and fill the channels with sand, then smooth that area so the surface stays continuous. Leaving rails in place can create height ridges and creates extra control points where thickness can vary from lane to lane.