Tiling a patio is absolutely a DIY project you can handle, but it lives or dies on preparation. Get the base right, slope it correctly, use the right mortar and tile for outdoor conditions, and your patio will look great for decades. Skip those steps and you'll be pulling up cracked, tented tiles within a couple of winters. This guide walks you through the whole process from choosing materials to final seal, with the honest details that actually matter. Once you have the tiles set, you can extend the same outdoor tiling approach to a patio table how to tile patio table.
How to Tile a Patio Floor Step by Step DIY Guide

Clara Farrell
27 May 2026
Picking outdoor patio tile and compatible materials
Not every tile that looks nice in a showroom belongs outside. Outdoor tile needs to survive rain, UV exposure, foot traffic, and in most climates, repeated freeze/thaw cycles. Get the material choice wrong and no amount of good installation technique will save you.
Porcelain vs ceramic for outdoor use
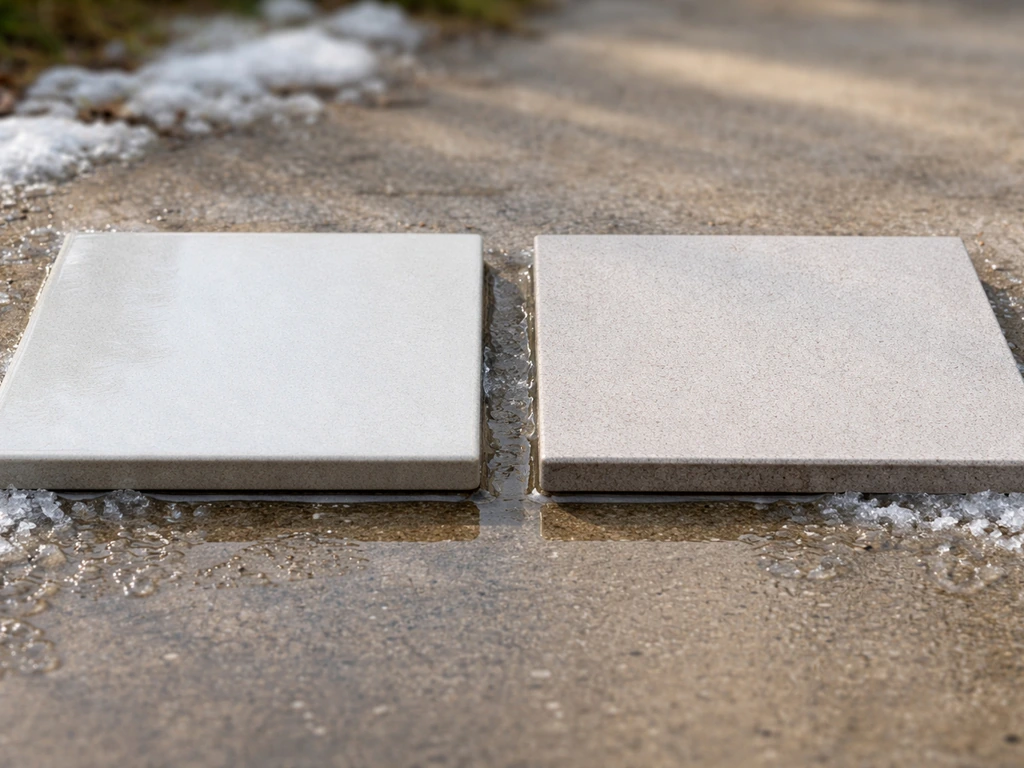
Porcelain is the clear winner for most outdoor patios. It has a water absorption rate below 0.5%, which means moisture can't work its way in and expand during freezing temperatures. Standard ceramic tile typically absorbs far more water and is genuinely risky in freeze/thaw climates. LATICRETE’s installation guidance notes that in cold climates and exterior pool settings, you can help eliminate freeze-thaw problems by following appropriate installation system approaches eliminating freeze-thaw problems with appropriate installation system approaches. If you're in a region that sees hard winters, use porcelain. Period. In mild, frost-free climates you have more flexibility, but even then, porcelain is more durable under heavy furniture and foot traffic.
Slip resistance: what COF actually means
For outdoor wet surfaces you want a tile with a static coefficient of friction (COF) of at least 0.60, which is the generally accepted minimum for wet areas. This is measured by the ASTM C1028 test method. When you're shopping, look for tiles labeled as rated for exterior or wet applications, and avoid anything with a polished or high-gloss finish outdoors. Textured, matte, or slightly rough finishes grip wet feet much better. Tiles with a defined surface texture or raised pattern are ideal for patios where water sits after rain.
Thickness and size considerations
For a ground-level patio, aim for at least 3/8 inch (10 mm) thick tile, with 1/2 inch (12 mm) or thicker being even better for durability. Large-format tiles (24x24 inches and up) look stunning but demand a flatter substrate and a bit more skill to set without lippage. If this is your first tiling project, 12x12 or 16x16 inch tiles are much more forgiving to work with. Larger tiles also require larger trowels and more mortar, which affects your material budget.
Mortar, grout, and sealer choices
For outdoor porcelain, you need a polymer-fortified exterior-grade thinset mortar. Products like LATICRETE 254 Platinum and MAPEI Ultraflex 1 are specifically formulated for exterior applications and meet or exceed ANSI A118.4/A118.11 standards, with freeze/thaw performance included. These aren't just marketing claims: the polymer content gives the mortar flexibility to move slightly with temperature changes without cracking the bond. Do not use basic or economy thinsets for outdoor work.
For grout, use a sanded exterior-rated grout for joints wider than 1/8 inch. Many outdoor installers now prefer epoxy grout for its stain resistance and durability, though it's trickier to work with. For movement joints (more on those later), you'll fill them with a flexible ASTM C920-compliant sealant, not grout. For sealing the finished surface, most porcelain tiles are dense enough that they don't need sealing. Natural stone and some textured tiles do. Check with your tile supplier, and only use sealers rated for exterior use.
Site assessment and planning the patio floor layout
Before you order a single tile, spend time understanding your site. Walk the area after heavy rain and watch where water goes. Note any low spots where it puddles. Check what's underneath: is this bare ground, existing concrete, or something else? All of these factors change your approach.
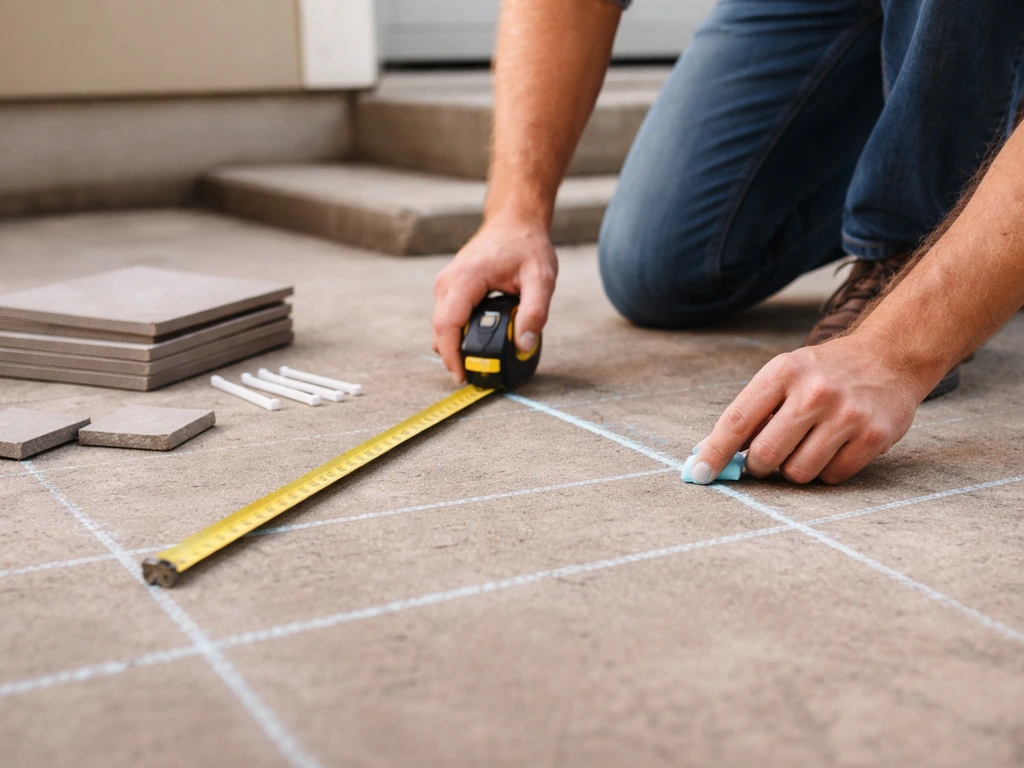
Measuring and ordering tile
Measure the length and width of your patio, multiply for square footage, and add 10% for cuts and waste (15% for diagonal layouts). Order everything from the same batch/dye lot to avoid color variation. Tile is much cheaper to order all at once than to try to match it later.
Planning your layout before you set anything
The best starting point for most rectangular patios is to find the center of the space and work outward, so you end up with balanced cuts on opposite sides rather than one full tile on one edge and a sliver on the other. Snap chalk lines through the center in both directions to create your grid. Then do a dry layout: lay tiles out without mortar all the way to the edges to see exactly where your cuts will fall. Adjust your starting point a few inches if it means avoiding awkward slivers at visible edges. This dry layout step is not optional if you want professional-looking results.
Deciding on joint width
Outdoors, wider grout joints handle slight movement better than super-tight joints. A minimum of 1/8 inch is typical, with 3/16 to 1/4 inch being common and more forgiving. Larger tiles can go a bit wider. Use plastic tile spacers to keep joints consistent as you work.
Prep work: base/substrate, slope, and leveling
This is the section most DIYers want to skip to get to the fun part. If you are wondering how to tile outside patio areas, this section is where your success starts with the base and drainage. Don't. At least 80% of failed outdoor tile jobs trace back to inadequate base preparation. I've seen beautiful tile work collapse after one winter because someone laid it over poorly compacted soil or skipped the drainage slope.
Getting the slope right
Your patio must slope away from the house at a minimum of 1/8 inch per foot, with 1/4 inch per foot being the ideal target. On a 12-foot-deep patio, that means 1.5 to 3 inches of drop from house to outer edge. This slope needs to be built into your base, not compensated for with uneven mortar later. Use a long level and tape measure, or better yet, rent a laser level, to confirm slope at multiple points across the width.
Tiling over bare ground (new build)
Tile cannot be set directly on soil or compacted gravel. You need a rigid, stable base. The standard approach for new builds is: excavate 8 to 12 inches, lay 4 to 6 inches of compacted crushed gravel (compacted in 2-3 inch lifts, not all at once), then pour a concrete slab at minimum 3.5 inches thick. In clay soil, you may need deeper excavation because clay holds water, expands, and moves. Some installers add a layer of sand or a decoupling membrane on top of the slab before tiling to buffer movement. Once the concrete has fully cured (at least 28 days for new pours), you're ready to tile.
Tiling over existing concrete
Existing concrete is a great substrate if it's in good shape. Check for: cracks wider than a hairline (they'll telegraph through to tile), surface that's soft or crumbling, patches that flex or sound hollow, and any existing slope problems. Small cracks can be filled with a flexible crack-isolation membrane or patching compound. Major structural cracks mean the slab needs repair first. Sweep, degrease, and roughen very smooth surfaces with a diamond grinder or acid etch so the mortar bonds properly. If the existing slab doesn't have enough slope, you can use a self-leveling underlayment with a slight grade built in, or use varying mortar depth carefully (within limits).
Removing old tile or surfaces
If there's existing tile, pavers, or other material, removal is almost always the better path. Tiling over tile adds height, risks hidden problems, and can violate manufacturer warranty terms for your mortar. Rent an electric demolition hammer with a chisel bit to break up old tile efficiently. Scrape the substrate clean and repair any damage before starting fresh.
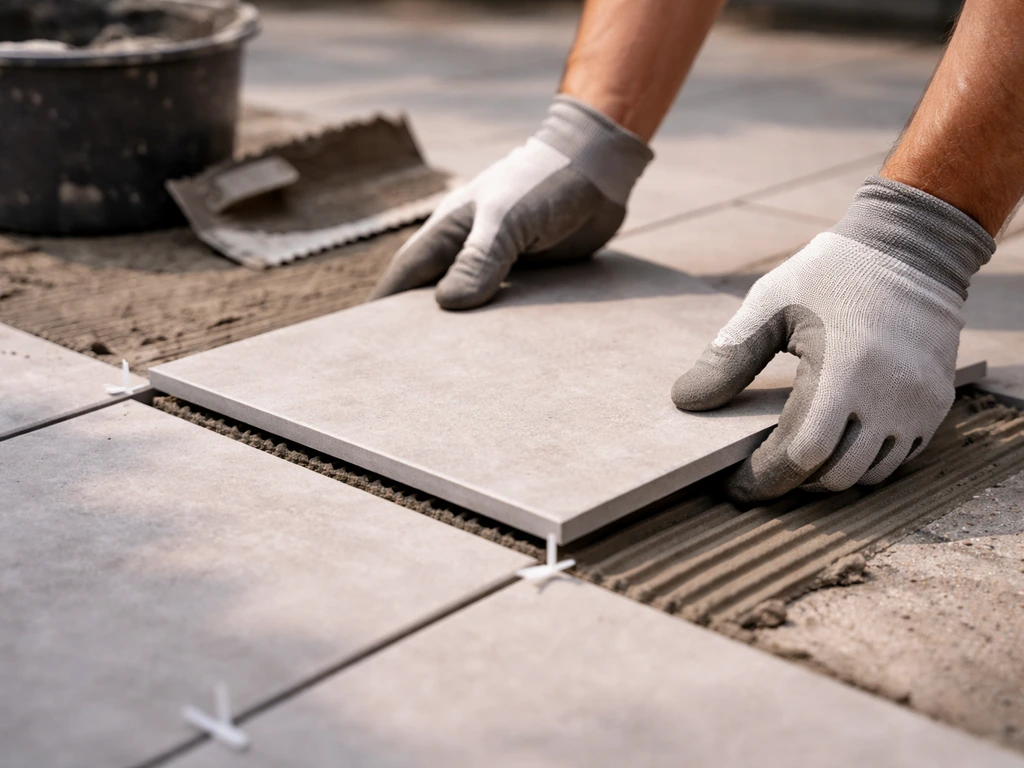
Setting tile: mortar selection, trowel technique, and layout
Once your base is solid, sloped, and clean, it's time to actually set tile. Once you’ve chosen your tile, the next step is learning the exact installation steps for patio tiles, from setting and grouting to sealing how to install patio tiles. The biggest mistake at this stage is poor mortar coverage. Outdoor tiles need full, solid contact with the substrate, and achieving that requires the right trowel and the right technique.
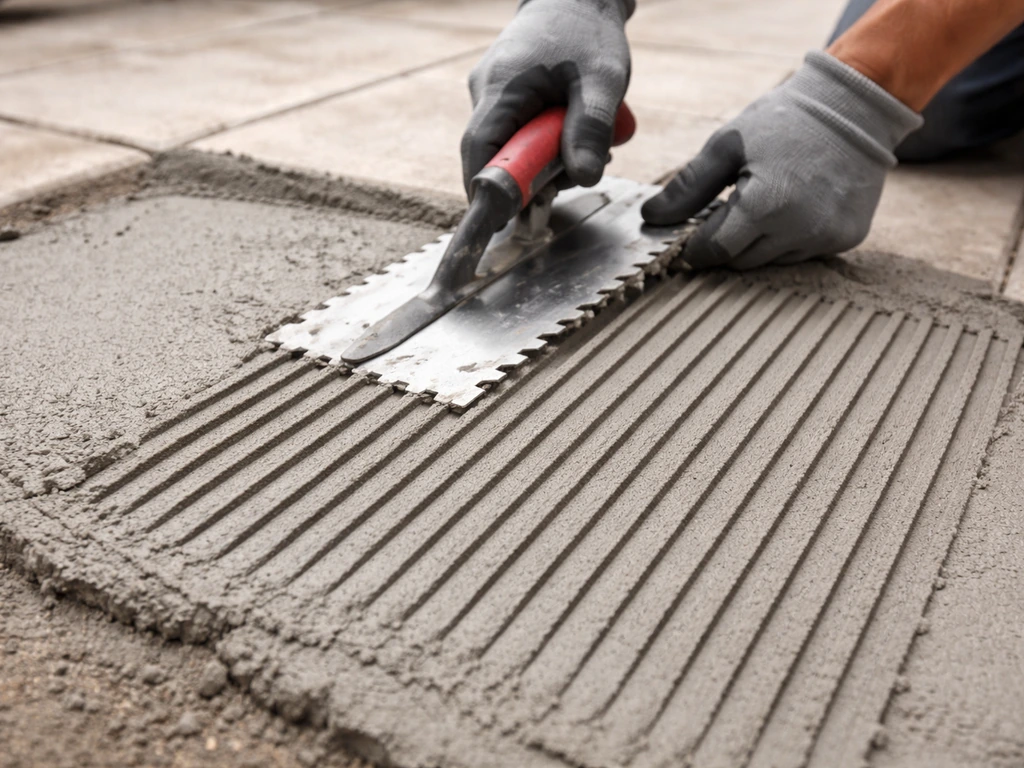
Choosing the right trowel size
Trowel notch size is matched to tile size. Larger tiles need larger notches to deposit enough mortar. A 1/4 x 1/4 inch square-notch trowel covers roughly 80 to 100 square feet per bag of mortar and works for tiles up to about 12x12 inches. For larger format tiles (16x16 and up), move to a 1/2 x 1/2 inch or 3/8 x 3/8 inch notch trowel to get adequate coverage. Check the mortar manufacturer's recommendations for your specific tile size, as MAPEI and LATICRETE both provide trowel size guidance in their data sheets.
Back-buttering and mortar coverage
For outdoor porcelain tile, you should back-butter the tile in addition to troweling the substrate. Apply a thin skim coat of mortar to the back of the tile with a flat trowel, then press it into the notched mortar bed. This fills any voids in the tile back and dramatically improves bond coverage. The target for exterior applications is 95% mortar contact on the back of the tile (TCNA standards for exterior installations). To check: set a few tiles, then lift one and look at the back. If you see large areas without mortar transfer, your technique or trowel size needs adjustment before you go further.
Setting tiles in sequence
- Snap your layout lines on the substrate and confirm they're square using the 3-4-5 triangle method.
- Mix mortar to a peanut butter consistency: firm enough to hold ridges from the notched trowel.
- Spread mortar over a small working area (about 3 to 4 square feet at a time) using the notched trowel at a consistent angle.
- Back-butter each tile with a thin skim coat of mortar before setting.
- Press the tile into the mortar bed with a slight twisting motion and firm pressure. Use a rubber mallet and a beating block (a piece of flat wood or foam) to tap tiles down to level.
- Insert spacers at each corner to maintain consistent joint width.
- Check level frequently across multiple tiles using a long straightedge or tile level. Catch any lippage early.
- Work from your center lines outward toward the edges, keeping your reference lines visible.
- Clean excess mortar from joints with a stick or small tool before it sets.
Don't spread more mortar than you can tile over in about 15 to 20 minutes. Once mortar starts to skin over on top, it loses its bonding ability. In hot or windy conditions, that window shrinks fast.
Cutting, edges, and joints (including drainage and expansion)
Cutting tile cleanly
A wet saw (diamond blade tile saw) is the right tool for cutting patio tile. Manual snap cutters work for straight cuts on thinner ceramic but struggle with thick porcelain. Rent a wet saw if you don't own one. Measure each cut individually rather than assuming all cuts in a row are the same width. Mark the tile with a pencil or felt-tip marker, cut just outside your line, then sneak up to it. For L-shaped cuts around obstacles, use a combination of two saw cuts or a diamond hole saw for internal curves.
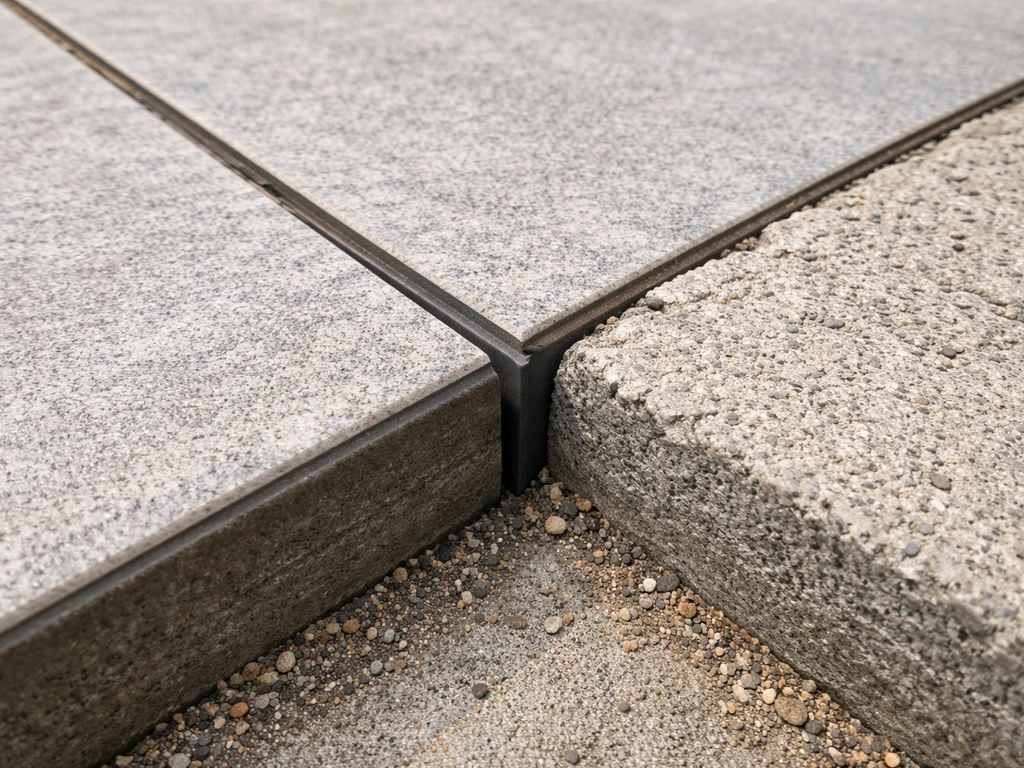
Edge details
The perimeter edge of your patio needs a finished look and a water management plan. Options include: bull-nose tiles (tiles with one finished rounded edge), metal edge trim profiles set in mortar, or a soldier course of tile laid on edge. Whatever you use, the outer edge should be slightly lower than the tile field to encourage water to drain off rather than sit. If your patio meets a wall or the house, that transition point is particularly important: water must not be allowed to pool or wick back toward the foundation.
Expansion and movement joints: non-negotiable outdoors
This is the step many DIYers skip, and it's one of the most common causes of tile failure outdoors. Tile and concrete expand and contract with temperature changes. Without a place to move, tiles tent (bow up) and crack. Per TCNA guidelines (EJ171), exterior tile installations need movement joints every 8 to 12 feet in all directions. At minimum, you need a movement joint at every 8 to 12 foot interval across the field and a perimeter movement joint wherever tile meets a wall, curb, column, or any fixed vertical surface.
blank" rel="noopener noreferrer">Movement joints are not grout. They must be filled with a flexible, ASTM C920-compliant elastomeric sealant, installed over a foam backer rod. The minimum joint width for joints spaced 8 feet on center is 3/8 inch. For perimeter joints, use a flexible profile system like MAPEI's Projoint Perimeter Profile (available in 3/8 inch and 1/2 inch versions to match tile thickness) or simply leave the joint open during installation and fill it with sealant after grouting. The sealant should match your grout color as closely as possible.
Managing drainage at edges
At the low end of your patio, water needs somewhere to go. Don't let tile abut a solid curb or step riser without a drain channel or a gap. Consider a small linear drain at the outer edge, or ensure the tile overhangs slightly over a gravel drainage border. The key principle: water should never be allowed to collect under or behind your tile installation.
Grouting, sealing, and final cleanup
When to grout
Wait at least 24 hours after setting tile before grouting, and longer if conditions are cool, damp, or you used a modified mortar that specifies an extended cure time. The tile should not move at all when you press on it. If any tiles rock or feel loose, fix them now before grouting locks in the problem.
Applying grout
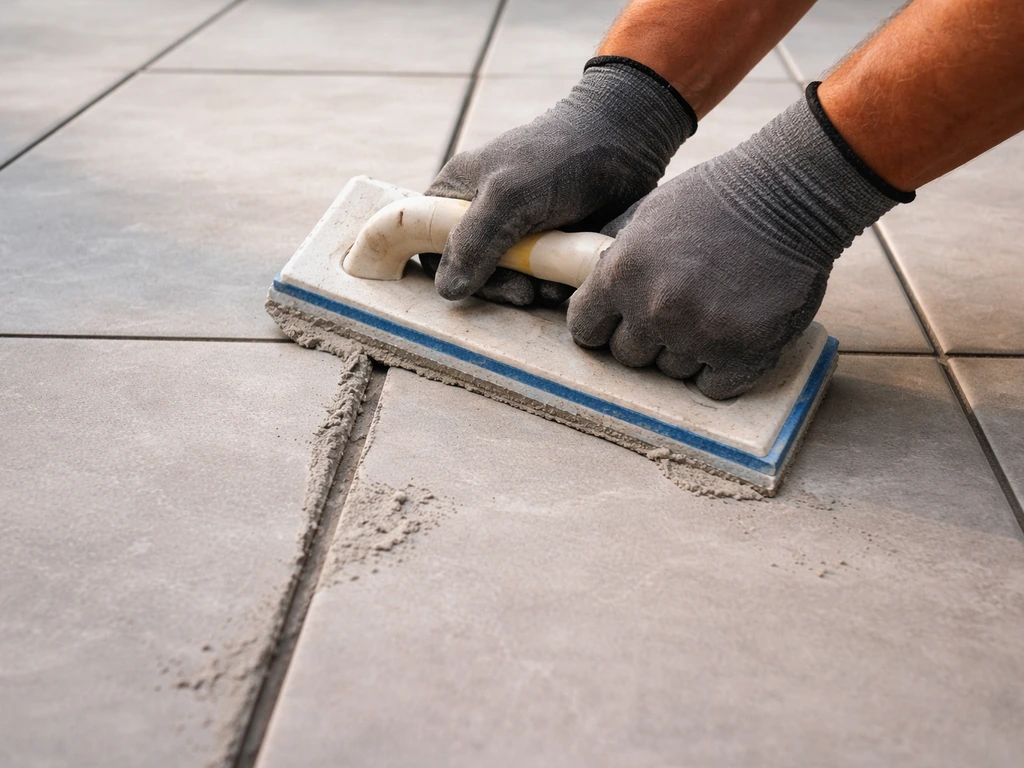
Remove all tile spacers before you start. Mix sanded grout to the consistency of thick peanut butter. Work it into joints using a rubber grout float held at about a 45-degree angle, pressing firmly to pack joints fully. Work diagonally across the tiles to avoid dragging grout out of joints. Once you've covered a manageable section (about 20 to 30 square feet), start cleaning: use a damp (not wet) sponge in circular motions to remove surface grout, rinsing the sponge frequently. Light grout haze will remain; buff it off with a dry cloth once the grout has firmed up. Do not grout movement joints, ever.
Sealing
Dense, glazed porcelain tiles typically don't need sealing. Unglazed porcelain, natural stone (travertine, slate, limestone), and textured tiles do need a penetrating sealer to prevent staining and moisture absorption. Apply sealer per manufacturer directions, typically after grout has cured for 72 hours or longer. Use a sealer rated for exterior use. Avoid film-forming sealers on outdoor tile as they can peel and trap moisture. Most grout manufacturers also recommend sealing the grout lines themselves, which helps with outdoor staining. Reapply every 1 to 3 years depending on traffic and conditions.
Protecting the patio during cure
Keep foot traffic off the tile for at least 24 hours after setting, and preferably 48 to 72 hours. Protect the surface from rain for the first 24 hours (a tarp works fine). In hot, sunny conditions, mist the tile lightly to slow curing and reduce the risk of the mortar drying too fast. Don't place furniture on the patio for at least a week. The mortar continues to gain strength over 28 days, even if it feels hard sooner.
Common failures and how to prevent them
These are the mistakes I see most often in DIY patio tile jobs. All of them are avoidable with a bit of planning.
| Problem | Why It Happens | How to Prevent It |
|---|---|---|
| Tiles crack after first winter | Ceramic tile or non-freeze/thaw-rated tile used in cold climates | Use porcelain tile with water absorption below 0.5% and a freeze/thaw-rated mortar |
| Tiles pop up or tent | No movement joints; thermal expansion has nowhere to go | Install TCNA EJ171-compliant movement joints every 8 to 12 feet and at all perimeters |
| Tiles come loose over time | Poor mortar coverage; less than full contact on tile backs | Back-butter every tile; check coverage by lifting a tile early in the job |
| Water pools on patio | Insufficient slope built into the base | Achieve 1/4 inch per foot slope away from the house before any tile is set |
| Grout cracks repeatedly | Movement joints filled with grout instead of flexible sealant | Fill all movement joints with ASTM C920-compliant sealant over backer rod |
| Tiles over concrete fail at edges | Water infiltrates under tile at perimeter; no proper edge drainage detail | Install perimeter movement joints and ensure outer edge drains freely |
| Uneven tile surface (lippage) | Inconsistent mortar bed; large format tiles on imperfect substrate | Check and correct flatness of substrate to within 1/8 inch over 10 feet before setting |
| Mortar dries before tiles are set | Spreading too large an area at once, especially in heat or sun | Work in small sections; mist substrate in very hot or windy conditions |
The clay soil problem
Clay soil is particularly problematic under patios because it swells when wet and shrinks when dry, causing constant movement in your base. If you have clay soil, excavate deeper than you think you need to (10 to 12 inches minimum), install a robust gravel drainage layer, and seriously consider a decoupling membrane between your concrete slab and tile. A decoupling membrane won't make up for a bad slab, but it does allow minor movement in the substrate without cracking the tile above.
When to call a professional
If your site has significant drainage issues, a sloping yard that pools water near the house, or an existing concrete slab with major structural cracks, those are problems worth getting a professional assessment on before you invest in tile. The tile installation itself is very achievable for a capable DIYer, but base engineering for problem sites is where professional experience genuinely pays off. Similarly, if you're tiling a large raised deck or elevated surface, the structural and waterproofing requirements go well beyond a basic patio guide and warrant professional input.
If you're planning to tackle just the tile floor of a ground-level patio over a sound concrete slab, you're well within DIY territory. Take your time on the prep, use the right materials, don't skip the expansion joints, and you'll end up with a patio that looks professional and lasts for many years. If you follow these steps for a porcelain patio, you will learn how to lay a porcelain tile patio without common failure points.
FAQ
Can I use ceramic tile instead of porcelain for an outdoor patio?
Use a porcelain that is specifically rated for exterior use and verify its freeze-thaw and water-absorption ratings (the lower the absorption, the safer in cold climates). If you are not sure your tile is rated for outdoor wet areas, assume it is not, and switch now rather than relying on “good grout” to compensate.
How do I keep outdoor patio tile from getting slippery when it rains?
Yes, but you must treat it as a wet-area slip risk. Avoid polished, highly glossy tiles, and target a textured or matte surface with a COF of at least 0.60 for wet conditions. Also confirm the tile’s surface texture is not going to become slick when wet (some finishes that look grippy dry can get smooth when algae or fine dust collects).
What happens if I grout the movement joints instead of sealing them?
Don’t. Movement joints are designed to accommodate expansion and contraction, so they must be filled with an elastomeric sealant over foam backer rod, not grout. If you grout movement joints, you lose the “movement space” and the tile is more likely to tent and crack.
How should I finish the patio edges so water doesn’t pool near the house?
Plan the layout so tile stays slightly above the drainage path, then keep the perimeter transition detailed so water cannot pool behind the edge. One practical approach is to maintain the slope and set the outer edge profile (bull-nose or metal trim) so the tile surface drains outward, not toward the house.
Do I need to adjust curing and waiting times if the weather is cold or damp?
If the patio surface is cold enough that mortar cures slowly, keep the patio protected from freezing and moisture for longer. Your “24 hours before grouting” and “48 to 72 hours before foot traffic” timelines can extend in cool, damp weather, and mortar that freezes before strength develops is a common reason tiles loosen.
What should I do if a few tiles feel hollow or rock when I press them?
Yes. Any loose tile found after the set needs to be corrected immediately before grouting, usually by lifting the tile, cleaning both surfaces, and re-setting with fresh mortar. Once grout is installed, you can trap a void under the tile and create repeating failures.
How can I tell if my mortar coverage and flatness are good enough before I keep going?
Use two checks. First, verify the substrate slope and flatness before tiling (laser or long level). Second, ensure full mortar coverage by back-buttering and lifting test tiles to confirm transfer. If you see poor transfer, adjust trowel size and technique before proceeding.
Can I tile directly over existing concrete, or should I remove it?
If the existing slab is sound, you can often tile directly, but you still need a clean, properly bonded surface. Roughen very smooth concrete (grinding or proper etching), remove dust, and check for structural cracks that are wider than hairline, crumbling areas, or areas that flex.
Do I have to seal outdoor porcelain tile and grout?
Seal only when the tile requires it. Dense glazed porcelain typically does not need sealing, while unglazed porcelain and many stones do. If you seal the wrong surface type, film-forming sealers can trap moisture, peel, and cause discoloration.
When should I apply sealer, and how soon after grouting?
Yes, but do it correctly. Follow the grout manufacturer’s cure time and then apply an exterior-rated sealer, usually after the grout has cured at least 72 hours. Also avoid film-forming products on outdoor tile, and if you are unsure whether a tile is glazed versus unglazed, check the product specs.
How do I handle layout when I end up with tiny sliver cuts near walls or obstacles?
If your patio has obstacles like posts or planters, avoid forcing perfect cuts that leave tiny slivers at visible edges. Instead, rotate or shift the starting point during the dry layout so the remaining gaps are on less visible sides and still meet a practical minimum tile cut width.
What if my patio area already pools water in certain spots?
If you’re installing over a slab that already has drainage issues or visible major cracking, prioritize solving the water problem first, sometimes with a professional-grade underlayment strategy or drainage correction. Adding tile over a moving or poorly sloped base is one of the fastest routes to tenting, cracking, and grout failure.