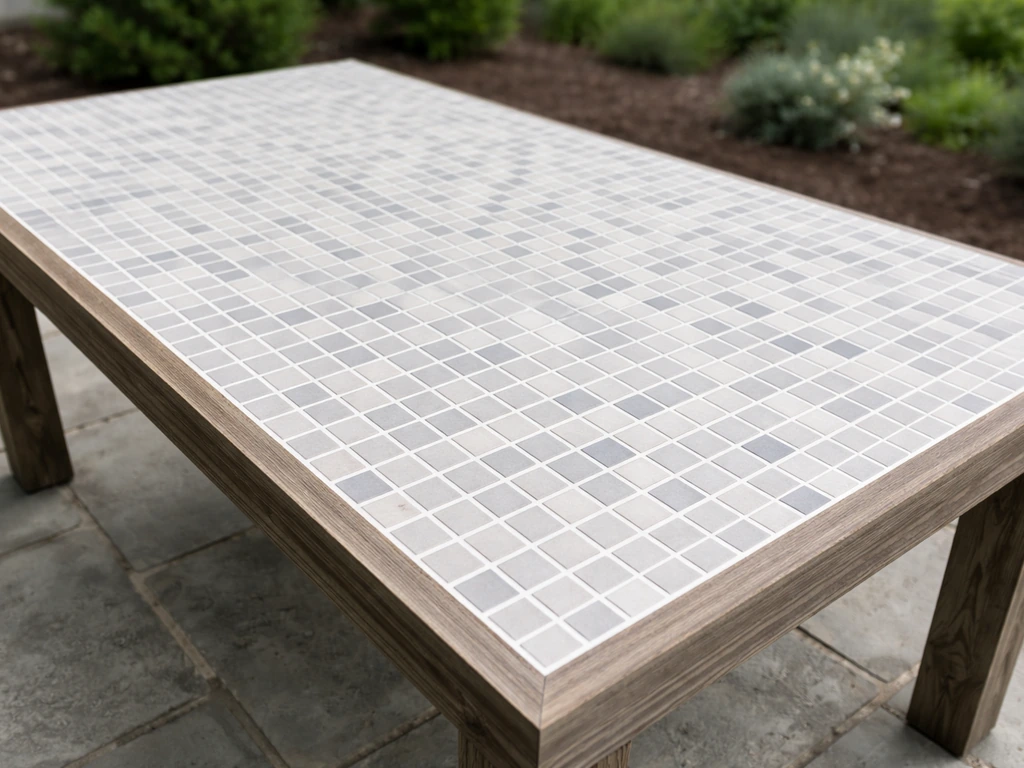
You can tile a patio table yourself in a weekend using outdoor-rated porcelain tile, a proper backer board or membrane, exterior-rated modified thinset, and sanded outdoor grout. This same approach is closely related to how to lay patio tiles on a larger outdoor surface, so the material and waterproofing priorities will feel familiar. The key is treating it like a miniature floor installation: get the substrate flat, waterproof it properly, set tiles with solid coverage, and seal everything when it's cured. Skip any of those steps and you'll be pulling cracked, popped tiles off within a season.
How to Tile Patio Table: Step-by-Step DIY Guide

Clara Farrell
14 May 2026
This guide covers both starting points: tiling over an existing table frame and building a fresh tiled tabletop from scratch. Either way, the process is almost identical once you have a solid, level surface to work on.
Choosing materials and tools for a tiled patio table top
Tile: what actually survives outdoors
For a patio table that sits outside year-round, water absorption is the number you care about most. Porcelain tile is defined by ANSI A137. 1 as having water absorption of 0. 5% or less, which is the key specification to look for when you need freeze-thaw durability [water absorption is the number you care about most](https://blog.
ansi. org/ansi/porcelain-ceramic-tile-ansi-a137-1-astm-definition/). Porcelain tile is defined by ANSI A137. 1 as having a water absorption rate of 0.
5% or less. That low absorption is exactly what prevents freeze-thaw damage, where water seeps into a porous tile, freezes, expands, and eventually cracks or spalls the surface. Look for tiles explicitly rated for exterior use, and check that the absorption rating is listed on the box or the manufacturer's spec sheet. Glazed ceramic tile might look fine at the store, but many ceramic tiles absorb 3% or more water and will start to fail after a couple of winters.
For a table top, tile size matters practically too. Large-format tiles (12x12 inches and up) look beautiful but require a very flat surface and can be harder to cut cleanly around curves or legs. Smaller mosaic tiles on a mesh backing (2x2 or 4x4) are more forgiving of minor substrate imperfections and wrap around edges more easily. A classic choice that balances looks and workability is a 6x6 or 4x4 porcelain in a color that complements your outdoor space.
Adhesive and mortar: exterior-rated is non-negotiable
Do not use basic white interior thinset for an outdoor project. The Tile Council of North America (TCNA) is clear that exterior thinset must be specifically rated for exterior applications, and for wet or exterior conditions you need mortar contact of at least 95% on the back of each tile. That means modified thinset mortars meeting ANSI A118. Schluter's guidance lists [ANSI A118.
](https://www. schluter. com/schluter-us/en_US/faq/ditra-ditraxl-thin-set-mortar-modified-unmodified)4, ANSI A118. 11, and ANSI A118.
15 as product standards for modified thin-set mortars. 4, A118. 11, or A118. 15.
Products like Schluter ALL-SET meet all three of those standards and work well with waterproofing membranes. If you're bonding a membrane like Schluter DITRA to a plywood or OSB tabletop frame, you need modified thinset meeting ANSI A118. 11. When you then set tile onto DITRA-XL, switch to unmodified thinset meeting ANSI A118.
1. Yes, two different mortars for two different layers. It sounds fussy but it matters for long-term bond strength.
Backer and waterproofing materials
If your table frame is wood or steel with a plywood top, you cannot tile directly onto raw plywood and expect it to last. Plywood expands and contracts with moisture, and that movement will crack your grout and pop your tiles within a season. You need either a cement backer board (like HardieBacker or Wonderboard) screwed down over the plywood, or an uncoupling and waterproofing membrane like Schluter DITRA.
DITRA is a polyethylene sheet with a grid of square cavities that gets embedded in thinset. It uncouples the tile layer from the substrate movement underneath, and when seams and corners are properly sealed it provides certified waterproofing. Schluter KERDI sheet membrane is another solid option: it's a sheet-applied bonded waterproofing membrane designed for direct tile application.
For liquid-applied waterproofing, products like LATICRETE Hydro BAN let you embed anti-fracture fabric at seams and corners, then topcoat the whole surface before tiling.
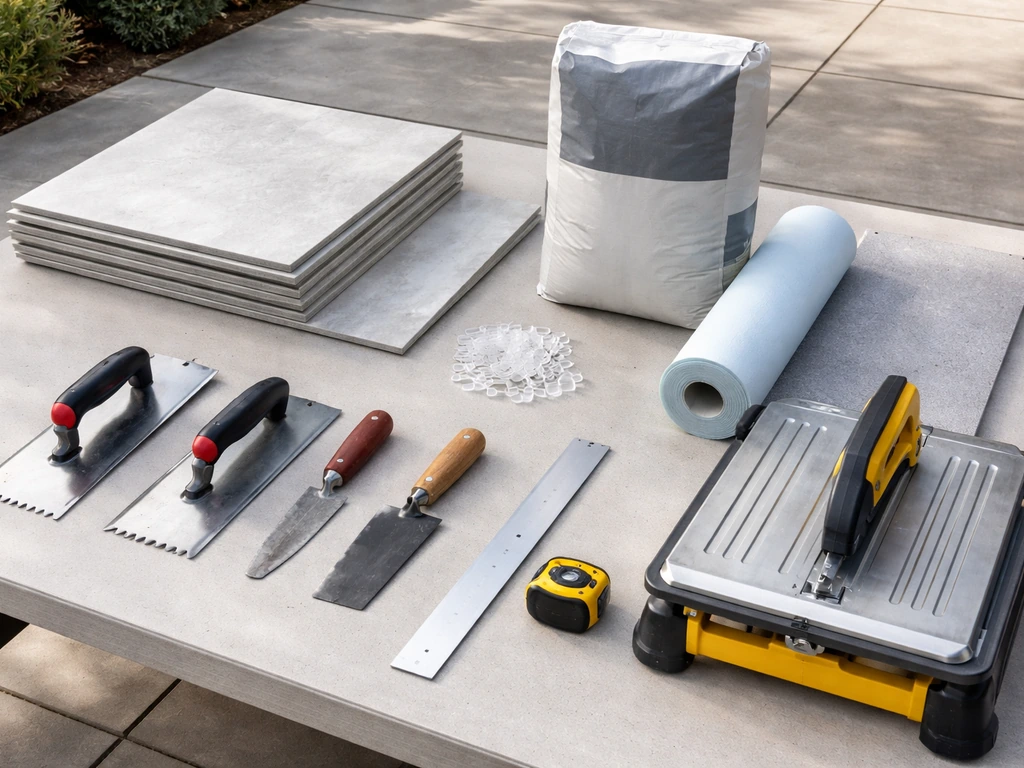
Tools and supplies checklist
- Porcelain tile rated for exterior use (water absorption 0.5% or less per ANSI A137.1)
- Exterior-rated modified thinset mortar (ANSI A118.4, A118.11, or A118.15)
- Uncoupling/waterproofing membrane (Schluter DITRA, KERDI, or liquid-applied Hydro BAN)
- Cement backer board (if not using a membrane system)
- Plastic tile spacers (1/8 inch for tight joints, 3/16 inch for a more prominent grout line)
- Sanded, outdoor/exterior-rated grout
- Penetrating tile and grout sealer rated for exterior porcelain
- Notched trowel (V-notch or square-notch sized to your tile)
- Margin trowel for mixing and detail work
- Wet tile saw or angle grinder with a diamond blade
- Rubber grout float
- Grout sponges and clean buckets
- Level and straightedge (at least 24 inches long)
- Tape measure and chalk line or pencil
- Tile nippers for small cuts or curved edges
- Tile edge trim or bullnose tiles for finished edges
- Screws and drill (for securing backer board if applicable)
- Mesh tape for backer board seams
Preparing the table frame and surface for tiling
This is where most DIY tiled table projects fail. A wobbly, soft, or uneven surface will telegraph directly into cracked tiles and failed grout lines. Before you buy a single tile, get the table frame solid.
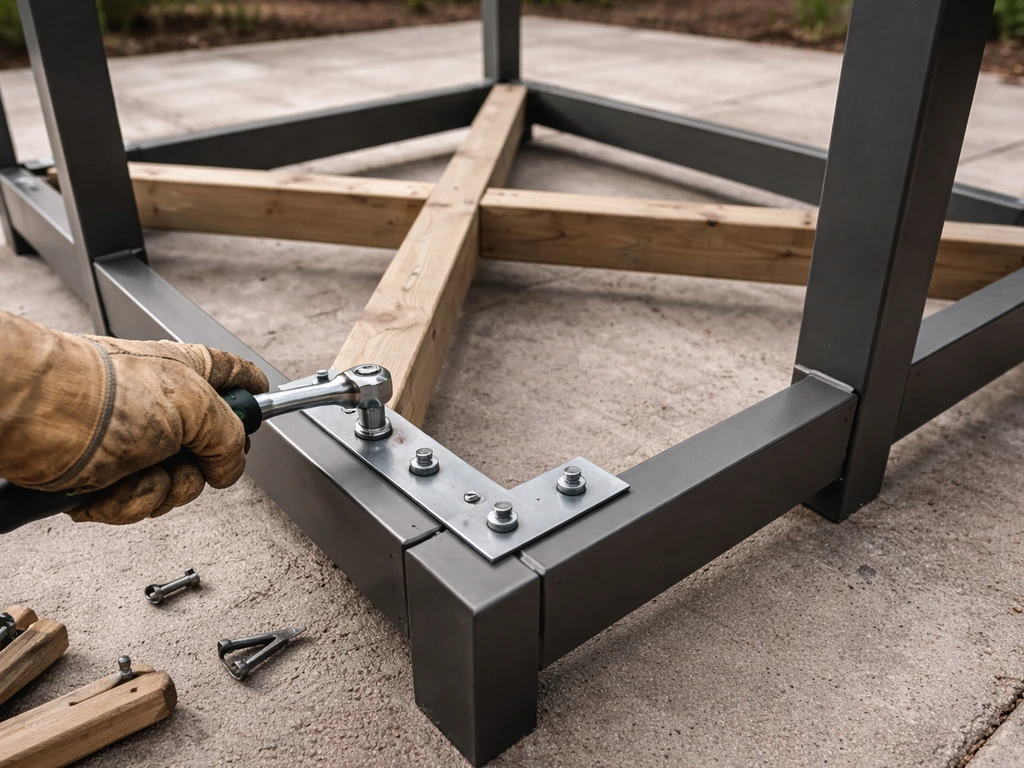
Checking and reinforcing the frame
Push on the table from all four sides and corners. There should be zero racking or flex. If a wood frame wobbles, add diagonal corner brackets or a cross-brace underneath. If it's a metal frame, weld or bolt gussets at the joints.
Tile is rigid and heavy (a standard ceramic tile weighs about 4 pounds per square foot), and a wobbly frame will crack tiles at stress points. Check that the frame is level too. A patio table doesn't need to drain like a floor does, but a visibly tilted tabletop will look off and could cause grout to settle unevenly.
If you're also planning a larger patio surface, see this guide on how to tile outside patio for the exterior-specific steps and durability checkpoints.
Building or replacing the tabletop panel
If you're building from scratch or replacing a damaged top, use exterior-grade plywood (at least 3/4 inch thick, preferably marine-grade for outdoor exposure). Cut it to fit the frame and screw it down every 6 to 8 inches along the perimeter and across the field. No gaps, no soft spots, no bouncing when you press on it. If you're tiling over an existing surface, remove any old paint, peeling laminate, or rust completely. Thinset will not bond to glossy or contaminated surfaces. Sand painted surfaces to rough them up, grind rust off metal, and degrease everything.
Installing backer board or your membrane system
If you're going the cement backer board route, cut pieces to cover the plywood top and screw them down with backer board screws every 6 to 8 inches. Tape and skim-coat seams and screw heads with thinset before tiling. If you're using DITRA, mix your modified thinset and comb it onto the plywood with your notched trowel, then embed the DITRA fleece-side down and press it firmly so the thinset fills the cavities.
Butt seams tightly, then seal seams and perimeter edges with Schluter Kerdi-Band or the membrane system's recommended overlap and seam tape. For Hydro BAN or similar liquid membranes, apply the first coat, embed anti-fracture fabric at all seams and inside corners, let it cure, then apply a topcoat over the entire surface. Let it cure fully per the product directions before tiling. Flat, clean, and waterproofed is the goal.
Common mistakes at this stage
- Tiling directly onto raw plywood without a backer or membrane
- Using drywall (gypsum board) as a substrate for any outdoor project
- Leaving gaps or loose screws in the backer board
- Skipping seam tape on backer board joints
- Not sealing membrane seams and corners, leaving the waterproofing incomplete
Planning tile layout, cut lines, and waterproofing strategy
Spend 20 minutes planning your layout before you ever open the thinset. A little dry-run work now saves a lot of frustration with awkward cuts later.
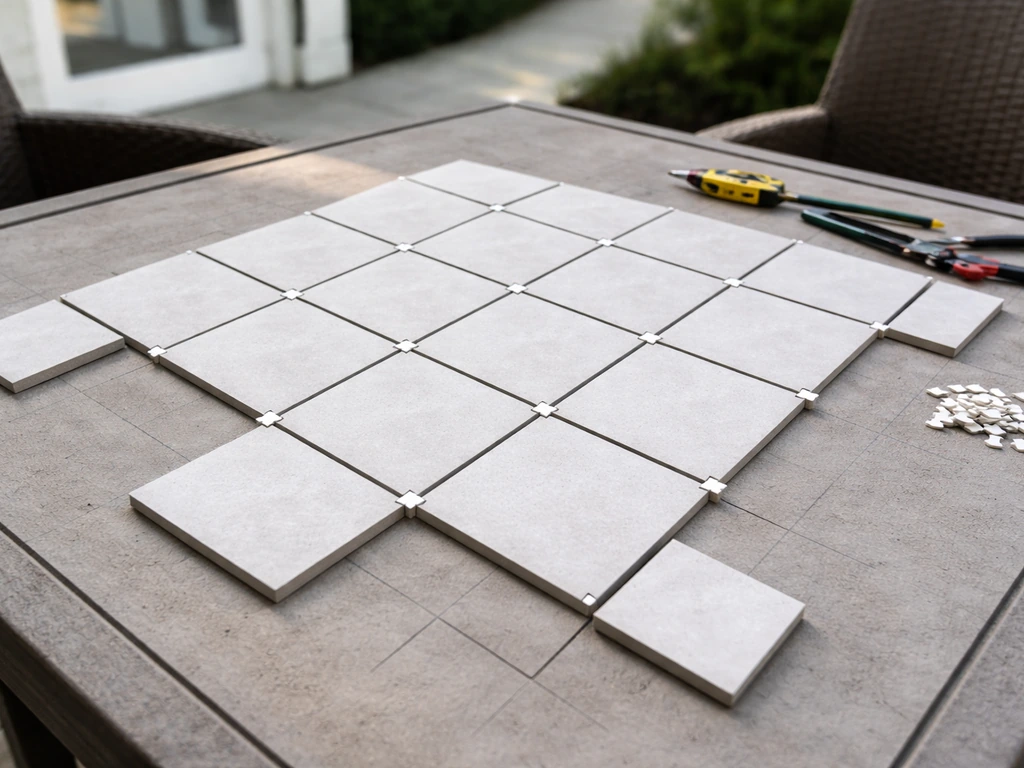
Dry-laying your tiles
Set your tiles on top of the prepared surface without any adhesive, using your spacers to simulate the actual grout lines. Start from the center of the table and work outward. This lets you see immediately where cuts will fall. Ideally you want cut tiles at the edges to be at least half a tile wide. A 2-inch sliver of tile at the edge looks bad and chips easily. If your layout shows slivers, shift the whole grid a few inches until the cuts look balanced. Mark your center reference lines on the surface with a chalk line before you take the tiles back off.
Planning for edge finishes
Decide upfront how you're finishing the table edges, because it affects how you start your layout. If you're using bullnose tiles (tiles with one factory-finished edge), those go on the perimeter first, which means you measure inward from there. If you're using metal or PVC edge trim (like Schluter Jolly or Rondec profiles), the trim sets the edge height and the field tiles butt up to it. For a patio table, edge trim is often the cleanest solution and makes transitions between the tile surface and the table frame look intentional. Pick your edge method before you buy tiles, since bullnose may need to be ordered separately.
Waterproofing strategy recap
The waterproofing happens at the substrate level, not on top of the finished tile. Your membrane or backer treatment is the actual water barrier. The grout and tile sealer you apply later reduce how much surface water sits on the grout, but they are not your primary protection. Make sure your membrane is fully cured and seams are completely sealed before you start setting tile. Pay special attention to the four corners of the table and anywhere the substrate meets the frame, since those are the spots most likely to have water infiltration.
Tiling the patio table top (setting, spacing, and edge finishes)
With your surface prepped, layout marked, and membrane cured, you're ready to set tile. Work in small sections so the thinset doesn't skin over before you get tiles down.
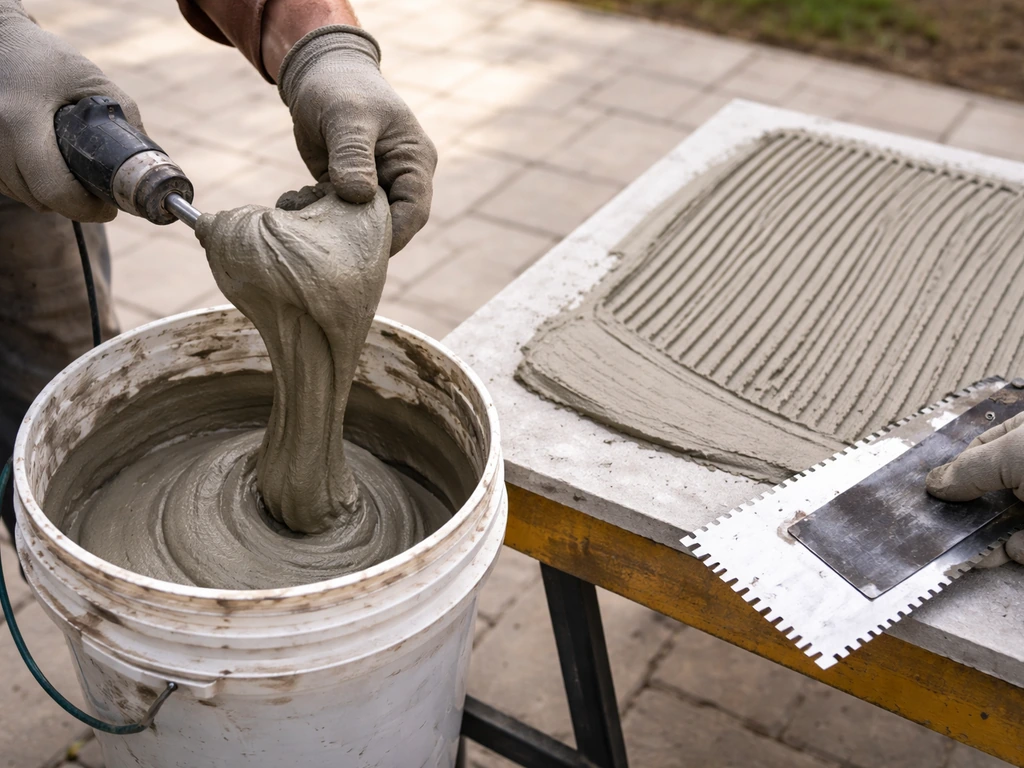
Mixing and applying thinset
Mix your thinset to a peanut butter consistency: it should hold a ridge from your trowel without slumping, and it should not be soupy. Let it slake for about 5 to 10 minutes after mixing, then stir again before use. Apply it to the substrate using the flat side of your notched trowel first to press it in, then comb ridges with the notched side.
The notch size depends on your tile: for tiles up to 4x4 inches, a 3/16 inch V-notch works. For 6x6 and up, use a 1/4 inch square notch. Larger tiles may need back-buttering too, where you also spread a thin coat on the back of the tile itself. This is especially important outdoors: the TCNA target for exterior applications is 95% mortar coverage on the tile back, which means no voids or air pockets.
Setting tiles
Start at your center reference lines and work outward toward the edges. Press each tile firmly into the thinset with a slight twisting motion as you set it, then lift one corner of the first few tiles to confirm you're getting full coverage on the back. You should see thinset contact across the full surface, not just the ridges. If you see a grid pattern of bare spots, you're not getting enough coverage. Use spacers consistently, and check your work frequently with a level and straightedge. On a small table top, it's easy to set three or four tiles and then realize one is riding slightly high. Tap it down gently with a rubber mallet.
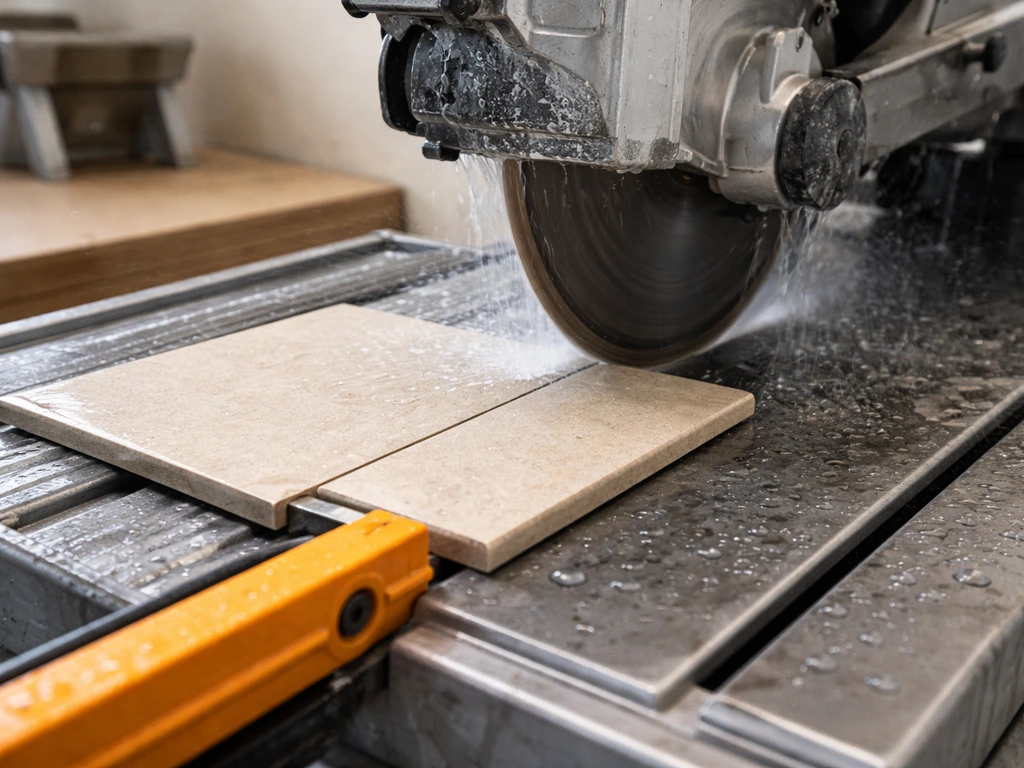
Making cuts
A wet tile saw gives the cleanest cuts and is worth renting for a day if you don't own one. Score-and-snap tile cutters work on larger ceramic tiles but struggle with dense porcelain. Measure each perimeter cut individually rather than assuming they're all the same size. Table frames are often slightly out of square. For cuts around table legs or any inside corners, use an angle grinder with a diamond blade or tile nippers for the final shaping.
Installing edge trim or bullnose
If you're using metal edge trim, set it in thinset along the perimeter before you fill in the field tiles, pressing it to the correct height so field tiles will be flush with the trim's top lip. If you're using bullnose tiles, set these after the field tiles are in so you can align the finished face cleanly with the field tile surface. Either way, the edge treatment is what makes a table look professionally done versus a DIY project you're embarrassed to show off.
Let thinset cure before grouting
Don't rush into grouting. Modified thinset typically needs a minimum of 24 hours before you grout, and in cool or humid outdoor conditions, 48 hours is safer. Remove spacers after the thinset is firm enough that tiles don't shift when you touch them, usually a few hours after setting.
Grouting, sealing, and protecting against weather
Choosing the right grout
For a patio table, use sanded grout for grout joints 1/8 inch or wider, which is most common with spacers. Use unsanded grout only for very tight joints under 1/8 inch. Make sure the grout is rated for exterior use and freeze-thaw conditions. Many standard interior grouts contain ingredients that don't hold up to outdoor temperature swings. Epoxy grout is extremely durable and stain-resistant, but it's harder to work with and sets quickly, so it's best reserved for experienced DIYers or small surface areas. For most people, a high-quality polymer-modified sanded grout is the right call.
Applying grout
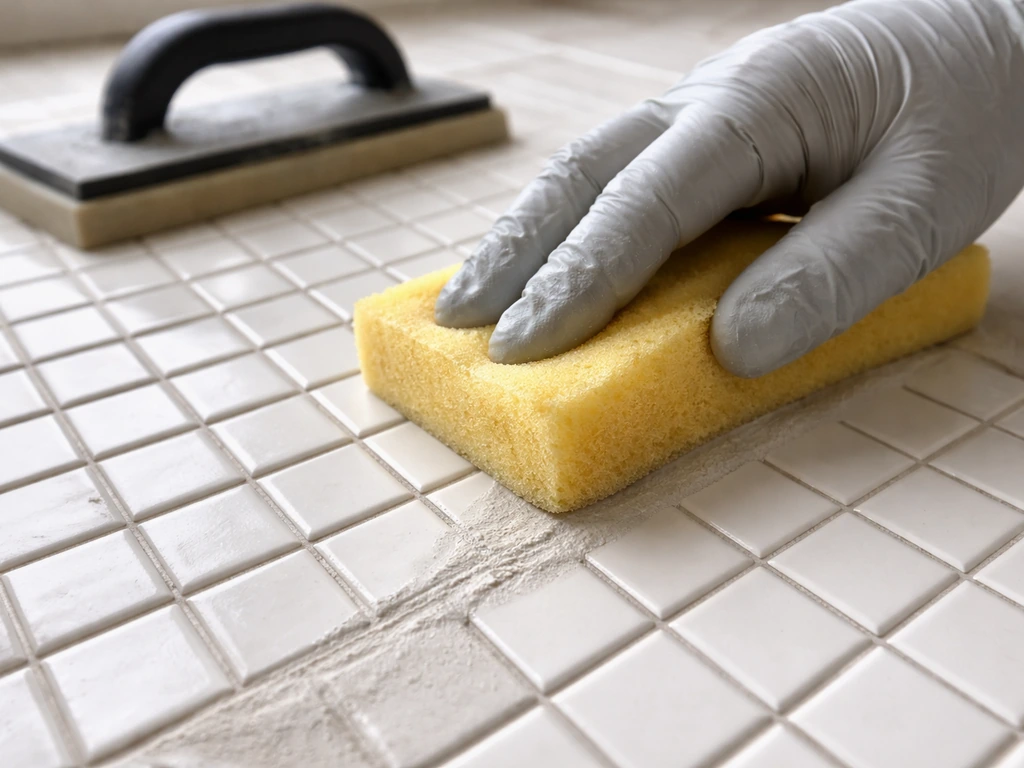
Mix grout to a slightly stiffer consistency than thinset. Dampen the tile surface lightly before grouting so the tiles don't pull water out of the grout too quickly. Apply with a rubber grout float held at a 45-degree angle, pressing grout diagonally across the joints to pack them fully. Don't grout parallel to the joints or you'll drag grout back out. Work in small sections (about 4 to 6 square feet at a time on a table top) and begin cleanup before the grout hazes.
Cleaning and haze removal
Wring out a damp sponge almost dry and wipe the tile surface diagonally across the grout joints. Rinse the sponge frequently. You'll need two or three passes to get the surface clean. After the grout dries fully (usually 24 hours), you may see a light grout haze on the tile surface. Buff this off with a dry cloth or a cheesecloth. For stubborn haze on porcelain, a diluted commercial haze remover works well.
Sealing the grout and tile
Once the grout has fully cured (most manufacturers say at least 72 hours, but allow a full week for outdoor projects where humidity may slow curing), apply a penetrating sealer rated for exterior porcelain and grout. Penetrating sealers soak into the grout and tile surface and repel water and stains without leaving a film. Apply with a foam brush or applicator pad, let it sit for the recommended dwell time, then wipe off any excess before it dries. Two coats are better than one. Don't apply sealer if rain is forecast in the next 24 to 48 hours.
Caulk, not grout, at movement joints
Where the tile meets the table frame, edge trim, or any change of plane, use a color-matched silicone caulk instead of grout. Grout is rigid and will crack at these joints as the table expands and contracts. Silicone flexes. Run a clean bead, tool it smooth, and let it cure per the manufacturer's directions.
Drying time, curing, and re-installing/finishing for outdoor durability
A realistic curing timeline
| Stage | Minimum Wait Time | Notes |
|---|---|---|
| Membrane cure (liquid-applied) | 24 hours | Per product directions; longer in high humidity |
| Thinset cure before grouting | 24 to 48 hours | 48 hours recommended for exterior conditions |
| Grout cure before sealing | 72 hours to 7 days | Cooler or humid weather extends cure time |
| Sealer cure before use | 24 to 48 hours | Check product label; avoid rain during this window |
| Full cure before heavy outdoor use | 28 days | Thinset continues to cure and gain strength for weeks |
These timelines matter more outdoors than indoors because temperature and humidity fluctuate. If you tile on a hot summer day, thinset can skin over faster and grout can dry too quickly at the surface before curing underneath. Shade the table or mist it lightly during extreme heat. In fall or spring when nights drop below 50 degrees Fahrenheit, bring the table into a garage or shed during curing if possible, since cold slows curing significantly and freezing before full cure can damage the thinset bond.
Re-installing and finishing the table
Once fully cured, inspect every grout joint and tile edge before putting the table back into service. Press gently on tiles to confirm none are hollow-sounding (a hollow sound means the tile isn't fully bonded and will eventually pop). Check that edge trim or bullnose tiles are tight with no movement. If you removed the table legs or frame hardware during tiling, reinstall it now and verify the table is level and stable on your patio surface.
Ongoing maintenance
A tiled patio table is low maintenance but not no-maintenance. Clean the surface with a pH-neutral cleaner rather than harsh acidic or bleach-based products, which can strip sealer and degrade grout over time. Reapply penetrating sealer every one to two years, or whenever water stops beading on the surface. Inspect grout joints and caulk lines each spring. A small crack in grout can let water in, freeze, and expand a minor issue into a major repair. Touch up cracks with matching grout or caulk promptly.
Lessons learned from common mistakes
- Skipping the waterproofing membrane on a wood-framed table is the single most common reason tiled tables fail within a year or two
- Using interior or unmarked thinset and grout leads to crumbling joints after the first freeze
- Not back-buttering large tiles causes hollow spots that eventually crack from foot traffic or placing heavy items on the table
- Grouting all joints including movement joints at the frame leads to predictable cracking, always use silicone caulk at changes of plane
- Rushing the seal coat before grout fully cures traps moisture and causes the sealer to cloud or peel
- Ignoring a hollow-sounding tile at final inspection means you'll be doing the repair six months later instead of now when it's easy
What to do next
If this project got you thinking about tiling a larger outdoor surface, the same principles scale up well. If you’re wondering how to tile a patio beyond this table, the same waterproofing at the substrate and the right exterior-rated materials are what make it last outdoors tiling a larger outdoor surface. The substrate prep, waterproofing, and mortar selection choices you made here are the same fundamentals you'll use for a full patio installation.
The same substrate prep, waterproofing, and mortar choices apply when you learn how to lay a porcelain tile patio. If you want the full walkthrough for installing patio tile on a slab or other outdoor base, follow the same planning, mortar, and waterproofing principles in our guide on how to lay patio tiles mortar selection choices.
If you want to tackle a full patio area, the same substrate prep and exterior-rated materials apply when you learn how to install patio tiles. Whether you're installing patio tiles on a concrete base, laying porcelain tiles on a new patio slab, or working out how to tile an outside patio area, the groundwork is the same: flat, stable, waterproofed substrate plus exterior-rated materials plus patience during curing equals a surface that lasts.
FAQ
Can I tile a patio table directly onto plywood without backer board or a membrane?
Not automatically. You still need to treat the tabletop like a mini floor system: provide a flat, stable substrate, bond with exterior-rated mortar, and include a waterproofing or uncoupling layer. If your table has significant flex or a soft plywood top, tiling directly to it will fail even if the tile and grout are rated for exterior use.
Do I need to seal both porcelain and grout, and when should I do it?
For outdoor tables, many installers choose a penetrating sealer that soaks into grout and tile, but you still have to confirm compatibility with your specific grout (especially epoxy versus cementitious). Also avoid sealing if rain could hit before the tile and grout have fully cured, since trapped moisture can cause haze or adhesion issues.
When should I use silicone instead of grout on a tiled patio table?
Use silicone at every change-of-plane where movement is expected (table frame to tile surface, edge trim junctions, and any structural seams). Grout is rigid, so at those transitions it can crack even when the tile assembly is otherwise well built.
Can I use unsanded grout for exterior grout joints if the joints are narrow?
Yes, but only if the product is labeled for freeze-thaw and exterior exposure, and you match it to joint width. For small joints that are tighter than 1/8 inch, unsanded grout may be required. For wider joints, sanded grout resists shrinking and cracking better in outdoor cycles.
How long should I wait before grouting and before using the table outdoors?
Let thinset cure according to the mortar label before loading the assembly, and grout only after the bond has firmed up to prevent tile movement. Many failures come from rushing, then water exposure before the grout has developed strength.
What’s the best way to prevent grout haze or patchy sealer on porcelain tile?
Do not assume grout cleanup is “good enough” right away. If you leave haze or residue, it can reduce sealer performance and make the surface look patchy. Plan to wipe diagonally, rinse the sponge often, and do the final haze removal only after grout has dried.
Why do my edge tiles and leg cutouts keep ending up too tight or too loose?
Measure each perimeter cut at the table as-is. Frames are rarely perfectly square, and patio table surfaces can have slight twist or uneven legs. Cutting everything from one assumed dimension commonly leads to visible gaps or tiles that won’t align with edge trim.
How can I tell if my thinset coverage is strong enough for an outdoor tabletop?
If you can lift the first few tiles and see mostly ridges or voids on the back, you have poor contact and should fix it before proceeding. Outdoor installations target full coverage on the tile back, so you may need larger trowel notches or back-buttering for bigger tiles.
Is epoxy grout worth it for a DIY patio table?
Epoxy grout is more forgiving outdoors in terms of stains and chemical resistance, but it’s harder to mix and clean, and it can leave permanent haze if cleanup is delayed. If you choose epoxy, do a small test area first and strictly follow the pot-life and wash schedule.
What should I do if I see a crack in the grout after the table has been outside?
If a grout line cracks but the tile is firmly bonded, you usually can remove and regrout that joint after inspecting for water intrusion. However, if a tile sounds hollow or rocks, it can indicate debonding, and patching grout alone will not solve the underlying movement.
How should I clean a tiled patio table without damaging the sealer or grout?
Yes, but don’t use interior cleaners. Use a pH-neutral cleaner and avoid acidic or bleach products that can degrade sealers and accelerate grout deterioration. After cleaning, keep the table dry and avoid power washing grout joints directly.