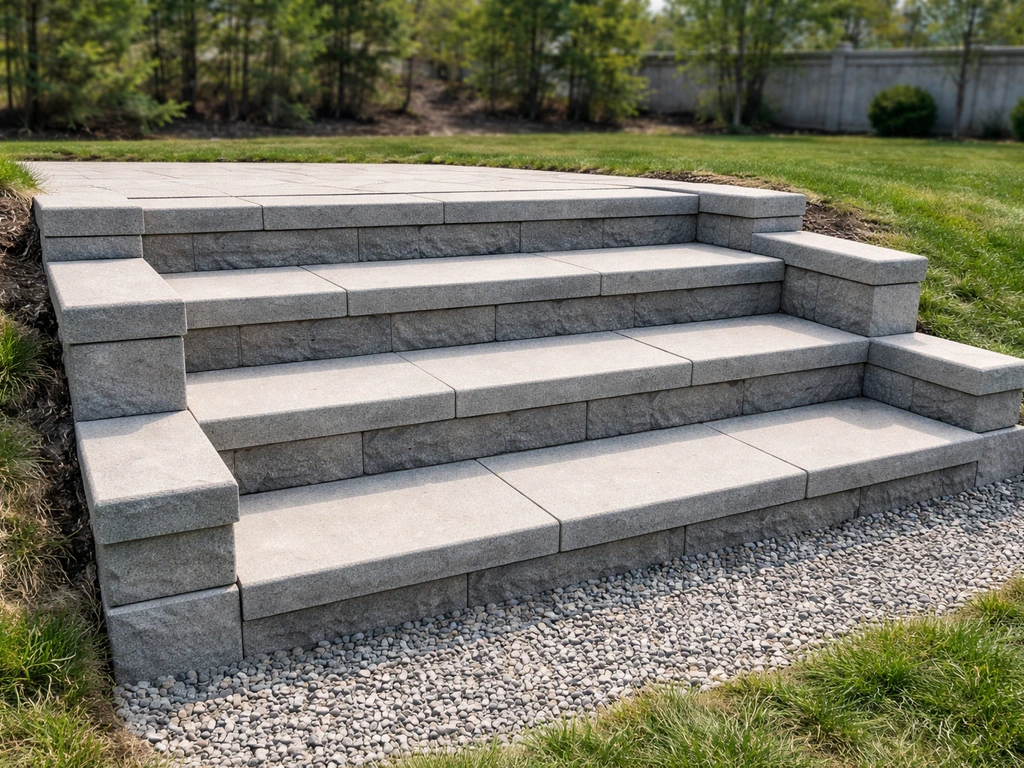
Building patio block steps that stay level, drain properly, and don't wobble after the first winter comes down to one thing: the base. Get the excavation, compaction, and drainage right, keep your riser height around 7 inches and tread depth at least 11 inches, and set each block on a properly screeded 1-inch sand bed over 4 to 6 inches of compacted aggregate.
Patio Block Steps DIY Guide: Build, Level, and Maintain

Clara Farrell
18 May 2026
If you are also adding a raised patio, the key is to align the step courses with the retaining wall block structure so the base and drainage perform as one system keep your riser height around 7 inches. Once you have the excavation, compaction, and drainage dialed in, follow the steps in this guide on how to install block patio so the rest of the build stays level and stable.
Do those things and your steps will hold up for decades. Skip any of them and you'll be re-leveling blocks every spring.
Planning the layout and measuring your steps
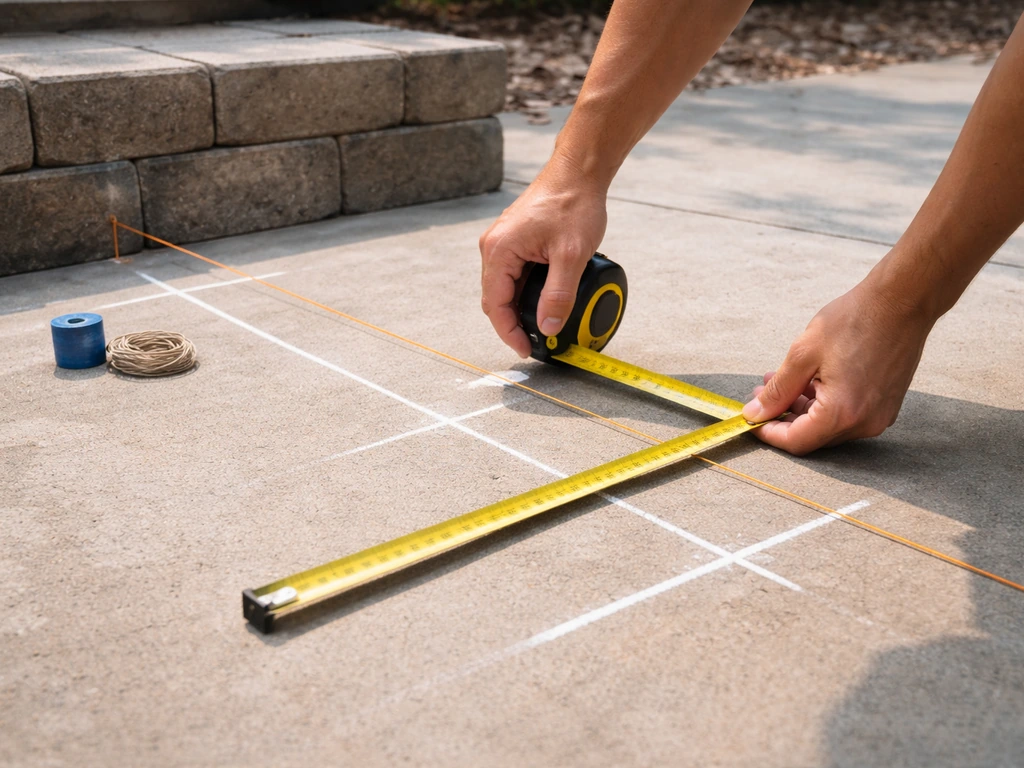
Before you buy a single block, figure out your total rise and total run. Total rise is the vertical height you need to climb, measured from the lower patio or ground surface to the upper surface. Total run is the horizontal distance you have available to work with. Divide the total rise by your intended riser height to get your number of steps, then multiply by your tread depth to confirm the total run fits your space.
The gold-standard proportion for outdoor block steps is the 7-11 rule: aim for risers around 7 inches tall and treads at least 11 inches deep. The IRC sets a minimum tread depth of 10 inches for residential stairs, so treat that as your absolute floor. Taller risers and shallower treads feel steep and are genuinely dangerous, especially when wet. If your total rise means you'd land on an awkward dimension like 7.8 inches per riser, it's always better to add an extra step and drop the riser height than to push risers over 7.5 inches. Uniformity matters too: every riser should be exactly the same height. Even a half-inch variation between steps is a trip hazard.
Sketch the layout on paper first. Mark the top step landing, the bottom step landing, and the width of the steps (usually matching or slightly narrowing from the patio edge). Wide steps, at least 4 feet across, feel generous and are much easier to use when carrying things. Once you have your step count and dimensions nailed down, you can calculate exactly how many blocks you need and plan your cuts.
Choosing the right blocks, materials, and tools
For patio block steps, you have a few solid material options. Dedicated concrete step units (like those from Techo-Bloc or Belgard) are designed specifically for this purpose and come in standard riser/tread sizes, which makes the geometry straightforward. Retaining wall blocks can be stacked to build step risers and topped with large patio pavers for the treads. Standard concrete pavers can work for treads but are better suited to the flat patio surface than to the riser face. If your patio is built from a specific block or paver system, try to source matching or complementary step units to keep the look cohesive.
| Block Type | Best Use | Pros | Cons |
|---|---|---|---|
| Dedicated concrete step units | Standalone or integrated steps | Correct proportions built in, clean finish | More expensive, limited profiles |
| Retaining wall blocks (stacked riser) | Riser faces with paver treads on top | Strong, widely available, flexible height | Requires separate tread material |
| Large concrete pavers | Tread surfaces over block risers | Matches patio surface, smooth finish | Need riser support underneath |
| Cinder blocks (filled/capped) | Budget builds | Cheap and strong if done right | Rough look, needs capping and finishing |
For tools, you'll need a tape measure, a long level (4 feet at minimum), a rubber mallet, a plate compactor or hand tamper, a wheelbarrow, a straight screed board, stakes and string line, safety glasses, and work gloves. For cutting blocks to fit, a diamond blade on a circular saw or angle grinder works for pavers; a masonry saw rental handles thicker step units cleanly. You'll also need a garden hose or sprayer for wetting down materials and cleaning up.
- Concrete step units or retaining wall blocks for risers
- Large pavers or caps for tread surfaces
- Compactable gravel aggregate (3/4-inch crushed stone or road base) for the base layer
- Coarse bedding sand for the 1-inch setting bed
- Polymeric sand for joints
- Construction adhesive or masonry mortar for bonding step units
- Geotextile landscape fabric (if building over clay or seasonally wet soil)
- Plate compactor (rent one — a hand tamper is exhausting for anything larger than a small project)
Getting the base right: excavation, drainage, and compaction
This is where most DIY step projects fail. People underestimate how much soil needs to come out and how critical proper compaction is. Soft, uncompacted ground under your steps will settle unevenly, and you'll end up with wobbly blocks and a trip hazard within a season or two.
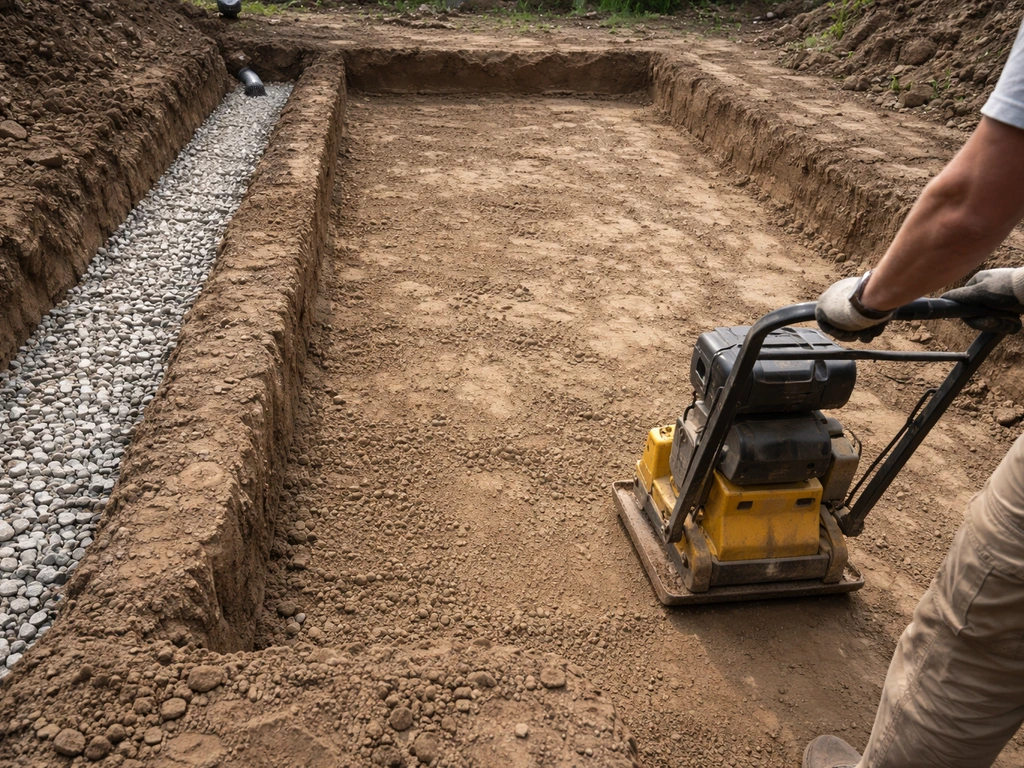
Start by marking out the footprint of your steps and excavating all the topsoil and soft material. For pedestrian-use steps, you need a minimum of 4 inches of compacted aggregate base, plus 1 inch of bedding sand, plus the thickness of your block or step unit. For pedestrian-use steps, ConcreteNetwork says the setting bed (the sand layer) is typically a 1-inch to 1 1/2-inch layer spread over compacted base material blank" rel="noopener noreferrer">plus 1 inch of bedding sand. That means you're often digging 8 to 12 inches deep depending on your block size. Don't guess: measure the total depth of your intended system (base + sand + block thickness) and dig to that number, checking with a tape measure as you go.
If your soil is clay-heavy or stays wet seasonally, lay geotextile landscape fabric across the bottom of the excavation before adding any aggregate. This separation layer keeps the clay from migrating up into your base over time under load and freeze-thaw cycles, which is one of the biggest causes of settling in cold climates. Simply overlap the fabric edges by about 12 inches and fold the sides up the walls of the excavation.
Add your crushed aggregate in layers no deeper than 4 inches at a time, and compact each layer with a plate compactor before adding the next. This is called compacting in lifts, and it's non-negotiable if you want a stable base. One thick, uncompacted layer of gravel will not compact properly no matter how long you run the plate compactor over it. Aim for 4 to 6 inches of compacted aggregate total for standard pedestrian steps. Check that the compacted surface is level (or has a slight pitch for drainage) before moving to the sand layer.
Drainage deserves its own attention. Water pooling behind or under block steps is the fastest way to destroy them, especially in climates with freezing temperatures. Make sure the ground slopes slightly away from the house (about 1/4 inch per foot is the standard for landings), and plan for each tread to pitch forward about 1/8 inch per foot so rain runs off the front edge rather than pooling. If water naturally flows toward your step location, consider adding a small gravel drainage channel on one or both sides to redirect it.
Setting the blocks: layout, leveling, and alignment
Once the compacted base is ready, spread a 1-inch layer of coarse bedding sand and screed it flat using a straight board pulled across screed rails (metal pipes work great for this). The sand layer should be exactly 1 inch deep and consistent. This is your fine-leveling layer, so take your time. A 1.5-inch sand bed is acceptable, but don't go thicker than that, a deep sand bed will compress unevenly under load and cause settling over time. Techo-Bloc’s STEPS & CAPS installation guide also specifies limits on the setting bed thickness, showing a maximum value to follow blank" rel="noopener noreferrer">don't go thicker than that.
Run a string line across the front edge of your first (bottom) step at the finished height you want. This is your reference for every block in that course. Set your first block at one end, check it with a level in both directions (side to side and front to back), and tap it down gently with a rubber mallet until it sits at the string line height with that slight forward pitch for drainage. Set the next block tight against it, check level again, and keep working across the row. Don't assume the blocks will naturally stay level just because the sand was screeded flat, check every single one.
For stacked riser-and-tread systems using retaining wall blocks, build each riser course first, then set the tread pavers on top. Make sure the back edge of the tread overlaps the top of the riser block by at least an inch, and that the front edge of each tread overhangs the face of the riser slightly (about 1 inch) for a clean, safe nosing. Keep each step's riser height identical to the others. Check with a level constantly. A 4-foot level tells you more than a 2-foot level ever will.
Step back periodically and sight down the step edges from the side. Alignment issues that aren't obvious close up become very visible from a few feet away. It's much easier to correct a block that's slightly out of line before you've set the next course on top of it.
Reinforcement, adhesive vs. mortar, and handling slopes and curves
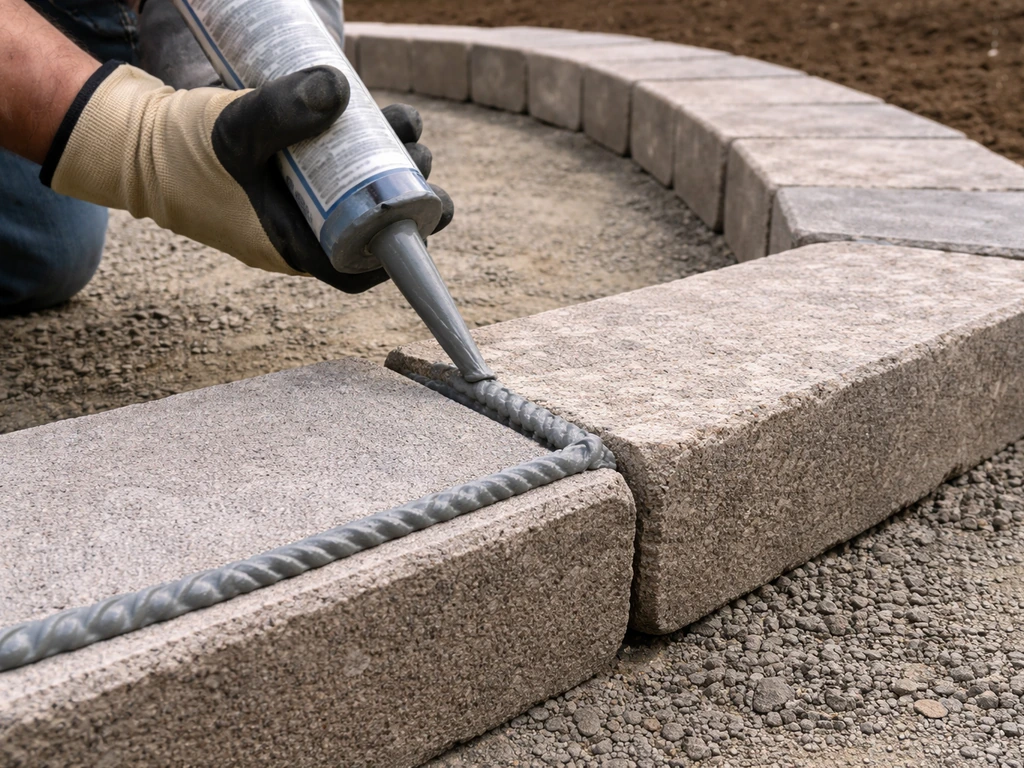
For most DIY patio block steps, construction adhesive (a landscape block adhesive or heavy-duty masonry adhesive) is the right choice for bonding stacked courses together. It's easy to apply, holds well, and allows a bit of flex that solid mortar doesn't. Apply a generous bead on the top surface of each block before setting the next course, keep it a couple of inches back from the front edge so it doesn't squeeze out and show, and press the upper block firmly into place. Masonry mortar is a better option if you want a more permanent, rigid bond, particularly for step units on a poured concrete pad, but it requires more skill to get the joints clean and consistent.
If your steps are more than three or four courses high, or if they're carrying heavy loads (like a step up to a heavily used door), consider setting the first course on a poured concrete footing rather than on compacted gravel and sand alone. A simple footing 6 inches deep and as wide as your step keeps the base stable through freeze-thaw cycles and is worth the extra work on larger projects.
For steps on sloped ground, you'll be stepping down your base as you move forward, which means more excavation at the bottom of the run. Dig each step's footprint to the correct depth independently, compact it, and set each step unit level front-to-back and side-to-side regardless of the surrounding slope. The slope around the steps is handled by the grading of the yard, not by tilting your blocks. This is a common source of confusion for first-timers.
Curved steps take more planning. Taper-cut blocks or use specially curved step units available from some manufacturers. Mark the curve on the ground with spray paint using a string-and-stake compass, then work from the center outward. Expect to make more cuts and accept that this takes longer.
If your patio itself involves a curved layout (something covered in depth in guides on how to build a patio with patio blocks), coordinate the step curve to flow naturally from that edge.
If your patio itself involves a curved layout (something covered in depth in guides on how to build a patio with patio blocks), coordinate the step curve to flow naturally from that edge, and apply the same base prep principles in how to build a block patio.
Finishing details: treads, risers, edging, caps, and clean-up
The finishing phase is where your steps go from looking like a construction project to looking like an intentional part of your outdoor space. Start by filling all joints between blocks with polymeric sand. Sweep it into every joint, then mist with water to activate the binder. The sand should fill to within 1/8 inch of the top of the joint, any shallower and it won't stay put; any deeper and it may not bond fully. Let it cure before allowing foot traffic.
Add coping or cap blocks along the top edge of any exposed riser faces where the block surface looks raw. Many step unit systems include a matching cap profile. This also protects the top course from water intrusion. For edging along the sides of the steps where they meet the ground or the patio surface, use plastic or aluminum paver edging pinned with landscape spikes, or mortar in a cut soldier course of matching pavers.
Anti-slip matters for outdoor steps. Rough-textured or tumbled concrete blocks have natural grip, but polished or smooth-faced products can get slippery when wet. If your blocks are on the smoother side, apply a clear anti-slip sealer after installation. Some installers also embed a thin strip of aluminum anti-slip nosing along the front edge of each tread, which is a particularly good call on steps used heavily in winter.
Once everything is set, clean the entire block surface with a stiff brush and rinse away any polymeric sand haze, adhesive squeeze-out, or construction grime. Most manufacturers recommend waiting 24 to 48 hours before applying any sealer, and at least a week in cool or damp weather. A good penetrating concrete sealer applied every 2 to 3 years will protect the surface from freeze-thaw damage, staining, and efflorescence.
What goes wrong and how to fix it
Settling is the most common complaint after installation. One or two blocks drop lower than the others, usually because the base wasn't compacted enough at that spot, or a thicker-than-recommended sand bed compressed unevenly. To fix settled blocks: pry them up carefully (a flat bar works), remove the sand, re-compact the aggregate base, re-screed fresh sand at the correct 1-inch depth, and reset the block. Don't just add more sand on top of the existing layer, it won't compact properly and you'll be doing this again next year.
Uneven risers are almost always a planning and measurement problem. If you notice partway through that your risers are coming out at different heights, stop and figure out why before continuing. Usually it's because the total rise was divided unevenly or because each riser course wasn't set to exactly the same height. There's no shortcut fix for this once all the courses are set, consistency from the start is everything.
Water pooling on treads or at the base of the steps means the drainage pitch wasn't built in correctly. Repointing joints with polymeric sand won't solve this if the underlying grade is wrong. On a minor pooling issue, you can sometimes correct it by adding a thin layer of non-shrink grout to redirect water, but significant pooling usually means pulling the tread blocks and re-setting them with the correct 1/8-inch-per-foot forward pitch. This is worth doing right the first time, standing water on steps freezes, and ice on steps is a serious safety hazard.
Cracked or spalled blocks after the first winter are often caused by water infiltrating joints or the block surface and then freezing and expanding. Good polymeric sand, proper drainage pitch, and a penetrating sealer are your defenses here. If you're using cinder blocks as a structural base (a budget-friendly approach covered separately in guides on patio cinder block steps), make sure they're filled with concrete and capped, hollow cinder blocks exposed to freeze-thaw are very prone to spalling.
If you are wondering how to build a patio with cement blocks, make sure the blocks are properly filled and supported so they do not spall in freeze-thaw weather cinder blocks. If you are specifically building patio cinder block steps, focus on filling and capping the units and planning for freeze-thaw protection.
Maintenance and safety checks to do after installation
Block steps are relatively low maintenance, but a quick annual inspection catches small problems before they turn into expensive fixes. Do a walk-through every spring after the ground thaws and again every fall before freezing temperatures arrive.
- Check each step for any rocking or movement by pressing on the corners. Any block that shifts needs to be re-seated immediately.
- Look at every joint and check whether the polymeric sand has washed out or eroded. Top up any shallow joints with fresh polymeric sand and re-activate with water.
- Check the drainage pitch on each tread by pouring a small amount of water and watching where it flows. It should run off the front edge, not pool.
- Inspect the side edging and any caps or coping for looseness. Re-glue or re-mortar anything that has shifted.
- Look at the riser faces for cracks, spalling, or efflorescence (white mineral deposits). Surface efflorescence can be cleaned with a diluted acid wash; cracks in structural blocks need to be assessed — a single small crack in a cap is cosmetic, but a cracked riser block may need replacing.
- Confirm handrail anchors (if you installed them) are still tight and the rail has no visible movement.
- Apply a fresh coat of penetrating sealer if water is no longer beading on the block surface.
If your steps lead from the patio up to a deck, door, or raised surface, also check that the gap between the top step and the landing surface hasn't changed. Frost heave can push the steps up or down relative to the fixed landing, and even a 1-inch height difference at the top step is a real tripping risk. If you're planning to combine your steps with a more complex raised patio structure, the approach to how to build a raised patio with retaining wall blocks goes deeper into the structural side of tying steps into that kind of project.
Done right, patio block steps are one of the most satisfying outdoor projects you can tackle yourself. If you want a full walkthrough from start to finish, see this guide on how to install block patio. They're visible every day, they genuinely improve how you use your outdoor space, and a well-built set of block steps will easily outlast the original patio surface surrounding them. The investment of time in the base prep and accurate leveling pays off every time you walk up those steps without a single wobble.
FAQ
Can I build patio block steps using regular patio pavers instead of dedicated step units?
Yes, but only if you treat it like a drainage and bedding change, not just a material swap. Most builders still use compacted aggregate plus a consistent sand screed, then set steps to the required 7 to 11 geometry. Avoid relying on pavers alone as the structural riser because pavers flex and move differently than designed step units. If your chosen system includes matching step components, use them to keep the nose and overlap details consistent.
What changes should I make for patio block steps in freeze-thaw climates?
If a frost-prone area is involved, do not skip the separation layer and consistent compaction. Clay-heavy soil needs geotextile to slow migration, base should be compacted in 4-inch lifts, and drainage pitch must stay correct so water does not sit near the steps. Also consider a concrete footing for projects with multiple courses or heavier traffic, because freeze-thaw movement magnifies even small base weaknesses.
If my steps start settling, can I fix it by adding more polymeric sand or sand on top?
Do not. Polymerics can help stabilize joints, but they cannot compensate for a base that is settling. If you see one or more blocks dropping, the correct repair is to remove the affected block(s), clean out the sand bed, re-compact the aggregate underneath, re-screed to the correct 1-inch sand depth, then reset. Otherwise, the same spot will continue to compress and you will chase the height problem repeatedly.
How wide should patio block steps be, and does width affect safety?
Match the width of the tread to your step system design, but for layout purposes you can plan with a practical rule: keep the step run so your foot lands fully on the tread, not on the edge. Wide steps (around 4 feet or more) are easier to use when carrying items, and they reduce the sense of “steepness” even if the riser height is correct. If you narrow the width toward the patio edge, keep the change subtle so alignment and drainage stay uniform across the full tread surface.
What should I inspect during my annual check to catch problems early?
Walk-through inspection should include checking each riser height consistency, looking for rocking when you press down at multiple points on a tread, and scanning joint lines for washed-out polymeric sand or voids. Also verify that water is draining away from the house after a rain, because that can change if surrounding grading or mulch shifts. Taking photos of the step edges each season makes it easier to spot small height changes early.
If my patio block steps lead to a deck or door, how do I prevent a dangerous gap at the top step?
Yes, but treat the connection as a structural and height-management task. The top step landing must remain aligned with the fixed patio, deck, or door landing, because frost heave can create a gap that becomes a tripping hazard. Plan for the base prep to be consistent at the step zone, and if the landing is a fixed surface, confirm elevation after the first freeze cycle so you can correct movement early.
My math gives a riser height that is not perfectly uniform, what should I do?
You should aim to keep each riser uniform, and if your total rise does not divide cleanly, adjust by adding a step rather than making one riser “close enough.” A half-inch mismatch between risers is enough to feel unsafe when wet. The most reliable method is to calculate total rise, choose a riser height near 7 inches, then confirm every riser height lands exactly the same after you lay out and measure the full run.
Do I really need anti-slip features for patio block steps, and where should they go?
Plan to use anti-slip treatment when the step surface is smoother or has a polished finish, especially if the steps get winter wet. A sealer can help, but for best traction you want the tread nose to remain grit-friendly, not just coated. If your system allows it, an embedded anti-slip nosing or rough-textured cap profile on the tread edge provides more consistent grip during freezing conditions.
What causes water to pool on patio block steps, and how do I fix it?
For outdoor steps, small pooling usually means the pitch or grade is wrong under the treads. Repointing joints will not correct water that is trapped by the base geometry. If pooling is minor, some installers add a thin non-shrink grout to redirect surface flow, but significant standing water typically requires pulling and re-setting the affected tread blocks so the forward pitch is restored.
Should I cap the top of each riser and use edging on the sides of patio block steps?
Capping or coping helps protect the top of exposed riser faces from water intrusion and surface erosion. If your chosen step units include matching caps, use them, because they also keep the profile consistent and reduce chipping at the edge. For exposed side edges, use proper edging so soil does not wash in, which can undermine support and lead to rocking blocks.