You can build solid, long-lasting patio cinder block steps yourself in a weekend or two. The basic process is: calculate your riser height and tread depth, dig and compact a gravel base, lay your first course of blocks on a mortar bed, stack and mortar each course up, then cap the top with a flat slab or coping block. Do it right and these steps will outlast a wood deck by decades. Skip the base prep or rush the layout math, and you'll be pulling them apart and starting over inside a few years.
Patio Cinder Block Steps: DIY Build Guide and Fixes

Clara Farrell
3 Jun 2026

Decide step layout and get measurements right
Before you touch a block or buy a bag of mortar, you need three numbers: total rise, riser height, and tread depth. Total rise is the vertical distance from your finished patio surface (or ground level) up to the door threshold or landing you're stepping to. Measure this carefully because every calculation flows from it.
For comfortable, code-friendly steps, aim for risers between 6 and 7 inches high and treads at least 11 inches deep. The ADA standard for exterior stairs puts risers between 4 and 7 inches, so staying in that range keeps you safe and accessible. A quick ergonomic check: 2 x riser height + tread depth should land between 24 and 26 inches. So a 7-inch riser and 12-inch tread gives you 26 inches, which is right at the comfortable edge.
Here's the math in plain terms. Say your total rise is 21 inches and you want roughly 7-inch risers. Divide 21 by 7 and you get exactly 3 risers. That works out cleanly. If you get a decimal (say 23 inches of rise), round to the nearest whole number of risers (3 or 4), then divide your total rise by that whole number to get your actual riser height. With 23 inches and 4 risers, each riser is 5.75 inches. Every riser in the flight must be the same height, no variation, because an uneven step is a trip hazard and a code violation.
| Total Rise | Target Riser | Riser Count | Actual Riser Height | Tread Depth | Ergonomic Check (2R+T) |
|---|---|---|---|---|---|
| 14 in | 7 in | 2 | 7.0 in | 12 in | 26 in |
| 21 in | 7 in | 3 | 7.0 in | 11 in | 25 in |
| 23 in | ~7 in | 4 (rounded) | 5.75 in | 12 in | 23.5 in (adjust tread to 13.5 in) |
| 28 in | 7 in | 4 | 7.0 in | 12 in | 26 in |
Once you have your numbers, mark out the total run (tread depth x number of treads) on the ground in front of your patio. Use stakes and a string line to mark the outer edge of the bottom step and the back edge where the steps meet the existing patio surface. Check your corners with a 3-4-5 triangle: measure 3 feet along one string, 4 feet along the perpendicular, and the diagonal should be exactly 5 feet if your layout is square. Getting this right before you dig saves a lot of headaches later.
Materials, tools, and choosing the right block approach
Standard concrete cinder blocks (8x8x16 inches nominal) are the workhorse for this project. They're cheap, strong, and easy to work with. You can also use solid concrete block or specially designed retaining/landscape block, but standard hollow CMU (concrete masonry unit) block is perfectly fine for most residential steps when the cores are filled with concrete or grouted solid on the load-bearing courses.
Block options compared
| Block Type | Best For | Mortar Needed? | Core Fill Needed? | Approx. Cost |
|---|---|---|---|---|
| Standard 8x8x16 CMU | Most patio step projects | Yes, Type S | Yes, on structural courses | Low ($2–3/block) |
| Solid concrete block | Heavy-load or narrow steps | Yes, Type S | No (already solid) | Medium ($4–6/block) |
| Segmental retaining wall block | Curved steps, landscape look | Optional (pins/adhesive) | No | Medium-high ($5–10/block) |
| Decorative face block | Visible side faces | Yes, Type S | Yes | Medium ($4–7/block) |
For most DIYers building a standard straight run of patio steps, standard 8x8x16 hollow CMU with Type S mortar and core fill is the right call. Type S mortar is rated for exterior structural masonry and handles the freeze-thaw stress that cracks steps apart over time. Don't use Type N or basic all-purpose mortar for this job.
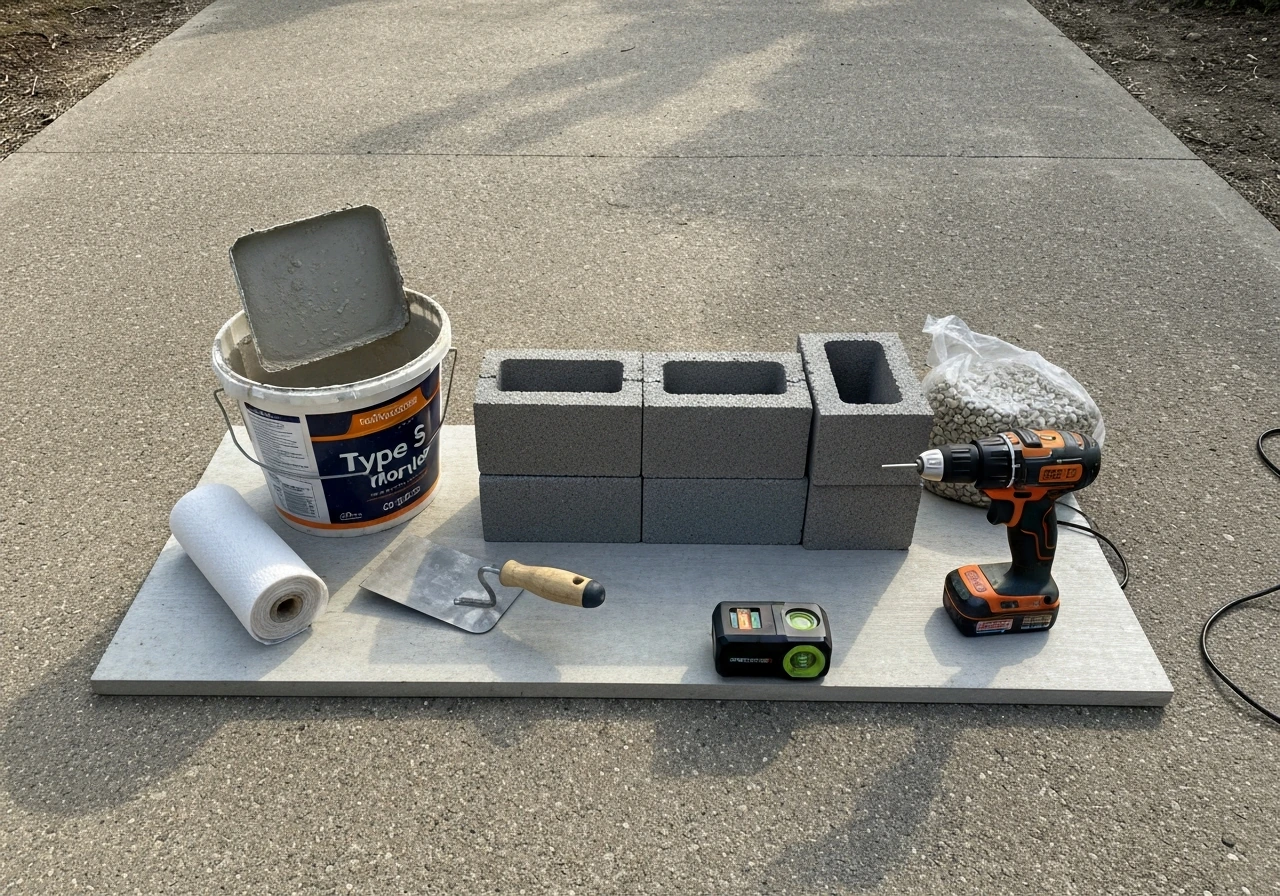
Tools and materials checklist
- Concrete cinder blocks (calculate quantity based on layout)
- Type S mortar mix (bags) and a mortar tub or mixer
- Premixed concrete or bagged concrete mix for core fill
- Crushed stone/gravel base material (3/4-inch minus with fines)
- Coarse sand for leveling layer
- Concrete cap blocks or patio cap/coping stones for the top tread
- Rebar (1/2-inch) for reinforcing filled cores if height exceeds 2–3 courses
- Masonry adhesive or construction adhesive (for capping blocks)
- Stakes and string line
- 4-foot level and a line level
- Rubber mallet and brick hammer
- Margin trowel and pointing trowel
- Tape measure and chalk line
- Plate compactor or hand tamper
- Shovel and wheelbarrow
- Masonry saw or angle grinder with diamond blade (for cuts)
- Safety glasses, gloves, and knee pads
- Silane/siloxane penetrating sealer (for finishing)
Site prep: demo, grading, drainage, and base prep
This is the part most people underestimate, and it's why steps fail. Cinder block steps are heavy, and if the ground underneath shifts, settles, or washes out, your steps crack and tilt no matter how well you laid the blocks. If you want your patio steps to stay solid, focus on the same base prep principles as you plan how to build a patio with cement blocks cinder block steps. Good base prep is the whole game. Concrete paver installation guidance notes that compacting the base material to a high density, such as a 95% target, is an important anti-settlement parameter blank" rel="noopener noreferrer">compact the base material to a high density (about a 95% target).
Demo and grading
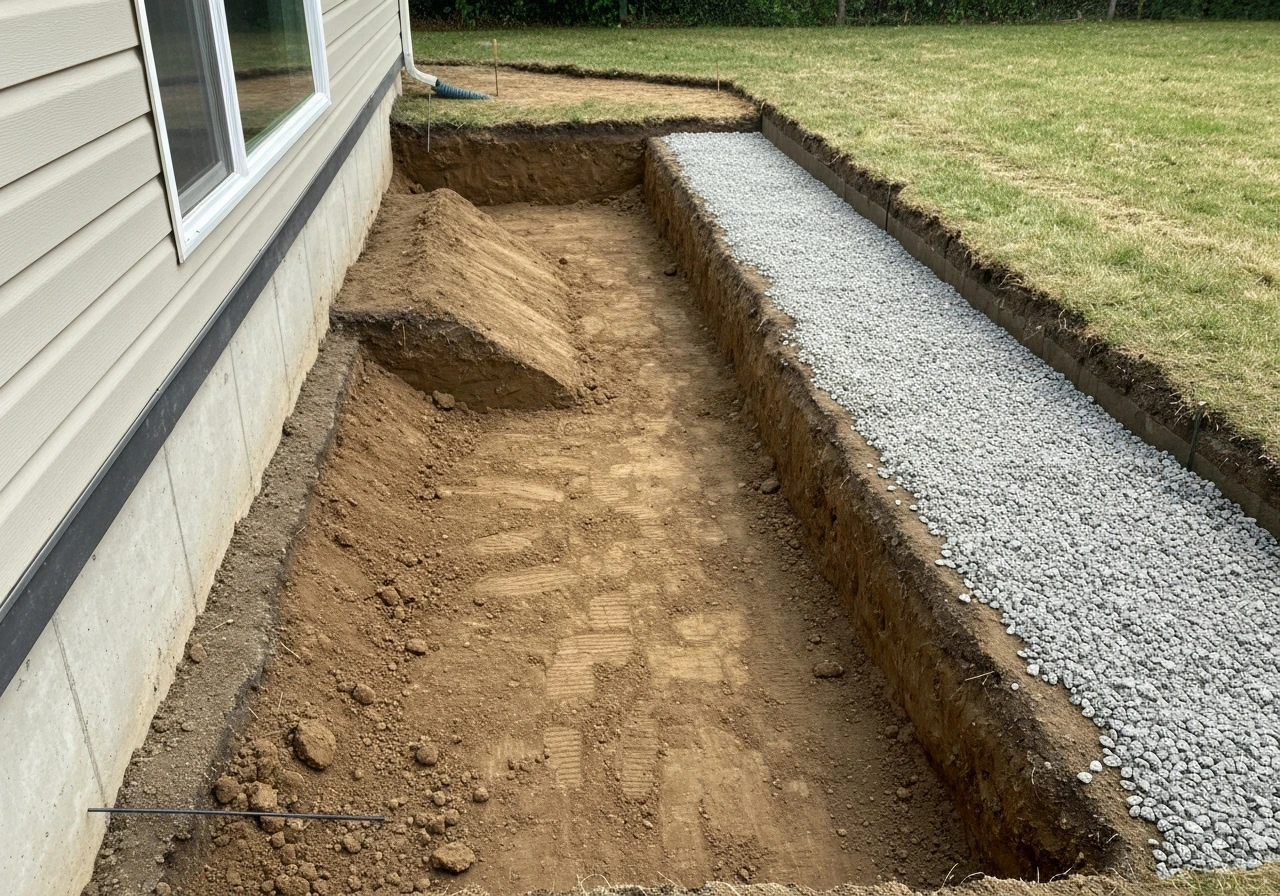
If you're replacing old steps, remove them completely and assess the soil underneath. Soft, spongy, or clay-heavy soil needs to be dug out more aggressively. For new steps on bare ground, excavate the footprint of your entire step run plus 6 inches on each side and at least 8 to 12 inches deep, depending on your climate. In freeze-thaw climates, going deeper (below the frost line for the footing, or at least 12 inches of compacted gravel) is worth the extra effort.
Grade the bottom of your excavation so it slopes very slightly away from the house (about 1/8 inch per foot). This prevents water from pooling under the base and undermining it over time. On sloped ground, use string lines to establish a level reference plane and plan for stepped footings rather than trying to level a continuous base across uneven terrain. Stepped footings follow the slope in a staircase pattern so each section of base is flat and properly supported.
Base installation
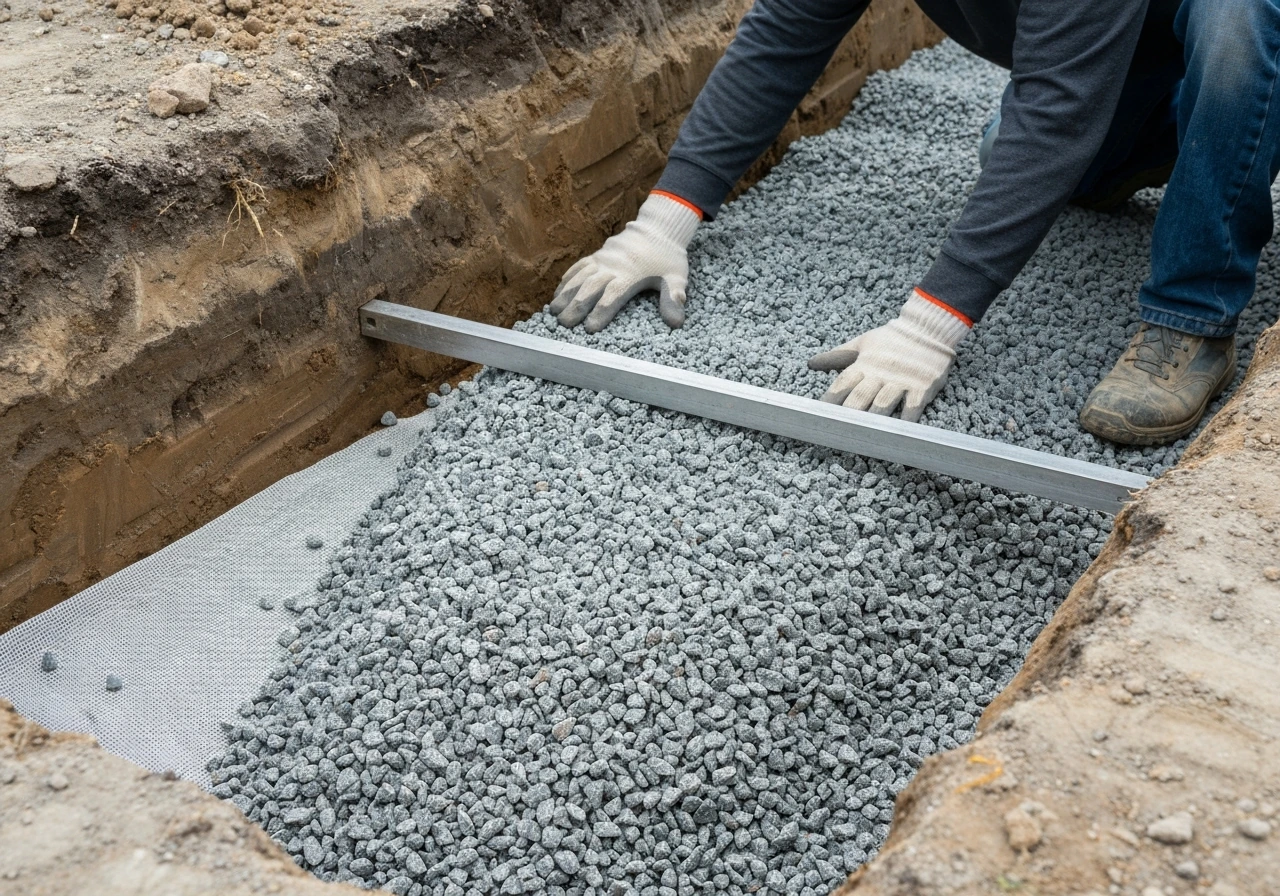
- Lay a geotextile landscape fabric on the excavated subgrade if you have sandy or unstable soil. This separates the native soil from your base material and prevents migration.
- Fill with 3/4-inch minus crushed stone (the kind with fines, not clean stone) in 3–4 inch lifts.
- Compact each lift thoroughly with a plate compactor. Don't just dump in 8 inches and compact once. Compact in layers to hit close to 95% density.
- Finish the base with a 1-inch leveling layer of coarse sand, screeded flat and level using a board and rails.
- Check that the top of your finished base is at the right elevation to place the first course of block and still hit your target riser heights.
blank" rel="noopener noreferrer">Total base depth should be 6 to 8 inches of compacted gravel for most residential projects. In areas with heavy clay soil or significant freeze-thaw cycles, go to 10 to 12 inches. Skimping on depth is the single most common cause of settling and cracking in block steps. After you have the courses and foundation in place, you can use the same raised-block layout approach to build a patio retaining wall with retaining wall blocks raised patio retaining wall blocks.
Build the step foundation and first course of blocks
The first course is your foundation, and it has to be dead level in all directions. Everything above it follows. Take your time here even if it means spending an entire afternoon on just the bottom row. If you are planning the whole project from scratch, follow a complete how to build a block patio guide so your steps, base, and drainage all work together.
Mix your Type S mortar to a peanut butter consistency, not soupy. Lay a full mortar bed on your leveled sand base, about 3/4 to 1 inch thick, across the footprint of your first course. Set the first block at one corner, press it firmly into the mortar, and check it with your 4-foot level both lengthwise and across the width. Tap it down gently with the rubber mallet to adjust. Butter the end of each subsequent block before setting it (apply mortar to the vertical face), and push it tight to the preceding block. Check level constantly as you go.
The first course for a 3-step run actually forms the base of all three steps. Think of it as a stepped pyramid: the bottom step's first course is deepest, and each step back builds on the one below. For a 3-step design, your footprint on the ground includes 3 block widths front to back (for a 12-inch tread, roughly 3 feet total run). The front face of the bottom step is your lowest block course. The second step starts one block width back and one course up, and so on.
Once the first course is set, fill the hollow cores with concrete. Drop a piece of rebar down each core before filling if you're building more than 2 courses high. This ties the structure together and dramatically increases resistance to lateral movement and cracking. Let the mortar and core fill cure for at least 24 hours before stacking the next course.
Stack risers and secure and level each course
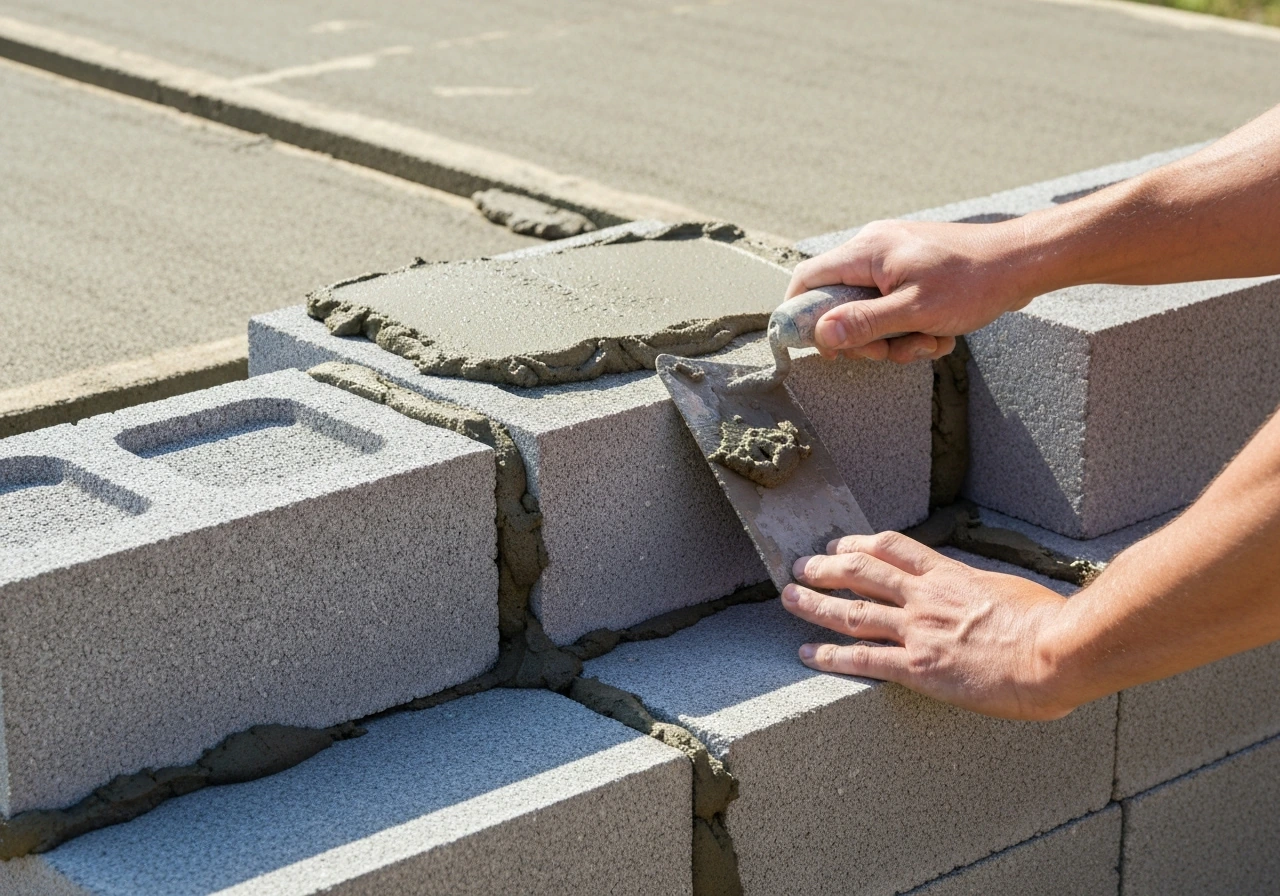
Each course of block adds one riser height. Your mortar joint thickness becomes part of your riser measurement, so account for it. A standard mortar joint is 3/8 inch. If your target riser height is 7 inches and your block is 7.625 inches nominal (a standard CMU), add the 3/8-inch joint and you're at about 8 inches total, which is too tall. This is where you adjust: either use a thinner mortar joint, use a different block height (4-inch block for lower risers work well for steps), or adjust your calculated riser height to match the block dimensions you're working with. Plan this out before you start, not after.
Lay mortar on the top of the first course and set the second course in a running bond pattern, meaning each block is offset by half a block from the course below. This is exactly like brick laying and it's what gives the wall its structural strength. Stagger the joints, never stack them directly on top of each other. Use your string line stretched across the front face of each course to keep the blocks perfectly aligned as you work across the run.
After setting each block, check level in both directions and check that the front face is flush with your string line. Tap to adjust before the mortar starts to set (you have maybe 20–30 minutes in warm weather). Check your riser height from the top of the finished tread below to the top of the block you're setting. It must match your calculated riser height on every single step. Use a story pole (a marked stick) to check this quickly rather than re-measuring every time.
Fill cores with concrete on every course. If you're using rebar, lap it at least 12 inches and tie it with wire. Tool (smooth out) your mortar joints after they've stiffened slightly, about 20 minutes after setting. A concave or V-shaped joint sheds water better than a flat or flush joint, which is important for exterior work.
Tying into an existing patio
Where the back of your top step meets an existing concrete patio or slab, you need to connect them so they move together and don't create a gap. Drill into the existing concrete slab with a masonry bit and set anchor bolts or threaded rebar with construction adhesive or epoxy anchor. Then tie rebar from the anchors into the core fill of your top course. This connection prevents the steps from migrating away from the patio over time, which is one of the most common long-term failure modes.
Top surface, coping and caps, and weatherproof finishing
The top of a cinder block step is the weakest point if you leave the hollow cores exposed or just mortar over them. Cap each tread properly and you protect the whole structure from water intrusion, which is the number one cause of freeze-thaw cracking.
Cap options for the tread surface
| Cap Option | Look | Durability | Cost | DIY Difficulty |
|---|---|---|---|---|
| Concrete cap block (precast) | Clean, utilitarian | Excellent | Low | Easy |
| Natural stone slab (bluestone, limestone) | Premium, natural | Excellent | High | Moderate |
| Brick pavers | Classic, traditional | Very good | Medium | Moderate |
| Poured concrete topping slab | Seamless | Excellent | Medium | Moderate |
| Porcelain tile (frost-rated) | Modern | Good (if frost-rated) | Medium-high | Harder |
For most DIY projects, a precast concrete cap block or a natural bluestone slab is the practical choice. Set cap blocks in a full bed of Type S mortar or construction-grade masonry adhesive. Overhang the front edge of each cap by about 1 to 1.5 inches to create a nosing that sheds water forward and gives you a visual shadow line that makes the steps easier to see. Make sure the cap slopes very slightly forward (1/8 inch per foot) so rainwater runs off the front rather than pooling on the tread surface.
Sealing and weatherproofing
Once the mortar has cured for at least 28 days (yes, the full cure time matters), apply a silane/siloxane penetrating sealer to the entire step assembly, blocks and cap surfaces included. This type of sealer soaks into the masonry rather than sitting on top, creating a chemical barrier against moisture, freeze-thaw damage, and deicing salts. It won't change the look of the surface noticeably, which is a good thing. Apply it with a garden sprayer or roller per the manufacturer's directions, typically two coats with the second applied while the first is still wet. Reapply every 3 to 5 years.
If you have any joints between the steps and an adjacent wall, or where the steps meet the house foundation, fill those with an exterior masonry joint sealant rather than mortar. Mortar is rigid and will crack as the materials move slightly with temperature changes. A flexible sealant accommodates that movement and keeps water out far better. Use a backer rod (foam rope) in wider joints so the sealant only adheres to two sides and can flex properly, not three sides which would restrict movement and cause it to fail faster.
Prevent common failures and troubleshoot uneven or unstable steps
Most cinder block step failures come down to four problems: bad base prep, inconsistent riser heights, poor water management, and skipped core fill. Here's how to avoid them, and what to do if you're already seeing symptoms.
Common mistakes and how to avoid them
- Inconsistent riser heights: Always use a story pole or mark your riser height on a spare board and check every course against it. Never eyeball it.
- Hollow cores left unfilled: This is the most common DIY shortcut that causes cracking. Fill every core with concrete on every course.
- Mortar joints that are too thick or uneven: Mix to the right consistency and use spacers or your story pole to keep joint thickness consistent.
- No drainage slope on the tread: Even a slight slope (1/8 inch per foot forward) prevents water from sitting on the step and working into joints.
- First course not level: Check with a 4-foot level and a string line. One degree of tilt at the bottom becomes a big problem four courses up.
- Skipping the geotextile fabric in sandy or clay soil: This fabric prevents your base gravel from migrating into the native soil over time.
- Using the wrong mortar: Type N is for interior or light-duty work. Type S is what you need for exterior structural masonry.
Troubleshooting steps that are already sinking or uneven
If your existing block steps are rocking, tilting, or have cracked across mortar joints, the base has almost certainly failed. You can sometimes re-level minor settlement by carefully lifting individual cap blocks, cleaning the mortar bed, and resetting them with fresh mortar. But if the blocks themselves have shifted or the entire step structure has moved, you need to tear it down to the base, rebuild the compacted gravel foundation properly, and start over. There's no reliable shortcut for a failed base.
Crumbling edges on the block faces or cap blocks usually mean freeze-thaw spalling, which happens when water gets into the masonry and freezes. If it's caught early, clean out loose material, apply a hydraulic cement patching compound, and then seal the entire surface. If spalling is deep or widespread, the affected blocks need to be replaced. Trying to patch deeply spalled block with surface mortar rarely holds more than a season or two.
Gaps opening between the steps and the house foundation or adjacent patio surface are normal if you didn't use flexible sealant. Clean out the old mortar from that joint with a grinder or oscillating tool, install a backer rod, and fill with exterior-rated flexible masonry sealant. This is a repair you'll want to revisit every few years as part of routine maintenance.
When to call a professional
This is a very manageable DIY project for most homeowners if you're comfortable with basic masonry work and have a free weekend (or two). That said, if your steps need to be more than 4 or 5 courses high, if they're attached to a load-bearing wall, or if your soil conditions are significantly problematic (expansive clay, high water table, or major slope), getting a masonry contractor to at least consult on the foundation design is worth it.
Building patio block steps that are stable and attractive is satisfying work. If you're looking for the full ground-up process beyond steps, see how to build a patio with patio blocks for the patio surface, layout, and base details Building patio block steps. Building them twice because the base failed is not.
FAQ
Can I build patio cinder block steps without mortar (just dry stacking)?
For exterior steps, dry stacking is risky because wind and small movements can create gaps that let water in. If you omit mortar, at minimum you need a fully grouted or core-filled structure and a proper cap system, but the more reliable DIY approach is to mortar at the course joints and use Type S mortar for the load-bearing masonry layers.
What if my riser height comes out slightly different after accounting for mortar joints?
Adjust before you start stacking. The article’s guidance assumes you want consistent risers, so use either thinner joints, a different CMU height (for example 4-inch blocks for lower risers), or recalculate your riser count so the measured riser stays the same from tread to tread.
How do I handle a doorway landing that isn’t level with my patio?
Use the total rise measurement to the specific threshold height, then re-check riser math using the landing-to-finished-surface distance. If the landing plane slopes, you may need a small transition section or a stepped footing approach so the steps stay level front to back while the surrounding slabs handle the slope.
Do I really need to fill all the block cores with concrete on every course?
Yes for most stable DIY steps, especially where you expect freeze-thaw or lateral forces (like people stepping off-center). If you only fill some cores, you reduce resistance to cracking and side shifting, and the top courses become more vulnerable even if the base looks fine.
How thick should the gravel base be if I’m on clay or I get lots of freeze-thaw cycles?
Plan for deeper and more heavily compacted base than the typical residential range. A common decision aid is to go toward 10 to 12 inches of compacted gravel on heavy clay or in cold regions, and if you see pumping or standing water, consider improving drainage before you pour any mortar or set blocks.
What’s the best way to connect patio cinder block steps to an existing concrete slab?
Don’t rely on mortar alone. Drill into the slab and use anchors (or threaded rebar set with adhesive/epoxy), then tie rebar into the core fill of the top course. This lets both sections move together and helps prevent a visible gap from forming over seasons.
My steps feel solid but water pools on the top tread. What should I change?
Check cap slope and nosing. The top needs a slight forward slope (about 1/8 inch per foot) and an overhang so water sheds off the front edge. If pooling persists after construction, you may need to reset caps with correct thickness and drainage rather than just resealing.
How often should I seal patio cinder block steps and what happens if I skip it?
Seal with a penetrating silane/siloxane product after full cure (the full 28-day cure time matters), then plan to reapply every 3 to 5 years. Skipping sealer increases water absorption, which accelerates freeze-thaw spalling and can widen mortar joint cracking.
Can I reuse blocks or caps if I’m repairing or replacing old patio steps?
If block faces are spalled, cracked, or the caps are deteriorated, replacement is usually the only durable fix. You can sometimes reuse unbroken pieces from a smaller demo, but verify cores are sound and caps aren’t porous through the whole thickness before reinstalling.
When should I hire a contractor instead of continuing DIY?
If your design is more than about 4 to 5 courses high, attached to a load-bearing wall, or on problematic soil (expansive clay, high water table, major slope), get a foundation consult. The failure mode is often base and drainage related, and a professional can advise footing depth and reinforcement strategy before you invest in materials.